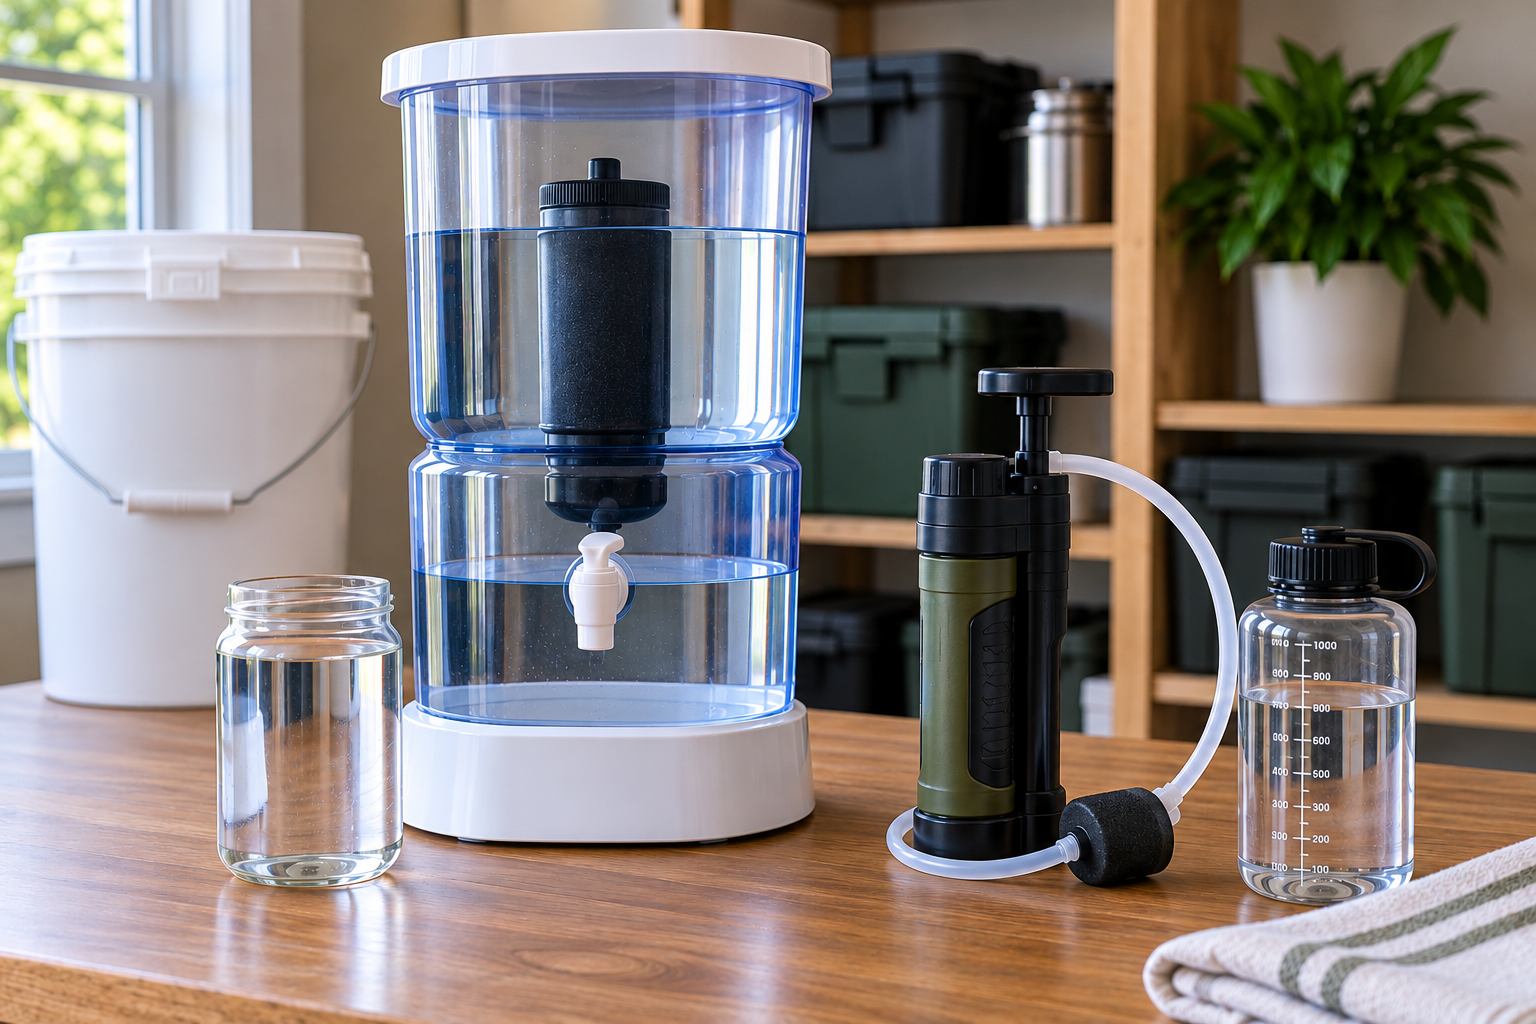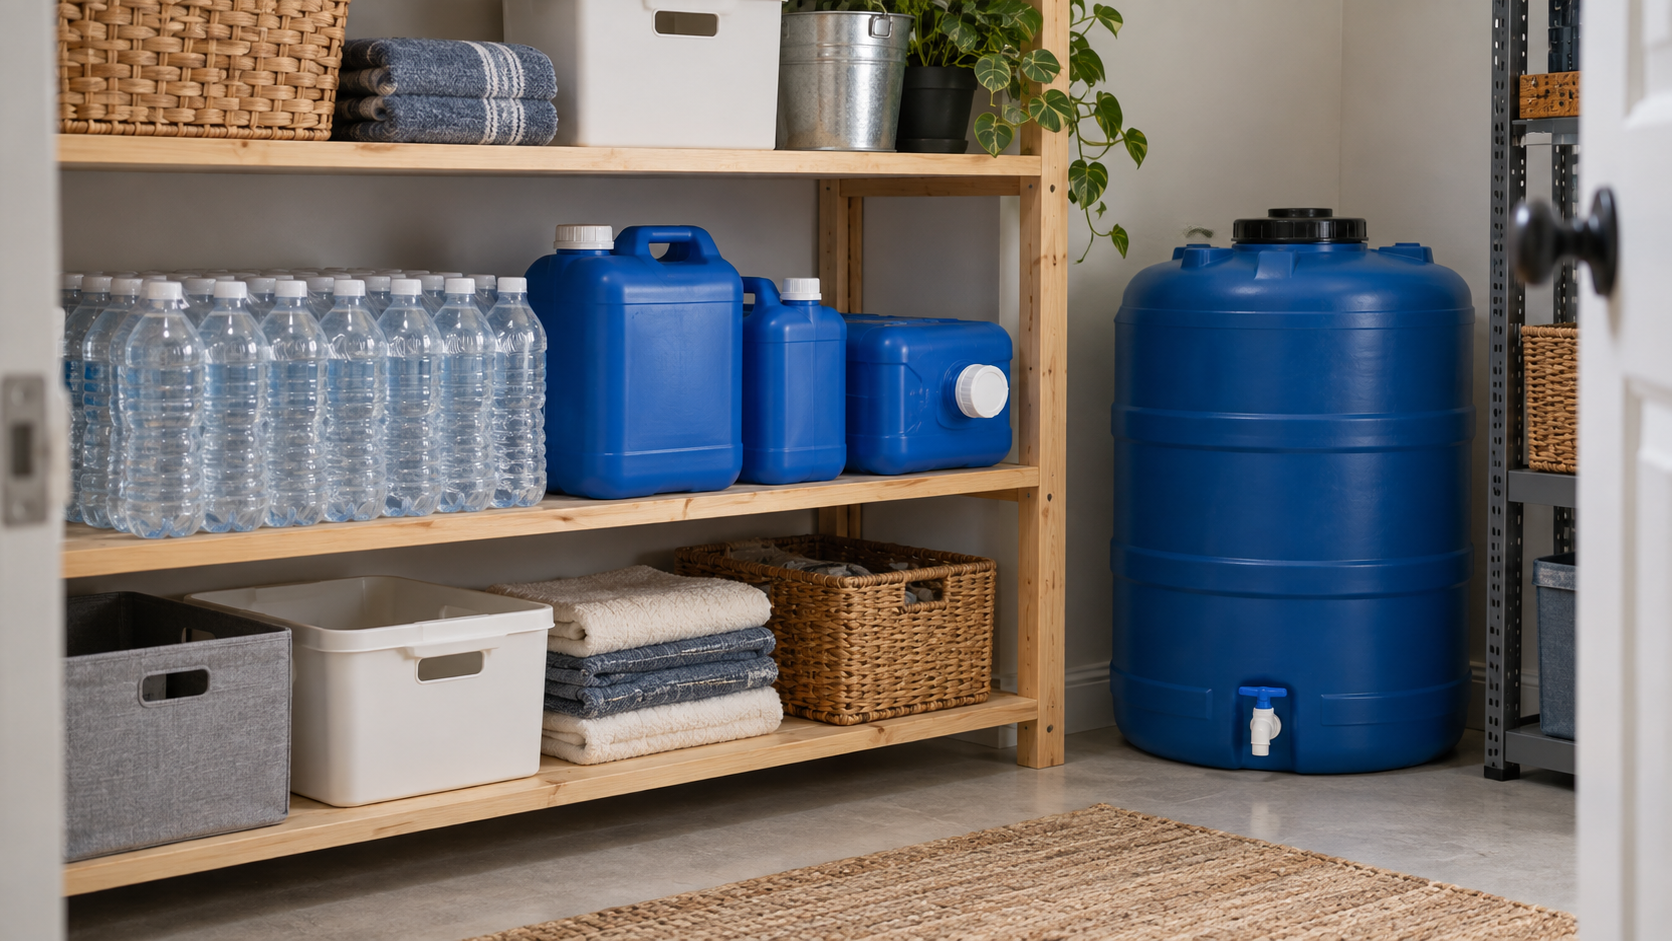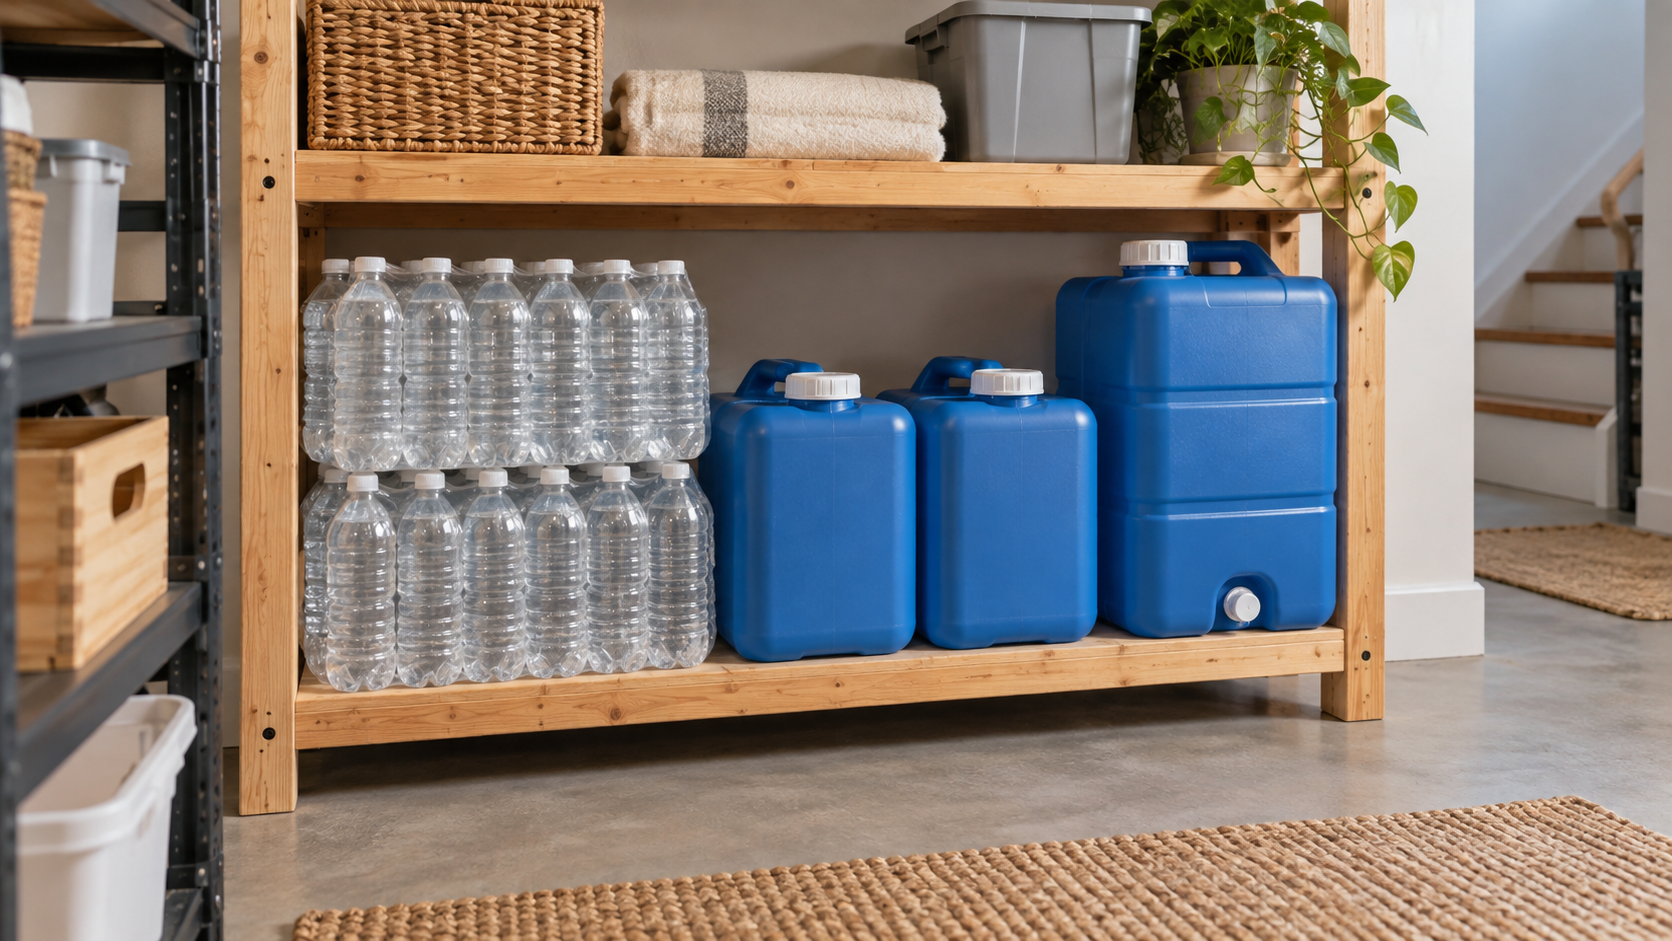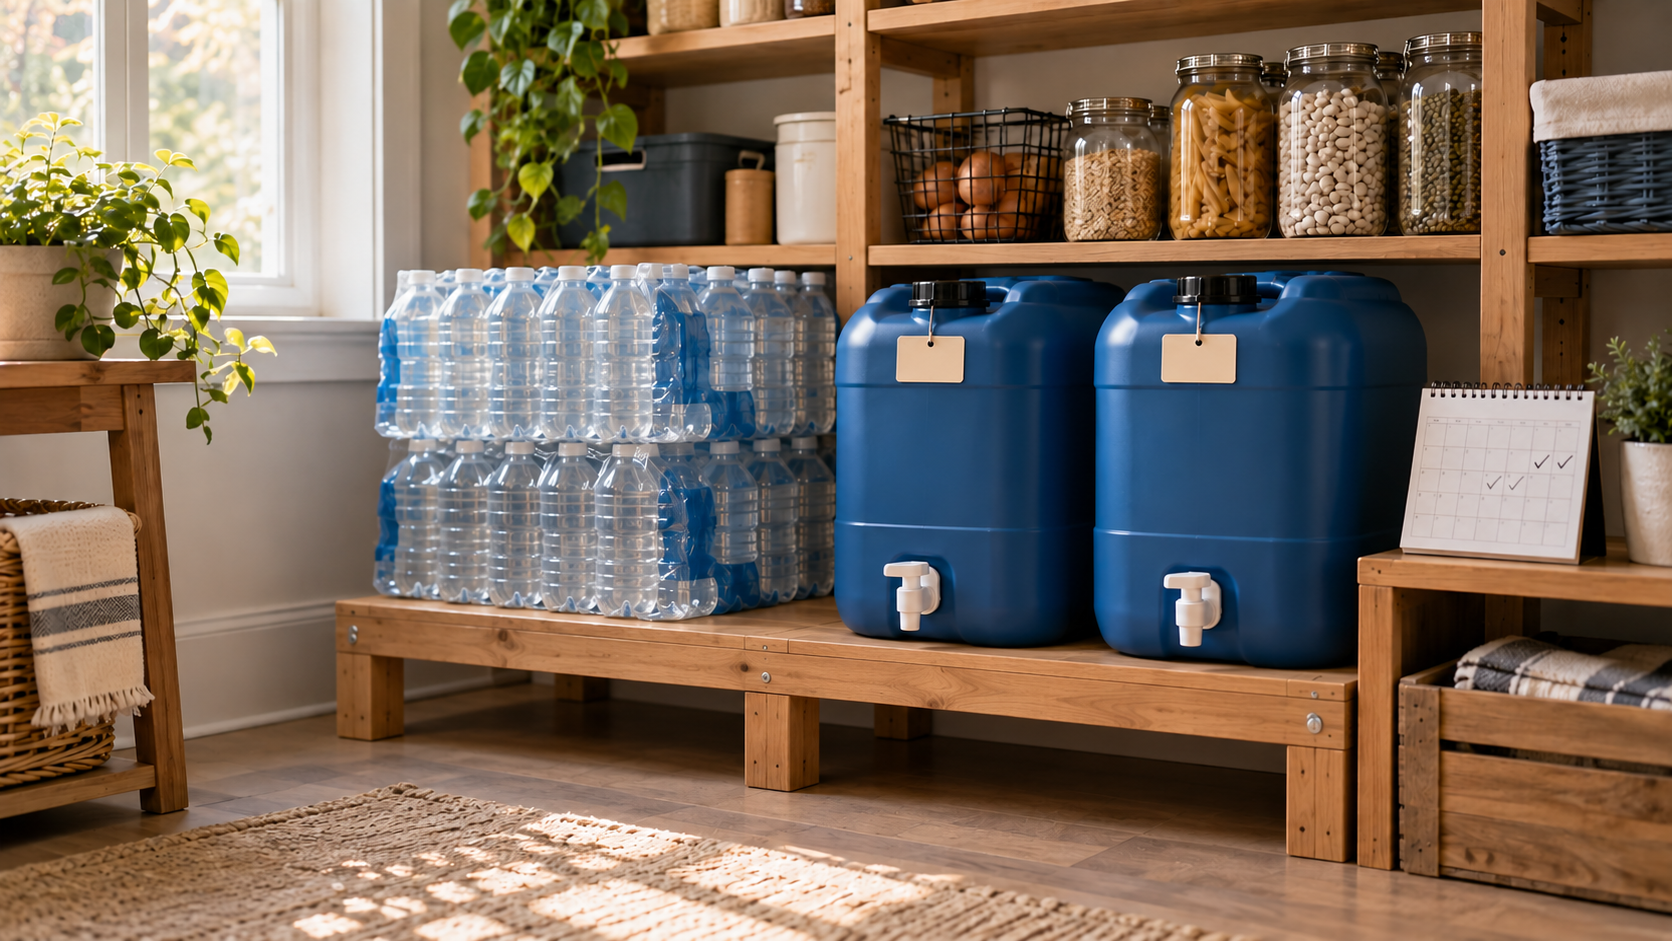
Author: Ready Chateau

  • How to Cook During a Power Outage

    How to Cook During a Power Outage

    A power outage does not automatically mean your household has to live on crackers until the lights return. It does change which cooking methods are safe, how much fuel and water a meal may require, and which food should be used first.

    The safest plan begins with foods that need no cooking. If you want a hot meal, use an appliance that is designed for the location where you are operating it, and make sure your power or fuel source can support it. A power outage is not the time to improvise with charcoal, a camp stove or an unfamiliar flame inside the house.

    Quick Answer

    During a power outage, use this order of preference:

    1. Eat shelf-stable foods that require no cooking.
    2. Use an indoor-rated electric appliance only if it is powered safely by a portable power station or a correctly operated generator.
    3. Use a gas cooktop only if the gas service is safe and the manufacturer provides an approved way to operate that model without normal electrical ignition.
    4. Use grills, charcoal cookers and camp stoves outdoors only, well away from the house and every door, window and vent.

    Never operate a generator, charcoal grill, propane grill or camping stove inside a house, garage, basement, carport, tent or other enclosed or partly enclosed space. Opening a garage door or window does not make the space safe from carbon monoxide.

    Decide Whether You Need to Cook

    Hot food is comforting, but cooking is not always the best first move. Every hot meal uses something that may be limited during an outage: electricity, fuel, safe water or time outdoors.

    Begin by checking what your household can eat without heat. Useful combinations include:

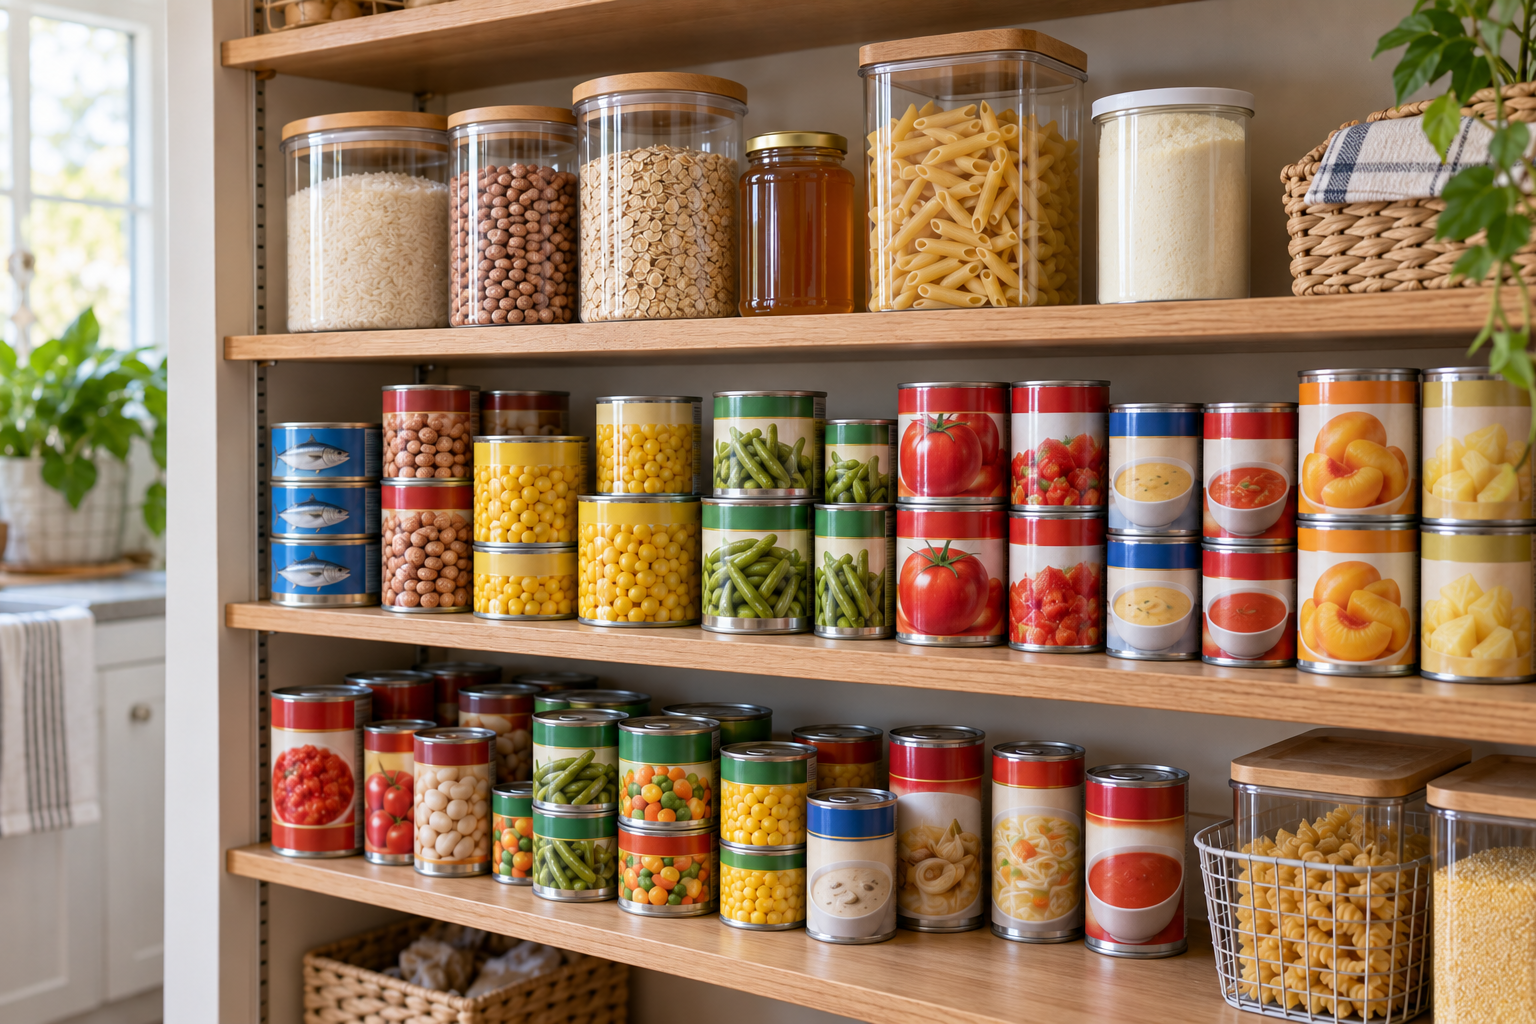
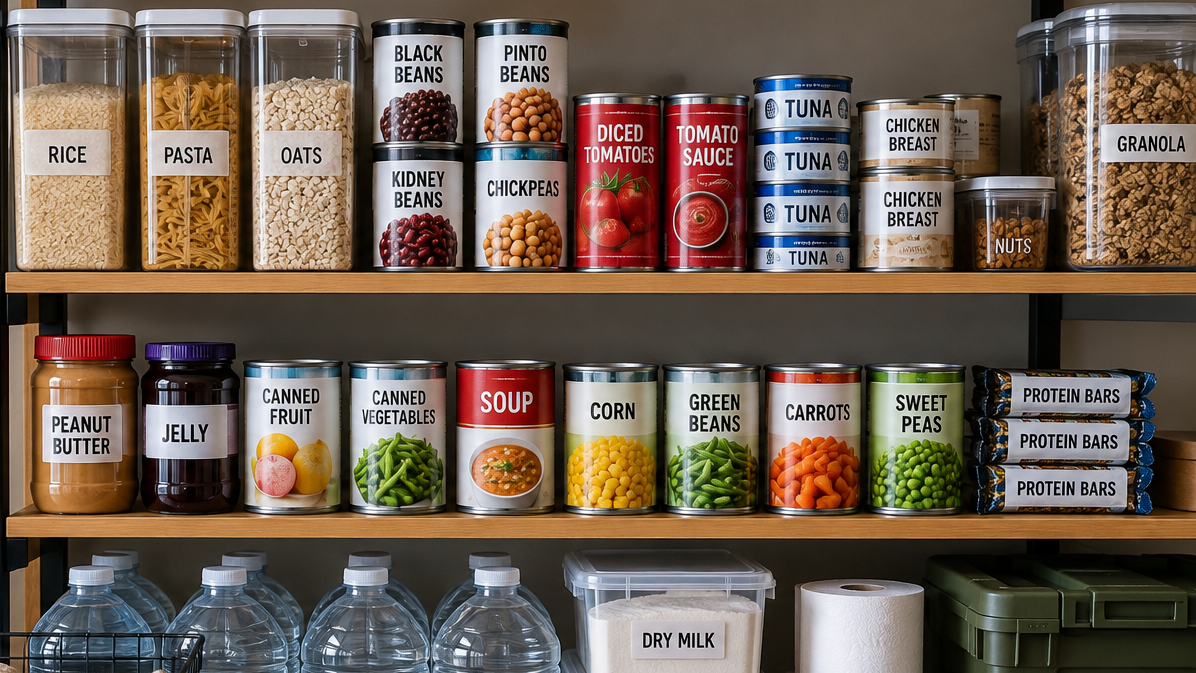
    • Canned chicken or tuna with crackers
    • Peanut butter with bread or tortillas
    • Canned beans, corn and tomatoes mixed as a simple salad
    • Shelf-stable milk with cereal
    • Fruit cups, applesauce, nuts, jerky and snack bars
    • Ready-to-eat soup or pasta that your household is willing to eat at room temperature

    Keep a manual can opener with these foods. Choose cans with pull tabs when practical, but do not make them your only option because the tabs can break.

    No-cook food also gives you a safe fallback when high winds, flooding, wildfire restrictions or extreme weather make outdoor cooking impractical. If there is no safe place to operate a fuel-burning appliance, do not force the issue. Eat a cold meal and wait for safer conditions.

    If your pantry is not ready for that kind of meal, Build an Emergency Food Supply Without Wasting Money explains how to add familiar food gradually instead of buying a separate menu that your household may never use.

    Safe Ways to Heat Food

    The right method depends on the equipment already in your home, the weather outside and the amount of power or fuel you can use safely.

    Small Electric Appliances

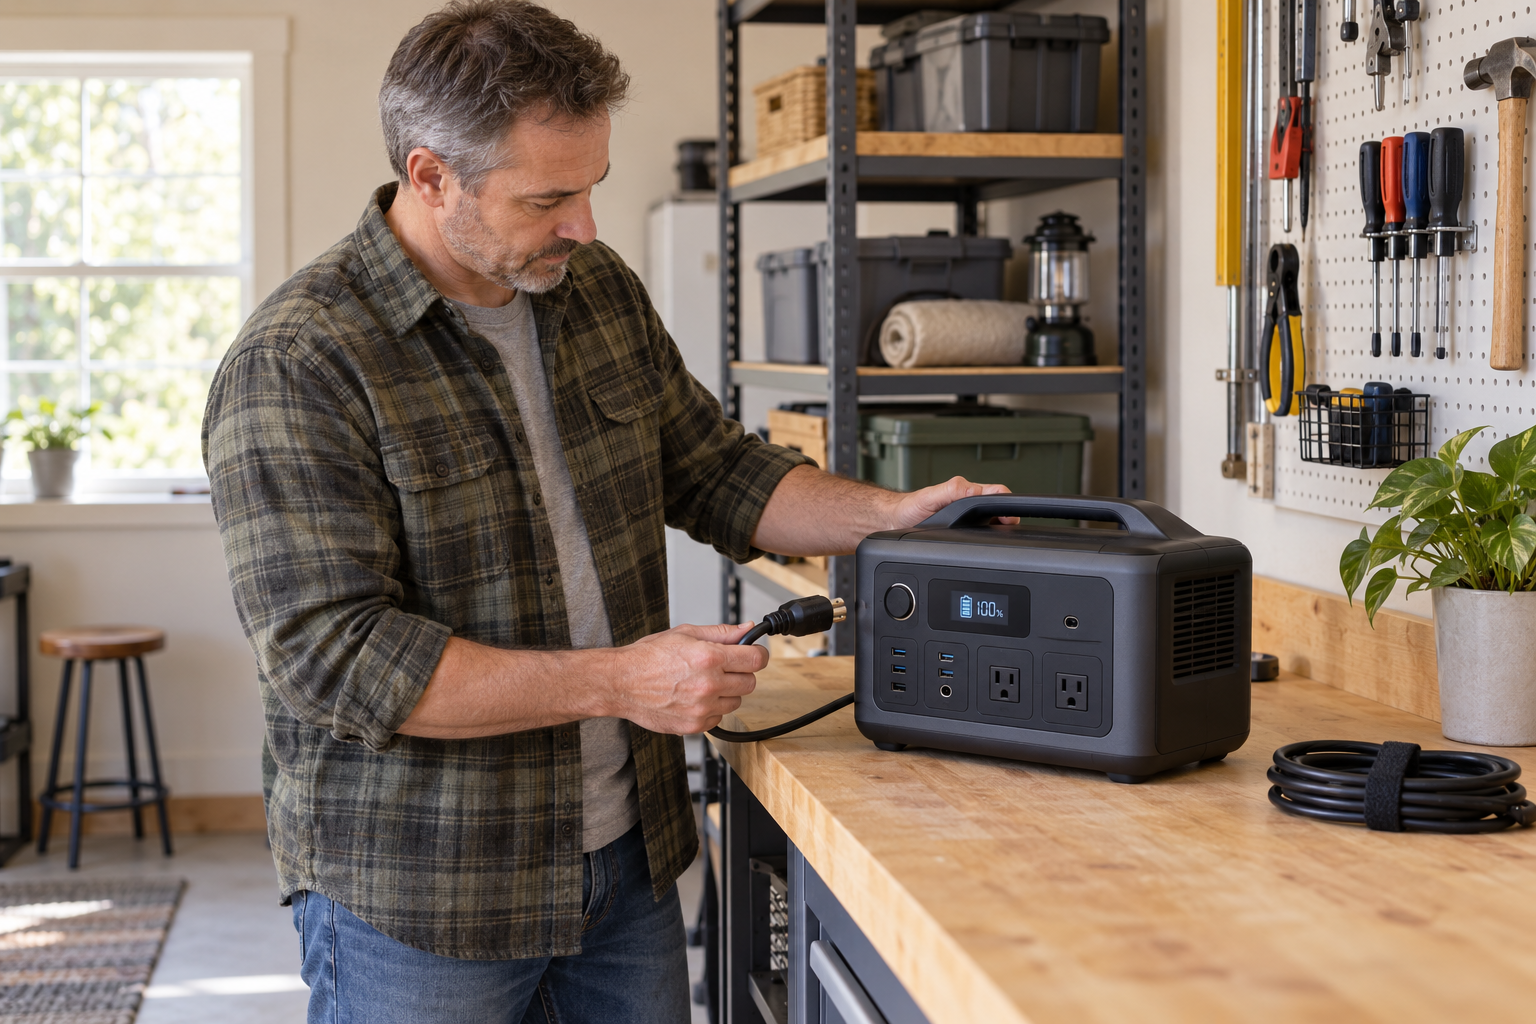
    A portable power station can run some countertop cooking appliances indoors because it does not produce engine exhaust. The limiting factor is electrical demand. Electric kettles, microwaves, hot plates, toaster ovens and pressure cookers can draw substantial power, even when they are used for only a few minutes.

    Check the appliance nameplate and the power station’s continuous-output rating before connecting them. Confirm that the battery has enough usable capacity for the planned cooking time, and follow the power station manufacturer’s ventilation, charging and operating instructions. Keep the unit dry and do not place it against fabric, bedding or another surface that can trap heat.

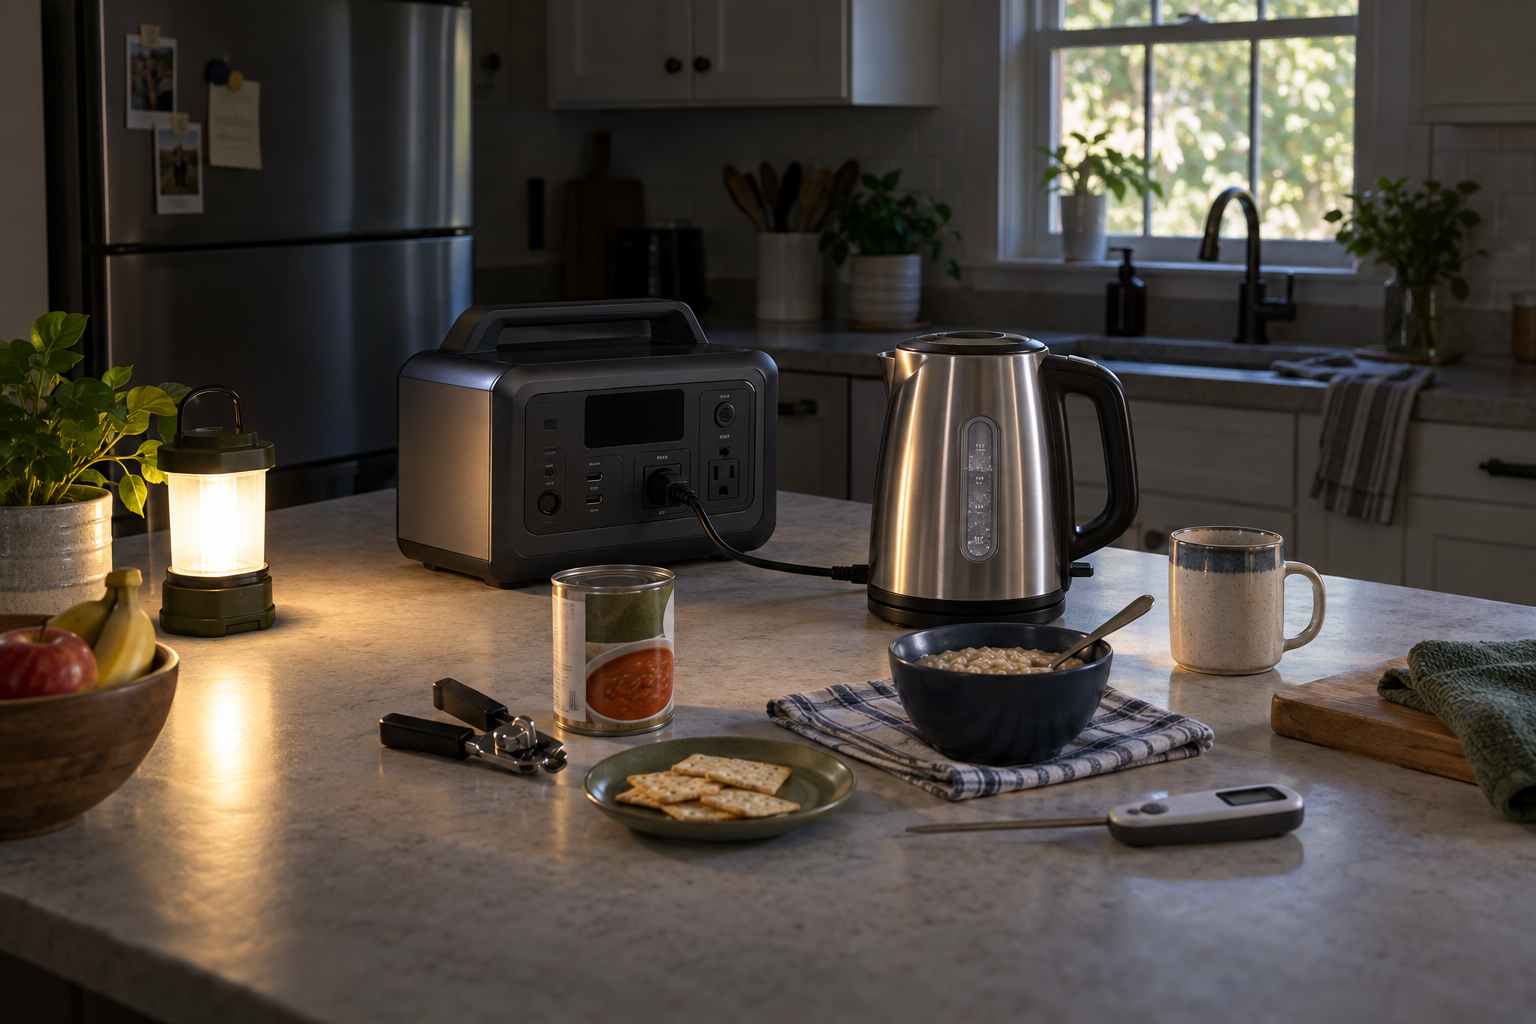
    An electric kettle is often one of the most efficient choices because it heats only the water you need. That hot water can prepare oatmeal, instant grits, couscous, instant potatoes, dehydrated meals and some quick-cooking noodles. A microwave can heat canned food quickly, but its electrical input may be considerably higher than the cooking wattage printed on the front of the appliance.

    Before planning meals around battery power, use What Can You Actually Run During a Power Outage to compare appliance demand with the power you have available.

    Generator Powered Cooking

    A portable generator can power a refrigerator or selected cooking appliance, but the generator itself must remain outdoors. The U.S. Consumer Product Safety Commission says to place a portable generator at least 20 feet from the home with the exhaust directed away from the house.

    Do not run a generator in a garage, even with the door open. Do not place it on a porch, under a carport or near a window, door, crawlspace opening or vent. Keep working carbon-monoxide alarms on every level of the home and outside sleeping areas.

    Use a heavy-duty outdoor-rated extension cord that is suitable for the appliance load, or use a properly installed transfer system. Never connect a generator to a wall outlet. If you are using a generator for both refrigeration and cooking, confirm that the total running and starting demand stays within the generator’s capacity.

    Review Portable Generator Safety before making a generator part of the cooking plan.

    A Gas Cooktop

    Some gas cooktops can operate during a power outage, while others depend on electrical ignition or safety controls. Do not assume that every burner can be lit manually. Check the appliance manual before an outage and follow the manufacturer’s instructions for that exact model.

    Do not use the cooktop if you smell gas, if the appliance may have been damaged, or if emergency officials or the gas utility have told customers not to use gas service. Never use a gas range or oven to heat the home.

    Even when a cooktop is approved for use, keep combustible items away from the flame, turn pot handles inward and supervise the food from start to finish. A flashlight or battery lantern is safer than placing candles around the cooking area.

    Grills and Camp Stoves

    Propane grills, charcoal grills and camping stoves can be useful outage tools when they are operated outdoors in a safe location. They are not indoor appliances.

    The U.S. Fire Administration advises using propane, charcoal and wood-pellet grills outside only and placing them well away from siding, deck railings, eaves and overhanging branches. Keep at least a three-foot child- and pet-free zone around the cooking area. Stay with the appliance while it is lit.

    Set the cooker on a stable, level surface. Keep the area clear of dry grass and anything that can burn. Follow the manufacturer’s lighting and shutdown procedure, let equipment cool before moving it, and never bring a charcoal grill indoors while the coals are still producing heat or fumes.

    A covered porch, attached garage or carport is not a safe substitute for open outdoor space. Carbon monoxide has no color or odor, and partial ventilation does not make an outdoor cooker safe indoors.

    Methods That Are Not Worth the Risk

    An outage can make a questionable shortcut look reasonable. Avoid these improvised methods:

    • Burning charcoal anywhere inside a building, vehicle or tent
    • Operating a propane or liquid-fuel camp stove indoors
    • Running a generator in a garage or close to the house
    • Heating food over candles
    • Building a homemade alcohol stove or pouring fuel into an open burner
    • Using an oven or cooktop to heat the room
    • Cooking in an unvented fireplace or on a wood stove that was not designed for the purpose

    If an appliance’s instructions do not clearly permit the planned use, choose another method. The emergency plan should reduce risk, not trade a cold dinner for carbon-monoxide poisoning, fire or serious burns.

    Protect the Food Before You Plan the Menu

    The first food decision during an outage may be what not to open. Keep refrigerator and freezer doors closed while you determine whether the outage is likely to be short.

    According to the U.S. Department of Agriculture:

    • An unopened refrigerator keeps food safely cold for about four hours.
    • A full freezer holds a safe temperature for about 48 hours if the door remains closed.
    • A half-full freezer holds a safe temperature for about 24 hours if the door remains closed.

    A refrigerator or appliance thermometer removes much of the guesswork. Refrigerated perishable food that has been above 40 degrees Fahrenheit for more than two hours should be discarded. Frozen food that still contains ice crystals or measures 40 degrees Fahrenheit or below can generally be refrozen or cooked, although its quality may decline.

    Never taste food to decide whether it is safe. Smell and appearance are not reliable safety tests. When the time or temperature is uncertain, throw the food away.

    Cooking does not restore food that has been held outside safe temperature limits. Do not turn questionable meat, dairy, eggs or leftovers into an outage meal simply to avoid wasting them.

    Use Perishable Food in the Right Order

    If the outage is expected to last and you have a safe cooking method, a simple order can prevent waste without encouraging you to open the refrigerator repeatedly.

    During the First Four Hours

    Leave the refrigerator closed if power may return soon. If the outage is clearly becoming extended, choose one planned meal, remove everything you need at once and close the door again.

    Use only food that is still at 40 degrees Fahrenheit or below. Cook a manageable amount so you do not create leftovers that cannot be refrigerated.

    After Four Hours

    Do not assume refrigerated meat, poultry, fish, milk, soft cheese, eggs or leftovers are safe. Check their temperature and follow the USDA’s emergency food-safety guidance. Discard perishable food that has been above 40 degrees Fahrenheit for more than two hours.

    Move to shelf-stable meals rather than spending scarce fuel trying to save questionable food.

    From the Freezer

    Keep the freezer closed as long as possible. When you do open it, group remaining frozen food together to help it stay cold. Use a thermometer rather than relying on how the package feels.

    Food that still has ice crystals or remains at 40 degrees Fahrenheit or below can generally be cooked or refrozen. Once food thaws and remains above that temperature for too long, discard it according to USDA guidance.

    Cook Food to a Safe Temperature

    Power loss does not change safe cooking temperatures. Use a food thermometer, especially when wind, cold weather or an unfamiliar cooker makes cooking time unpredictable.

    The USDA’s minimum internal temperatures include:

    FoodMinimum internal temperature
    Poultry, including ground poultry165 degrees Fahrenheit
    Leftovers and casseroles165 degrees Fahrenheit
    Ground beef, pork, lamb and veal160 degrees Fahrenheit
    Beef, pork, lamb and veal steaks, chops and roasts145 degrees Fahrenheit followed by a three-minute rest
    Fish145 degrees Fahrenheit

    Cook eggs until the yolks and whites are firm unless you are following a recipe that reaches a verified safe temperature. Keep raw meat separate from ready-to-eat food, and wash hands, utensils and preparation surfaces with safe water.

    Use Safe Water for Cooking

    An outage may occur at the same time as a boil-water advisory, flood or loss of water pressure. Do not assume the kitchen faucet is safe simply because water still comes out.

    Use bottled, boiled or properly treated water for drinking and food preparation when local officials say the water supply may be unsafe. The Centers for Disease Control and Prevention advises bringing clear water to a rolling boil for one minute, or three minutes at elevations above 6,500 feet. Boiling does not remove fuel, toxic chemicals or radioactive contamination. If officials issue a do-not-drink advisory, use a different water source and follow their instructions.

    Rice, pasta and dried beans can use far more water and fuel than expected. During a short outage, canned beans, canned meat, instant grains and other foods that need little water are usually easier choices.

    For water planning, see How Long Does Stored Water Last.

    Build Meals Around the Method You Have

    You do not need an elaborate outage cookbook. Match familiar food to the safest method available.

    Available methodPractical meal ideasMain limitation
    No heatTuna and crackers, peanut butter tortillas, canned bean salad, cereal with shelf-stable milkRequires food your household will eat without warming
    Electric kettleOatmeal, instant grits, couscous, instant potatoes, dehydrated soupNeeds substantial short-duration electrical power
    MicrowaveCanned soup, vegetables, rice cups and leftovers that are still safeHigh electrical demand and short battery runtime
    Hot plate or induction burnerOne-pot soup, canned chili, eggs, quick-cooking pastaHigh continuous electrical draw
    Outdoor grillMeat that is still safely cold, foil packets, one-pan mealsOutdoor use only; weather and fuel may limit use
    Outdoor camp stoveSoup, oatmeal, coffee, quick-cooking grains and one-pot mealsOutdoor use only; requires stable setup and stored fuel

    Favor meals that use one pot, a short cooking time and little water. Add canned meat, beans or shelf-stable milk when a simple starch needs more protein. Prepare only what the household can finish unless you have a dependable way to keep leftovers at 40 degrees Fahrenheit or below.

    Prepare Before the Power Fails

    A useful outage cooking plan can be tested in one ordinary evening. Turn off the intended appliance, leave the emergency equipment where it is normally stored and prepare one meal without using the regular kitchen power.

    The test should answer these questions:

    • Can you reach the cooker, fuel, extension cord and manual can opener in the dark
    • Does the selected appliance work with the power source you own
    • How much battery capacity or fuel does one meal use
    • Can you operate the equipment in bad weather without moving it into an unsafe location
    • Do you have a food thermometer, refrigerator thermometer, flashlight and working carbon-monoxide alarms
    • Will the household actually eat the planned meal

    Store printed appliance instructions with the equipment. Label fuel clearly and store it according to the manufacturer’s directions and local fire rules. Do not wait for an outage to discover that a power station cannot run the hot plate or that the only can opener is electric.

    A Practical Power Outage Cooking Plan

    Keep the plan simple:

    1. Leave the refrigerator and freezer closed while you assess the outage.
    2. Start with a no-cook meal if the outage is short or outdoor conditions are unsafe.
    3. Choose one approved cooking method and confirm its power or fuel requirements.
    4. Use safe water and a food thermometer.
    5. Cook only the amount your household can eat.
    6. Keep every fuel-burning cooker outdoors and well away from the home.
    7. Discard perishable food that has exceeded safe time and temperature limits.

    The goal is not to recreate a normal kitchen with emergency equipment. It is to feed the household safely with the food, water and energy that are actually available.
    Primary Sources Used for Safety Review

  • What Foods Actually Last the Longest?

    What Foods Actually Last the Longest?

    Some foods can remain usable for years—or even decades—when they are packaged and stored correctly. That does not mean every food with an impressive shelf-life claim belongs in your emergency supply.

    The longest-lasting food may require more water, fuel or preparation than you can manage during an outage. Another food may not last as long, but it may be easier to eat, more familiar to your household and far more useful when the power is off.

    The practical goal is not to find one food that lasts forever. It is to build a dependable mix of foods that store well, provide useful nutrition and can be prepared under the conditions you are actually planning for.

    Quick Answer

    Properly packaged white rice and dried beans are among the longest-lasting practical staples for most households. Granulated sugar and honey can remain safe for an exceptionally long time, although they are ingredients rather than complete meals. Commercial freeze-dried foods may also carry very long shelf-life claims, but the actual life depends on the product, packaging and storage conditions.

    Nonfat dry milk does not last for decades, but it deserves a place in the discussion because it adds protein, calcium and versatility that rice, beans and sugar do not provide. Under cool storage conditions, unopened nonfat dry milk may retain good quality for roughly three to five years. Heat can shorten that life dramatically.

    For most households, the best emergency food supply combines:

    • Familiar canned foods that can be eaten with little or no preparation
    • Dry staples such as white rice, pasta, oats and beans
    • Foods that provide protein, fat and variety
    • Nonfat dry milk or another shelf-stable milk option, if your household uses it
    • A smaller amount of specially packaged long-term food, if it fits the household’s plan

    If you are still deciding how much food to keep, start with How Much Emergency Food Should You Keep at Home? If you want a practical method for building the supply gradually, see Build an Emergency Food Supply Without Wasting Money.

    Shelf Life Is Not Just One Number

    Shelf-life discussions often mix together three different questions:

    1. Is the food still safe?
    2. Does it still taste and perform as expected?
    3. Does it still provide the same nutritional value?

    A dry food may remain safe from microbial growth while losing flavor, texture or vitamins. An old bean may still be edible but take much longer to soften. A can may remain sealed beyond its best-quality date while its color and texture gradually decline.

    That is why a “best if used by” date should not automatically be treated as the moment every food becomes unsafe. USDA guidance explains that most food date labels indicate quality rather than safety, with infant formula being an important exception. Packaging damage, moisture, pests, heat and a broken seal can matter more than the printed date.

    Which Foods Have the Longest Shelf Life?

    FoodLong-term potentialImportant limitation
    Granulated sugar and commercial honeyIndefinite resistance to microbial spoilage when properly storedProvides calories but not balanced nutrition; texture and flavor can change
    Properly packaged white riceApproximately 25–30 years under cool, oxygen-free storage conditionsOrdinary retail packaging does not provide decades of protection
    Whole wheat kernels, often called wheat berriesCan remain acceptable for decades under favorable storage conditionsSpecialized choice that requires grinding or other preparation
    Properly packaged dried beans10 years or more; some stored samples remained acceptable much longerOlder beans may require more water, fuel and cooking time
    Commercial freeze-dried foodOften among the longest-labeled prepared foodsShelf life varies by product; usually requires water and may be expensive
    Nonfat dry milkRoughly 3–5 years under cool storage conditionsHeat causes rapid quality loss; whole-milk powder stores less successfully
    Commercial low-acid canned foodCommonly 2–5 years for best qualityHeavy and bulky, but often easy to eat during an outage
    Commercial high-acid canned foodCommonly 12–18 months for best qualityAcidity can cause quality to decline faster

    These are not interchangeable promises. The multi-decade figures for rice, wheat and beans depend on specialized packaging and favorable temperatures. A bag of rice placed on a warm garage shelf should not be treated like rice sealed in an oxygen-free container and stored in a cool room.

    1. White Rice

    White rice is one of the strongest long-term storage staples because it is calorie-dense, versatile and relatively low in fat. Utah State University Extension reports that polished white rice can store well for 25 to 30 years when it is properly sealed and kept under appropriate conditions.

    The packaging matters. Rice intended for long-term storage needs protection from moisture, oxygen and insects. A thin retail bag is useful for a rotating pantry, but it is not a decades-long storage system.

    White rice also lasts considerably longer than brown rice. Brown rice retains its oily bran layer, which makes it more nutritious in some respects but also gives it a much shorter pantry life.

    Rice still has an emergency-planning drawback: it needs safe water and heat. Store it as part of a broader supply rather than making it your only food.

    2. Dried Beans and Lentils

    Dried beans provide protein, carbohydrates, fiber and minerals. Utah State University reports a shelf life of 10 years or more when beans are packaged in #10 cans or Mylar-type bags with oxygen removed. Some much older samples remained acceptable for emergency use.

    Age still affects performance. Older beans become harder, take longer to rehydrate and may eventually refuse to soften normally. Vitamins also decline during extended storage even when protein, carbohydrates and minerals remain.

    Beans can consume a surprising amount of water and fuel. Most dried beans require soaking and then prolonged cooking. Lentils and split peas generally cook faster, making them useful companions to traditional beans.

    3. Nonfat Dry Milk

    Nonfat dry milk is not the longest-lasting food on this list, but it may be one of the most useful additions to a balanced emergency pantry. It provides protein and calcium, can be mixed for drinking, and can be used in cereal, sauces, bread and other recipes.

    Utah State University Extension gives nonfat dry milk a general storage range of about three to five years when it is kept cool. Storage temperature makes a major difference. Under hot conditions, noticeable quality loss can occur in only a few months.

    The type of milk powder matters. Whole-milk powder and dried buttermilk contain more fat and are not as suitable for long-term storage. For the best storage potential, choose nonfat dry milk in intact, moisture-resistant packaging and follow the manufacturer’s date and storage directions.

    Dry milk still requires safe water. Once it is mixed, treat it like fresh milk and refrigerate it if refrigeration is available. If your household does not normally drink powdered milk, try a small package before buying a large supply.

    4. Sugar and Honey

    Granulated sugar and commercial filtered honey resist microbial growth and can remain safe for an exceptionally long time when kept dry and protected from contamination. Sugar may harden, and honey may crystallize or change color, but those quality changes do not automatically make them unsafe.

    Neither product is an emergency meal. They provide energy and make basic foods easier to use, but they lack protein, fat, fiber and most vitamins. Store them as supporting ingredients, not as the foundation of the plan.

    Do not place oxygen absorbers in sugar. Utah State University advises that oxygen removal is unnecessary and can turn granulated sugar into a hard block.

    5. Commercial Freeze-Dried Food

    Commercial freeze-dried foods can carry some of the longest shelf-life labels in the emergency-food market. The exact life varies by the food, moisture level, packaging, seal and storage temperature, so use the manufacturer’s date and storage instructions rather than assuming every freeze-dried product lasts 25 years.

    Freeze-dried food is lightweight and compact, but it normally needs water. It can also cost considerably more per serving than ordinary pantry food.

    Before buying a large package, check:

    • Total calories rather than the advertised number of servings
    • Protein, fiber and sodium
    • Allergens and dietary restrictions
    • Water required for preparation
    • Whether meals can be prepared without normal kitchen power
    • Whether your household has actually tried the food

    6. Commercial Canned Food

    Canned food does not win the decades-long shelf-life contest, but it may be the most useful category during a short household emergency.

    Many canned foods are ready to eat, require little or no water and can be served without cooking. USDA guidance commonly gives high-acid canned foods such as tomatoes and many fruits a best-quality window of about 12 to 18 months. Low-acid canned foods such as meats, vegetables and many soups commonly retain best quality for about two to five years.

    Those are quality guidelines, not permission to ignore the container. Discard cans that are bulging, leaking, badly rusted or deeply dented—especially around seams. Do not taste food from a suspect container.

    Keep a manual can opener with your emergency food.

    What About Whole Wheat Kernels?

    Whole wheat kernels, often called wheat berries, can remain usable far longer than flour. The intact grain offers better protection than a milled product, and research cited by Utah State University found that properly stored wheat remained acceptable after decades.

    Wheat kernels are a specialized choice rather than a basic recommendation for every household. You need a way to grind or cook them, enough water and fuel, and the knowledge to turn them into food your household will eat. Their baking performance can also decline during long storage.

    If your household already grinds wheat or cooks the whole kernels, they may deserve a place in your long-term supply. If you have never used them, more familiar staples are likely to serve you better.

    Foods That Do Not Last as Long as People Expect

    Some nutritious foods are poor candidates for very long room-temperature storage because they contain more fat or have fragile packaging.

    These include:

    • Brown rice
    • Whole-grain flour
    • Nuts and seeds
    • Nut butters
    • Cooking oils
    • Granola
    • Crackers
    • Many snack bars
    • Whole-milk powder and dried buttermilk

    That does not mean you should leave them out. Fat, protein, flavor and familiar snacks all matter during an emergency. It means these foods belong in the rotating part of the pantry rather than the forgotten back corner.

    Buy quantities your household can use before quality declines. Replace what you use and keep the newest package behind the older one.

    Storage Conditions Can Matter More Than the Food

    Heat and moisture shorten storage life. Utah State University Extension identifies moisture and temperature as two of the most important storage factors. In one cited study, wheat remained acceptable for 25 years in cool basement storage but only about five years in hot storage.

    For better results:

    • Choose a cool, dry and dark location
    • Avoid hot garages, sheds and uninsulated attics
    • Use clean, food-grade containers
    • Protect dry food from moisture, insects and rodents
    • Keep food off bare concrete floors
    • Label each container with the food and storage date
    • Divide bulk food into smaller containers so one failure does not ruin everything
    • Inspect the supply regularly
    • Use the oldest food first

    The ideal storage location is not always available. If your home runs warm, plan for shorter storage and faster rotation instead of pretending the temperature does not matter.

    What About Home-Canned Food?

    Home-canned food belongs in a separate safety category. Use only current, research-tested recipes and approved processing methods from USDA or a cooperative extension source.

    The National Center for Home Food Preservation recommends canning no more than you expect to use within about one year for best quality. Never rely on appearance or smell alone to prove that improperly processed food is safe.

    If you are uncertain about how a jar was processed, do not use it as emergency food.

    A More Useful Way to Build a Long-Lasting Food Supply

    Think in three layers.

    Layer 1: Foods You Already Eat

    Start with canned meat, fish, beans, vegetables, fruit, soup, pasta, rice, cereal and other shelf-stable foods already used in your household. Rotate these through normal meals.

    Layer 2: Longer-Term Staples

    Add carefully chosen quantities of white rice, dried beans, lentils or other dry staples that you know how to prepare. Include nonfat dry milk if your household will use it. Package foods for the length of time you realistically intend to store them.

    Layer 3: Specialty Emergency Food

    Add freeze-dried meals, whole wheat kernels or other specially packaged foods only when they solve a real problem, such as portability, limited storage space or the desire for a reserve that requires less rotation.

    Across all three layers, make sure you have:

    • Safe water
    • A manual can opener
    • A realistic cooking method
    • Enough fuel
    • Foods that fit medical, allergy and dietary needs
    • Some foods that require no cooking

    The Bottom Line

    Properly packaged white rice and dried beans are among the longest-lasting practical staples for most households. Sugar and honey can remain stable for an exceptionally long time, while nonfat dry milk adds protein, calcium and versatility for a shorter storage period. Commercial freeze-dried products may last a long time as well, but their labels and preparation requirements must be checked individually.

    Whole wheat kernels can last for decades under favorable conditions, but they make sense mainly for households that already know how to use them.

    The longest-lasting food is not automatically the best emergency food.

    A dependable supply includes food you can safely store, prepare and eat. Combine long-term staples with familiar canned and packaged foods, protect them from heat and moisture, and rotate the foods that do not belong in deep storage.

    Preparedness is not about winning a shelf-life contest. It is about having useful food when your household needs it.

    Sources

  • How Much Emergency Food Should You Keep at Home?

    How Much Emergency Food Should You Keep at Home?

    “How much emergency food do I need?” sounds like a question that should have one simple answer.

    It does not.

    A household with two adults who can cook during an outage has different needs from a family with young children, an older parent, food allergies, pets or no practical way to heat food. The right amount also depends on what kind of disruption you are preparing for and how long you want to be able to stay home without shopping.

    Fortunately, you do not need to calculate every calorie your household might consume during a disaster.

    A better place to begin is much simpler: choose how many days you want to cover, count the people you are feeding and build enough realistic meals for that period.

    Start With a 3-Day Minimum

    Federal preparedness guidance generally starts with enough food and other supplies to last several days. Ready.gov recommends keeping at least a several-day supply of nonperishable food, while North Carolina emergency preparedness guidance recommends enough food for three to seven days for each person and pet.

    Three days is a useful starting point because it gives a household some breathing room during a short power outage, storm, transportation disruption or temporary store closure.

    For one person, a basic three-day plan could mean:

    • 3 breakfasts
    • 3 lunches
    • 3 dinners
    • A few snacks or easy extras

    For four people, the same three-day plan becomes 36 meal portions:

    4 people × 3 days × 3 meals = 36 meal portions

    That does not mean you need 36 cans or 36 individual packages. One box of cereal might provide several breakfasts. A pot of shelf-stable soup ingredients may provide several servings. The point is to count usable meals instead of counting packages.

    Seven Days Is a Stronger Household Target

    Once you have three days covered, moving toward seven days gives you substantially more flexibility.

    ReadyNC recommends three to seven days of food and other supplies for each person and pet.

    A seven-day food supply can help when an outage lasts longer than expected, roads are difficult to travel, stores reopen slowly or you simply prefer not to join the rush for groceries immediately after a storm.

    Using the same simple calculation:

    People × Days × Meals Per Day

    A household of four planning for seven days would need:

    4 × 7 × 3 = 84 meal portions

    Again, that number is a planning tool, not a requirement to purchase 84 separate products.

    Think in meals:

    • What would everyone eat for breakfast?
    • What could serve as lunch?
    • What could serve as dinner?
    • Which meals work without refrigeration?
    • Which meals work without cooking?

    If you can answer those questions for seven days, you have a much clearer picture of what you actually need.

    Two Weeks Is a Practical Long-Term Home Goal

    The American Red Cross recommends a three-day supply of nonperishable, easy-to-prepare food for evacuation and a two-week supply for home use.

    That makes two weeks a reasonable longer-term target for a household that has the storage space, budget and ability to rotate the food.

    You do not have to reach two weeks immediately.

    A practical progression is:

    3 days → 7 days → 14 days

    Build the first three days. Make sure the meals work. Then extend the same system to a week. Once that feels manageable, add the second week.

    This approach fits the Ready Chateau philosophy much better than buying a large emergency-food package all at once and hoping it matches your household.

    How Much Food Is That for Your Household?

    Here is a simple planning table based on three meals per person per day.

    Household Size 3 Days 7 Days 14 Days
    1 person 9 meal portions 21 42
    2 people 18 42 84
    3 people 27 63 126
    4 people 36 84 168
    5 people 45 105 210
    6 people 54 126 252

    These numbers are not calorie recommendations. They are simply a way to make the size of the job visible.

    A “meal portion” should represent what that person would realistically eat.

    A six-year-old child and a large adult probably do not need identical portions. Someone with a medical diet may need completely different foods. Use the table as a planning framework, then adjust it to your household.

    Do Not Build the Plan Around Calories Alone

    You will sometimes see emergency-food plans built around a fixed number of calories per person per day.

    That can be useful for specialized planning, but it is not the easiest approach for most households.

    Calorie needs vary with age, body size, health, activity level and other factors. More importantly, a mathematically perfect calorie supply is not very useful if your family will not eat the food or cannot prepare it when the power is out.

    For most homeowners, complete meals are easier to plan and easier to manage.

    Instead of asking:

    “How many calories are in the pantry?”

    Ask:

    “How many breakfasts, lunches and dinners can we actually serve?”

    That question usually exposes shortages much faster.

    Include Food You Can Eat Without Cooking

    A household may have plenty of food and still have a problem if every meal requires a stove.

    FoodSafety.gov recommends emergency foods with a long storage life that require little or no cooking, water or refrigeration.

    Your supply should include at least some meals that can be eaten without heating.

    Examples might include combinations of:

    • Peanut or other nut butter
    • Crackers
    • Canned or pouched meat or fish
    • Ready-to-eat beans
    • Canned fruit
    • Shelf-stable milk
    • Dry cereal
    • Nutrition or granola bars
    • Applesauce or fruit cups
    • Other shelf-stable foods your household normally eats

    USDA guidance also recommends keeping a hand-held can opener with an emergency food supply.

    You do not need every meal to be no-cook. You do need enough options that losing electricity does not immediately make your emergency pantry useless.

    Your Refrigerator and Freezer Are the First Layer — Temporarily

    During a short outage, the food already in your refrigerator and freezer may be useful, but you should not count it as your entire emergency supply.

    FoodSafety.gov says an unopened refrigerator will generally keep food cold for about four hours. A full freezer can maintain temperature for approximately 48 hours, or about 24 hours if it is half full, when the door remains closed.

    That means refrigerated and frozen food can sometimes become the first food you use during an outage.

    But your longer-term plan should depend on shelf-stable food rather than assuming refrigeration will continue indefinitely.

    Never taste food to determine whether it is safe after a power outage. Follow food-safety guidance based on time and temperature and discard questionable perishables.

    Count Everyone You Are Actually Feeding

    Emergency-food planning should include more than the number of adults in the house.

    Consider:

    • Children
    • Older family members
    • Overnight guests who may realistically shelter with you
    • Infants
    • People with allergies or medically necessary diets
    • Pets

    Government preparedness guidance specifically reminds households to include infant needs, special diets and pet food when building an emergency supply.

    If your dog eats two cups of food per day, for example, a seven-day household plan needs at least seven days of dog food too.

    Pets should not become an afterthought once the storm arrives.

    Add a Little Margin

    If your calculation says your household needs exactly 84 meal portions for seven days, you do not need to treat 84 as a magic number.

    A small margin can cover:

    • Larger appetites
    • An extra person staying with you
    • A damaged package
    • A meal that does not work as expected
    • A disruption lasting longer than planned

    The goal is not to create an enormous stockpile. It is simply to avoid designing a plan with absolutely no room for error.

    Watch Foods That Use a Lot of Water

    Dry rice, pasta, dried beans and dehydrated meals can be useful because they store well.

    But they also consume something else you need during an emergency: water.

    Some foods require water for cooking. Others create pots and dishes that require additional water for cleanup.

    That means emergency food and emergency water planning cannot be completely separated.

    If a large portion of your food supply consists of dry foods, make sure your stored water plan includes the water required to prepare them.

    This is one reason a combination of dry staples and ready-to-eat foods works well for many households.

    A Simple Way to Build Your Supply

    You do not need to fill an entire pantry this weekend.

    Start with three days.

    Write down what your household would realistically eat for breakfast, lunch and dinner. Include at least a few no-cook meals.

    Then check your pantry.

    You may discover that you already have much of the first three days.

    Buy only what is missing.

    Once three days are complete, repeat the process until you have seven. If your space and budget allow, gradually work toward two weeks.

    Our guide Build an Emergency Food Supply Without Wasting Money explains how to choose foods your household will actually eat, select useful package sizes and rotate the supply instead of letting it expire in the back of a closet.

    Example: A Family of Four for Seven Days

    Suppose a four-person household wants one week of emergency food.

    Their planning target is:

    4 people × 7 days × 3 meals = 84 meal portions

    They might divide that into:

    • 28 breakfast portions
    • 28 lunch portions
    • 28 dinner portions

    Then they plan actual foods.

    Breakfast might rotate among cereal with shelf-stable milk, oatmeal when cooking is available and breakfast bars with fruit.

    Lunch might include tuna or chicken with crackers, peanut butter, canned fruit, soup or shelf-stable meal combinations.

    Dinner might include pasta, rice dishes, canned beans, canned meat, vegetables or other familiar pantry meals.

    Some meals require cooking. Others do not.

    That mixture is important. If the stove is unavailable, the family still has something useful to eat.

    Do Not Forget the Foods People Actually Want

    Emergency food is partly about nutrition, but morale matters too.

    A week of eating unfamiliar food under stressful conditions is not likely to improve anyone’s mood.

    Include a reasonable amount of familiar snacks, coffee or tea, powdered drink mixes, crackers, cookies or other comfort foods your household normally enjoys.

    That does not mean filling the pantry with junk food.

    It means recognizing that an emergency food supply is meant for real people living through an inconvenient or stressful situation.

    Three Days First. Then Build From There.

    You do not need a year’s worth of food to be better prepared tomorrow than you are today.

    For most households, the sensible progression is straightforward:

    Start with three complete days.

    Build toward seven days.

    Then consider a two-week home supply if your household, space and budget support it.

    Count meals instead of cans. Include food that works without cooking. Account for children, dietary needs and pets. Make sure the food matches the water and cooking resources you actually have.

    Most importantly, build a supply your household can really use.

    An emergency pantry should not be a museum of food you hope never to touch. It should be an extension of the pantry you already live with every day.

  • Water Filters vs. Water Purifiers: What’s the Difference?

    Water Filters vs. Water Purifiers: What’s the Difference?

    When people start thinking seriously about emergency water, one question usually comes up pretty quickly:

    Do I need a water filter, or do I need a water purifier?

    Those terms are often used as though they mean the same thing. They don’t.

    A filter may be very good at removing certain contaminants from water while doing little or nothing about others. A purifier is generally intended to provide broader protection against disease-causing microorganisms.

    That difference matters during an emergency.

    The right choice depends less on which product has the most impressive packaging and more on a simple question:

    What might be wrong with the water you’re trying to treat?

    Understanding that first makes choosing the right equipment much easier.

    The Simple Difference Between a Filter and a Purifier

    A water filter physically removes certain things from water as the water passes through the filter material.

    Depending on its design, a filter may remove sediment, parasites, bacteria, chlorine, lead or certain other contaminants. But there is no single filter that automatically removes everything.

    The CDC warns that portable water filters do not remove all types of germs. Pore size matters. For example, the CDC says a portable filter needs an absolute pore size of 1 micron or smaller to remove parasites such as Giardia and Cryptosporidium, and 0.3 micron or smaller to remove bacteria. Portable filters generally should not be assumed to remove viruses.

    A microbiological water purifier is designed to go further.

    The EPA’s testing protocol for microbiological water purifiers addresses bacteria, viruses and protozoan cysts. NSF also maintains Protocol P231 for microbiological water purifiers based on EPA recommendations.

    That gives us a useful rule of thumb:

    A filter removes specific contaminants. A true microbiological purifier provides broader protection against disease-causing microorganisms, including viruses.

    But don’t stop reading at the word purifier on the box. Look at exactly what the product has been tested or certified to reduce.

    Why Viruses Are the Big Difference

    Viruses are one of the biggest reasons the filter-versus-purifier distinction matters.

    Many portable filters can remove parasites and, depending on their pore size and design, bacteria. Viruses are much smaller and may pass through filters that are otherwise very effective.

    That’s why the CDC recommends that when the safety of untreated water is uncertain, boiling is the best way to kill germs. When boiling isn’t practical, the CDC describes filtering followed by disinfection as the next-best approach.

    That doesn’t mean every emergency requires a purifier.

    It means you need to understand the possible contamination before deciding that filtration alone is enough.

    Think About the Water Source First

    Imagine two different situations.

    In the first, you’re treating relatively clear water from a natural freshwater source. Your primary concern may be microorganisms such as Giardia, Cryptosporidium and bacteria.

    In the second, flooding has affected a community water system or potentially introduced sewage contamination. Now viruses may also be a concern.

    Those are very different treatment problems.

    And there is an even more important third possibility: water contaminated by fuel, pesticides, industrial chemicals or other toxic substances.

    In that situation, don’t assume that a camping filter, purifier, bleach or even boiling will solve the problem.

    The CDC specifically warns that water containing fuel, toxic chemicals or radioactive materials cannot be made safe by boiling or disinfecting and recommends using bottled water or another safe source instead. EPA similarly warns that boiling and emergency disinfection do not remove contaminants such as heavy metals, salts and most other chemicals.

    Ready Chateau Safety Note: If authorities issue a Do Not Drink or Do Not Use advisory, follow that advisory. Don’t substitute your home filtration equipment for the instructions of local health or water officials. During a boil-water advisory, CDC guidance says to use commercially bottled water or boil tap water even if the water has already passed through a typical home filter.

    Filter, Purifier or Something Else?

    Here is the practical way to think about the options:

    Treatment methodWhat it can doImportant limitation
    Portable filterDepending on design, may remove parasites, bacteria and sedimentDo not assume it removes viruses
    Microbiological purifierDesigned and tested for broader protection against bacteria, viruses and protozoan cystsVerify the actual certification and performance claims
    BoilingKills viruses, bacteria and parasitesDoes not remove harmful chemicals or other non-biological contaminants
    Chemical disinfectionCan kill many disease-causing microorganismsEffectiveness varies by disinfectant and organism
    UV treatmentCan kill germs when properly usedWorks poorly in cloudy water unless the water is clarified first
    Activated carbon / specialty filtrationMay reduce specific chemicals, taste, odor or other contaminantsPerformance depends entirely on the filter and its certified claims
    Reverse osmosisCan reduce a broad range of specific contaminants depending on the systemRequires the correct system, maintenance and verified contaminant-reduction claims

    CDC guidance says boiling is the best emergency method for killing germs. It also notes that UV treatment works best with clear water because suspended particles can shield microorganisms from the light.

    The lesson isn’t that one technology is always better.

    It’s that different technologies solve different problems.

    Don’t Buy a Filter Based on Micron Rating Alone

    Micron ratings are useful, particularly when evaluating a filter’s ability to physically block microorganisms.

    But micron size doesn’t tell you everything a water-treatment device can do.

    Some systems combine multiple technologies. Others use activated carbon to reduce certain chemicals or improve taste and odor. Reverse-osmosis systems use a different treatment process. Purifiers may combine filtration with chemical, ultraviolet or other treatment methods.

    Instead of looking for the smallest number on the package, look for evidence that the product has actually been tested for the contaminants you’re concerned about.

    That’s where certification becomes important.

    What Do NSF Certifications Mean?

    You may see NSF/ANSI numbers on water-treatment equipment. Those numbers are not product rankings. Each standard addresses particular types of performance claims.

    For example, NSF explains that NSF/ANSI 42 covers aesthetic effects such as chlorine, taste and odor. NSF/ANSI 53 addresses contaminants with health effects. NSF/ANSI 58 applies to reverse-osmosis systems, while NSF P231 addresses microbiological water purifiers.

    Certification still doesn’t mean a product removes every contaminant.

    A filter certified under a particular standard should be checked for the specific contaminant-reduction claim you need. NSF explicitly cautions that certification to a standard or protocol does not mean the treatment system reduces every possible contaminant.

    That’s an important distinction.

    Don’t ask only:

    “Is this NSF certified?”

    Also ask:

    “Certified to reduce what?”

    Home Water Filters Aren’t Necessarily Emergency Water Filters

    The pitcher in your refrigerator and the filter attached to your kitchen faucet may be perfectly useful for their intended purpose.

    That doesn’t make them emergency purification systems.

    Some household filters are primarily designed to improve taste and odor. Others are certified to reduce specific contaminants such as lead or certain chemicals. CDC recommends choosing a home filter based on the harmful germs or chemicals you’re actually concerned about and maintaining the filter according to the manufacturer’s instructions.

    This is particularly important during a water emergency.

    If local authorities issue a boil-water advisory because disease-causing microorganisms may be present, don’t assume your normal refrigerator, pitcher or faucet filter replaces boiling. Follow the advisory.

    When a Portable Filter Makes Sense

    A portable filter can be an excellent preparedness tool.

    It may be especially useful when you need a compact way to treat water and the filter has appropriate verified claims for the likely contaminants.

    For home preparedness, portability also matters.

    A large household may need much more treated water than a backpacking filter was designed to produce. Flow rate, filter life, replacement elements and the physical effort required to process several gallons of water can become important very quickly.

    A filter that’s convenient for one person on a hiking trip may be frustrating as the primary water-treatment method for a family during a week-long outage.

    That’s something we’ll consider carefully when Ready Chateau eventually evaluates specific water-treatment products.

    When a Purifier Makes More Sense

    A purifier becomes more attractive when broader microbiological protection is needed, particularly when viruses may be part of the risk.

    But the same rule applies:

    Verify the claims.

    Look for independent certification or credible test results showing exactly what the device reduces or inactivates. Don’t assume that a product is appropriate for every emergency simply because the manufacturer uses the word purifier.

    And remember that microbiological purification still doesn’t automatically solve chemical contamination.

    A device designed to deal with bacteria, viruses and protozoa isn’t necessarily designed to remove fuel, heavy metals or every chemical contaminant.

    Sometimes the Best Answer Is More Than One Treatment Step

    Emergency water treatment doesn’t always have to depend on one piece of equipment.

    CDC guidance specifically describes filtering followed by disinfection when boiling isn’t available. Cloudy water can also be allowed to settle or be passed through a clean cloth, paper towel or coffee filter before further treatment.

    That illustrates a broader preparedness principle:

    Redundancy is useful.

    Stored drinking water should remain your first line of defense. A good filter or purifier gives you another option. Boiling or an appropriate emergency disinfectant can provide another treatment method.

    One method doesn’t have to do everything.

    Don’t Forget Maintenance

    Water-treatment equipment is not something to buy, put on a shelf for ten years and automatically expect to work perfectly when you need it.

    Filters have service lives. Some have cartridges that must be replaced. Others require cleaning or backwashing. Seals and hoses need to remain usable. Batteries in UV systems need power.

    CDC recommends maintaining filters and replacing filter elements according to manufacturer instructions because improper maintenance can allow germs to grow or reduce the filter’s effectiveness.

    For emergency equipment, that means periodically checking the unit, knowing how to operate it and keeping any necessary replacement components with your preparedness supplies.

    The middle of a water outage is a bad time to discover that your only replacement cartridge is three years overdue.

    What Should You Buy?

    Don’t begin with a brand.

    Begin with the problem you’re trying to solve.

    If your goal is simply improving normal municipal tap water, you may need a very different product than someone preparing to treat questionable water after a hurricane or extended utility failure.

    For emergency preparedness, consider the likely water source, the contaminants the treatment system is verified to address, how much water your household needs, how quickly the system can produce it, how complicated it is to operate and what maintenance or replacement parts it requires.

    And before buying another piece of equipment, make sure you have an adequate supply of stored drinking water in the first place.

    A filter or purifier should strengthen your emergency water plan—not become an excuse for having no stored water at all.

    If you haven’t established your water supply yet, start with How Much Water Should You Store for an Emergency?, then review The Right Way to Store Emergency Water at Home and Best Emergency Water Storage Containers.

    The Bottom Line

    A water filter and a water purifier are not automatically interchangeable.

    A filter removes particular contaminants according to its design and tested capabilities. A microbiological purifier is intended to provide broader protection against disease-causing microorganisms, including viruses.

    Neither term tells you everything you need to know.

    The smarter approach is to identify the water problem first and then choose equipment with verified performance claims that address that problem.

    For most households, the strongest emergency water plan isn’t built around one miracle device.

    It’s built around stored water first, appropriate treatment equipment second, and more than one way to make water usable when circumstances change.

  • Best Emergency Water Storage Containers

    Best Emergency Water Storage Containers

    Choosing an emergency water container looks simple until you calculate the weight, find a place to store it and try to pour from it. A container that holds plenty of water may be too heavy to move. A compact one may stack neatly but take longer to fill and rotate. A large tank may solve the capacity problem while creating a new problem if its valve leaks or the water must leave the house with you.

    The best setup is usually not one product. It is a combination of sealed bottled water for immediate use, manageable reusable containers for flexibility and, when the household has suitable space, a larger fixed container for added capacity.

    This guide compares five practical approaches and explains which one fits different homes. It does not repeat the cleaning, filling and rotation process covered in our guide to storing emergency water correctly.

    Affiliate disclosure: Ready Chateau may earn a commission from qualifying purchases made through links on this page, at no additional cost to you. As an Amazon Associate I earn from qualifying purchases.

    The Short Answer

    For most households, begin with unopened commercially bottled water, then add reusable food-grade containers in sizes the people in your home can actually lift and use. A large tank makes sense only after you have chosen a permanent, structurally sound location and a reliable way to dispense the water.

    Our quick picks:

    • Best first layer: Unopened commercially bottled water.
    • Best simple reusable jug: Reliance Aqua-Tainer, especially the 4-gallon size when lifting is a concern.
    • Best rugged portable container: Scepter 5-Gallon Military Water Container.
    • Best for tight or awkward storage spaces: 3.5-Gallon WaterBrick.
    • Best high-capacity fixed storage: WaterPrepared 55-Gallon Tank.

    No recommendation is best for every household. Capacity, filled weight, storage temperature, opening design and the way you will dispense the water matter more than a dramatic product claim.

    How We Chose These Options

    Ready Chateau has not performed laboratory or long-term hands-on testing on these containers. The recommendations are based on current public-health guidance, manufacturer specifications and practical household use. We considered:

    • Whether the container is identified for drinking-water or food storage.
    • Whether it closes tightly and is made from durable, unbreakable material.
    • How much it weighs when full.
    • Whether its opening, cap, gasket and dispensing method can be kept clean.
    • How efficiently it uses ordinary household storage space.
    • Whether the container remains useful during both a stay-at-home outage and an evacuation.

    The CDC recommends FDA-approved food-grade water-storage containers for water filled at home. It also advises choosing a tightly closing, durable container with a narrow opening when possible. Those requirements are the starting point for every recommendation below.

    Decide How Much Water You Need Before Buying Containers

    The CDC recommends storing at least one gallon per person per day for three days and trying to store a two-week supply when possible. Pregnant people, people who are ill, pets and households in hot climates may need more.

    Use our guide to calculate how much emergency water your household needs before choosing containers. The container decision becomes easier once you know whether you are trying to store 12 gallons, 30 gallons or more than 50.

    Remember that one gallon of water weighs about 8.3 pounds. That means:

    • A 3.5-gallon container holds about 29 pounds of water before the container is counted.
    • A 4-gallon container holds about 33 pounds of water before the container is counted.
    • A 5-gallon container holds about 42 pounds of water before the container is counted.
    • A 7-gallon container holds about 58 pounds of water before the container is counted.
    • A 55-gallon tank holds about 457 pounds of water before the tank and fittings are counted.

    A capacity you cannot safely lift, place or dispense is not useful capacity.

    1. Unopened Commercially Bottled Water

    Best for: The first three days, easy distribution and households that want the least complicated starting point.

    The CDC calls unopened commercially bottled water the safest and most reliable emergency source. It arrives sealed, requires no container preparation and is easy to divide among family members, vehicles and evacuation kits.

    Bottled water is also forgiving. If one bottle leaks, the rest of the supply remains protected. Smaller bottles can be handed to a child, an older adult or a neighbor without transferring water between containers.

    The tradeoff is storage efficiency. Cases of small bottles create more packaging and usually use more space per gallon than purpose-built reusable containers. Thin one-gallon retail jugs may also be less durable than rigid emergency-water containers.

    Ready Chateau recommendation: Use commercially bottled water to establish your first layer quickly. Store it in its original sealed packaging, follow the manufacturer’s date and storage guidance, and protect it from heat, sunlight and chemicals. Add reusable containers later if you want a larger supply.

    2. Reliance Aqua-Tainer

    Best for: A straightforward reusable jug for a pantry, closet, vehicle or short-term household outage.

    Reliance offers the rigid Aqua-Tainer in 4-gallon and 7-gallon sizes. That choice is useful because the same general design can serve households with very different lifting abilities.

    The 7-gallon version stores more water in one container, but the water alone weighs about 58 pounds. Once the container is included, it is portable in theory but heavy in practice. The 4-gallon version gives up some capacity but is far easier for many adults to lift, place and pour.

    This is the uncomplicated middle-ground option: more durable and space-efficient than a collection of disposable bottles, but less permanent than a drum or tank.

    Consider before buying: Choose the size by filled weight, not by the number printed on the label. Inspect the cap and dispensing parts before every rotation, and do not stack filled containers unless the manufacturer’s current instructions specifically allow the arrangement you plan to use.

    Ready Chateau recommendation: For most households, the 4-gallon Aqua-Tainer is the safer default. Choose the 7-gallon model only when someone in the home can comfortably manage roughly 60 pounds or the container will remain in place while being dispensed.

    3. Scepter 5-Gallon Military Water Container

    Best for: Rugged portable storage, frequent transport and households willing to pay more for a tougher container.

    Scepter identifies its 5-gallon Military Water Container as food-grade and BPA-free, with superior impact resistance and an easy-to-transport design. Its narrow, upright shape makes it useful when containers must fit beside other supplies or travel in a vehicle.

    Five gallons is a practical compromise between capacity and handling, but it is not light. Expect roughly 42 pounds of water plus the weight of the container. That may be manageable for one adult and too much for another.

    The Scepter is strongest where durability and transport matter. A household that expects the container to stay untouched in a closet may not benefit enough from the heavier-duty construction to justify its typically higher cost.

    Consider before buying: Confirm that you are buying the water container, not a similar-looking fuel container. Use only the cap, gasket and dispensing accessories intended for that model, and label it clearly as drinking water.

    Ready Chateau recommendation: Choose the Scepter when the container may be moved regularly, loaded into a vehicle or used beyond a stationary home supply. For quiet indoor storage, a less expensive food-grade jug may do the same basic job.

    4. 3.5-Gallon WaterBrick

    Best for: Apartments, closets, under-bed areas and households that need smaller modular containers.

    The standard WaterBrick holds 3.5 gallons and measures 9 by 18 by 6 inches. The manufacturer lists an empty weight of 2.52 pounds and describes the container, lid and gasket as BPA-free, FDA-compliant materials. Its interlocking shape allows the containers to be cross-stacked, which can make better use of low or narrow spaces.

    The smaller capacity is the main advantage. About 29 pounds of water is still substantial, but it is easier to manage than a 5- or 7-gallon load. Several small containers also reduce the risk that one damaged seal will affect the entire supply.

    The tradeoff is complexity. More containers mean more caps, gaskets, labels and surfaces to inspect. The 3¼-inch lid is wider than the narrow opening preferred by the CDC when possible, so clean handling and a clean dispensing method deserve extra attention.

    Check current price: WaterBrick 3.5-Gallon Water Containers — 4-Pack on Amazon

    Consider before buying: Plan the stack before filling, follow the manufacturer’s stacking instructions and keep every lid accessible enough to inspect. Do not assume that a stackable shape makes any shelf or floor capable of carrying the combined weight.

    Ready Chateau recommendation: WaterBrick is the strongest choice here for limited space or limited lifting ability. It is less attractive when low cost per gallon and the fewest possible components are the priorities.

    5. WaterPrepared 55-Gallon Tank

    Best for: A larger stay-at-home supply in a house with a permanent, level and properly supported location.

    WaterPrepared lists its 55-gallon tank at approximately 22 by 28 by 30 inches. The manufacturer describes it as stackable and made from BPA-free, FDA food-grade materials, with a large fill cap and front dispensing connections.

    A 55-gallon tank approaches the two-week, one-gallon-per-person-per-day target for a four-person household. That capacity is difficult to match with small jugs without using a great deal of shelf and floor space.

    The limitation is equally important: a filled tank can approach 480 pounds after the tank and fittings are included. It is not an evacuation container, and it should not be filled until its permanent location, floor capacity, clearance and dispensing method have been settled.

    A large tank also concentrates risk. One damaged valve, contaminated opening or inaccessible room can affect most of the household supply. Keep a separate layer of bottled water or smaller containers even when a tank holds the majority.

    Check current price: WaterPrepared 55-Gallon Water Storage Tank on Amazon

    Consider before buying: Measure the route into the storage area as well as the final footprint. Confirm that the floor can support the filled weight, test every valve before relying on it, and follow the manufacturer’s current instructions for installation and stacking. Marketing claims about UV resistance do not replace the CDC recommendation to store water in a cool location away from direct sunlight and toxic substances.

    Ready Chateau recommendation: Choose a 55-gallon tank only as the fixed-capacity layer of a mixed system. It should supplement—not replace—water that household members can lift and carry.

    Which Container Fits Your Household?

    Apartment or very limited storage: Begin with bottled water, then add WaterBricks or other smaller food-grade containers that fit under beds or on properly rated low shelving.

    Typical house with a pantry or conditioned storage room: Combine bottled water with several 4- or 5-gallon containers. This provides useful capacity without making the entire supply immovable.

    Household with limited lifting ability: Favor individual bottles, one-gallon commercial containers and 3.5- or 4-gallon reusable containers. More pieces are easier to manage than one oversized jug.

    Household preparing for evacuation: Keep small sealed bottles and rugged portable containers with the 72-hour emergency kit. A large tank can support sheltering at home but cannot travel with you.

    Household building toward two weeks: Use a layered system. Keep small water for immediate use, medium containers for flexible household needs and a fixed tank only if the home can support it.

    What to Avoid

    • Containers that previously held bleach, pesticides, fuel or any other toxic substance.
    • Unlabeled generic containers whose food-grade or drinking-water suitability cannot be confirmed.
    • Glass containers that can break during an emergency.
    • Thin milk jugs or similar containers that are difficult to clean thoroughly and prone to leaking.
    • A single oversized container with no backup supply.
    • A barrel or tank purchased before its filled location and dispensing method are planned.
    • Collapsible containers as the only long-term supply. They can be useful for temporary collection or transport, but they are a weaker primary choice than durable rigid containers.

    Accessories That Actually Matter

    • A compatible spigot or pump tested before the emergency.
    • A spare manufacturer-approved cap, gasket or valve when those parts are replaceable.
    • A permanent marker or durable labels for “Drinking Water” and the fill date.
    • A clean, food-grade transfer hose when a large tank requires one.
    • Shelving or a platform rated for the full stored weight—not merely the empty containers.

    Accessories should solve a real handling problem. A full tank with a missing pump is not ready, and an expensive rack is not useful if the floor below it cannot support the load.

    How to Build the Supply Without Overspending

    Start with the minimum instead of waiting to afford the perfect system. One case of bottled water is more useful today than a large tank that remains on a wish list.

    Then add capacity in stages:

    • Calculate the three-day target for everyone in the household, including pets.
    • Cover as much of that target as practical with sealed bottled water.
    • Add one or two manageable reusable containers.
    • Use the containers through one filling and rotation cycle before buying more.
    • Expand toward two weeks only after the storage location and routine work in real life.

    This approach also reveals whether a cap is frustrating, a container is too heavy or a spigot is difficult to clean before you repeat the purchase several times.

    Do Not Let the Container Replace the Routine

    A food-grade label does not keep water safe by itself. Reusable containers must still be cleaned and sanitized, filled without recontamination, labeled, protected from heat and chemicals, inspected and rotated.

    The CDC recommends replacing water filled at home every six months. For unopened commercially bottled water, follow the manufacturer’s date and storage guidance. Review how long stored water lasts and set a rotation schedule before the purchase disappears into a closet.

    The Bottom Line

    The best emergency water-storage system is a mix of containers matched to the household. Commercially bottled water is the simplest first layer. A 4- or 5-gallon rigid container adds reusable capacity. WaterBricks help when space or lifting is limited. A 55-gallon tank can extend a stay-at-home supply when the home has a safe permanent location.

    Do not buy solely by gallon capacity. Buy by filled weight, storage space, clean dispensing and the people who will actually use the water. A modest supply divided among manageable containers is more resilient than one impressive container no one can move.

    Sources

  • The Right Way to Store Emergency Water at Home

    The Right Way to Store Emergency Water at Home

    Emergency water is only useful if it is safe to drink, protected from contamination and stored where you can actually reach it. A row of containers in the garage may look prepared, but heat, chemicals, damaged seals or containers that are too heavy to move can undermine the entire supply.

    A sound storage plan does not require a basement full of specialized equipment. It requires safe water, the right containers, a suitable location and a rotation routine simple enough to maintain.

    If you have not calculated your target yet, start with how much emergency water your household needs. Once you know the number of gallons, this guide will help you store them correctly.

    The Short Answer

    The simplest approach is to keep unopened commercially bottled water and follow the manufacturer’s storage guidance. If you fill your own containers, use food-grade water-storage containers, clean and sanitize them first, fill them with safe tap water, close them tightly, label and date them, and replace the water every six months.

    Store all emergency water in a cool place away from direct sunlight and away from gasoline, pesticides, cleaners and other toxic substances. Divide the supply among manageable containers and more than one safe location.

    Start With Safe Water

    The CDC describes unopened commercially bottled water as the safest and most reliable emergency source. It is sealed at the factory, easy to distribute and requires no container preparation. For many households, cases of bottles or factory-sealed jugs are the easiest way to establish the first three days of supply.

    Commercial water still needs sensible storage. Keep it in its original sealed container, protect it from heat and sunlight, and observe the date and storage instructions provided by the manufacturer.

    Home-filled water can be practical when you need larger quantities or want reusable containers. Begin with water that is safe to drink. If your public water supply is treated, the CDC says it can be placed in clean, sanitized containers and sealed. If you use a private well or have any reason to question the water, follow your local health department’s advice before storing it.

    Do not treat routine storage and emergency water treatment as the same job. Water collected after a flood, from an uncertain source or during a drinking-water advisory may require boiling, disinfection or another response directed by local officials. Boiling or disinfecting water can kill many disease-causing organisms, but it does not remove heavy metals, salts or most chemicals.

    Choose Containers Made for Drinking Water

    For home-filled water, use containers identified by the manufacturer as food-grade and intended for water storage. A suitable container should be durable, unbreakable, able to close tightly and, when possible, have a narrow opening that limits hand contact and makes pouring easier.

    Never use a container that previously held bleach, pesticides, fuel or another toxic substance. Washing does not make that container appropriate for drinking water.

    Container size matters as much as material. One gallon of water weighs about 8.3 pounds. A five-gallon container holds roughly 42 pounds of water before the container itself is counted. Larger barrels can be efficient, but they become permanent fixtures once filled.

    A mixed-size supply works well for most homes:

    • Small bottles are easy to carry, share and place in an evacuation kit.
    • One- or two-gallon containers are manageable for many adults and fit into several storage areas.
    • Five- to seven-gallon containers reduce the number of packages but require more lifting strength.
    • Large drums conserve floor space, but they need a stable location and a compatible hand pump or spigot.

    Do not make your entire supply dependent on one large container. A failed cap, cracked seam or contaminated opening should not jeopardize every gallon you own.

    Clean and Sanitize Reusable Containers

    A new container should not be assumed clean simply because it came from a store. Follow the manufacturer’s instructions first. If the container is designed for home-filled drinking water and does not require another method, the CDC provides this process:

    • Wash the container with soap and rinse it completely with water.
    • Mix 1 teaspoon of unscented liquid household chlorine bleach containing 5% to 9% sodium hypochlorite with 1 quart, or 4 cups, of water.
    • Pour the sanitizing solution into the container, close it tightly and shake it so the solution touches every inside surface.
    • Wait at least 30 seconds, then pour out the solution.
    • Allow the empty container to air-dry.
    • Fill it with safe water and close the lid tightly.

    Safety First

    That bleach mixture is for sanitizing the empty container. It is not a general formula for treating an uncertain water supply. If emergency water must be disinfected, use the current CDC or EPA instructions for the exact bleach concentration and water condition.

    Fill Without Recontaminating the Container

    Clean hands, a clean work surface and a clean filling method matter. Do not touch the inside of the cap, opening or container. Avoid resting the cap on a dirty counter while filling.

    Fill the container as directed by its manufacturer and leave any required expansion space. Close it immediately and check that the cap, gasket and spigot are secure. Wipe the outside dry so a small leak will be easier to spot.

    Label every home-filled container with “Drinking Water” and the date it was filled. If you keep separate water for toilet flushing or cleanup, label that supply just as clearly so it cannot be confused with drinking water.

    Choose the Storage Location Before You Fill

    Water becomes difficult to move quickly. Decide where a container will live before adding forty, one hundred or several hundred pounds to it.

    The CDC recommends a cool storage temperature of about 50°F to 70°F, away from direct sunlight and away from toxic substances such as gasoline and pesticides. An interior closet, pantry, conditioned basement or another clean, temperature-stable space is usually a better choice than a hot attic, sun-exposed shed or garage corner beside fuel and lawn chemicals.

    Use these placement rules:

    • Keep containers off weak or questionable shelving. Put heavy water low, on a stable floor or on shelving rated for the load.
    • Protect containers from freezing, excessive heat, sharp objects and anything that could puncture or crush them.
    • Leave enough room to inspect caps, seams and the floor beneath the containers.
    • Keep a small accessible supply on the main living level rather than placing every gallon behind boxes or down a difficult stairway.
    • Divide the supply between two safe locations when possible so one leak, obstruction or damaged room does not eliminate all of it.
    • If your area is prone to flooding, avoid placing the full supply directly on the lowest floor where contaminated floodwater could reach it.

    The goal is not a perfect storage room. It is a location that protects the water and still allows someone in the household to use it.

    Plan How You Will Dispense It

    A sealed container protects water only until you open it. Once it is in use, keep hands, cups and scoops out of the water. Pour from the container, use its clean spigot or use a compatible pump.

    If a scoop is necessary, the CDC advises using a clean one each time and avoiding contact between hands and the stored water or the inside of the container. Do not dip a used drinking cup back into the supply.

    Test pumps and spigots before the emergency. A full barrel without a working pump is not an accessible water source. Keep the required wrench, hose or replacement cap with the container rather than in another room.

    Build a Rotation Routine You Will Keep

    The rotation rule depends on how the water was packaged. For unopened commercially bottled water, observe the manufacturer’s date and storage guidance. For water you fill at home, the CDC recommends replacing it every six months.

    Choose two memorable months six months apart and add water rotation to your household calendar. At each check:

    • Confirm the label and fill date are readable.
    • Inspect the cap, gasket, seam, spigot and surrounding floor for leaks.
    • Look for damage, cloudiness, floating material or anything else unusual.
    • Replace home-filled water that has reached six months.
    • Check commercially bottled water against its manufacturer’s guidance.
    • Make sure pumps, spigots and other dispensing supplies are clean and present.

    Do not taste suspicious water to decide whether it is safe. If a seal has failed, the container is damaged or the water may have been exposed to chemicals or floodwater, do not use it for drinking.

    Common Storage Mistakes

    • Using ordinary household containers without checking whether they are food-grade.
    • Reusing milk jugs or other thin containers that are difficult to clean well and prone to leaking.
    • Placing every gallon in one container or one location.
    • Storing water beside gasoline, pesticides, paint, cleaners or other chemicals.
    • Putting heavy containers on shelving that was never designed for the load.
    • Filling a large barrel before deciding how it will be emptied.
    • Forgetting the date and allowing home-filled water to sit indefinitely.
    • Assuming a filter will make chemically contaminated water safe.

    A Practical Setup for Most Households

    Begin with the three-day minimum rather than waiting until you can build the ideal supply. Unopened bottled water can cover that first layer quickly. Then add food-grade reusable containers or more sealed water as you work toward a longer home supply.

    Keep some small containers for evacuation and easy daily use. Add medium containers that household members can lift. Use a large container only when its filled location, floor capacity and dispensing method are already settled.

    Finally, connect the storage plan to a twice-yearly inspection. Correct storage is not a one-time purchase. It is a small household system: calculate, containerize, protect, label, inspect and rotate.

    If you already have water stored, review how long stored water lasts and decide which containers need inspection or replacement now.

    The Bottom Line

    The right way to store emergency water is straightforward: start with safe water, use sealed commercial packaging or clean food-grade containers, keep it cool and away from sunlight and chemicals, divide it into usable sizes, label it, and rotate home-filled water every six months.

    A modest supply stored correctly is more useful than a larger supply that is contaminated, inaccessible or forgotten. Meet the three-day minimum first, then strengthen the system one container at a time.

    Sources

  • How Long Does Stored Water Last?

    How Long Does Stored Water Last?

    Stored water is easy to forget about. You tuck it onto a shelf, feel better knowing it is there, and then notice the date six months—or two years—later.

    Is it still safe? Does bottled water really expire? Should you empty every container and start over?

    The reassuring answer is that you do not need to guess. A simple rotation schedule will keep your emergency water supply dependable without turning it into another complicated household project.

    The Quick Answer

    • Unopened, commercially bottled water: Follow the expiration or best-by date printed by the manufacturer.
    • Water you fill and store at home: Replace it every six months.
    • Any stored water: Replace it sooner if the seal is broken, the container is damaged, the water has an unusual odor or appearance, or it may have been exposed to floodwater, fuel, pesticides, or other chemicals.

    Those are the practical household guidelines from the Centers for Disease Control and Prevention. You do not need to determine the exact day water “goes bad.” You only need a dependable date for rotating it.

    Ready Chateau Note: A date is a reminder to rotate your supply—not a home safety test. Water can be compromised before that date if its container, seal, or storage conditions have been compromised.

    Start With the Kind of Water You Have

    Not all stored water starts in the same place. The right rotation schedule depends on whether it came sealed from a commercial bottler or whether you filled the container yourself.

    Commercially Bottled Water

    For sealed bottled water, use the date printed on the package as your guide. The CDC advises households to observe the expiration date for store-bought water.

    That keeps the decision refreshingly simple:

    1. Leave the bottles sealed until you need them.
    2. Store them where they will stay protected.
    3. Rotate them by the printed date.

    The U.S. Food and Drug Administration regulates commercially bottled water as a food product. Bottlers must follow sanitation, testing, processing, and storage requirements intended to keep the product safe. You can read the FDA’s overview of how bottled water is regulated.

    If the outer case has several dates or the date is difficult to read, write the earliest visible date on a piece of tape and place it where you can see it. You are creating a reminder, not a filing system.

    Water You Fill at Home

    If you fill your own food-grade water containers, replace the water every six months. Mark the fill date directly on each container so you will not have to rely on memory later.

    Six months can sound surprisingly short. The point is not that water suddenly becomes unusable on day 181. The six-month schedule gives you a clear, conservative routine for water that was handled and packaged at home rather than in a regulated bottling facility.

    Home-filled water has more opportunities for contamination to enter through hands, lids, funnels, spigots, or containers. A regular refresh helps you stay ahead of those variables.

    If you are setting up home-filled containers for the first time, use containers made for drinking-water storage and follow the cleaning and filling directions in our guide, The Right Way to Store Emergency Water at Home. This article is about how long to keep the water; that guide will cover the container and setup decisions in full.

    What Can Shorten the Life of Stored Water?

    A rotation date assumes the water has remained sealed and properly stored. Replace it early when that is no longer true.

    A Broken or Questionable Seal

    Once a cap, lid, or spigot has been opened, the water is no longer in the same protected condition. Hands, cups, dust, and the surrounding air can introduce contamination.

    If you open a large emergency container, treat it as water you are actively using. Keep it covered, dispense it without touching the opening, and use it promptly. Do not pour leftover water from a cup back into the container.

    There is no single useful “opened water lasts exactly this many days” rule for every container and situation. A clean bottle opened in your kitchen is different from a jug being shared during a power outage. Good handling matters more than trying to stretch an opened container to a particular date.

    Heat and Direct Sunlight

    Stored water should be kept in a cool place and away from direct sunlight. Heat and sun can work against the container and the quality of the water over time.

    A hot garage, an exposed shed, or the trunk of a car may be convenient, but those locations can experience major temperature swings. If that is the only storage space you have, check the supply more often and rotate it sooner when the bottles or containers show damage or deterioration.

    Nearby Fuels, Pesticides, or Other Chemicals

    Do not store drinking water near gasoline, paint thinner, pesticides, household chemicals, or other toxic substances. If you suspect the water or its container has been exposed to a chemical spill or fumes, do not taste it to investigate.

    Boiling and ordinary household disinfection can kill many germs, but they cannot make water containing fuel, toxic chemicals, or radioactive material safe. The CDC’s emergency water guidance recommends using a different water source and contacting your local health department when chemical contamination is suspected.

    Floodwater

    Floodwater can carry sewage, chemicals, and other contaminants. Bottled water that has been exposed to floodwater should not be treated as part of your safe drinking supply.

    This is one reason to store emergency water above the floor when possible. A sturdy shelf or raised platform gives the supply a little more protection from leaks and minor flooding.

    A Damaged Container or Changed Water

    Replace water if the container is leaking, cracked, swollen, badly dented, or otherwise damaged. Do the same if the water has an unusual odor, color, or visible material in it.

    Just remember that normal-looking water is not proof that it is safe. Many contaminants cannot be seen, smelled, or tasted. When you know the seal or storage conditions were compromised, trust that information instead of the water’s appearance.

    Safety First

    Do Not Try to Rescue Chemically Contaminated Water

    If stored water may have been exposed to fuel, pesticides, toxic chemicals, or floodwater, set it aside and use a safe replacement source. Boiling is not a fix for chemical contamination.

    Can You Drink Stored Water After Its Date?

    The safest practical answer is to rotate it rather than debate it.

    For commercially bottled water, follow the printed date. For water filled at home, follow the six-month schedule. These rules give your household a clear standard and prevent an uncertain container from becoming the one you must rely on during an emergency.

    If a date has passed, do not use a taste test to decide whether the water is safe. Taste and smell cannot identify every harmful contaminant.

    Water that is merely due for routine rotation is different from water that may be contaminated. If the container stayed sealed, undamaged, and away from chemicals or flooding, you may be able to use the old water for non-drinking tasks such as flushing a toilet or cleaning outdoor tools. Do not use questionable water for drinking, cooking, brushing teeth, making ice, preparing infant formula, or giving to pets.

    When there is any reason to suspect chemical or flood contamination, follow local public-health instructions for disposal. Do not repurpose it around food, people, animals, or gardens.

    A Simple Water-Rotation Routine

    The easiest system is one you can maintain in a few minutes twice a year.

    1. Choose Two Reminder Dates

    Pick dates already connected to a household routine. The first weekends in March and September work well, as do daylight-saving weekends if your area observes them.

    Add a recurring calendar reminder called Check emergency water. If you fill containers at different times, put their exact replacement dates on the calendar instead.

    2. Read the Labels

    Check the date on commercially bottled water and the fill date on home-filled containers. If you cannot find a date, treat the container as due for rotation. A fresh label solves the uncertainty going forward.

    3. Inspect the Supply

    Look for:

    • Broken seals
    • Leaks or damp shelving
    • Cracks, swelling, or damaged caps
    • Unusual color, cloudiness, particles, or odor
    • Signs of heat, sunlight, pests, flooding, or chemical exposure

    If something looks wrong, replace it. Emergency water is there to remove uncertainty, not create more of it.

    4. Replace What Is Due

    Use the printed date for commercial bottles and the six-month rule for home-filled water. Replace any compromised containers immediately, even if their dates have not arrived.

    5. Mark the New Date Clearly

    Label home-filled containers Drinking Water and include the fill date. For cases of bottled water, place the printed date—or your planned rotation date—where it is easy to see without unpacking the case.

    Then reset the reminder and move on.

    The Five-Minute Version: Check the dates, check the seals, check the storage area, and replace anything you would hesitate to serve your family.

    Common Stored-Water Mistakes

    Waiting Until an Emergency to Inspect It

    The worst time to discover a leaking jug is after the tap stops working. A quick check twice a year gives you time to replace damaged containers while water is easy to get.

    Treating Every Date the Same

    Commercially bottled water follows its printed date. Home-filled water follows a six-month replacement schedule. Keeping those two rules separate prevents both confusion and unnecessary work.

    Keeping Water in a “Temporary” Location for Years

    Water placed beside gasoline, under a sunny window, or in a hot vehicle is not protected simply because it is sealed. Storage conditions remain part of the safety plan.

    Assuming Clear Water Must Be Safe

    Appearance is only one clue. If you know a container was opened, flooded, damaged, or exposed to chemicals, replace it even when the water looks normal.

    Forgetting Water for Pets

    Pets need safe water too. Include them when calculating your supply, and apply the same rotation and replacement rules to the water you plan to give them.

    Keep the Rest of the Plan Just as Simple

    Water rotation works best as part of a small, repeatable preparedness routine.

    If you are still deciding how much water your household needs, start with How Much Water Should You Store for an Emergency?. It will help you set a realistic target based on the people, pets, and needs in your home.

    Then make sure the water is included in your broader 72-hour emergency kit. You do not need to finish everything in one weekend. A dependable supply built in manageable steps is far more useful than a perfect plan that never leaves the page.

    The Bottom Line

    For commercially bottled water, follow the date on the package. For water you fill at home, replace it every six months. Replace either one sooner if the seal, container, or storage conditions have been compromised.

    That is the whole system: label it, protect it, check it, and rotate it. Once the reminder is on your calendar, your emergency water supply can go back to doing exactly what it should—waiting quietly until you need it.

  • How to Build a 72-Hour Emergency Kit Without Overcomplicating It

    How to Build a 72-Hour Emergency Kit Without Overcomplicating It

    Most people already have the beginnings of an emergency kit somewhere in the house.

    There may be a flashlight in the kitchen drawer, a few cans of food in the pantry and a phone charger on the nightstand. The problem is that those things may be scattered across five rooms—and no one wants to search for them after the lights go out.

    A 72-hour emergency kit brings the basics together so your household can get through the first three days of a power outage, water interruption, evacuation or other disruption.

    You do not need to buy everything today. You do not need a closet full of survival gear, either. Start with what your household would actually need, gather what you already own and fill the important gaps from there.

    Quick Answer

    Start with enough water and familiar food for three days. Add medications, first-aid supplies, dependable lighting, a way to receive local information, basic hygiene items and anything your family or pets use every day.

    Keep the smaller essentials together in a container you can move. Store water and other heavy supplies beside it in sizes you can lift. Check everything every six months so the kit is still useful when you need it.

    Think of 72 hours as a strong beginning—not the end of your household preparedness.

    What Should a 72-Hour Kit Help You Do?

    Picture the first evening of a long power outage.

    The house is dark. Your phone battery is dropping. The refrigerator is no longer keeping food cold, and the stores may be closed. If the water system is also affected, you may not be able to drink safely from the tap.

    Now imagine needing to leave home with very little warning.

    A useful emergency kit should make both situations easier. It should give you the basics to remain at home, but it should also be organized well enough to take with you if local officials order an evacuation.

    That does not mean forcing everything into one enormous tote.

    Water is the clearest reason why. Three days of water weighs about 25 pounds for each person. A family of four needs at least 12 gallons, weighing roughly 100 pounds before a single can of food or flashlight is added.

    A more useful setup is simple:

    • Keep flashlights, a radio, first aid, documents and other smaller essentials together.
    • Store food in a second container if needed.
    • Keep water beside the kit in containers that can be moved one at a time.
    • Give each person a smaller grab-and-go bag if your evacuation plan calls for one.

    The goal is not to fit your household into a backpack. The goal is to know where everything is and be able to move it without unpacking half the house.

    Start With the People in Your Home

    Before making a shopping list, think about who will depend on the kit.

    Write down every person and pet in the household. Then think through an ordinary day for each one.

    Who takes daily medication? Who wears glasses or hearing aids? Is there a baby, an older adult or someone with limited mobility? Does anyone have food allergies or medicine that must stay cold? What would your pets need if you had to leave home?

    These are often the items that matter most—and the ones a store-bought kit cannot provide.

    A generic list can remind you to buy batteries. It cannot know that someone in your home needs a certain medication, your child will only eat a few shelf-stable foods or your dog needs a carrier large enough to use comfortably.

    If you have not completed this household review, begin with Household Emergency Preparedness: Start With the Basics. Your emergency kit should grow out of that plan.

    1. Begin With Water

    Water takes up the most space, but it should not be the item you plan to find at the last minute.

    The Centers for Disease Control and Prevention recommends storing at least one gallon of water per person per day for three days. That includes water for drinking, preparing food, brushing teeth and other basic needs.

    The calculation is straightforward:

    Number of people × 3 days × 1 gallon = minimum number of gallons

    That means:

    • One person needs at least 3 gallons.
    • Two people need at least 6 gallons.
    • Four people need at least 12 gallons.
    • Six people need at least 18 gallons.

    Pets, hot weather, pregnancy and illness may increase the amount your household needs. Once the three-day supply is in place, the CDC recommends trying to build toward two weeks of water when space and circumstances allow.

    Unopened commercially bottled water is the easiest place to start. Keep it in a cool location away from sunlight, gasoline, pesticides and other chemicals. Follow the dates printed by the manufacturer.

    If you fill your own containers, use food-grade water-storage containers and follow the CDC instructions for cleaning, sanitizing and storing them. Write the filling date on each one and replace the water every six months.

    Avoid one container so large that no one can move it. Several smaller containers are easier to carry, rotate and share.

    Ready Chateau Tip

    Keep a small amount of water with the items you would grab first. Store the rest directly beside the kit. If you need to leave, you can load the water one container at a time instead of hunting through the garage or pantry.

    2. Shop Your Pantry for Food

    Emergency food does not have to come in a bucket with a 25-year shelf life.

    Start in your own pantry. Look for food your household already eats that can be stored safely and prepared with little or no cooking.

    Good choices may include:

    • Ready-to-eat canned food
    • Nut or seed butter
    • Crackers and cereal
    • Dried fruit
    • Protein or snack bars
    • Shelf-stable meals
    • Shelf-stable milk

    Choose enough for at least three days. Include food that fits any allergies, medical needs or dietary restrictions in the household. If something comes in a can, put a manual can opener in the kit.

    Try not to depend on food that needs a great deal of water or fuel to prepare. During an outage, both may be harder to replace than expected.

    Most importantly, store food people will eat. An emergency is a poor time to discover that no one likes the expensive meals packed away for the occasion.

    Our guide to building an emergency food supply without wasting money explains how to add food gradually and rotate it through your normal meals.

    Include familiar food for pets as well. A frightened or stressed animal may not handle a sudden change in diet very well.

    3. Take Care of Health Needs

    A basic first-aid kit belongs in every emergency kit. It will not, however, replace the health items your household depends on every day.

    Think about adding:

    • Prescription medications
    • A current medication list and copies of prescriptions
    • Over-the-counter medicine your household normally uses
    • Glasses, contact-lens supplies and hearing-aid batteries
    • Allergy and medical information
    • Mobility or communication aids
    • Menstrual products
    • Infant supplies
    • A thermometer
    • Sunscreen and insect repellent when appropriate
    • Masks suited to your household needs and local risks

    The American Red Cross recommends keeping a seven-day supply of medications and medical items. That may not be as simple as buying an extra bottle. Refill limits, insurance rules and storage requirements vary, so ask the prescribing clinician or pharmacist what is practical for each medication.

    Keep prescription labels and dosing instructions with the medicine. Do not move pills into an unmarked bag or container that could be confusing during an already stressful day.

    Medicine that requires refrigeration needs its own plan. Ask the pharmacist how cold it must remain, how long it can safely be outside that range and what kind of cooler or backup power is appropriate. Write the instructions down while everything is calm.

    Do the same for medical equipment that relies on electricity. Know what powers it, how long the backup lasts and what you will do if the outage continues.

    4. Make Sure You Can See, Charge and Listen

    When the power goes out, a working flashlight is more useful than three dead ones in a drawer.

    Gather:

    • Flashlights or headlamps
    • A battery-powered or hand-crank radio
    • A NOAA Weather Radio if possible
    • Spare batteries in the right sizes
    • Phone-charging cables
    • A charged USB power bank
    • Important phone numbers written on paper
    • A local paper map

    Use flashlights instead of candles. An open flame creates another hazard when people are walking through a dark house or dealing with storm damage.

    Store the correct cable with every rechargeable device. This sounds obvious, but a full power bank cannot help much when its cable is somewhere in a bedroom drawer.

    Save local maps and emergency information on your phone before severe weather arrives. Keep paper backups too. A charged phone may still be unable to reach the internet or cellular network.

    5. Add Enough Comfort to Get Through the Disruption

    You do not need to move the entire bathroom cabinet into the emergency kit. You do need enough to keep everyone reasonably clean, warm and comfortable.

    Start with:

    • Toilet paper
    • Moist towelettes
    • Hand sanitizer and soap
    • Toothbrushes and toothpaste
    • Heavy-duty garbage bags and ties
    • Disposable gloves
    • Paper towels
    • A change of clothing
    • Sturdy shoes and work gloves
    • Rain protection
    • Blankets or sleeping bags for the season

    If your plan includes an emergency toilet or another way to handle waste when water service stops, keep the necessary supplies together. It is much easier to understand that setup before you need it.

    If wildfire smoke, ash or airborne debris is a concern where you live, consider properly fitting N95 respirators. Use them only for the hazards they are designed to address. They do not supply oxygen or make it safe to enter a dangerous area.

    6. Protect the Information You May Need

    During an evacuation, a few pieces of paper can save hours of frustration.

    Place copies of the most important documents in a waterproof pouch or sealed bag. Your household may need:

    • Identification
    • Insurance information
    • Medication and medical information
    • Emergency contacts
    • Proof of address
    • Pet vaccination and ownership records
    • Evacuation routes and meeting locations

    Secure digital copies are useful too, but do not make internet access your only way to reach them.

    Keep a modest amount of cash in small bills. ATMs and card readers may not work when power or communication systems are down.

    A few simple tools can also help:

    • A multipurpose tool
    • A whistle
    • Duct tape and scissors
    • Spare house and vehicle keys
    • A pencil and notepad
    • A wrench or pliers if they are part of your household plan

    Do not shut off natural gas simply because the electricity fails. Learn the correct procedure from your utility and follow local instructions. Once gas has been turned off, the utility or a qualified professional may need to restore it.

    7. Remember the Needs No Checklist Can Predict

    Now go back to the people and pets you listed at the beginning.

    For a baby or young child, that might mean diapers, wipes, formula or safe food, extra clothing and one familiar comfort item.

    For an older adult or someone with a disability, it might mean batteries for adaptive equipment, a communication aid, an extra cane, medical documents or contact information for someone who can help. The CDC recommends reviewing individual emergency kits every six months because those needs can change.

    For a pet, consider:

    • Food, water and bowls
    • Medications and instructions
    • A leash, harness and current identification
    • A carrier
    • Waste bags or litter supplies
    • Veterinary and vaccination records
    • A familiar blanket or toy

    Keep the carrier where you can reach it. A carrier buried behind holiday decorations will not help when a nervous animal needs to leave quickly.

    Give Everything a Sensible Home

    Clear plastic bins make supplies easy to see. Backpacks and duffel bags are easier to carry. Use whatever combination works for your household.

    Label the containers in plain language: WATER, FOOD, MEDICAL, PET and CORE KIT. Store them together near an exit you could realistically use, but avoid any place that becomes extremely hot, freezes, floods or contains fuel and chemicals.

    Keep the things you may need first near the top. Put documents and medications in waterproof pouches. Keep loose batteries away from coins, keys and other metal objects. Store gasoline, propane cylinders and similar fuels somewhere safe and appropriate—not inside the emergency kit.

    Then show everyone where the kit is. A perfectly organized tote is not useful if only one person knows it exists.

    Build the Kit Without Turning It Into a Major Project

    If the complete list feels overwhelming, finish it in three short rounds.

    First: Walk Through the House

    Choose your containers. Gather the flashlights, radio, charging cables, first-aid supplies, hygiene items, spare keys and documents you already have.

    Second: Fill the Important Gaps

    Store the right amount of water. Add three days of food, necessary medications, batteries, a power bank and the personal supplies your household needs.

    Third: Try Everything

    Turn on the flashlights and radio. Charge a phone with the power bank. Make sure you can open the food. Lift every container. Label everything and write the next review month on the outside.

    You do not have to complete all three rounds in one day. What matters is making steady progress until the basics are covered.

    After the 72-hour kit is ready, use the Complete Home Emergency Preparedness Checklist to decide what comes next. You can build toward a longer at-home food and water supply as your space, budget and local risks allow.

    Avoid These Common Mistakes

    Buying a ready-made kit and never opening it. It may contain useful basics, but it will not know your medications, diet, pets, climate or family size.

    Making one container too heavy to move. Divide water, food and other supplies into sizes you can handle.

    Packing canned food without an opener. Make sure every food item can actually be opened and served.

    Relying on one light. Keep more than one flashlight or headlamp and check the batteries.

    Forgetting the cables. Keep the right charging cable with each device.

    Choosing a poor storage location. A hot garage, damp basement or flood-prone closet can ruin supplies before you need them.

    Focusing on survival gadgets instead of daily needs. Prescriptions, glasses, pet supplies and sturdy shoes will often matter more.

    Finishing the kit and forgetting it. Food gets old, batteries leak, children outgrow clothing and medications change.

    Check the Kit Twice a Year

    Choose two easy-to-remember months and review the kit every six months. Also give it a quick check before hurricane season, winter weather or another predictable local threat.

    During the review:

    • Check the dates on food, water, medicine and batteries.
    • Replace damaged, leaking or used items.
    • Recharge power banks and other devices.
    • Turn on every flashlight and radio.
    • Update documents and emergency contacts.
    • Change clothing for the season and replace anything that no longer fits.
    • Review the needs of children, older adults, people with disabilities and pets.
    • Make sure every container is still easy to reach and move.

    Write the next review month on the outside of the kit before you put it away. That small step is more reliable than hoping someone remembers six months from now.

    The Bottom Line

    The best 72-hour emergency kit is not the one with the most gear. It is the one that fits the people in your home and is ready when something interrupts an ordinary day.

    Begin with three days of water and food your household already knows. Add medication, first aid, lighting, communication, basic hygiene, important documents and the personal supplies no generic checklist could choose for you.

    Keep it together. Keep it manageable. Check it twice a year.

    You are not trying to prepare for every possible disaster in one shopping trip. You are giving your household a calmer, safer place to start when normal life is suddenly interrupted.

    Building a 72-hour kit is an important start. Use the free Ready Chateau Home Preparedness Checklist to review the rest of your household’s emergency preparations.

  • How Often Should You Test Your Emergency Equipment?

    How Often Should You Test Your Emergency Equipment?

    Emergency equipment has one bad habit: it can stop working while no one is looking.

    A flashlight can sit in a drawer with leaking batteries. A weather radio can lose its programming. A portable power station can slowly discharge in the back of a closet. Even a generator that worked perfectly last year may not be ready when the next outage begins.

    You do not need to test everything every weekend. You do need a routine that catches problems before an emergency does.

    The easiest approach is to divide the work into monthly, quarterly, six-month and annual checks. Add a short check before a predictable threat, such as hurricane season or a winter storm, and inspect equipment again after you use it.

    Quick Answer

    Test smoke and carbon monoxide alarms every month. Check stored power, lighting, radios and battery supplies at least every three months. Review emergency kits every six months, and complete a full household equipment review once a year.

    Those are practical default reminders—not universal manufacturer requirements. The manual for your exact equipment, its maintenance schedule and any medical guidance always take priority.

    Testing, Inspecting and Maintaining Are Not the Same Thing

    It is easy to call every check “maintenance,” but three different jobs are involved.

    Inspection means looking for trouble. You check for cracks, corrosion, swelling, leaks, missing parts, blocked vents, damaged cords or an expired service date.

    Testing means confirming that the equipment performs its intended function. A flashlight turns on. A radio receives the local station. A smoke alarm sounds when its test button is pressed. A backup power source carries a small, familiar load.

    Maintenance means doing the work required to keep the equipment dependable. That might include charging a battery, changing generator oil, rotating stored fuel or arranging professional service.

    A useful calendar includes all three, but it does not turn the homeowner into a repair technician. If a test reveals damage, a safety warning or a problem you cannot address confidently, stop using the equipment and follow the manufacturer’s instructions.

    The Ready Chateau Emergency Equipment Schedule

    Monthly

    • Test every smoke alarm using its test button.
    • Test every carbon monoxide alarm using its test button.
    • Visually inspect household fire extinguishers.
    • Confirm that any automatic standby-generator exercise occurred without a warning.
    • Complete any portable-generator exercise required by its manual.
    • Check medically necessary backup equipment according to the schedule provided by the manufacturer and health-care team.

    Every Three Months

    • Check and service portable power stations according to their manuals.
    • Turn on flashlights, headlamps and emergency lanterns.
    • Check rechargeable lights, USB power banks and spare batteries.
    • Turn on the weather radio and verify its station, alert settings and backup power.
    • Inspect emergency charging cables, adapters and extension cords.
    • Check manufacturer notices and recalls for important equipment.

    Every Six Months

    • Review home, evacuation and vehicle emergency kits.
    • Replace expired or damaged supplies and account for changing household needs.
    • Check stored fuel and fuel stabilizer against the storage plan and product directions.
    • Update seasonal clothing, pet supplies, medications and contact information.
    • Confirm that everyone in the household knows where the equipment is stored.

    Once A Year

    • Complete a full equipment inventory.
    • Review manuals, model numbers, serial numbers and replacement dates.
    • Replace alarm batteries when required.
    • Review generator maintenance by both operating hours and calendar time.
    • Check whether aging batteries still provide enough useful runtime.
    • Practice a short outage routine with the household.

    Before A Seasonal Threat Or Expected Outage

    • Charge rechargeable equipment for emergency readiness.
    • Test the devices and loads you realistically expect to use.
    • Confirm that fuel, cables, adapters and other supporting supplies are available.
    • Check local alert sources and weather-radio programming.
    • Move buried or hard-to-reach equipment where it can be used safely.

    After Each Use

    • Inspect equipment for heat, damage, leaks or unusual behavior.
    • Recharge, refuel, clean or store it according to its manual.
    • Replace supplies that were consumed.
    • Record any problem that must be corrected before the next emergency.

    Safety Warning: A Test Should Not Create a New Hazard

    Do not run a portable generator indoors or in a garage, shed or other enclosed or partially enclosed space. Do not test a smoke or carbon monoxide alarm with a flame, smoke or engine exhaust. Do not intentionally disconnect critical medical equipment from power without approved instructions and a safe backup already available.

    Do not charge or operate a lithium-ion battery that is swollen, leaking, unusually hot, damaged or producing an unfamiliar odor or sound. Stop any test that produces smoke, sparks, leaking fuel, rapidly increasing heat or repeated fault warnings.

    Use the equipment’s built-in test function, a small controlled load or the exact procedure in its manual. The goal is to confirm readiness, not to prove how far the equipment can be pushed.

    What to Check Every Month

    Smoke And Carbon Monoxide Alarms

    Life-safety alarms belong on the shortest schedule because waiting six months to discover a dead alarm is too long.

    The U.S. Fire Administration recommends testing smoke alarms every month. The Consumer Product Safety Commission gives the same monthly guidance for smoke and carbon monoxide alarms.

    Use the test button and follow the alarm manufacturer’s directions. Do not use a flame, vehicle exhaust or another source of smoke or carbon monoxide to test an alarm.

    Replace removable alarm batteries at least annually unless the manufacturer specifies a different schedule. Do not try to open or replace the battery in an alarm sold with a sealed long-life battery. Replace smoke alarms at 10 years, and replace carbon monoxide alarms according to the manufacturer’s end-of-life instructions.

    Fire Extinguishers

    Give each household fire extinguisher a quick visual inspection every month. Make sure it is where it belongs, easy to reach and not blocked by stored items. Check the pressure indicator if the unit has one, and look for a missing pin or seal, corrosion, leakage, a damaged hose or other visible damage.

    Do not discharge an extinguisher merely to see whether it works. Follow the label for inspection, professional service and replacement requirements. If an extinguisher has been used—even briefly—have it recharged or replace it as directed.

    Generators

    There is no single exercise schedule for every generator. Some portable-generator manufacturers recommend a monthly run, while standby generators may perform an automatic exercise weekly, every two weeks or monthly.

    Follow the schedule for the exact model. Our guide to how often you should run your generator explains how to perform a useful exercise without treating a brief engine start as proof that the entire backup-power setup is ready. Use the portable generator maintenance checklist to track the inspections and service that a test run cannot replace.

    Never move a generator into a garage, shed or other enclosed or partially enclosed space for a convenient test. Review our portable-generator safety guide before operating one.

    Medically Necessary Equipment

    Do not place electrically powered medical equipment on a generic household schedule.

    Work with the equipment supplier, manufacturer and health-care team to determine how its batteries, alarms and backup power should be tested. Do not create a power failure by unplugging critical equipment unless the approved instructions specifically call for that test and a safe backup is already available.

    Ready.gov recommends identifying equipment that depends on electricity and making backup plans, including model and serial numbers and any special operating instructions. Treat this part of the household plan as essential, not optional.

    What to Check Every Three Months

    Portable Power Stations And Power Banks

    A three-month reminder is a practical starting point for stored rechargeable power because several major power-station manufacturers use that interval. The exact charging or storage percentage is not universal.

    Turn the unit on, inspect the case, ports, cables and vents, and check the remaining charge. Follow the manufacturer’s directions for recharging or cycling the battery. Then connect a small, familiar device and confirm that the expected outlet works.

    Our complete guide to portable power station maintenance explains the model-specific storage differences and the warning signs that mean you should stop using the unit.

    Do not run a lithium-ion battery to zero simply because the calendar says it is time for a test. Do not charge or use a unit that is swollen, leaking, unusually hot, damaged or producing an unfamiliar odor or sound.

    Flashlights, Headlamps And Lanterns

    Turn on every emergency light and let it run long enough to reveal a weak battery, loose switch or flickering connection. Check each brightness setting that you expect to use.

    Recharge built-in batteries as directed. Inspect removable batteries for corrosion or leakage, and confirm that your spare batteries are the correct size and have not expired. Store at least one dependable light where you can reach it without crossing a dark house.

    The U.S. Fire Administration recommends flashlights instead of candles during a power outage. That advice only helps if the flashlight works.

    Weather Radios

    Turn on the radio and confirm that it receives the nearest National Weather Service broadcast clearly. Check the clock, location codes, alert types, volume and battery backup according to the radio’s manual.

    National Weather Service offices normally transmit a routine test each week, although the test may be postponed during threatening weather. The NOAA Weather Radio page explains the national alert network, and your local National Weather Service office publishes the test schedule for its transmitters.

    You do not need to stand beside the radio every Wednesday. During the quarterly check, confirm that the radio has received or recorded a recent test and that it has not been left in silent, travel or demonstration mode.

    Cables, Adapters And Extension Cords

    The power source is only half of a backup-power system. Inspect the cables, chargers and adapters required to connect the equipment you intend to use.

    Look for cracked insulation, bent or missing prongs, loose connectors, corrosion and heat damage. Confirm that generator extension cords are outdoor-rated and sized for the load. Replace damaged cords rather than wrapping them in tape and returning them to the emergency bin.

    What to Review Every Six Months

    Twice a year, widen the check beyond equipment and review the supplies that make the equipment useful.

    The Federal Emergency Management Agency’s preparedness guide recommends reviewing household needs and emergency kits every six months. The American Red Cross also advises checking emergency supplies every six months so expired food, water and medications can be replaced.

    Use the six-month review to check:

    • Home, evacuation and vehicle kits
    • Food, water and medication dates
    • First-aid supplies
    • Pet food, records, carriers and medications
    • Clothing that no longer fits or matches the coming season
    • Fuel age, storage condition and stabilizer directions
    • Printed contacts, insurance information and evacuation details
    • Changes in the household, including new medical, mobility or dietary needs

    Use the complete home emergency preparedness checklist for the broader household review. Our guide to the things people forget in an emergency kit can help uncover less obvious gaps.

    Do not automatically throw away every dated item. Follow the label, storage guidance and household policy for each product. The purpose of the review is to make a decision while replacement supplies are easy to obtain.

    The Annual Whole-House Test

    Once a year, stop looking at each device as a separate object and test whether the pieces work together.

    Choose a safe time when the household is not facing severe weather. Walk through a short imaginary outage:

    1. Find the flashlights without using normal room lighting.
    2. Turn on the weather radio and locate other trusted alert sources.
    3. Confirm that phones and essential devices can be charged.
    4. Set up backup power outdoors or in its approved location without connecting it to the house.
    5. Power one or two realistic loads with the equipment intended for them.
    6. Locate the emergency kit, medications, pet supplies and printed contacts.
    7. Confirm that everyone knows the safest meeting place and how to leave if necessary.

    This does not require shutting off power to the house. It is a short function check designed to reveal missing cords, dead batteries, inaccessible equipment and forgotten instructions.

    Use the annual review to record model and serial numbers, download missing manuals and check the CPSC recall database. Note replacement dates for alarms, batteries, extinguishers and any other equipment with a stated service life.

    When to Test Outside the Calendar

    A calendar is the baseline, not a reason to ignore changing conditions.

    Test or inspect equipment again:

    • Before hurricane, tornado, wildfire or winter-storm season in your area
    • When severe weather or a planned utility outage is forecast
    • After equipment has been dropped, flooded, overheated or exposed to unusual conditions
    • After lending equipment to someone else
    • After a firmware update or major configuration change
    • After any use during an outage
    • When the display, runtime, sound, smell or behavior changes
    • When a manufacturer or safety agency publishes a notice affecting the model

    If you discover a problem shortly before a storm, do not rush into an unsafe repair. Use the manufacturer’s support process, arrange qualified service or change the household plan around the equipment that remains dependable.

    Keep the Record Simple

    The best maintenance record is the one you will actually use.

    Write the next-check month on a tag attached to the equipment, add four recurring reminders to a digital calendar or keep one printed page with the emergency supplies. Record only what helps:

    • Equipment name and location
    • Model and serial number
    • Last inspection or test date
    • Result or problem found
    • Next required action and date

    Do not build a complicated system that takes longer to update than the equipment takes to test. A checkmark and a short note are usually enough.

    The Bottom Line

    Emergency equipment does not become dependable simply because you bought it and found a place to store it.

    Test life-safety alarms monthly. Check stored power, lighting, radios and supporting cables every three months. Review household kits every six months, and bring the entire system together once a year.

    Use those reminders as a starting point, then follow the manual for each product. Fifteen quiet minutes on the calendar is much easier than discovering a dead battery, missing cord or silent alarm after the lights have already gone out.

  • Portable Power Station Maintenance: How to Make the Battery Last

    Portable Power Station Maintenance: How to Make the Battery Last

    A portable power station is much easier to maintain than a gasoline generator. There is no oil to change, carburetor to clean or fuel to stabilize.

    But easier does not mean maintenance-free.

    A power station can sit quietly in a closet for months while its battery slowly loses charge. Heat, improper storage and repeated deep discharges can also reduce the amount of power it can deliver over time.

    The good news is that portable power station maintenance is simple. A few minutes several times a year can help protect the battery and make it more likely that the unit will be ready when the lights go out.

    Quick Answer

    Keep the power station in a cool, dry location. Do not leave it stored with an empty battery. Check it at least every three months, recharge it according to the instructions for your exact model and test it before storm season or any expected outage.

    The exact storage charge level is not the same for every power station. Your owner’s manual—not a generic percentage found online—should be the final authority.

    Start With the Manual and the Model Number

    Before creating a maintenance routine, find the manual for your exact model.

    Do not assume that instructions for another unit from the same company apply to yours. Manufacturers may use different battery chemistries, battery-management systems and storage procedures in different product lines.

    Record three things somewhere you can find them:

    • The manufacturer and exact model number
    • The serial number
    • A link to or saved copy of the owner’s manual

    The model and serial numbers also make it easier to check warranty information, contact support and determine whether the unit is affected by a safety recall.

    There Is No Universal Storage Percentage

    You will often see advice to store every lithium battery at 50% or 60%. That may be appropriate for some power stations, but it is not a safe universal rule.

    Current manufacturer guidance illustrates the difference:

    Those instructions are not interchangeable. They are examples of why Ready Chateau will not give every reader one storage number.

    Follow the manual for your model. If the manual is missing or unclear, ask the manufacturer rather than guessing.

    After You Use the Power Station

    When the outage, camping trip or household project is over, do not simply put the power station back on the shelf.

    1. Turn off the outputs. AC outlets, USB ports and DC outputs can draw standby power on some units even when nothing useful is being powered. Turn off the outputs and then shut down the unit according to its manual.
    2. Disconnect everything. Remove appliances, charging cables, solar panels and expansion batteries unless the manufacturer specifically directs you to leave something connected during storage.
    3. Let it return to a safe temperature. If the unit became hot during use or charging, allow it to cool in a dry, well-ventilated area before storing it. Do not cover the vents or place it immediately into a closed cabinet while it is still warm.
    4. Inspect and clean it. Look for damage to the case, ports, plugs and cables. Wipe the exterior with a dry, soft cloth and remove loose dust from the vents without pushing debris into the unit. Do not spray cleaner or water into the power station.
    5. Set the proper storage charge. Recharge or discharge the unit to the level specified in its manual. Do not leave it near empty and assume you will remember it later.

    Where You Store It Matters

    The best storage location is cool, dry, clean and protected from direct sunlight.

    A garage or shed may seem convenient, but it can become much hotter or colder than the air outside. A vehicle can become dangerously hot in the sun. The U.S. Fire Administration advises keeping lithium-ion batteries out of direct sunlight and hot vehicles.

    Also keep the unit:

    • Away from heaters, open flames and other heat sources
    • Away from water, flooding and excessive humidity
    • Where its vents will not be blocked
    • Where it cannot be crushed, punctured or knocked from a shelf
    • Away from materials that burn easily
    • Where children and pets cannot tamper with the controls or cables

    Do not use the operating-temperature range as the storage-temperature range. Charging, discharging and storage limits may be different. Check all three in the manual.

    Be Especially Careful With Cold Batteries

    Many portable power stations can supply power at temperatures that are too cold for charging. For example, several current models specify a minimum charging temperature around 32°F, but the limit varies.

    If a power station has been stored in a cold vehicle, garage or shed, do not connect it to a charger just because the display turns on. Move it to a dry location and allow it to reach the charging-temperature range listed in its manual.

    Some models include low-temperature charging protection, but that protection should be treated as a safeguard—not permission to ignore the manufacturer’s limits.

    The Three-Month Check

    Three months is a practical default reminder because several major manufacturers use that interval. If your manual requires a different schedule, use the shorter interval.

    Every three months:

    • Inspect the case for cracks, swelling, discoloration or other changes.
    • Check the charging cable, plug and ports for damage, looseness or corrosion.
    • Make sure the vents are clean and unobstructed.
    • Turn the unit on and confirm that the display and controls operate normally.
    • Check the remaining charge and service any expansion batteries separately.
    • Recharge or cycle the battery exactly as the manufacturer instructs.
    • Test the unit with a small, familiar load, such as a lamp or fan.
    • Check the manufacturer’s support page and the Consumer Product Safety Commission recall database for notices affecting your model.

    This is a function check, not a contest to see how far you can drain the battery. Unless the manual calls for a full discharge cycle, there is no reason to run the power station to zero merely to exercise it.

    Test It Before You Need It

    A charge indicator is helpful, but it does not prove that the outlets, inverter and cables will work with the equipment you plan to use.

    Before storm season—and before a forecast outage—perform a realistic test:

    1. Charge the power station for emergency readiness according to its manual.
    2. Connect one or two of the devices you actually expect it to power.
    3. Confirm that the power station carries the load without warnings or unexpected shutdowns.
    4. Verify that the display, cooling fan and charging inputs operate normally.
    5. Return the battery to the manufacturer’s recommended storage condition after the test.

    You do not need to recreate an all-day outage. The purpose is to discover a bad cable, damaged outlet, depleted battery or forgotten setting while normal power is still available.

    If you are unsure what equipment your unit can support, start with our guide to choosing between a portable power station and a generator. If refrigeration is the priority, use our refrigerator runtime guide and calculator to estimate what your battery capacity may provide.

    Remember that an estimate made when the unit was new may become less accurate as the battery ages. Actual runtime also changes with the appliance load, inverter losses, temperature and the condition of the battery.

    Habits That Can Shorten Battery Life

    Avoid these common mistakes:

    • Leaving it completely discharged. A power station that continues to self-discharge in storage may eventually reach a condition from which it cannot recover normally.
    • Storing it in heat. A hot vehicle, attic or unconditioned shed can expose the battery to temperatures outside its recommended range.
    • Ignoring standby drain. A forgotten AC or DC output can slowly consume power while the unit appears to be stored.
    • Using an incompatible charger or solar setup. Charging voltage, current, connectors and panel arrangements must remain within the limits specified for the unit.
    • Blocking the vents. The inverter and charging system need airflow. Do not operate the power station inside a closed box or with clothing, papers or other objects covering it.
    • Running every test to zero. A short function test normally tells you what you need to know. Follow the manual when a full charge-and-discharge cycle is required for maintenance or display calibration.
    • Assuming the app replaces inspection. Remote settings and firmware tools can be useful, but they cannot reveal a cracked case, damaged cord or blocked vent.

    Safety Warning: Know When to Stop Using It

    Stop using or charging the power station if you notice:

    • Swelling, bulging or a change in shape
    • Cracks, impact damage or a damaged charging port
    • Leaking or unusual discoloration
    • An unfamiliar chemical or burning odor
    • Hissing, popping or other unusual sounds
    • Smoke, visible gas or rapidly increasing heat
    • Repeated fault messages or shutdowns that the manual does not resolve

    The U.S. Fire Administration identifies excessive heat, changes in shape, leaking, odors and unusual noises as warning signs for lithium-ion batteries.

    If any of these signs appear, stop using the unit and keep people away from it. Disconnect power only if that can be done safely. Follow the manufacturer’s instructions for a damaged battery. If the unit is smoking, venting gas, rapidly heating or burning, leave the area and call 911.

    Do not open the case or attempt to repair the battery pack yourself. A portable power station may still contain dangerous stored energy even when its display reads zero.

    Check for Recalls

    Recalls are not merely a concern for old or unknown brands. The Consumer Product Safety Commission has announced recalls involving portable power stations from established manufacturers because of fire, burn or electrical hazards.

    Check the CPSC recall database when you buy a used power station, during your periodic maintenance review and whenever a unit begins behaving differently. Search by manufacturer and model number.

    If your power station is recalled, stop using it and follow the recall instructions. Do not assume that ordinary battery-recycling procedures are appropriate for a recalled or damaged unit.

    When the Battery Reaches the End of Its Life

    A battery that provides less runtime than it did when new is not automatically dangerous. Batteries gradually lose usable capacity with age and use. The practical question is whether the remaining capacity still meets your emergency needs.

    Consider manufacturer service or replacement when:

    • Runtime has fallen below what your household requires.
    • The battery loses a substantial amount of charge during a normal storage interval.
    • The unit can no longer support loads it previously handled.
    • Charging becomes unreliable or the unit reports persistent battery errors.

    Do not put a portable power station or its lithium-ion battery in household trash or curbside recycling. The Environmental Protection Agency recommends taking lithium-ion batteries and battery-containing devices to an appropriate battery recycler, electronics recycler or household hazardous-waste collection point. Damaged or recalled units require special handling, so contact the manufacturer and the collection facility before transporting one.

    A Simple Portable Power Station Maintenance Schedule

    After Each Use

    • Turn off outputs and disconnect equipment.
    • Inspect the unit and charging cables.
    • Let the unit cool and clean the vents if needed.
    • Return the battery to the storage condition specified in the manual.

    Every Three Months

    • Check the remaining charge.
    • Inspect the case, ports, cables and vents.
    • Recharge or cycle the battery as directed.
    • Run a short function test with a familiar load.
    • Check for manufacturer notices and recalls.

    Before Storm Season or an Expected Outage

    • Charge the unit for emergency readiness.
    • Test the equipment you expect it to power.
    • Confirm that all required cables and adapters are stored with it.
    • Review the maximum output and charging instructions.

    Once a Year

    • Review whether its remaining capacity still meets your household’s needs.
    • Confirm that the manual, serial number and warranty information are accessible.
    • Review battery-disposal options before an urgent problem forces the decision.

    The Bottom Line

    Portable power station maintenance is not complicated. Keep the unit cool and dry, do not let it sit empty, inspect it regularly and follow the storage instructions written for your exact model.

    Most of the work takes only a few minutes. What matters is remembering to do it before the power station has spent another year untouched in the back of a closet.

    The goal is not to preserve a battery forever. It is to know how much dependable power you have—and to keep it ready for the day your household needs it.