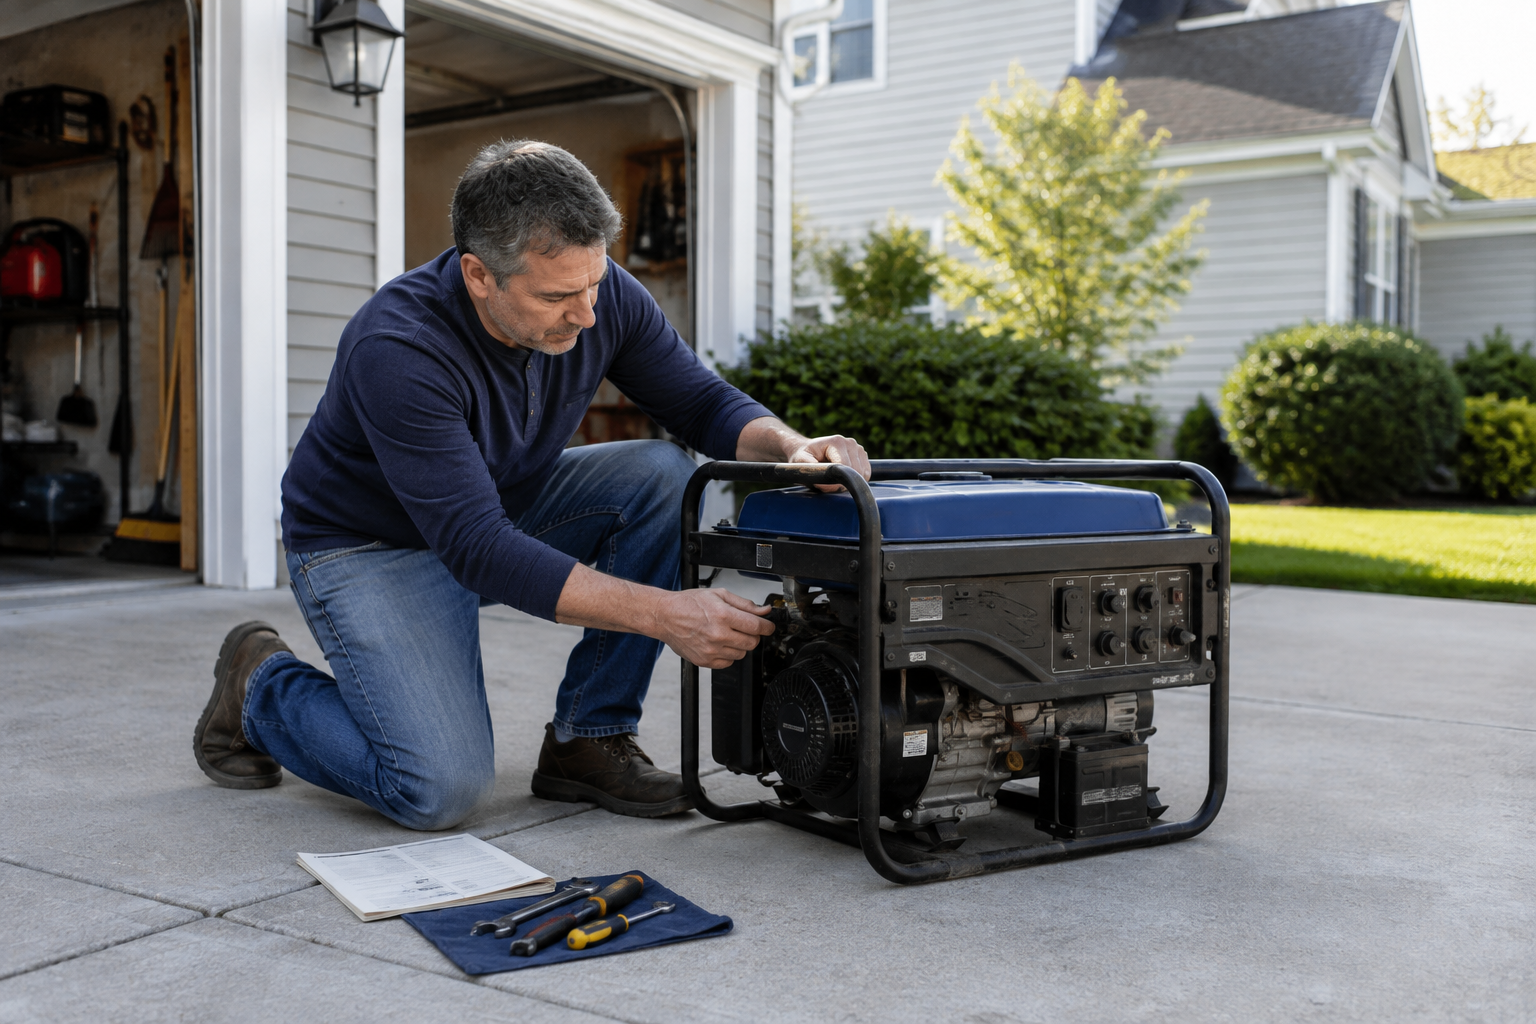
Author: Ready Chateau

  • Portable Generator Maintenance Checklist: Keep It Ready for an Outage

    Portable Generator Maintenance Checklist: Keep It Ready for an Outage

    A portable generator does not need constant attention. It does need a routine.

    The trouble is that generators measure maintenance in two different ways: time on the calendar and hours on the engine. A generator can sit for months and develop fuel or battery problems without adding a single operating hour. During a long outage, it can reach an oil-change or inspection interval in just a few days.

    This checklist gives you a practical way to keep up with both. It is written for portable generators. Standby generators have different systems and service requirements.

    Your owner’s manual remains the authority for your machine. Use this checklist to remember what to inspect and when to look at the manual—not to replace the manufacturer’s schedule.

    Start With Four Pieces of Information

    Before you make a maintenance plan, find and record:

    • Generator manufacturer and model number
    • Engine model number, if listed separately
    • Required engine oil type and capacity
    • Maintenance intervals from the owner’s manual

    Keep the manual with the generator or save a digital copy where you can reach it during an outage. If the original is missing, use the manufacturer’s website and search by the exact model number.

    Also locate the hour meter. If your generator does not have one, keep a simple written estimate of operating hours. Calendar reminders alone cannot tell you when an engine has worked long enough to need service.

    Before Every Use

    Do this inspection while the generator is off, cool and sitting on a level surface:

    • Look for fuel or oil leaks.
    • Inspect fuel lines, the fuel cap and visible connections for cracks or damage.
    • Check the engine-oil level using the procedure in the manual.
    • Confirm that the air intake, cooling openings and exhaust area are clear.
    • Check the air filter if the manual calls for a pre-use inspection.
    • Inspect outlets, controls and the frame for damage.
    • Inspect extension cords from end to end for cuts, crushed areas, damaged insulation or missing ground prongs.
    • Make sure the fuel is fresh and approved for the generator.
    • Confirm that the generator will operate outdoors in its safe location.
    • Test the home’s carbon-monoxide alarms.

    Do not start a generator that is leaking fuel, has damaged wiring or shows another condition you cannot address confidently.

    Safety First

    Operate a portable generator outdoors only, at least 20 feet from the house, with the exhaust pointed away from the home and other occupied buildings. Never run one in a garage, shed, basement, porch, carport or other enclosed or partially enclosed space.

    The U.S. Consumer Product Safety Commission also recommends checking that outdoor extension cords have adequate wattage ratings, intact insulation and all three prongs. Never connect a generator to home wiring through a wall outlet. See our complete portable-generator safety guide before relying on the generator during an outage.

    During a Long Outage

    Maintenance does not pause because the power is out. Record the hours each day and compare the total with the manual’s service schedule.

    • Check the oil as often as the manufacturer requires.
    • Shut the generator down and let it cool before refueling or servicing it.
    • Watch for leaks, unusual vibration, surging, abnormal smoke or changing engine sound.
    • Keep cooling openings and the surrounding operating area clear.
    • Recheck cords and connections for heat or damage.
    • Complete hour-based service when it becomes due.

    A generator running around the clock can accumulate 72 operating hours in three days. That is why the hour meter matters. A service interval that sounds distant during storage can arrive quickly during an extended outage.

    Do not touch or reposition a damaged, wet or overheated cord while it is energized. Shut down the connected load and generator using the manufacturer’s procedure before inspecting or replacing it.

    After Every Use

    Once the generator is off and completely cool:

    • Record the ending hour-meter reading or estimated operating time.
    • Note any hard starting, surging, smoke, warning lights or shutdowns.
    • Inspect for new leaks, loose hardware or damage.
    • Remove dirt and debris using the cleaning method allowed by the manual.
    • Check whether an oil change or other hour-based service is now due.
    • Prepare the fuel system for the expected storage period.
    • Recharge the electric-start battery if the manual requires it.
    • Store cords and operating supplies where they can be found.

    Do not wash the generator with a garden hose or pressure washer unless the manufacturer specifically permits it. Water forced into the control panel, alternator or electrical connections can create damage that is not visible from the outside.

    Follow the Manual’s Maintenance Schedule

    Manufacturers do not use one universal schedule. Even generators from the same company may have different break-in periods, oil-change intervals and service requirements.

    Your manual may schedule maintenance by months, operating hours or whichever comes first. It may also call for more frequent service in dusty, hot or demanding conditions.

    Use the manual to fill in your generator’s actual intervals for these items:

    Engine oil

    • Check the oil level at the required interval.
    • Complete the first oil change after the specified break-in period.
    • Change the oil at the regular hour or calendar interval.
    • Use the specified oil type, viscosity and quantity.
    • Recycle used oil through an appropriate collection location.

    Do not assume that every generator uses the same first-change or regular-change interval. Honda and Generac manuals demonstrate how schedules can vary by model and operating conditions.

    Air filter

    • Inspect it at the interval in the manual.
    • Clean or replace it according to its type and the manufacturer’s procedure.
    • Service it more often when operating in dusty conditions if directed.
    • Replace a damaged filter.

    Foam and paper elements are not maintained the same way. Do not wash, oil or blow out a filter unless the instructions for that exact filter permit it.

    Spark plug

    • Inspect the plug at the scheduled interval.
    • Check the condition and gap using the manual’s specifications.
    • Replace it with the specified plug when required.
    • Start the threads by hand during installation to reduce the risk of cross-threading.

    Spark arrestor and cooling system

    • Inspect or clean the spark arrestor when the manual requires it.
    • Keep cooling-air openings and engine fins clear of debris.
    • Let the muffler and engine cool before touching nearby components.

    Fuel system

    • Use fresh fuel that meets the manual’s requirements.
    • Inspect hoses, the tank, cap and connections for deterioration or leaks.
    • Treat or drain gasoline according to the expected storage period.
    • Date stored fuel and rotate it before it becomes a problem.

    Fuel stabilizer can slow deterioration when added correctly to fresh gasoline, but it cannot restore stale fuel. See Should You Use Fuel Stabilizer in Your Generator? for the complete decision process.

    Electric-start battery

    • Inspect the battery and terminals as directed.
    • Maintain its charge using the manufacturer’s approved method.
    • Check for corrosion, swelling, leakage or damaged cables.
    • Replace the battery when it no longer holds a dependable charge.

    Dealer or technician service

    • Identify maintenance the manual assigns to a qualified technician.
    • Schedule valve-clearance checks or other specialized work when due.
    • Address recalls, persistent fuel leaks and electrical problems before the next outage.

    Some work requires model-specific procedures, special tools or mechanical experience. The checklist should help you catch those items—not encourage you to take apart equipment you are not prepared to service.

    Complete a Readiness Check Before Storm Season

    Do not wait for a warning cone to appear on the weather map.

    Several weeks before the season when outages are most likely:

    • Review the maintenance schedule and operating-hour record.
    • Complete any service that will become due soon.
    • Inspect the generator, cords and connection equipment.
    • Check the electric-start battery.
    • Confirm that stored fuel is fresh or properly rotated.
    • Move the generator to its planned outdoor operating location.
    • Start it using the manufacturer’s procedure.
    • Test it under an appropriate load if the manufacturer permits.
    • Confirm stable operation and electrical output.
    • Test the home’s smoke and carbon-monoxide alarms.
    • Replace missing supplies before stores become crowded.

    The goal is not simply to hear the engine start. The generator must operate safely and carry an appropriate load before you count it as ready.

    Our guide to how often you should run your generator explains why the manufacturer’s test schedule matters and why a brief no-load start may not prove enough.

    Prepare It Properly for Storage

    Storage is part of maintenance. Old gasoline, a discharged battery, moisture and pests can undo the work you completed during the rest of the year.

    Before putting the generator away:

    • Let it cool completely.
    • Inspect for leaks and damage.
    • Record operating hours and completed service.
    • Follow the manual’s fuel-treatment or draining procedure.
    • Maintain or disconnect the starting battery as directed.
    • Clean the exterior without forcing water into electrical components.
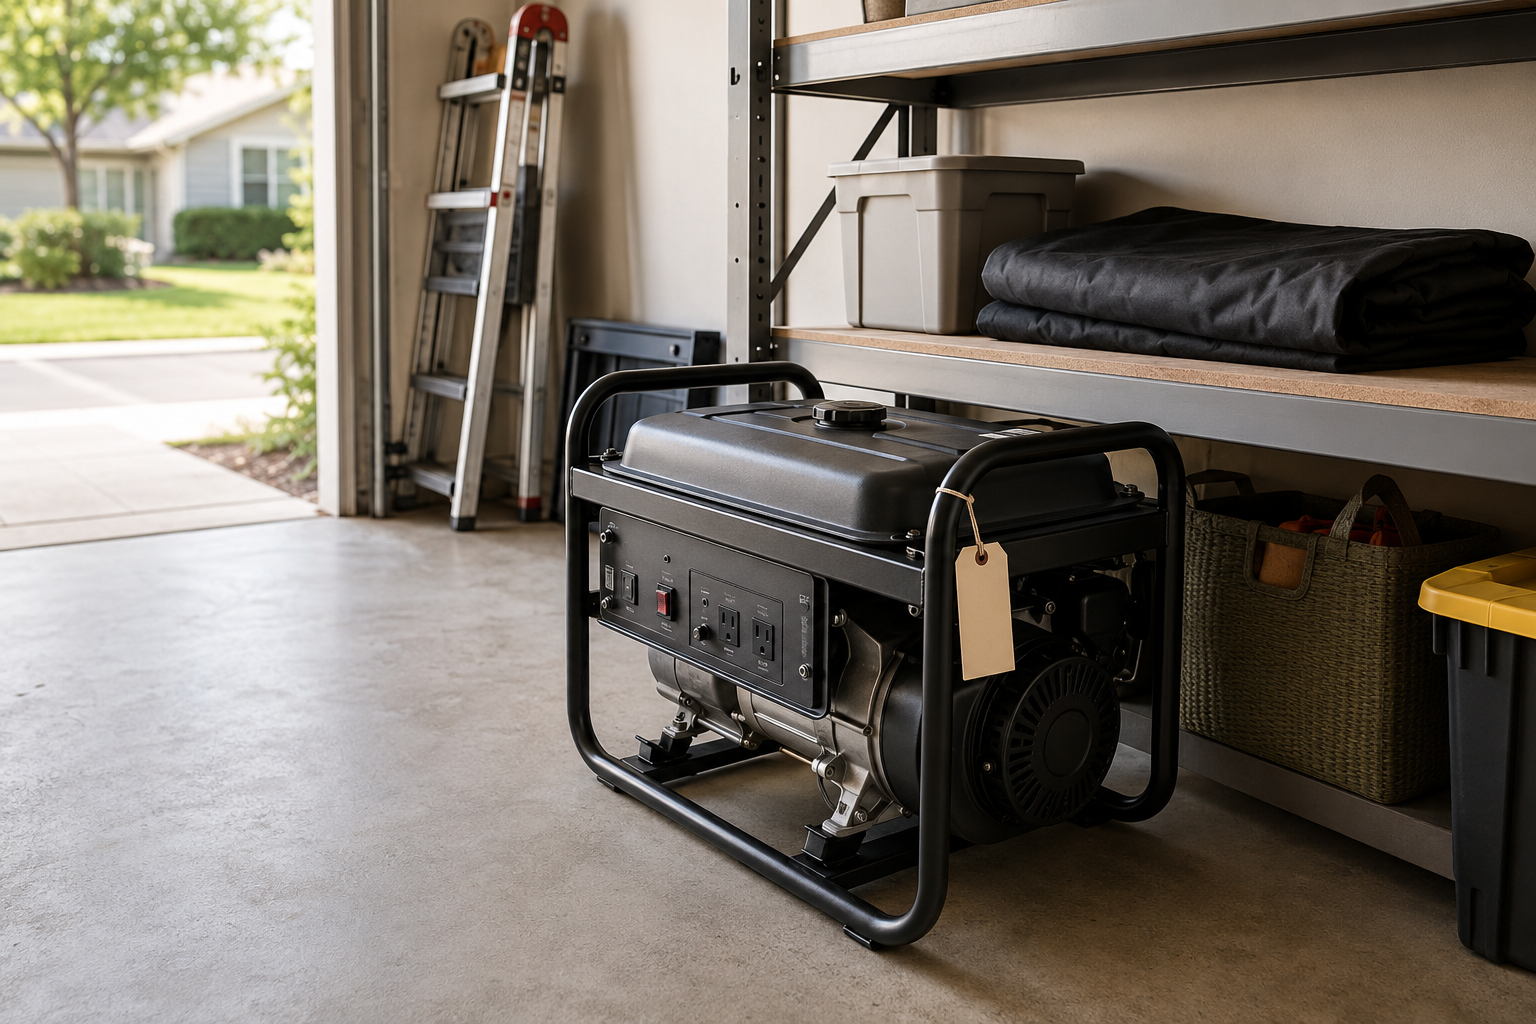
    • Store the generator upright in a dry, protected location.
    • Keep it away from flames, sparks and other ignition sources.
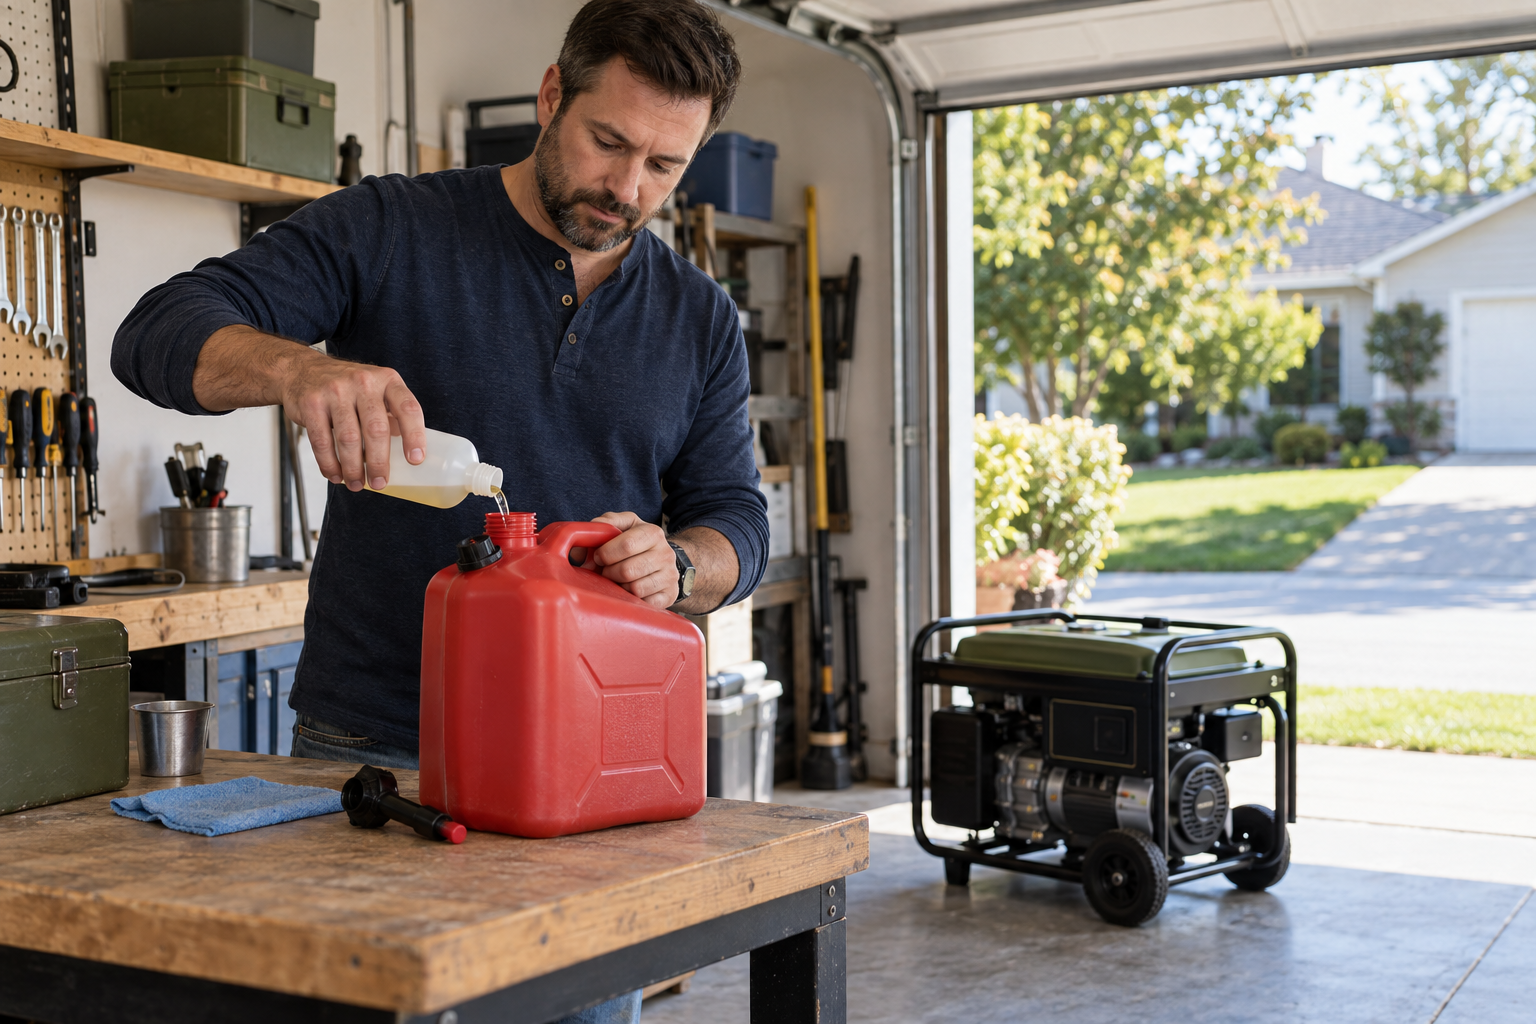
    • Store gasoline outside living areas in an approved container.

    See How to Store a Portable Generator the Right Way for the complete storage procedure.

    Keep a Simple Maintenance Record

    You do not need a complicated spreadsheet. A notebook page kept with the manual is enough if you use it consistently.

    Record:

    • Date
    • Hour-meter reading
    • Work performed
    • Oil, filter, spark plug or other parts used
    • Fuel treatment or draining completed
    • Problems noticed
    • Next service due

    The record answers the question that causes trouble during an outage: “Did I already do that, or was I planning to do it?”

    Stop and Get Help When Necessary

    Do not operate the generator until it has been properly inspected or repaired if you find:

    • A persistent fuel or oil leak
    • A cracked fuel line or damaged tank
    • Burned, loose or damaged wiring
    • A damaged outlet, plug or grounding component
    • Abnormal smoke, surging, knocking or vibration
    • Repeated low-oil, carbon-monoxide or fault shutdowns
    • Unstable or missing electrical output
    • A repair that exceeds your tools, manual or experience

    If the generator has already been neglected and will not start, use our guide to a generator that will not start after sitting before assuming the machine is ruined.

    The Bottom Line

    Generator maintenance becomes manageable when you stop treating it as one annual chore.

    Inspect the generator before every use. Track its operating hours. Follow the model-specific schedule for oil, filters, spark plug, fuel system, battery and professional service. Prepare it correctly for storage, then test it early enough to fix a problem before an outage.

    The generator may spend most of its life waiting. Your maintenance record is what makes that waiting useful instead of risky.

    Sources

  • Should You Use Fuel Stabilizer in Your Generator?

    Should You Use Fuel Stabilizer in Your Generator?

    Fuel stabilizer is useful for many portable generators, but it is not magic in a bottle.

    Added correctly to fresh gasoline, stabilizer can slow fuel deterioration while a generator sits unused. It cannot restore gasoline that has already gone stale, clean a clogged carburetor or replace the storage procedure in your generator’s owner’s manual.

    The practical answer is simple: Use fuel stabilizer when you plan to keep gasoline for later use and your generator manufacturer allows that storage method. Use it correctly, circulate it through the fuel system and do not treat it as permission to forget the fuel indefinitely.

    What Fuel Stabilizer Actually Does

    Gasoline begins changing as it sits. Its lighter components evaporate, oxidation occurs and deposits can develop inside the fuel system. Heat, air and moisture can accelerate the process.

    Fuel stabilizer is designed to slow that deterioration. It may help reduce the gum and deposits that contribute to hard starting, rough running and clogged carburetor passages.

    What it does not do is equally important:

    • It does not make old gasoline fresh again.
    • It does not remove water from contaminated fuel.
    • It does not clean an already clogged carburetor.
    • It does not guarantee that gasoline can remain in every generator for the same length of time.
    • It does not override the generator manufacturer’s instructions.

    Honda specifically warns that fuel stabilizer will not reconstitute stale fuel. Its generator guidance also recommends draining the carburetor during longer periods of inactivity for certain models. See Honda’s generator fuel guidance.

    When Stabilizer Makes Sense

    Fuel stabilizer is usually worth considering when:

    • You keep gasoline on hand for outages.
    • Your generator may sit unused for more than a few weeks.
    • You rotate stored fuel rather than buying it only when a storm approaches.
    • Your owner’s manual permits storage with treated gasoline.
    • You want fresh treated fuel available for periodic generator testing.

    Adding stabilizer to the portable fuel container when it is filled is often more practical than waiting until the gasoline has been sitting for months. That way, you know when the fuel was treated and can use it in either the generator or another compatible gasoline engine during normal rotation.

    When Draining May Be the Better Choice

    Stabilizer is not always the complete storage answer.

    Some manufacturers recommend draining the carburetor even when stabilized fuel remains in the tank. Others recommend emptying the entire fuel system for extended or indefinite storage. Instructions can also differ among models from the same manufacturer.

    Honda, for example, provides different procedures depending on storage time. Generac also directs owners to consult the storage instructions for their particular generator and describes both treated-fuel and drained-fuel methods. See Generac’s portable-generator storage guidance.

    This is why a universal rule such as “add stabilizer and forget about it” is unreliable.

    If you do not know when the generator will be used again, or its manual calls for draining, follow that procedure. See our guide to storing a portable generator for the broader storage process.

    How to Use Fuel Stabilizer Correctly

    1. Start with fresh gasoline

    Stabilizer works best when added before the gasoline has deteriorated. Pouring it into fuel that already smells stale or has been sitting for an unknown period does not reset the clock.

    2. Follow the product label

    Measure the amount specified for the volume of gasoline you are treating. More is not automatically better, and different products may use different treatment ratios.

    3. Follow the generator’s manual

    Check whether the manufacturer wants the tank filled, the carburetor drained or the fuel system emptied for your expected storage period.

    4. Circulate the treated fuel

    If the stabilizer was added after gasoline entered the generator, the treated fuel needs to reach the carburetor and fuel passages. Manufacturers commonly instruct owners to run the generator outdoors for several minutes after treatment. Use the exact time and procedure in your manual.

    Safety First

    Never run a generator in a garage, shed, basement, porch or other enclosed or partially enclosed space.

    5. Date the fuel

    Mark the fuel container with the purchase or treatment date. A small piece of tape and a permanent marker can prevent a surprising amount of confusion several months later.

    6. Rotate it

    Use stored gasoline while it is still suitable for compatible equipment, then replace it with fresh treated fuel. Stabilizer extends useful storage time; it does not make gasoline permanent.

    Common Fuel-Stabilizer Mistakes

    The most common mistake is waiting too long. Stabilizer should be added to fresh fuel, not used as a rescue treatment after a generator refuses to start.

    Other mistakes include:

    • Guessing at the treatment amount.
    • Failing to circulate treated fuel through the generator.
    • Leaving untreated gasoline in the carburetor.
    • Assuming every generator has the same storage procedure.
    • Losing track of when the fuel was purchased.
    • Storing fuel near ignition sources.
    • Keeping gasoline longer than the stabilizer label or equipment manual allows.

    If a generator already has old gasoline in it and will not start, adding stabilizer is unlikely to solve the problem. Start with our guide to a generator that will not start after sitting.

    What About Ethanol-Free Gasoline?

    Ethanol-free gasoline may reduce some moisture-related concerns, but it still ages. If you plan to store it, you still need a deliberate storage and rotation plan.

    Use the fuel type and ethanol limit specified in your generator’s manual. Do not assume that a more expensive fuel eliminates the need for proper storage.

    Store Gasoline Safely

    Fuel treatment does not reduce gasoline’s fire risk.

    Use an appropriate, closed fuel container and store it in a cool, well-ventilated location away from children and ignition sources. Never keep gasoline inside the house or basement. See the CPSC fuel-container safety guidance.

    Local fire codes may limit how much gasoline can be stored and where it may be kept.

    The Bottom Line

    Fuel stabilizer is a useful part of generator readiness when it is added to fresh gasoline and used according to both the product label and the generator’s manual.

    It is not a substitute for draining the carburetor when required, rotating stored gasoline or testing the generator regularly. A bottle of stabilizer can help protect your fuel system, but the real protection comes from having a repeatable routine.

    Treat fresh fuel. Date it. Circulate it properly. Store it safely. Rotate it before it becomes a problem.

    That is much more dependable than hoping an old can of gasoline will still be ready when the power goes out.

    Sources

  • How to Store a Portable Generator the Right Way

    How to Store a Portable Generator the Right Way

    The power comes back on, the refrigerator is humming again and the last thing most people want to do is spend another half hour thinking about the generator.

    It is tempting to shut it off, roll it into the corner of the garage and deal with it later.

    That hurried last step can determine whether the generator starts the next time you need it.

    Proper storage is not complicated, but it does require a decision about the fuel, a few checks after use and a safe place for the generator and its fuel. The exact procedure depends on your generator, how it is fueled and how long it will sit.

    The Short Answer

    To store a portable generator correctly:

    • Disconnect the electrical loads and follow the manufacturer’s shutdown procedure.
    • Let the generator cool completely.
    • Prepare the fuel system for the expected storage time using the method in the owner’s manual.
    • Complete any maintenance that became due during the outage.
    • Charge, disconnect or remove the starting battery if the manual requires it.
    • Store the generator upright in a cool, dry, protected location.
    • Store gasoline containers and propane cylinders separately under their own safety rules.
    • Record what you did and when the generator should be checked again.

    The most important rule is simple: use the storage section of the owner’s manual for your exact model. There is no universal number of days after which every generator should be drained, and there is no single fuel-storage method that is correct for every machine.

    Start With a Proper Shutdown

    Storage begins before the generator is moved.

    Turn off or disconnect the electrical loads in the sequence specified by the manufacturer. Some generators should run briefly without a load before shutdown; others provide a different cooldown sequence. Then stop the engine and close the fuel valve, fuel-cap vent or other controls as directed.

    Do not refuel, drain, move or cover the generator while the engine or muffler is hot. Let it cool completely first.

    This is also a good time to look for anything that changed during use:

    • Fuel or oil leaks
    • Damaged cords, plugs or receptacles
    • Loose fasteners or panels
    • Unusual vibration, smoke or noise
    • A warning light or fault that needs attention

    Do not put away a leaking or damaged generator with a promise to remember it later. Tag the problem and arrange the repair while you still know what happened.

    Decide What to Do With the Gasoline

    Gasoline causes many storage problems because it begins changing as soon as it is purchased. Heat, humidity, air in a partly filled tank and time can speed deterioration. Old fuel can make an engine hard to start and leave deposits in the carburetor’s small passages.

    You will usually find one of two approaches in a portable generator manual.

    Method 1: Store With Fresh, Treated Fuel

    Some manufacturers permit gasoline to remain in the tank for a defined period when the fuel is fresh and the correct stabilizer is added.

    If your manual specifies this method:

    • Begin with fresh gasoline that meets the generator’s fuel requirements.
    • Add the amount and type of stabilizer directed by the generator and stabilizer manufacturers.
    • Run the generator outdoors long enough for treated fuel to reach the fuel system.
    • Follow the manual’s instructions for the fuel valve, carburetor and tank.
    • Mark the date and the end of the permitted storage period.

    Fuel stabilizer can slow deterioration. It cannot restore stale gasoline, and it does not make fuel last forever.

    Method 2: Store With the Fuel System Dry

    Other manuals direct the owner to remove gasoline from the tank, carburetor or both after a certain storage period. The procedure may involve draining through a designated point, closing the fuel valve and running the carburetor dry, or a combination of steps.

    Do not assume that letting the engine stop from fuel starvation empties every part of every carburetor. If the manual also calls for draining the carburetor bowl, follow that step.

    Drain or transfer gasoline only outdoors, after the engine has cooled, into an approved fuel container. Keep flames, sparks, cigarettes and other ignition sources away. If gasoline is no longer usable, contact your local household hazardous-waste program instead of pouring it onto the ground or into a drain.

    Why We Are Not Giving You One Storage Deadline

    The manufacturers do not agree on one.

    Honda explains that gasoline can deteriorate enough to cause problems in less than 30 days under some conditions and directs owners to the storage instructions for their specific model.

    Generac recommends draining the tank and running the carburetor dry for many portable generators expected to sit longer than 30 days.

    Champion’s general guidance allows properly stabilized gasoline in the tank for a longer period under stated conditions, while warning that gasoline left in the carburetor can create trouble much sooner.

    Those differences are why advice from a neighbor, a video or another generator owner may be wrong for your machine. Find the model number, locate the correct manual and use its time period and procedure.

    Safety First

    Any step that requires the engine to run must be done outdoors in the generator’s safe operating location—not in the garage or shed where it will be stored. Operate it at least 20 feet from the home with the exhaust directed away from doors, windows and vents.

    Handle or drain gasoline outdoors only after the generator has cooled. Use an approved container, control spills and keep all ignition sources away. Never use the storage area as a convenient place for a “quick” test run.

    Review our portable generator safety guide before operating or servicing the generator.

    Check the Maintenance Hours Before You Put It Away

    A long outage can add more operating hours than several years of occasional testing.

    Check the hour meter and the maintenance table in the manual. If an oil change, air-filter service, spark-plug inspection or other scheduled work is due, completing it before storage leaves the generator ready for the next outage.

    Do not add maintenance steps simply because they appear on a generic checklist. Some manufacturers call for putting a small amount of oil into the cylinder before extended storage; others do not. Procedures and service intervals belong to the exact engine and generator.

    Record the operating hours and the work completed. A strip of masking tape on the handle is better than relying on memory, but a simple maintenance log is better still.

    Do Not Forget the Starting Battery

    If the generator has electric start, the battery needs its own storage plan.

    The manual may direct you to disconnect it, remove it, recharge it periodically or connect an approved maintainer. A short generator run may not fully recharge a battery that was heavily discharged during storage.

    Inspect the terminals for looseness or corrosion and follow the manufacturer’s temperature and charging instructions. If the generator also has a recoil starter, make sure you know how to use it—but do not treat that as a reason to neglect the battery.

    Choose the Storage Location Carefully

    Store the cooled generator upright in a dry, cool and protected location. Keep it away from standing water, direct sunlight, corrosive chemicals, pilot lights, sparks and other ignition sources.

    A fitted cover can keep off dust, but the generator must be completely cool first. Avoid trapping moisture against the machine, and do not block the area in a way that makes later inspection difficult.

    Watch for rodents and insects. Nests in an air inlet, control compartment or exhaust area can create a problem that was not there when the generator was stored.

    The right storage location is not automatically the right operating location. A garage or shed may protect a cooled generator, but a fuel-burning generator must never be run there—even with the door open.

    Store the Fuel Separately and Safely

    The generator and the spare fuel do not have identical storage rules.

    The U.S. Consumer Product Safety Commission says portable fuel containers should be kept closed in a cool, well-ventilated area and never stored inside a house, basement or near ignition sources such as pilot lights, heaters or open flames.

    Use approved, properly labeled containers and keep them out of reach of children. Check local fire-code limits before deciding how much gasoline to store or where to keep it.

    Date each container. Rotate the fuel within the period allowed by the fuel and stabilizer manufacturers rather than assuming that a full can is ready simply because it has never been opened.

    What About Propane and Dual-Fuel Generators?

    Propane avoids some of gasoline’s carburetor problems, but the cylinder has its own fire and leak hazards.

    Close the cylinder valve when it is not in use and disconnect it when the generator manual directs. Keep portable cylinders outdoors, upright and secured so they cannot fall, shift or roll. The Propane Education & Research Council advises against storing even an apparently empty portable cylinder in an enclosed area such as a house, basement, garage or shed.

    Keep cylinders away from ignition sources and added heat, and follow local rules and the cylinder supplier’s instructions.

    If you used gasoline in a dual-fuel generator, the gasoline side still needs the storage procedure specified in the manual. Switching the selector to propane does not remove gasoline left in the tank or carburetor.

    Common Storage Mistakes

    • Rolling the generator away while it is still hot
    • Leaving untreated gasoline in the system without checking the manual
    • Adding stabilizer to fuel that is already stale
    • Assuming “run it dry” empties every carburetor
    • Draining gasoline indoors or into an unapproved container
    • Covering the generator before it cools
    • Storing a propane cylinder in a garage, shed or basement
    • Ignoring maintenance that became due during a long outage
    • Letting the starting battery discharge for months
    • Storing the generator where it cannot be inspected or removed easily

    The Ready Chateau Generator Storage Checklist

    Before you walk away, confirm that you have:

    • Disconnected all loads and followed the correct shutdown sequence
    • Allowed the generator to cool completely
    • Checked for leaks, damage and maintenance due
    • Prepared the gasoline system for the expected storage period
    • Closed or positioned all controls as the manual directs
    • Addressed the starting battery
    • Stored the generator upright in a dry, protected location
    • Stored gasoline containers or propane cylinders under their separate safety rules
    • Recorded the operating hours, storage date and next test date
    • Kept the manual, cords and essential accessories where they can be found

    Before You Start It Again

    Move the generator to its safe outdoor operating location before doing anything that could start the engine.

    Inspect it for fuel or oil leaks, damaged hoses, corrosion, loose connections, debris and pest nests. Check the oil and battery. Add only fresh, approved fuel when required, then follow the manual’s return-to-service and starting procedure.

    Test it while the weather is calm. Our guide to how often you should run your generator explains how to build that check into a regular readiness routine.

    If the generator has already sat with old fuel and will not start, begin with our guide to why a generator may not start after sitting rather than repeatedly pulling the starter or adding more fuel.

    Put It Away Ready, Not Merely Out of Sight

    Generator storage is not about making room in the garage. It is about preserving a machine your household may need without warning.

    Shut it down correctly. Let it cool. Follow the model-specific fuel procedure. Complete the maintenance that is due, protect the battery and store the generator and its fuel safely.

    Then write down what you did.

    The next outage should not begin with you wondering what was left in the tank the last time the lights came back on.

  • What Can You Actually Run During a Power Outage?

    What Can You Actually Run During a Power Outage?

    When the power goes out, the goal is not to recreate normal life. It is to keep the household safe, protect the things that matter and use limited backup power where it does the most good.

    That means the first question is not, “How much can my generator or power station run?” It is, “What must keep working, and what can wait?”

    Short Answer

    Most households can cover a useful group of essentials with far less power than the whole house normally uses. A refrigerator, a few LED lights, phones, a modem or router and a portable fan may fit within a modest backup plan. Pumps, furnace blowers, medical equipment, cooking appliances and air conditioning require more careful planning.

    Whether a load will work depends on four things:

    • The power source’s continuous output
    • The extra power a motor or compressor needs when it starts
    • The voltage and connection the equipment requires
    • How long the battery or fuel must last

    A backup source can have enough watts to start a refrigerator but not enough stored energy to run it overnight. It can also have plenty of battery capacity but too little surge output to start the compressor. You have to check both power and runtime.

    Power the Household in Layers

    1. Protect health and immediate safety

    Equipment that supports breathing, mobility, medication, temperature control or another health need comes first. Do not estimate a medical device’s requirements from a generic chart. Use its exact label and instructions, and confirm the backup plan with the device manufacturer, supplier and health-care provider.

    Extreme heat or cold can also turn comfort into a safety issue. A fan may help someone feel cooler, but the CDC warns that fans alone do not prevent heat-related illness when temperatures are very high. Know where you can go if the home becomes unsafe.

    2. Protect refrigeration and necessary household systems

    A refrigerator or freezer is often the largest load in a basic outage plan. It cycles rather than running continuously, but its compressor can require several times more power for a moment when it starts.

    A sump pump, well pump or furnace blower may be even more important in some homes. These loads often have motors, high starting demand, hardwired connections or 240-volt requirements. They should not be added to a portable setup by guesswork.

    3. Keep communication and safe lighting available

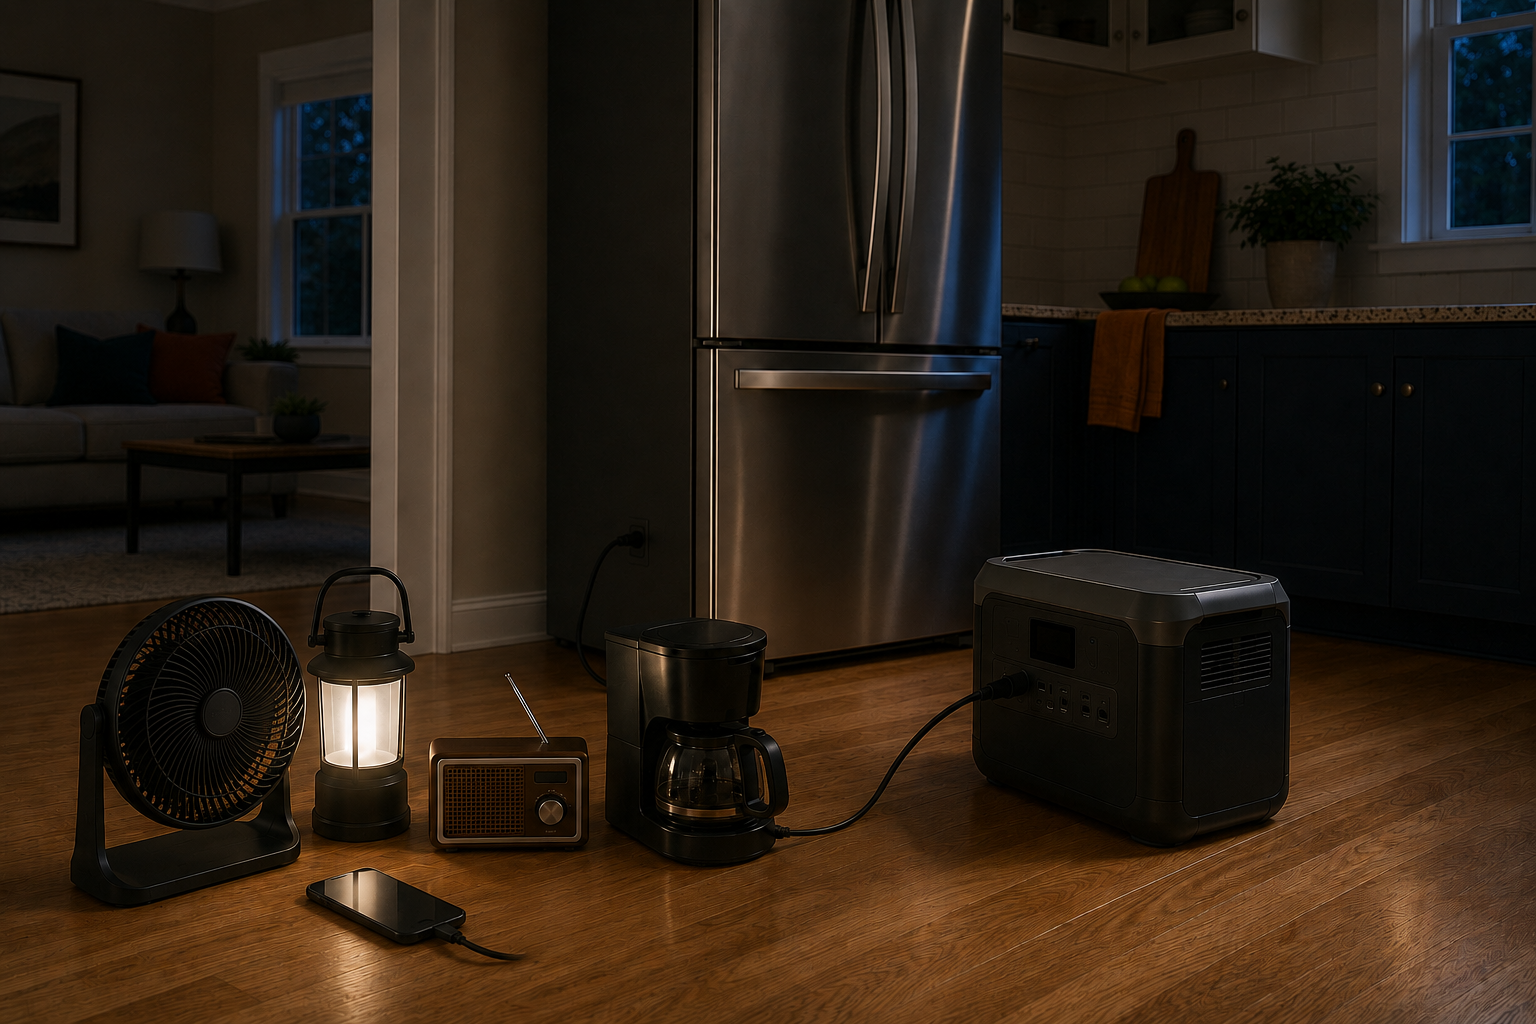
    Phones, a modem or router, a radio and a few LED lights usually use much less power than heating, cooling or cooking appliances. They are often the easiest loads to keep running, and they help the household receive alerts, contact others and move safely after dark.

    Internet service may still be unavailable if the provider’s local equipment has lost power. Keep another way to receive emergency information.

    4. Add comfort and convenience only after the essentials fit

    A television, laptop, fan or small kitchen appliance may be reasonable when capacity allows. Electric heat, hot plates, toaster ovens, hair dryers and similar resistance-heating loads consume a large share of a small power station’s output and energy.

    Use them only if the source, connection and runtime plan can safely support them. During a limited outage, a lower-power alternative is often the better choice.

    A Quick Load Guide

    These figures are planning examples, not ratings for your equipment. Check the appliance label and manufacturer’s information before relying on any backup source.

    Load or groupTypical planning demandMain limit
    Phone chargers, LED lights, modem/routerUsually tens of watts each or lessAdd the label watts for every item. These are often the easiest loads to support.
    Refrigerator or freezerAbout 130–200W running; roughly 1,200–1,600W starting in Honda examplesThe compressor’s startup surge and the appliance’s cycling determine output and runtime needs.
    Portable fanAbout 40W running and 120W starting in Honda’s exampleUseful for comfort, but not a substitute for air conditioning in dangerous heat.
    Laptop or televisionOften about 50–250W eachActual model, brightness, charging and use can change demand.
    Microwave or coffee makerRoughly 600–1,500W while operatingHigh draw but short use. It may be practical to run one by itself.
    Sump pump, well pump or furnace blowerFrom hundreds to more than 2,000W; starting demand may be much higherCheck motor startup, voltage and whether the equipment is hardwired.
    Space heater or portable electric cookingOften about 1,300–1,500WThese loads can consume a small system’s output and stored energy quickly.
    Central air, electric water heater, range or dryerSeveral thousand watts; commonly 240V and hardwiredUsually outside a small portable-backup plan. Use a properly designed system.

    The ranges above are drawn from representative manufacturer planning examples. They show the scale of the problem; they do not replace the ratings for your equipment. A newer refrigerator, a larger pump or a different appliance may be far outside the example.

    A Realistic Essential-Load Example

    Suppose a household wants to run:

    • A refrigerator using 200W after startup
    • Four 10W LED bulbs
    • A 40W portable fan
    • A 15W modem and router
    • Two phone chargers using 30W together

    The combined running load is about 325W. That looks small, but the refrigerator may need about 1,600W for a moment when its compressor starts. If the other loads remain on, the source may need to supply roughly 1,725W during that start.

    A backup source with 1,000W of continuous output but only 1,000W of surge output would not be a dependable match for this example. A source with sufficient surge capacity may operate the group, but runtime is a separate question.

    For a generator, use How Much Generator Do I Need? to enter the actual running and starting figures. For a battery system, the refrigerator-runtime calculator can estimate how long the stored energy may last.

    What a Portable Power Station Can Usually Handle

    A portable power station is often a good fit for electronics, LED lighting, communication equipment and selected appliances that stay within its output limits. Larger stations may also operate a refrigerator, freezer, fan or certain medical devices if the exact startup, continuous-output and compatibility requirements are met.

    The number marked in watts tells you how much power the station can deliver at one time. The number marked in watt-hours tells you roughly how much energy it stores. Neither number replaces the other.

    A station that can start every connected load may still run out of energy quickly if it is powering a heater, cooking appliance or several devices continuously. Compare the two types of backup in Portable Power Station vs. Generator if you are still deciding which system fits your needs.

    What a Portable Generator Changes

    A portable generator can generally support larger or longer-running loads because it continues producing power while fuel is available. It still has output, voltage, receptacle, cord, fuel and connection limits.

    Do not add loads until a generator trips and call that a plan. Overloading can shut the system down when an essential motor starts. It can also overheat an undersized cord or create other hazards.

    A fuel-burning generator must operate outdoors only, at least 20 feet from the home, with the exhaust directed away from doors, windows and vents. Never operate one in a garage, porch, carport, shed or other enclosed or partly enclosed space. Never connect it to a wall outlet. Read the portable-generator safety guide before using one.

    240-Volt and Hardwired Loads Are a Separate Decision

    A wattage total does not tell you whether the equipment can be connected.

    Many well pumps, sump pumps, furnace blowers, central air conditioners, electric water heaters, ranges and dryers are hardwired or require 240V. Many portable power stations provide only 120V, and a generator’s full advertised output may not be available through every receptacle.

    Do not improvise a connection or alter household wiring. If the outage plan includes hardwired or 240V equipment, have a qualified electrician verify the power source, voltage, transfer equipment, inlet, breaker and local requirements.

    Medical Equipment Needs Its Own Plan

    An electrically powered medical device should not be treated as one more row in a household wattage chart.

    Ready.gov recommends talking with the medical provider about a power-outage plan for devices and refrigerated medicines. The FDA also advises checking the device instructions or contacting the distributor or manufacturer to determine whether the equipment can be used with a battery or generator.

    Confirm:

    • The device’s exact input and startup requirements
    • Whether it requires a particular power quality, accessory or backup battery
    • How long it can safely be without power
    • Who to contact if the backup fails
    • Where the person can go if the home becomes unsafe

    Do not change treatment, disconnect equipment or substitute an unapproved power source based on a generic online estimate. Make the medical backup plan with the appropriate provider and device professionals before an outage.

    Manage Loads Instead of Powering Everything at Once

    The 1960s sitcom Green Acres turned the need to manage generator loads into a running joke. Oliver Douglas assigned every appliance a number because the farmhouse generator could support only so much at once, and Lisa kept choosing combinations that exceeded the limit. The comedy was exaggerated; the electrical lesson was not. During a real outage, the same idea is called load management.

    Think of a generator or power station as a power budget. The refrigerator, pump and essential equipment get first claim. A coffee maker, microwave, television or other convenience load can take a turn when the plan leaves enough room for essential equipment to restart.

    Start large motors separately. Turn off a microwave, coffee maker or other high-draw appliance while a pump or refrigerator is starting. Charge phones and battery packs when other demand is low. Keep refrigerator and freezer doors closed so the compressors do not have to work as hard.

    Remember that some equipment restarts automatically. A refrigerator, freezer, pump or furnace blower can switch on while another appliance is operating. If two large loads could start together, the source and connection plan must account for it or reliably prevent it.

    Load management is not permission to exceed a rating. Every operating combination must remain within the limits of the power source, receptacle, cord, inlet and transfer equipment.

    Make Your Outage Load List Before You Need It

    Use this process while the power is still on:

    • Divide equipment into “must run,” “helpful” and “can wait.”
    • Record the voltage, running watts and starting watts from the label or official manual.
    • Mark every motor, compressor, 240V load and hardwired connection.
    • Add the running demand for equipment that may operate together.
    • Add the largest realistic startup demand.
    • Compare the result with every limit in the power path.
    • Estimate how long the battery or fuel must last.
    • Test the exact setup under safe, supervised conditions.

    If a rating or connection is unclear, stop and verify it with the manufacturer or a qualified professional. Guessing low does not make the load smaller.

    Bottom Line

    During an outage, a few carefully chosen loads can do more for the household than trying to power everything.

    Protect health first. Keep refrigeration, communication and safe lighting available. Add fans, electronics and short-use appliances only when capacity allows. Treat pumps, medical devices, hardwired equipment and 240V loads as special cases that require exact information.

    Then calculate with the real ratings, plan the runtime and test the setup before the next outage.

    If you are building the rest of the household plan, start with What to Do When the Power Goes Out.

  • How Long Can a Portable Power Station Run a Refrigerator?

    How Long Can a Portable Power Station Run a Refrigerator?

    Short answer

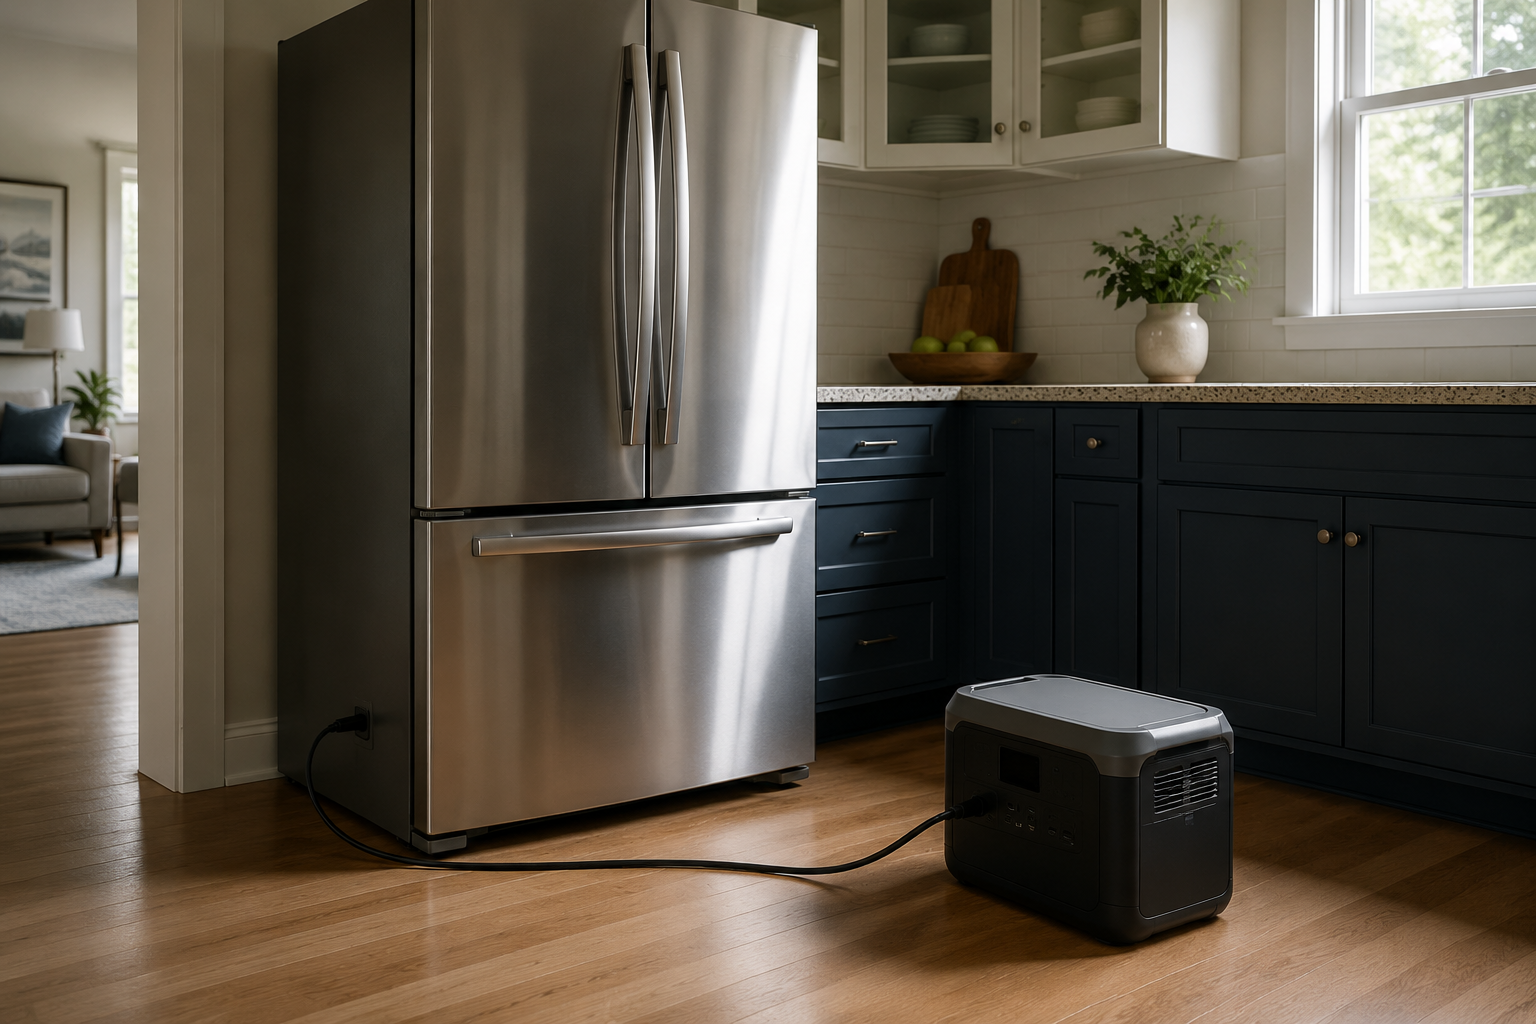
    A portable power station can run a refrigerator for a few hours, overnight, or longer than a day. The answer depends on the station’s usable battery capacity and the refrigerator’s actual energy use—not the size of your home or the largest watt number on the appliance label.

    For example, a 1,024Wh power station with about 85% usable AC energy is estimated to run a refrigerator rated at 500kWh per year for about 11 hours when the calculation includes a 20% operating allowance and 10W of station idle draw. Your result may be very different.

    The safest way to plan is to answer two separate questions:

    1. Can the power station start and continuously run the refrigerator?
    2. If it can, how long will the battery last?

    First, make sure the station can run the refrigerator

    Battery capacity and AC output are not the same thing. Battery capacity is measured in watt-hours, or Wh. It tells you how much energy the station stores. AC output is measured in watts, or W. It tells you how much power the station can deliver at one time.

    A station may have enough watt-hours for a long runtime but still shut down when the refrigerator compressor starts. Before relying on it, compare:

    • The station’s continuous output with the refrigerator’s running watts.
    • The station’s surge output with the refrigerator’s starting watts.

    Use ratings from the refrigerator manufacturer, power-station manufacturer, or a meter that can capture startup demand. If you cannot verify starting watts, do not assume the station will handle them. Test the exact combination before an outage.

    If a portable battery is not the right fit for the loads you need to cover, review Portable Power Station vs. Generator. If you are considering a fuel-powered generator, use How Much Generator Do I Need? to size it correctly.

    Use energy consumption—not maximum watts—to estimate runtime

    A refrigerator does not draw the same amount of power all day. Its compressor cycles on and off, and defrost heaters, fans, ice makers, room temperature, and door openings all affect energy use.

    That is why a sticker showing running or maximum watts is a poor runtime estimate. It describes power at a moment in time, not the energy used over a full day.

    The better starting point is one of these:

    The annual figure is still an estimate. Actual consumption changes with the refrigerator, room temperature, door openings, settings, age, condition, and how much warm food is added.

    Refrigerator runtime calculator

    Enter the power station’s battery capacity and your refrigerator’s annual or measured energy use. The calculator also lets you account for usable AC energy, station idle draw, other continuous loads, and a real-world operating allowance.

    The result is a planning estimate. It assumes the station is not being recharged by a wall outlet, vehicle, or solar panels while it is operating.

    Use your refrigerator’s annual energy use or a measured 24-hour total. The result is a planning estimate, not a guarantee.

    1. Estimate Runtime

    2. Optional: Check Whether the Station Can Start the Refrigerator

    Runtime capacity and AC output are different. Enter verified ratings below; leave unknown values blank.

    Food-safety reminder: An unopened refrigerator keeps food safe for about four hours without power. Keep the door closed, use an appliance thermometer, and follow current USDA guidance if food has been above 40°F.

    This calculator assumes no solar or wall recharging while the refrigerator is running. Do not use refrigerator nameplate or startup watts as a 24-hour energy estimate.

    How the calculator works

    The calculation starts by converting the refrigerator’s annual energy figure into average daily energy use:

    Daily refrigerator energy (Wh) = annual kWh × 1,000 ÷ 365

    It then adds the operating allowance you selected and converts daily energy into an average 24-hour load. Station idle draw and any other continuous loads are added before the usable battery energy is divided by the total average load.

    Estimated runtime (hours) = usable battery Wh ÷ total average load W

    The calculator defaults to 85% usable AC energy as a planning estimate. That value accounts broadly for energy that does not reach the appliance, but it is not universal. Use tested or manufacturer information for your power station when available.

    Worked example

    Assume the following:

    • Power station capacity: 1,024Wh
    • Usable AC energy: 85%
    • Refrigerator EnergyGuide rating: 500kWh/year
    • Extra refrigerator-use allowance: 20%
    • Station idle draw: 10W
    • Other loads: 0W

    The station has about 870Wh of usable energy. The refrigerator’s label works out to about 1,370Wh per day before the allowance and about 1,644Wh per day after it. That is an average refrigerator load of roughly 68.5W. Adding 10W of station idle draw produces a total average load of about 78.5W.

    870Wh ÷ 78.5W = about 11.1 hours

    This example does not promise that every 1,024Wh station will run every refrigerator for 11 hours. It shows how the inputs change the answer.

    What can shorten runtime?

    • Hot rooms. A refrigerator in a hot kitchen or garage may run more often.
    • Frequent door openings. Every opening lets cold air out and warm, humid air in.
    • Warm food. Adding a large amount of unfrozen or warm food increases the cooling load.
    • An older or poorly maintained refrigerator. Dirty condenser coils, worn door seals, and mechanical problems can increase energy use.
    • Battery temperature and age. Available battery energy can change with condition and operating temperature.
    • Station idle draw. The inverter, display, fans, and internal electronics use energy even when the compressor is off.
    • Other connected devices. A router, lights, chargers, or another appliance will reduce refrigerator runtime.

    How to make the battery last longer

    • Keep the refrigerator and freezer doors closed as much as possible. Decide what you need before opening the door.
    • Disconnect nonessential loads. Reserve the station for refrigeration and truly necessary devices.
    • Start with a fully charged station and verify the battery’s state of charge before severe weather.
    • Keep the refrigerator maintained. Follow the manufacturer’s instructions for cleaning coils, checking airflow, and inspecting door seals.
    • Test before you need it. Run the refrigerator from the station under supervision and record the battery percentage over several hours. A real test of your equipment is more useful than a generic online estimate.

    Food safety still depends on temperature

    A runtime number does not tell you whether food is safe. FoodSafety.gov says an unopened refrigerator will keep food safe for up to four hours during a power outage. Keep the door closed as much as possible.

    Use an appliance thermometer. If the refrigerator has been without adequate cooling, follow current USDA guidance for food exposed above 40°F. Never taste food to decide whether it is safe.

    For a broader outage plan—including lighting, communication, water, and food decisions—see What to Do When the Power Goes Out.

    Frequently asked questions

    Will a 1,000Wh power station run a refrigerator overnight?

    It may, but the battery-capacity number alone cannot answer the question. Use the refrigerator’s annual or measured energy use, include station losses and idle draw, and confirm that the station can handle the compressor’s starting surge.

    Is a 2,000W power station the same as a 2,000Wh power station?

    No. A 2,000W rating describes output power. A 2,000Wh rating describes stored energy. You need enough output to start and run the refrigerator and enough stored energy for the runtime you want.

    Can I run a refrigerator and a router at the same time?

    Yes, if their combined running and startup demands stay within the station’s ratings. Add the router and any other continuous loads to the runtime calculator because they reduce how long the battery lasts.

    Will solar panels keep the refrigerator running indefinitely?

    Not necessarily. Solar production changes with weather, season, shade, panel position, and the station’s charging limits. Treat solar as a possible energy input, not a guarantee of continuous operation.

    Bottom line

    Do not choose refrigerator backup by watt-hours alone. First verify that the power station’s continuous and surge output can operate the refrigerator. Then estimate runtime from annual or measured energy use, include station losses and idle draw, and test the setup before an outage.

    A calculator can give you a useful planning number. Your own refrigerator, power station, room conditions, and usage determine the real result.

  • How Much Generator Do I Need for My House?

    How Much Generator Do I Need for My House?

    Shopping for a generator by house size sounds simple. A small house needs a small generator, a large house needs a large one and somewhere in the middle is the right answer for everyone else.

    That shortcut does not work very well.

    A 2,500-square-foot home with gas heat, gas water heating and a plan to power only the refrigerator, lights and phones may need less backup power than a much smaller all-electric home with a well pump, electric heat and medical equipment.

    The right generator size depends on what your household actually needs to run—not the number of bedrooms or square feet.

    The Short Answer

    List the equipment you need during an outage. Add the running watts for everything that may operate at the same time. Then account for the additional power that the largest motor or compressor may require when it starts.

    After that, confirm that the generator provides the correct voltage, enough output on the fuel you intend to use and a safe way to connect the equipment.

    That calculation can help you estimate a portable generator for ordinary household essentials. If your plan includes central air conditioning, electric heat, a well pump, medical equipment, several large motors or most of the house, have a qualified electrician or generator professional confirm the size and connection system.

    Decide What Needs Power

    Do not start with the house’s square footage. Start with the outage you are planning for and the loads that protect health, safety and the home.

    For many households, the first list includes:

    • A refrigerator or freezer
    • Necessary medical equipment
    • A sump pump, well pump or furnace blower
    • A limited amount of lighting
    • Phones, radios and internet equipment
    • Fans, a window air conditioner or another practical cooling plan
    • Anything else the household cannot safely go without

    Then separate essentials from conveniences. A microwave may be useful, but it does not have to run while a pump is starting. A clothes dryer may matter during a long outage, but it may not justify enough generator capacity to operate normally. Managing when equipment runs can reduce generator size, fuel use and cost.

    If you are still deciding whether a fuel-powered generator is the right backup system, compare a portable power station and a generator before sizing either one.

    Choose How Much of the House You Want to Power

    Most backup-power plans fall into one of three levels:

    • Plug-in essentials: A portable generator supplies a refrigerator, freezer, lights, chargers and other modest equipment through properly rated extension cords. This generally does not cover hardwired loads.
    • Selected circuits: A qualified electrician installs approved transfer equipment and a power inlet so the generator can supply chosen household circuits. This also makes deliberate load management easier.
    • Whole-home operation: Heating, central cooling, cooking and water heating can move the project beyond a simple portable-generator calculation. A standby system should be evaluated as one professionally installed electrical and fuel system.

    Understand Running Watts and Starting Watts

    Running watts are the power an appliance uses after it is operating. Starting watts—also called surge watts—describe the brief increase some motors and compressors need when they start.

    Your generator must support the combined running load and a realistic startup event while the other planned loads are operating. This is why adding only running watts can produce a generator that looks adequate but trips or stalls when a refrigerator, pump, furnace blower or air conditioner starts.

    Wattage charts use “starting watts” in two different ways. Some list the appliance’s total demand during startup. Others list only the additional watts above its normal running load.

    For example, an appliance that uses 300 running watts and 1,200 total starting watts needs 900 additional watts during startup:

    1,200 total starting watts − 300 running watts = 900 additional starting watts

    If a chart already provides additional starting watts, do not subtract the running watts again. Always follow the definition used by the equipment manufacturer or calculator.

    Where to Find the Wattage

    Use actual equipment information whenever possible. Check:

    • The appliance identification label or nameplate
    • The owner’s manual
    • The manufacturer’s official specifications
    • The generator manufacturer’s sizing guide
    • A qualified electrician, HVAC professional or equipment dealer for hardwired or high-demand loads

    Generic wattage charts are useful for an early estimate, but they should not be treated as the exact requirement for every refrigerator, pump or air conditioner. Honda’s wattage guide and Champion’s wattage chart both show how widely common household loads can vary.

    Some labels provide volts and amps instead of watts. Manufacturer guides sometimes estimate watts by multiplying volts by amps. That can be a useful planning shortcut for simple loads, but alternating-current motors and compressors introduce starting demand and other factors that the shortcut may not capture accurately.

    If the label is unclear—or the equipment is hardwired—do not guess.

    Common Household Wattage Estimates

    The figures below are useful for early planning. They are not model-specific ratings. Use the appliance nameplate, owner’s manual or manufacturer’s specifications when available.

    The “total starting watts” column is the appliance’s approximate total demand during startup—not just the extra surge above its running load. “Same as running” means the chart does not assign a separate startup surge. Voltage still must be checked separately, especially for pumps, water heaters and other hardwired equipment.

    Household loadTypical running wattsTypical total starting watts
    Refrigerator150–400 W800–1,200 W
    Freezer100–500 W500–1,000 W
    Window AC (5,000 BTU)450–600 W900–1,200 W
    Window AC (10,000 BTU)900–1,200 W1,800–2,400 W
    Furnace fan (1/2 HP)300–800 W800–1,600 W
    Sump pump (1/3 HP)500–800 W1,000–1,600 W
    Sump pump (1/2 HP)800–1,050 W1,300–2,150 W
    Well pump (1/2 HP)750–1,000 W1,500–2,000 W
    Microwave600–1,200 WSame as running
    Space heater750–1,500 WSame as running
    Television (32–55 in.)80–400 WSame as running
    LED light bulb8–15 WSame as running
    Phone or laptop charger20–100 WSame as running
    CPAP with heated humidifier60–120 WSame as running
    Internet router and modem10–20 WSame as running
    Electric water heater3,000–4,500 WSame as running

    How to Calculate Your Generator Requirement

    Use this process for an initial estimate:

    • List every appliance and device you expect to power.
    • Record its voltage, running watts and total starting watts. Note whether a source gives total or additional starting watts.
    • Decide which loads may operate at the same time and add their running watts.
    • Find the largest additional startup demand likely to occur while the other loads are running.
    • Add that startup demand to the simultaneous running total.
    • Compare the result with the generator’s running and surge ratings, voltage, receptacles, breaker limits and output on the fuel you will use.

    Do not plan to operate continuously at the absolute edge of the rating. Follow the manufacturer’s sizing guidance rather than applying an unsupported universal percentage.

    Generator Sizing Calculator

    Use the calculator on this page to add the appliances and devices that may run at the same time. Choose a built-in estimate or replace it with information from your own equipment.

    The calculator reports the simultaneous running load, an estimated peak with the largest single startup event, a more conservative all-motors-start estimate and a warning for 240-volt loads.

    Treat the results as planning figures—not a generator recommendation. Compare them with the generator’s fuel-specific running and surge ratings, voltage, receptacles, breakers and connection equipment.

    Enter total starting watts, not only the extra startup amount. Add identical appliances as separate loads.

    This calculator estimates electrical demand; it does not select a generator. Compare the result with the generator’s continuous and surge ratings on the fuel you will use, plus voltage, receptacles, breakers and connection equipment. Have hardwired, medical, central-HVAC, whole-home or uncertain loads professionally evaluated.

    A Simple Household Example

    Suppose a household plans to run a refrigerator, freezer, LED lights, internet equipment, chargers and a portable fan. Its estimated loads are:

    • Refrigerator: 300 running watts; 1,200 total starting watts
    • Freezer: 300 running watts; 1,000 total starting watts
    • All other selected loads: 300 running watts

    The simultaneous running load is 900 watts. The refrigerator adds the largest startup demand: 1,200 total starting watts minus 300 running watts, or 900 additional watts.

    The estimated peak is therefore 900 running watts plus 900 additional starting watts, or approximately 1,800 watts.

    That is a planning figure, not a recommendation to buy a generator labeled 1,800 watts. Actual equipment data, automatically cycling loads, voltage, connection limits and the manufacturer’s recommended allowance still matter. If the refrigerator and freezer could start together, account for that possibility or manage the loads.

    Check the Generator, Not Just the Total Watts

    A generator can have enough advertised wattage and still be wrong for the job. Before buying, check four things:

    • Voltage: A 240-volt load requires a generator and connection system that provide compatible 240-volt power. An adapter cannot create voltage or capacity.
    • Fuel rating: Dual- and tri-fuel generators may produce less power on propane or natural gas than on gasoline. Use the rating for the fuel you expect to burn.
    • Continuous and surge output: Compare normal household demand with running watts and motor-starting demand with surge watts.
    • The complete power path: Receptacles, breakers, cords, power inlets and transfer equipment can limit how much power reaches the load.

    Generac’s guidance on portable-generator power limits illustrates why the largest number on the box may not be available through every protected receptacle. The generator is only one part of the system; every component between it and the appliance must be appropriate for the load.

    If the plan includes a well pump, electric water heater, range, dryer, central air conditioner or other hardwired 240-volt equipment, have a qualified electrician verify the generator and connection plan.

    Use Load Management Before Buying More Generator

    You may not need to operate everything at once. A microwave, coffee maker or water heater can usually wait while a pump or compressor starts.

    Honda’s sizing guidance shows how starting large loads at different times can allow a smaller generator to serve more equipment. Manual load management may be as simple as turning one appliance or circuit off before using another.

    The plan still has to be realistic. Refrigerators, freezers, pumps and furnace blowers can restart automatically. If two large motors can start together, include that possibility in the calculation or use a dependable system that prevents it.

    A smaller generator can cost less, use less fuel and be easier to move. The tradeoff is paying closer attention to what is running.

    When to Stop Calculating and Call a Professional

    A homeowner worksheet is useful for understanding the problem. It is not a substitute for professional sizing when the project includes:

    • Central air conditioning or a heat pump
    • Electric resistance heat or electric water heating
    • A hardwired well pump, sump pump or furnace with uncertain starting data
    • Medical equipment that cannot safely lose power
    • Several large motors that may start together
    • A connection to household wiring
    • Whole-home standby operation
    • A service panel, fuel supply or load requirement you do not understand

    A qualified electrician can verify the actual loads, voltage, transfer equipment, inlet, breaker and local requirements. A standby-generator professional can also evaluate fuel supply, equipment placement and load-management options.

    Safety First

    Never connect a generator to a wall outlet. Supplying household wiring requires approved transfer equipment installed by a qualified electrician. Improper backfeeding can energize utility lines, injure or kill utility workers and create electrical or fire hazards.

    Operate a portable fuel-burning generator outdoors only, at least 20 feet from the home, with the exhaust directed away from doors, windows and vents. Keep the generator and electrical connections dry, use working carbon-monoxide alarms and follow the manufacturer’s instructions.

    Review our complete portable-generator safety guide before planning how the generator will be placed and connected. The U.S. Consumer Product Safety Commission also provides current generator and carbon-monoxide guidance.

    Generator Sizing Checklist

    Before choosing a generator, confirm that you have:

    • Listed the loads that truly need power
    • Used actual running, total starting and voltage information where available
    • Calculated what may run at the same time and allowed for realistic motor starts
    • Checked the generator’s ratings for the fuel you will use
    • Checked receptacle, breaker, cord, inlet and transfer-equipment limits
    • Decided how large loads will be managed
    • Obtained professional help for hardwired, high-demand, medical or whole-home loads and planned a safe connection and operating location

    Buy for the Plan, Not the House

    The right generator is not the one assigned to your square footage by a generic chart.

    It is the one that can safely support the electrical loads your household has decided are important—without depending on wishful math, an incompatible connection or more fuel than you can reasonably store and obtain.

    Start with the loads. Calculate the running and starting demand. Check the voltage, fuel rating and connection limits. Manage what does not need to run at the same time.

    Then choose the generator.

    Once you own it, the work is not finished. Learn why a generator may not start after sitting and how often to run your generator so the equipment you sized carefully is actually ready when the power goes out.

  • How Often Should You Run Your Generator?

    How Often Should You Run Your Generator?

    A portable generator can sit quietly for months and still look ready. The fuel tank may be full, the oil may be clean and the extension cords may be stacked beside it. None of that proves the generator will start when the power goes out.

    Running it on a regular schedule gives you a chance to find problems while the lights are still on and replacement parts, fresh fuel and help are easier to find.

    The short answer is that once a month is a practical starting point for many portable generators—but your owner’s manual controls. Manufacturers do not all prescribe the same interval, run time or storage method. The correct schedule depends on the generator, fuel system, battery and the way the manufacturer expects it to be stored.

    Start With the Manual, Not a Universal Rule

    Honda advises owners to run a portable generator at least once a month. Generac also discusses monthly running, but says that when monthly operation is not possible, the generator should be run at least every three months for 30 minutes.

    Those examples show why “run every generator for exactly 30 minutes each month” is too broad. A manufacturer may specify a different interval, a particular startup and shutdown sequence, whether loads should be connected and how the fuel system should be prepared between uses.

    Find the exact manual for your model. If the paper copy is missing, locate the model number on the generator’s identification label and search the manufacturer’s official support or manuals page. Confirm that the model number on the manual matches the machine before following it.

    Portable and Standby Generators Are Not the Same

    This article focuses primarily on portable generators—the machines homeowners move outside, fuel and connect when needed.

    A permanently installed standby generator usually has an automatic exercise cycle controlled by its own system. Depending on the model, that cycle may run weekly, every two weeks or monthly. For example, some Generac standby models allow weekly, biweekly or monthly exercise schedules.

    Do not replace or override a standby generator’s programmed schedule with generic portable-generator advice. Check its controller, owner’s manual and service requirements. If an automatic exercise does not occur when expected or the unit displays a warning, address that problem rather than assuming the generator is ready.

    What Regular Exercise Actually Accomplishes

    Regular operation is useful because it can:

    • Confirm that the engine starts
    • Circulate engine oil
    • Move fuel through the system when the generator is stored with fuel as permitted by the manufacturer
    • Help maintain the starting battery on models designed to charge it while running
    • Reveal fuel leaks, oil leaks, unusual sounds or unstable operation
    • Confirm that the generator is producing usable electrical power
    • Give you practice with the correct startup and shutdown procedure

    The last two points are easy to overlook. Hearing the engine run is encouraging, but the generator’s purpose is to produce electricity. A meaningful test should confirm more than the sound of the engine.

    Should You Test the Generator Under Load?

    If the owner’s manual permits it, testing with a modest, known electrical load gives you more information than letting the engine idle with nothing connected. It helps confirm that the outlets, circuit protection and power-producing side of the generator are functioning.

    That does not mean connecting every appliance you hope to use during an outage. Follow the manufacturer’s loading procedure and remain within the generator’s rated capacity. Start with electrical loads disconnected or switched off if the manual requires it, allow the engine to stabilize and then add the test load as directed.

    A simple load might be a suitable work light or another device whose power requirement is known and comfortably within the generator’s capacity. Do not use sensitive or expensive electronics as the first test device, and do not improvise a connection to household wiring.

    If the generator supplies home circuits through transfer equipment, follow the operating instructions provided for that system. Transfer equipment should be installed by a qualified electrician. Never connect a generator to a wall outlet or use a cord with male plugs on both ends.

    A Practical Monthly Generator Check

    Use the schedule and procedure in your manual. For a portable generator that calls for regular exercise, the following routine provides a practical framework.

    1. Choose a Safe Day and Location

    Do not run a fuel-burning generator inside a garage, shed, basement, porch, carport or other enclosed or partially enclosed space—even for a short maintenance test.

    Move it to the same safe outdoor location you plan to use during an outage. The U.S. Consumer Product Safety Commission says portable generators should be operated outside only, at least 20 feet from the home, with the exhaust directed away. Keep doors and windows closed near the exhaust path.

    Choose dry conditions and a firm, level surface. If you cannot keep the generator dry while meeting its outdoor clearance requirements, postpone the test rather than moving it into an unsafe location.

    2. Inspect Before Starting

    Before every test, look for:

    • Fuel or oil leaks
    • Cracked or deteriorated fuel lines
    • Loose or damaged components
    • Debris or pest nests around air inlets and the exhaust
    • Damaged receptacles
    • Frayed cords or broken plugs
    • Correct oil and fuel levels
    • Maintenance that is due

    Do not start a generator that is leaking fuel or shows electrical or mechanical damage you do not understand.

    3. Follow the Correct Startup Procedure

    Use the sequence in the manual. Control positions, choke operation, fuel valves, battery switches and circuit breakers vary among models.

    Start with electrical loads disconnected or off when instructed. Allow the engine to warm and stabilize before applying a load. Pay attention to difficult starting, surging, smoke, unusual vibration or warning lights.

    4. Run It for the Specified Time

    Use the run time stated by the manufacturer. If the manual recommends monthly exercise but does not give a duration, contact the manufacturer for model-specific guidance rather than treating an internet rule as authoritative.

    The purpose is not to burn fuel for its own sake. The generator should reach normal operation long enough for you to observe how it runs and, when permitted, verify electrical output with a suitable load.

    5. Shut It Down Correctly

    Remove or switch off electrical loads as instructed before stopping the engine. Follow the manufacturer’s cooldown and shutdown sequence, close the fuel valve or vent when required and allow the generator to cool before moving, covering or refueling it.

    Record the date, run time, hour-meter reading and anything unusual. A simple log makes scheduled maintenance easier and helps you notice a generator that is becoming harder to start.

    Running the Generator Does Not Fix Old Fuel

    Regular exercise and proper fuel storage are related, but they are not interchangeable.

    Starting the generator every month does not make deteriorated gasoline fresh again. It can instead move poor fuel through the carburetor and engine. Fuel treatment, draining and storage instructions vary by model, fuel type and expected storage period.

    Honda’s guidance for several inverter models says that when the generator will be operated less than once a month, the carburetor should be drained. Generac recommends draining the fuel tank and running the carburetor dry when some portable models will be stored for more than 30 days. Your generator may have different requirements.

    Decide which storage method you will follow before filling the tank. Do not add stabilizer automatically, leave fuel in the carburetor or drain a system based only on general advice. Use the fuel type, treatment method and storage procedure specified for your generator.

    If your generator has already sat with old fuel and will not start, review why a generator may not start after sitting before repeatedly pulling the starter or adding more fuel.

    Do Not Forget the Starting Battery

    An electric-start generator can run perfectly and still leave you with a dead starting battery months later.

    Some generators charge the battery while operating, but a short exercise may not restore a deeply discharged battery. Others require a charger or maintainer during storage. Honda recommends keeping electric-start generator batteries fully charged for maximum service life.

    Follow the battery-charging instructions for your model. Inspect terminals for looseness or corrosion, and do not assume that monthly engine operation replaces every battery-maintenance requirement.

    If the generator also has a recoil starter, practice using it while conditions are calm. Knowing that a backup starting method exists is different from knowing you can operate it correctly.

    Exercise Is Not the Same as Maintenance

    A successful monthly start does not mean maintenance can be ignored. Oil, air filters, spark plugs, batteries, fuel systems and valve clearances may be serviced according to operating hours, calendar time or both.

    Check the maintenance table in the manual and use the hour meter if the generator has one. Record outage use as well as exercise time. A generator that runs for several days during an outage may reach a maintenance interval long before the next calendar reminder.

    Regular testing should reveal whether maintenance is due—not replace it.

    Test the Entire Setup, Not Just the Engine

    At least before the season when outages are most likely, review the equipment that makes the generator useful:

    • Approved outdoor-rated extension cords
    • Plugs and receptacles
    • Transfer equipment, if installed
    • Carbon-monoxide alarms and their backup batteries
    • Weather protection allowed by the generator manufacturer
    • Approved fuel containers
    • The correct oil and basic maintenance supplies
    • The load plan showing what you intend to power

    Our portable generator safety guide explains the placement, carbon-monoxide, electrical, weather and refueling rules that apply during a test just as they do during an outage.

    A generator that starts but cannot be placed, connected or fueled safely is not fully ready.

    When Should You Test More Often?

    A regularly scheduled exercise is the baseline. An additional test may be sensible:

    • Before hurricane, winter-storm or severe-weather season
    • Before a forecast event likely to cause outages
    • After maintenance or repair
    • After changing the fuel-storage method
    • After the generator has been transported
    • After unusually long storage
    • After any test that produced difficult starting, surging, leakage or warning indications

    Do not wait until the storm is close enough that testing creates a rush for parts or fuel. Give yourself time to correct a problem safely.

    When to Stop Testing and Get Help

    Shut the generator down if you notice a fuel leak, oil leak, electrical arcing, smoke that is not normal for startup, strong fuel odors, repeated breaker trips, unstable engine speed or unusual mechanical noise.

    Do not keep restarting a damaged or leaking generator to see whether the problem clears itself. Consult the correct manual, the manufacturer or a qualified service professional.

    If a carbon-monoxide alarm sounds or anyone develops a headache, dizziness, weakness, nausea, chest pain or confusion while a fuel-burning generator is operating, move everyone to fresh air and call 911. Do not re-enter until emergency responders say it is safe.

    The Ready Chateau Generator Test Schedule

    For many portable generators, a monthly calendar reminder is a sensible place to begin. The reminder should say more than “start generator.”

    Use it to:

    1. Review the manual’s exercise requirement.
    2. Inspect the generator and cords.
    3. Move the generator to its safe outdoor location.
    4. Start and run it for the required time.
    5. Verify electrical output with an appropriate load when permitted.
    6. Shut it down and store it correctly.
    7. Record the test and any maintenance that is due.

    If your manufacturer specifies a different interval or procedure, follow that instead.

    The goal is not to run the generator simply because another month passed. The goal is to know that the generator, fuel, battery, cords and operating plan are ready before the next outage turns a small problem into an urgent one.

  • 15 Things People Forget in Their Emergency Kit

    15 Things People Forget in Their Emergency Kit

    Most emergency-kit lists begin with the obvious supplies: water, food, a flashlight, batteries and a first-aid kit. Those basics matter, but they are not the items households are most likely to miss after the first round of shopping.

    The overlooked items are usually ordinary things you depend on every day. They are the medication in the bathroom cabinet, the charging cable beside the bed, the spare key in a kitchen drawer and the pet records saved on your phone.

    If you already have an emergency kit, you may not need a bigger shopping trip. You may just need a more thoughtful review.

    First, Decide What You Mean by an Emergency Kit

    One container does not have to solve every emergency. A home supply, an evacuation bag and a small vehicle kit serve different purposes. Start with the complete home emergency preparedness checklist if you are still building the basics, then decide which of the following items belong at home, in a grab-and-go bag or in your vehicle.

    The goal is not to fit your entire household into one backpack. It is to keep essential items available when power, stores, internet access or normal routines are interrupted.

    1. Prescription Medications

    Food and water are easy to remember because every standard checklist includes them. Daily medication is easier to overlook because it remains in active use.

    Ask your healthcare provider or pharmacist how to plan for an emergency supply, refill restrictions and medications that require refrigeration. Do not change doses, stockpile medication or improvise storage conditions. If cold storage is required, follow the medication label and your pharmacist’s instructions.

    Check medication dates when you review the rest of the kit. A written reminder to collect an actively used prescription can also be useful if keeping a separate supply is not practical.

    2. A Printed Medication and Medical-Information List

    A medication bottle does not tell a responder everything they may need to know. Keep a current list of medications, doses, allergies, major medical conditions, doctors, pharmacies and emergency contacts.

    Include only information that would be useful during an emergency, and protect it from water and casual access. The CDC recommends tailoring emergency kits to individual medical and communication needs, including important health documents and support contacts.

    3. Spare Glasses, Contact Supplies and Hearing-Aid Batteries

    A flashlight will not help much if you cannot see clearly enough to use it. Add spare prescription glasses if available, a protective case and any contact-lens supplies you regularly need.

    For hearing aids, include the correct batteries or charging equipment. Label small supplies clearly so another household member can identify them without guessing.

    4. The Correct Charging Cables and a Charged Battery Bank

    A battery bank is useful only if it is charged and paired with the right cables. Check every phone, tablet, radio, medical device and rechargeable light your household expects to use.

    Store the required cables with the battery bank instead of borrowing them from everyday use. Recharge the bank on a recurring schedule. If a device depends on electricity, include it when evaluating your household’s backup-power needs.

    5. Emergency Cash in Usable Denominations

    Card readers, ATMs and payment apps may not work during a power or communications outage. Keep a reasonable amount of cash for your household in a secure location, including smaller bills that are easier to use when a business cannot make change.

    There is no universal dollar amount. Consider the likely cost of fuel, food, transportation and one or two nights away from home, then choose an amount that fits your circumstances without creating another security risk.

    6. A Printed Contact List

    Most people no longer memorize phone numbers. If your phone is lost, damaged or out of power, a printed contact list can become surprisingly important.

    Include household members, an out-of-area contact, doctors, veterinarians, insurance providers, utilities and anyone responsible for children, older adults or pets. Keep the list short enough to update easily, and place a copy in each kit where it may be needed.

    7. Secure Copies of Essential Documents

    You may need identification, insurance information, medical details or proof of residence after an evacuation or property loss. Keep protected copies of the documents your household would need to recover or obtain assistance.

    Do not place irreplaceable originals or unsecured sensitive information in an easily stolen bag. Use a waterproof document pouch for appropriate paper copies, and consider an encrypted digital backup that you know how to access without relying on your home computer.

    8. Spare House and Vehicle Keys

    An evacuation can become much harder when the only vehicle key is misplaced or another household member has the only house key. Add clearly identified spare keys where authorized family members can reach them.

    Do not label keys with a full home address, and do not leave them in a vehicle or unsecured exterior location. The point is reliable access, not creating an easy path into your property.

    9. A Manual Can Opener

    Canned food does not help if the only opener is electric. Put a sturdy manual can opener with the food supply, then test it before assuming it works.

    This is also a good moment to check whether your stored food can be prepared with the water, fuel and equipment you expect to have. Our guide to building an emergency food supply without wasting money can help you choose foods your household will actually use.

    10. Personal-Hygiene and Sanitation Supplies

    Small sanitation problems become large comfort and health problems quickly. Think beyond a bar of soap. Depending on your household, useful supplies may include toilet paper, hand sanitizer, moist wipes, garbage bags, menstrual products, diapers, incontinence supplies, toothbrushes and a small amount of unscented cleaning soap.

    Choose compact quantities for an evacuation bag and larger quantities for a home supply. Keep liquids sealed so one leak does not ruin documents, food or electronics.

    11. Weather-Appropriate Clothing and Sturdy Shoes

    An emergency rarely waits until everyone is properly dressed. Keep sturdy closed-toe shoes, work gloves and a change of clothing where they can be reached quickly.

    Adjust the kit as seasons change. Cold-weather households may need hats, gloves and insulating layers. Hot-weather households may prioritize lightweight clothing and sun protection. Replace children’s clothing as they grow.

    12. A Paper Map of the Local Area

    Navigation apps are convenient until a phone battery dies, cell service fails or roads close. A local paper map provides a backup view of alternate routes, nearby towns, waterways and major landmarks.

    Mark important destinations without adding sensitive household information. Consider shelters, hospitals, family meeting places and more than one route away from your neighborhood.

    13. Complete Pet Supplies

    Pet food alone is not a pet plan. Include water, medication, feeding instructions, waste supplies, a leash or harness, identification, a carrier when appropriate and recent veterinary records.

    The CDC pet preparedness checklist also recommends recent photographs, microchip information and a waterproof container for records. A collapsible bowl and familiar blanket can make an evacuation easier without taking much space.

    14. Supplies Unique to the People in Your Household

    Generic kits are built for generic people. Your household may include an infant, a pregnant person, a young child, an older adult or someone who uses mobility, communication or medical equipment.

    Walk through one ordinary day and list what each person uses. The CDC emergency-kit checklist for pregnant women, infants and children is a useful prompt for needs that broad supply lists may miss.

    Comfort items matter too. A familiar toy, a simple activity or noise-reducing headphones may help a child or adult manage a stressful disruption.

    15. A Whistle

    A whistle is small, inexpensive and easier to sustain than shouting. It may help you signal your location if you are trapped, separated from others or unable to call out loudly.

    Attach it where it can be reached rather than burying it at the bottom of the kit. A whistle is one signaling tool, not a substitute for following evacuation orders, carrying a charged phone or telling others where you plan to go.

    Do Not Buy Everything Again

    Preparedness improves when supplies are organized, current and usable—not when the same products are purchased repeatedly. Before buying anything, take inventory of what you already own.

    Move suitable duplicates into the kit, write down items that must remain in daily use and buy only the gaps. That practical approach is the same one we recommend when you start with the basics of household emergency preparedness.

    Give Your Emergency Kit a 15-Minute Review

    Open the kit and choose five items from this list to check today. Confirm that medications and records are current, cables fit, the battery bank is charged, clothing still fits and pet supplies match your present needs.

    Then put the next review on your calendar. A modest kit that your household understands and maintains is more useful than an impressive collection no one has checked in years.

  • Portable Generator Safety: Avoid Carbon Monoxide, Fire and Electrical Hazards

    Portable Generator Safety: Avoid Carbon Monoxide, Fire and Electrical Hazards

    A portable generator can keep refrigerators cold, charge essential devices and power equipment your household depends on during an outage.

    It can also create carbon-monoxide, electrical and fire hazards when it is placed, connected or refueled incorrectly.

    Most generator accidents do not happen because someone intended to take a dangerous risk. They happen because the power is out, the weather is bad and someone is trying to get the lights back on quickly.

    That is why generator safety should be worked out before the outage—not while standing outside in the dark with a machine you have not used since the last storm.

    This guide focuses on the mistakes that matter most and the practical steps that help prevent them.

    Start With the Generator’s Manual

    Portable generators are not all designed or wired the same way.

    Before operating yours, read the manufacturer’s instructions for:

    • Safe placement and required clearances
    • Grounding
    • Weather protection
    • Extension cords
    • Electrical capacity
    • Starting and shutdown
    • Refueling
    • Maintenance and storage

    Keep the manual where you can find it during an outage.

    If the original manual is missing, find the generator’s model number on its identification label and search the manufacturer’s official website. Look for a section labeled Support, Manuals, Product Documentation or Downloads.

    Confirm that the model number on the manual matches your generator exactly before following its instructions. If the manual is no longer available online, contact the manufacturer or an authorized dealer.

    Avoid relying on an unofficial manual-download site when the manufacturer’s version is available.

    General safety guidance is important, but it does not replace the instructions for your particular generator.

    Never Run a Portable Generator Indoors

    A fuel-burning generator produces carbon monoxide, or CO. Carbon monoxide cannot be seen or smelled, and it can build up quickly enough to cause illness, unconsciousness or death.

    Never operate a portable generator in:

    • A house
    • A garage
    • A basement
    • A crawlspace
    • A shed
    • A porch
    • A carport or breezeway
    • Any other enclosed or partially enclosed space

    Opening the garage door does not make the garage safe. Opening windows or placing fans nearby does not make an indoor location safe either.

    The generator belongs outside.

    The CDC says generators should be operated outdoors more than 20 feet from windows, doors and vents. Point the exhaust away from the home and from openings that could allow fumes inside.

    That distance is not permission to place the generator anywhere a cord happens to reach. Consider the direction of the exhaust, nearby buildings and whether fumes could enter a neighbor’s home.

    Do not move the generator closer because an extension cord is too short. Use an appropriately rated cord that allows the generator to remain in a safe location.

    Safety First

    If a carbon-monoxide alarm sounds, get everyone outside into fresh air and call 911. Do not remain inside looking for the source, and do not re-enter until emergency responders say it is safe.

    Possible symptoms of carbon-monoxide poisoning include headache, dizziness, weakness, nausea, vomiting, chest pain and confusion. Someone who is sleeping may become seriously ill without recognizing the warning signs.

    If anyone develops possible symptoms while a generator or another fuel-burning device is operating, move to fresh air immediately and seek emergency help.

    Use Working Carbon-Monoxide Alarms

    Correct generator placement is the first defense against carbon monoxide. Working CO alarms provide another important layer of protection.

    Use battery-operated CO alarms or plug-in alarms with battery backup. Battery backup matters because an ordinary plug-in alarm may not work during the same outage that caused you to use the generator.

    Install CO alarms on every level of the home and outside sleeping areas, following the alarm manufacturer’s instructions. Test them regularly and replace batteries or the alarm itself when required.

    Do not place a generator closer to the house because you have CO alarms. An alarm is a warning device, not a substitute for safe placement.

    Never Backfeed Power Through a Wall Outlet

    Never try to power your house by connecting a generator to an ordinary wall outlet.

    This practice—often called backfeeding—can send electricity into household wiring and out onto utility lines. It can injure or kill utility workers, neighbors or anyone who encounters wiring believed to be de-energized. It can also damage the generator or household electrical system and create a fire hazard.

    A homemade cord with male plugs on both ends is especially dangerous and should never be used.

    There are two basic ways to use portable-generator power:

    1. Connect selected appliances directly to the generator with properly rated extension cords, following the generator and appliance instructions.
    2. Connect the generator to designated household circuits through approved transfer equipment installed by a qualified electrician.

    Transfer equipment isolates generator power from utility power and prevents dangerous backfeeding. Requirements vary with the generator, electrical system and local rules, so connecting a generator to household wiring is not a do-it-yourself project.

    The Electrical Safety Foundation International recommends having transfer equipment installed by a qualified electrician.

    If you want the generator to supply household circuits, arrange the installation before an outage. Consult a qualified electrician and, where appropriate, your utility or local code authority.

    Use the Right Extension Cords

    An extension cord becomes part of the electrical system while the generator is running. A household cord chosen only because it is nearby may not be suitable.

    Use cords that are:

    • Intended for outdoor use
    • Grounded and equipped with three-prong plugs
    • Rated to carry the connected electrical load
    • Long enough to preserve safe generator placement
    • Free from cuts, crushed areas, exposed conductors and damaged plugs
    • Used according to the generator and appliance instructions

    A cord that is too light for the load can overheat. A damaged cord can create a shock or fire hazard.

    Do not run cords through standing water or place connections where they can become wet. Protect cords from vehicle traffic, sharp edges, closed doors and other locations where they could be crushed or damaged.

    Do not remove a grounding pin to make a plug fit.

    The generator’s grounding requirements depend on its design and how it is connected. Follow the manufacturer’s instructions rather than assuming that every generator requires the same grounding arrangement.

    Keep the Generator and Connections Dry

    Generators are often needed because of hurricanes, thunderstorms, ice storms or other conditions that also bring rain and moisture.

    Electricity and water are a dangerous combination.

    The Occupational Safety and Health Administration advises keeping portable generators dry and not operating them in rain or wet conditions. Never handle the generator’s electrical components with wet hands or while standing in water.

    Follow the generator manufacturer’s instructions for protection from rain and snow. Any operating cover or shelter must be approved or specifically permitted for use with your generator and must preserve all required ventilation, exhaust direction and clearances.

    Do not drape a tarp over a running generator or improvise an enclosure around it.

    Most importantly, do not solve the rain problem by moving the generator into a garage, shed, porch or other enclosed or partially enclosed space. That replaces an electrical hazard with a carbon-monoxide hazard.

    Plan for safe weather protection before the storm. If you cannot keep the generator dry while also meeting its outdoor placement and clearance requirements, do not operate it until conditions allow safe use.

    Do Not Overload the Generator

    A generator can supply only a limited amount of power.

    Connecting more equipment than it can support may trip its protection, damage appliances, overheat cords or create a fire hazard. Some appliances also require more power when they start than they use while running.

    Before an outage, identify what you actually need to operate. For many households, that might include:

    • A refrigerator or freezer
    • A few lights
    • Phone chargers
    • A modem or router
    • Necessary medical equipment
    • A limited number of other essential devices

    Find the running and starting requirements for the equipment you intend to connect. Make sure the combined load remains within the generator manufacturer’s limits.

    If you are uncertain about your needs, our comparison of a portable power station versus a generator explains the factors to evaluate before choosing a backup-power system.

    A generator does not have to power the entire house to be useful. Managing a few essential loads safely is better than overloading the generator while trying to recreate normal life.

    Shut Down and Cool the Generator Before Refueling

    Gasoline and other generator fuels require careful handling.

    A running generator becomes hot. Spilled fuel can ignite if it contacts the engine, muffler or another hot component.

    Before refueling:

    1. Disconnect or turn off electrical loads according to the generator instructions.
    2. Shut down the generator.
    3. Allow it to cool as directed by the manufacturer.
    4. Refuel outdoors using the correct fuel and an approved container.
    5. Clean up any spill according to the manufacturer’s instructions before restarting.

    Never refuel a generator while it is operating or still hot.

    Store fuel outside living areas in approved, properly labeled containers. Keep it away from flames, pilot lights, electrical equipment and other ignition sources. Follow local rules governing the type and amount of fuel that may be stored.

    Do not assume that a garage is automatically a safe fuel-storage location. Fuel vapors can travel and ignite when they reach a pilot light, switch or another ignition source.

    Fuel also ages. A safe generator plan includes knowing how the manufacturer says to store both the machine and its fuel between outages.

    Our guide to why a generator may not start after sitting explains why storage and maintenance matter before the next emergency.

    Keep the Generator Away From Combustible Materials

    Portable generators produce heat in addition to exhaust.

    Operate the generator on a stable surface with the clearance required by its manufacturer. Keep leaves, cardboard, stored fuel and other combustible materials away from the engine and muffler.

    Do not place the generator where dry grass, storm debris or other material could contact a hot component.

    Keep children and pets away from the operating area. A generator can have hot surfaces, exposed cords, fuel and moving components even when it does not look especially dangerous.

    Remember that the engine and muffler may remain hot after shutdown.

    Inspect the Generator Before Every Use

    An outage is not the time to discover that a cord is damaged, fuel is leaking or the generator has not been maintained.

    Before starting it, check for:

    • Fuel or oil leaks
    • Loose or damaged parts
    • Blocked air inlets or exhaust
    • Damaged receptacles
    • Frayed or unsuitable extension cords
    • Deteriorated fuel lines
    • Pest nests or debris
    • Correct oil and fuel levels
    • Maintenance that is due

    Do not operate a generator that is leaking fuel, smoking unexpectedly, producing unusual odors or showing signs of electrical or mechanical damage.

    If you do not understand what you are seeing, stop and consult the manual, manufacturer or a qualified service professional.

    A brief pre-use inspection does not replace scheduled maintenance. Start, maintain and test the generator according to its instructions so that you know whether it works before the next outage.

    Continue Monitoring the Generator While It Runs

    Conditions around a generator can change after it starts.

    Periodically confirm that:

    • The generator remains dry and stable.
    • Exhaust is still directed safely away.
    • Cords and connections have not become wet or damaged.
    • Fuel or oil is not leaking.
    • The electrical load remains within capacity.
    • Children, pets and other people cannot enter the operating area.
    • Wind, water, debris or other conditions have not made the location unsafe.

    Follow the manufacturer’s instructions concerning supervision, shutdown and overnight operation. Do not assume that a generator can be started and forgotten until morning.

    Apartment and Renter Considerations

    A fuel-burning portable generator is not a practical choice everywhere.

    Never operate one inside an apartment, on a balcony, in a hallway, on an enclosed patio or anywhere that does not provide a safe outdoor operating location. Exhaust could enter your unit or another resident’s home.

    Lease terms, building rules and local regulations may also restrict generator use and fuel storage.

    If you do not have an appropriate outdoor operating location, consider whether battery banks or a portable power station can meet your most important needs. These devices avoid engine exhaust, but they still have capacity, charging and electrical-safety limitations.

    Do not improvise an unsafe generator location because the power is out.

    Prepare the Safe Setup Before You Need It

    A generator should not be an unopened machine that comes out for the first time after the lights go off.

    Before the next outage:

    • Read the correct manual.
    • Choose a safe outdoor operating location.
    • Measure more than 20 feet from doors, windows and vents.
    • Point the exhaust away from buildings and openings.
    • Determine how you will keep the generator dry without enclosing it.
    • Install and test CO alarms.
    • Obtain properly rated extension cords.
    • Calculate the electrical loads you plan to connect.
    • Arrange approved transfer equipment if the generator will supply household circuits.
    • Store fuel safely.
    • Inspect, maintain and test the generator as directed.

    If any part of the setup depends on guesswork during an emergency, solve it now.

    The Ready Chateau Generator Safety Rule

    A generator is useful only when it can be operated without creating a greater emergency than the outage itself.

    Keep it outside. Keep it more than 20 feet from doors, windows and vents. Point the exhaust away. Keep the generator and connections dry. Connect it correctly. Refuel it only after shutdown and cooling. Never backfeed power into household wiring.

    Most importantly, decide how you will use it safely before the power goes out.

    If you are still developing your outage plan, begin with what to do when the power goes out. Then test your generator, review its manual and correct any missing part of your setup while you still have light, time and working electricity.

  • Build an Emergency Food Supply Without Wasting Money

    Build an Emergency Food Supply Without Wasting Money

    Emergency food does not have to mean expensive buckets of unfamiliar meals that sit untouched for years. For most households, the least wasteful place to begin is the food already in the pantry—and the meals people already know they will eat.

    The goal is not to build the largest stockpile possible. It is to keep enough practical, shelf-stable food to get through a disruption without depending on refrigeration, daily shopping or elaborate cooking. If those foods can also become part of ordinary meals before their quality declines, preparedness stops being a separate expense and becomes part of normal household management.

    Start With the Food You Already Eat

    Before buying anything, look through your pantry, refrigerator and freezer. Write down the shelf-stable foods your household uses regularly. That list may include canned vegetables, fruit, beans, meat or fish; dry pasta, rice, oats or cereal; shelf-stable milk; nut or seed butter; crackers; soup; sauces; and familiar snacks.

    This simple inventory does two things. It keeps you from buying food you already own, and it reveals which ordinary foods could serve two purposes: everyday meals now and emergency meals later. EPA guidance for reducing household food waste begins with the same basic practices—check what you already have, plan meals around it and buy only what you expect to use.

    Do not start with foods your family rarely eats merely because they are labeled for emergencies. A long advertised shelf life does not create value if no one wants the food, cannot tolerate it or does not know how to prepare it.

    Plan Meals, Not Just Ingredients

    A shelf full of cans and boxes may look reassuring, but it is not yet a meal plan. Group foods into simple combinations your household could actually eat during a power outage or another disruption.

    For example, a meal might combine:

    • Canned chicken or beans with crackers and canned fruit
    • Shelf-stable milk with cereal, oats or granola
    • Canned soup with crackers or shelf-stable bread
    • Pasta with jarred sauce and canned vegetables
    • Tuna or another shelf-stable protein with crackers and fruit cups

    These are only examples. Your best choices are the foods that fit your household’s tastes, dietary needs, culture and normal eating habits. The useful question is not simply, “How many cans do we own?” It is, “How many realistic meals can we make from what we have?”

    Include Food That Requires No Cooking

    Some emergencies interrupt power, fuel or safe water at the same time. Ready.gov recommends nonperishable foods and reminds households to include a manual can opener, utensils and any special dietary needs. FDA guidance also advises keeping a few days of ready-to-eat foods that do not require cooking or cooling.

    Keep at least some food that can be opened and eaten as it is. Possibilities include canned fruit, ready-to-eat beans, canned meat or fish, nut or seed butter, crackers, dry cereal, nutrition bars, shelf-stable milk and commercially packaged snacks. Choose pull-top containers where useful, but keep a manual can opener with the supply even if most cans have tabs.

    A few no-cook meals can take some pressure off when the power is out or cooking is not practical. They may be simple, but they should still include familiar foods everyone can eat safely. A mixture of protein, carbohydrates, fruit or vegetables and comfort foods will generally be more useful than a collection built around one type of food.

    Build the Supply in Small, Useful Steps

    You do not have to build your emergency pantry all at once. Start by adding one or two shelf-stable items to a normal grocery order. Once those items represent one complete household meal, build the next meal.

    A practical sequence is:

    1. Inventory food already on hand.
    2. Identify several ordinary shelf-stable meals your household will eat.
    3. Buy the missing ingredients for one meal at a time.
    4. Add several no-cook meals for outages that limit cooking.
    5. Use older food in normal meals and replace only what the household actually used.

    This approach spreads the cost across regular shopping trips and gives you a chance to learn what works. It also prevents a common mistake: buying a large quantity before discovering that the portions, preparation requirements or flavors are wrong for your household.

    Buy the Right Package Size

    Bulk packages are not automatically economical. They save money only when the food can be stored properly and used before it loses quality. During an outage, a large opened container may also create a new problem if the remainder requires refrigeration.

    Think about how much your household could realistically finish once a package is opened, especially when the remainder would normally require refrigeration. Smaller containers sometimes cost more per ounce, but they may waste less when refrigeration is unavailable.

    Before buying a case, test a single package in an ordinary meal. Confirm that everyone will eat it, that the portion is useful and that you have the equipment, water and energy needed to prepare it.

    Pay Attention to Water and Cooking Requirements

    Dry foods can be economical and compact, but they may require water, cooking time and fuel. Your emergency water supply must account for both drinking and food preparation. Rice, pasta, dried beans and dehydrated meals are less useful if your plan assumes unlimited water or a cooking method you cannot safely operate during an outage.

    For every planned meal, ask:

    • Does it require safe water?
    • How much water will preparation and cleanup use?
    • Does it require heating or extended cooking?
    • Can we prepare it with equipment we already own and know how to use?
    • What would we eat instead if cooking were unavailable?

    A practical pantry will probably include both: economical dry staples for times when you can cook and ready-to-eat foods for times when you cannot. Our guide to cooking during a power outage will cover that subject, including the safety limits of different cooking methods.

    Protect Special Household Needs

    Start with the people and animals in your home. Consider food allergies, diabetes, swallowing difficulties, low-sodium requirements, infant feeding, pregnancy, religious or cultural needs and any other dietary restriction that cannot simply be suspended during an emergency.

    Include familiar food for children and older adults, as well as pet food and any treats or supplements that are genuinely part of the animal’s routine. If someone relies on a medically necessary diet or specialized formula, discuss emergency substitutions and storage requirements with the appropriate clinician or manufacturer rather than improvising during a disruption.

    Store Food Where It Will Last

    FoodSafety.gov advises that canned and dried foods last best in a cool, dry, dark location and notes that specialty dehydrated emergency food is not required. Avoid locations exposed to heat, moisture, pests, household chemicals or possible floodwater. Do not store food above a stove, under a sink or in a hot garage simply because the space is convenient.

    Keep packages off the floor when flooding is a realistic risk. Inspect cans and packages periodically. Discard cans that are bulging, leaking, rusted through or badly damaged, and discard food that may have contacted floodwater. Never taste questionable food to decide whether it is safe.

    Dates Are Useful, but They Are Not All the Same

    Except for infant formula, federal law generally does not require food product dating, and USDA explains that many dates indicate quality rather than safety. Terms such as “Best if Used By” usually describe when a product is expected to have its best flavor or quality.

    You should still pay attention to package dates, but they are not all automatic throw-away dates. Follow any safety-related instructions on the package, use food before quality declines when practical and discard damaged, contaminated or suspicious products. USDA’s FoodKeeper resource provides storage guidance for hundreds of foods when a package date alone does not answer the question.

    Use a Simple First-In, First-Out Habit

    You do not need a detailed system to begin rotating emergency food. Start with one operating rule: place newer purchases behind older ones and use the older food first. Write the purchase month on a package if the printed date is hard to see.

    Once or twice a year, take a few minutes to look through your emergency food and pull out anything you should use soon. Move those foods into the everyday pantry, use them in normal meals and replace only what you still want in the emergency supply. If an item repeatedly reaches the end of its useful life without being eaten, stop buying it. The problem is probably the choice of food, not the rotation schedule.

    Common Ways Households Waste Money

    • Buying a large emergency-food package before trying the meals
    • Stocking foods no one normally eats
    • Buying ingredients without identifying complete meals
    • Ignoring water, cooking fuel or cleanup requirements
    • Buying containers too large to finish without refrigeration
    • Storing food in a hot, damp or pest-prone location
    • Forgetting allergies, medications, infants or pets
    • Treating a long shelf life as more important than usefulness

    The least expensive emergency food is not necessarily the product with the lowest price per ounce. It is food that meets a real need, stores safely and gets eaten before it becomes waste.

    A Practical Starter Exercise

    Choose three shelf-stable meals your household already likes. For each meal, list every required item, including water, seasonings and a safe way to open or prepare the food. Add one no-cook alternative.

    Then shop your pantry before shopping the store. Buy only the missing items. Keep the meals together on a written list—not necessarily on the same shelf—so anyone in the household can see what is available.

    Once those meals are complete, repeat the process. This creates a supply that grows in useful increments instead of becoming an expensive collection of disconnected products.

    A Useful Supply Is One You Can Actually Use

    A practical emergency food supply should reduce stress, not create another maintenance burden. Build it from familiar meals. Include food that works without cooking. Match packages to your household. Store everything properly. Use older items and replace them through normal shopping.

    Preparedness is not measured by the number of cans, buckets or years printed on a package. It is measured by whether your household has safe, usable food when normal routines stop—and whether the money spent today still provides value if the emergency never comes.