Author: Ready Chateau

  • Portable Power Station vs. Generator: Which Do You Actually Need?

    Portable Power Station vs. Generator: Which Do You Actually Need?

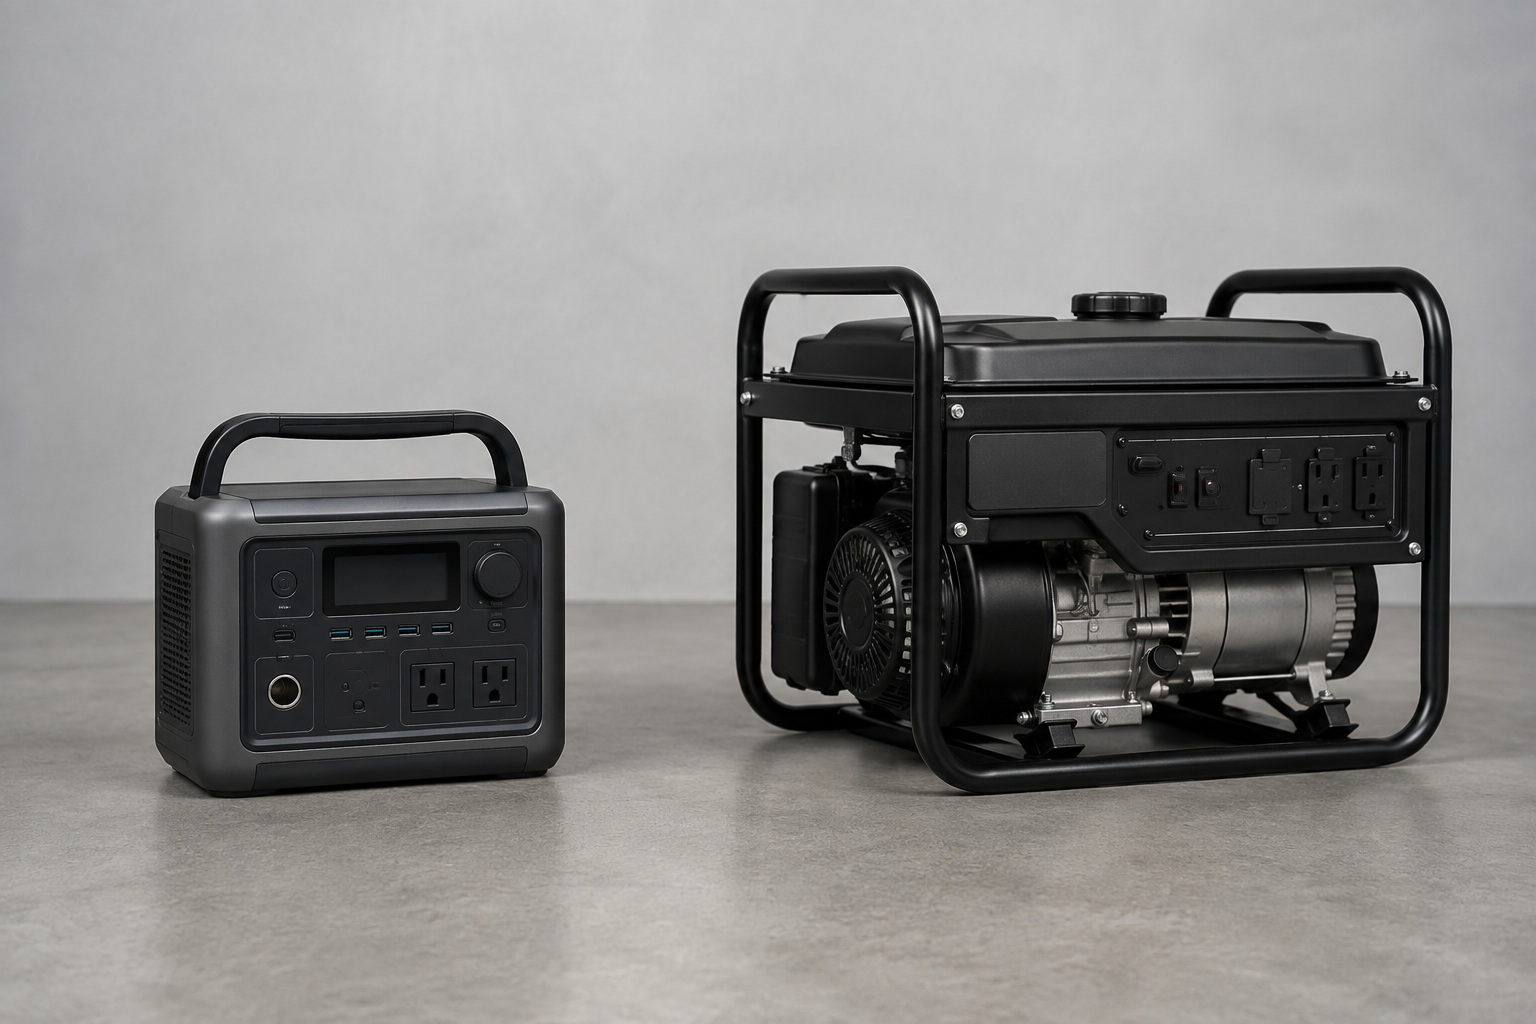
    A portable power station and a fuel-powered generator can both keep important equipment running during a power outage, but they solve different problems.

    A power station stores a limited amount of electricity in a rechargeable battery. A generator produces electricity as long as it has fuel and can continue operating safely. One is quiet and practical indoors. The other usually provides more power and can operate much longer.

    The right choice depends less on which product has the most impressive specifications and more on what your household actually needs to run, where you can safely operate the equipment and how long you expect to be without power.

    The Short Answer

    A portable power station is usually the better fit when you need quiet indoor power for phones, lights, internet equipment, a television, a compatible CPAP machine or other relatively modest loads. It requires little routine maintenance and produces no exhaust while supplying power.

    A portable generator is usually the better fit when you need to operate larger loads, support several appliances or continue producing electricity through a long outage. It requires fuel, maintenance and a safe outdoor operating location.

    Some households do not need to choose only one. A power station can handle quiet overnight loads while a generator runs outdoors during selected periods to operate larger equipment and, when the manufacturers’ instructions permit it, recharge batteries. That approach costs more, but it can reduce noise, fuel use and unnecessary generator runtime.

    Before buying either one, identify the equipment that truly matters during an outage. The best backup-power system is the one that can safely support those priorities—not the one with the longest feature list.

    What Is a Portable Power Station?

    A portable power station combines a rechargeable battery, an inverter and several types of electrical outlets in one movable unit. The battery stores direct-current electricity. The inverter converts that stored energy into alternating current for common household devices.

    Power stations may be recharged from a household outlet, a vehicle connection or compatible solar panels. Charging options and speeds vary substantially, so the manufacturer’s specifications matter.

    You may also see these products called “solar generators.” That name can be misleading. The unit does not create electricity from sunlight by itself. It is a battery power station that can be recharged from compatible solar panels.

    What Is a Portable Generator?

    A portable generator uses an engine and fuel—commonly gasoline, propane or both—to produce electricity. Unlike a battery, it does not begin with a fixed supply of stored electrical energy. It can continue producing power as long as fuel remains available and the generator is operated, refueled and maintained correctly.

    This article compares portable generators with portable power stations. A permanently installed standby generator is a different category with different installation, fuel and cost considerations.

    The Two Numbers That Matter Most

    Backup-power advertisements include many specifications, but two numbers answer most of the important questions.

    Watts tell you how much power the unit can deliver at one time. The combined running wattage of the equipment you connect must remain within the unit’s continuous output rating. Motors and compressors may also require a brief surge of additional power when they start.

    Watt-hours tell you how much energy a battery power station can store. A 1,000-watt-hour power station does not necessarily run a 1,000-watt appliance for exactly one hour. The inverter and the power station itself consume some energy, and real appliance use varies. Treat the published capacity as a starting point rather than a guaranteed runtime.

    Generators are normally compared by running watts and starting or surge watts. Their operating time depends on the load, fuel type, tank size and manufacturer’s rated runtime. Refueling can extend operation; a battery power station must be recharged from another available energy source.

    Portable Power Station Advantages

    No combustion exhaust while supplying power

    A power station does not burn fuel or produce carbon monoxide while discharging. That makes it practical for bedrooms, apartments and other occupied spaces. The charging source is a separate issue: never bring a fuel-powered generator indoors to recharge it.

    Quiet operation

    Power stations make little noise beyond possible cooling-fan operation. That matters at night, around children, in apartments and when powering medical or communications equipment.

    Simple operation and limited routine maintenance

    There is no engine oil, carburetor or stored gasoline to manage. The unit still needs inspection, periodic charging and storage within the temperature and charge-range instructions supplied by its manufacturer.

    Immediate power for smaller loads

    A charged power station can be brought inside and connected without starting an engine or handling fuel. It is particularly useful for lights, phones, routers, laptops, radios and other modest loads.

    Portable Power Station Limitations

    The stored energy is finite

    Once the battery is depleted, the power station is no longer a power source until it can be recharged. Solar panels may help, but output depends on panel capacity, sunlight, weather, placement and charging limits. Solar charging should not be treated as unlimited or guaranteed.

    Large loads use capacity quickly

    Heating appliances, cooking appliances, pumps and other high-wattage equipment can overwhelm a smaller unit or drain even a substantial battery quickly. Some devices may also exceed the inverter’s starting-surge capability.

    Battery condition matters

    Rechargeable batteries gradually lose capacity with age and use. Extreme temperatures, improper storage and unsuitable charging practices can also affect performance and safety. Follow the manufacturer’s charging and storage instructions, use the correct charger and check for applicable recalls.

    Portable Generator Advantages

    Higher output is commonly available

    Portable generators are available with enough output for refrigerators, freezers, pumps and combinations of household loads that would be difficult or expensive to support with a modest power station.

    Longer operation is possible

    A generator can continue producing electricity when additional fuel is available. That makes it useful during outages lasting several days, particularly when solar charging is unreliable or utility power is unavailable for recharging batteries.

    Fuel can restore capacity quickly

    Adding fuel after the generator has been shut down and allowed to cool takes far less time than fully charging a large battery. The tradeoff is that fuel must be purchased, transported, stored and rotated safely.

    Portable Generator Limitations

    It must remain outdoors

    A fuel-powered generator produces carbon monoxide. It must never be operated inside a home, garage, basement, crawlspace, shed, porch or carport. Current CPSC and Ready.gov guidance says to operate portable generators outside only, at least 20 feet from the home, with exhaust directed away from the building and its doors, windows and vents.

    Noise and fuel are ongoing concerns

    Generators create engine noise and require a dependable fuel supply. Fuel may be difficult to obtain during a widespread outage, and local rules may limit how much can be stored or where it may be kept.

    Maintenance is required

    Engines require inspection, oil service, periodic testing and proper storage. A generator that has been ignored for several years may not be ready when the power fails.

    Weather and electrical connections require planning

    A generator must remain outdoors but also be protected from rain and wet conditions according to its manufacturer’s instructions. Equipment should be connected with properly rated grounded extension cords, or the generator should connect to household circuits through appropriate transfer equipment installed by a qualified electrician. Never improvise a connection that sends generator power backward through household wiring.

    Which One Fits Your Household?

    Choose a portable power station when:

    • Your priorities are phones, lights, internet equipment, laptops, radios or similar smaller loads.
    • You need quiet power inside the home, particularly overnight.
    • You live in an apartment or another property without a safe generator location at least 20 feet from the building.
    • You want minimal routine maintenance and can keep the battery charged.
    • Your expected outages are usually brief, or you have a realistic way to recharge the unit.

    Choose a portable generator when:

    • You need to support larger loads or several appliances at the same time.
    • You may need power for days rather than hours.
    • You have a safe outdoor operating location and a plan for wet weather.
    • You can store, rotate and obtain the required fuel safely.
    • You are willing to test and maintain the engine before an emergency.

    Consider both when:

    • You want quiet battery power overnight but need generator capacity during the day.
    • You want to run the generator periodically rather than continuously.
    • You need a generator for large loads and a separate indoor source for communications, lighting or medical equipment.
    • You can afford the added cost and will maintain both systems.

    Four Common Household Scenarios

    1. Phones, lights and internet during short outages

    A modest power station may be the simplest solution. These loads are relatively small, and quiet indoor operation is valuable. Confirm the combined wattage and estimate how many hours the stored watt-hours can realistically support.

    2. Refrigerator, freezer and basic electronics

    Either category may work. The decision depends on appliance starting requirements, the battery’s usable capacity, outage duration and your recharging or refueling plan. Do not assume a refrigerator’s label tells the entire runtime story because compressors cycle rather than run continuously.

    3. Well pump, sump pump or several larger loads

    A generator will often be the more practical category, but pump starting requirements and electrical connections must be confirmed. Do not purchase from a rough internet estimate. Check the equipment nameplate, manuals and, when household wiring is involved, consult a qualified electrician.

    4. Electrically powered medical equipment

    Quiet indoor battery power may be useful, but this is not an ordinary appliance calculation. Ask the medical-equipment supplier and healthcare provider what backup source is compatible, how long backup power must last and what to do if power cannot be maintained. Ready.gov specifically advises households to develop a power-outage plan for electrically powered medical devices and refrigerated medicines.

    Do Not Overlook Recharging and Refueling

    Many comparisons stop after purchase price and output. During an extended outage, the more important question may be how the equipment receives its next supply of energy.

    A power station may recharge quickly from the grid—but the grid is unavailable during the outage. A vehicle may provide limited charging, and solar may help when conditions and system size are adequate. Review the unit’s actual input limits rather than assuming that adding more panels will always make it charge faster.

    A generator can be refueled, but only if suitable fuel is available. Gas stations may be closed or unable to pump fuel without electricity. Stored gasoline can deteriorate, and every fuel has storage and handling requirements.

    Your backup-power plan needs an energy-supply plan. Buying the machine is only the first step.

    A Safety Difference That Should Decide the Purchase

    Do not buy a fuel-powered generator unless your property provides a genuinely safe place to operate it. “Outside” does not mean in a garage with the door open, beneath a porch, inside a shed or beside an open window. If you cannot maintain the recommended separation from the building, a portable generator may not be a safe option for your home.

    Install working carbon monoxide alarms with battery backup on every level of the home and outside sleeping areas. Allow a generator to cool before refueling. Keep it dry without enclosing it, follow its manual and never connect it directly to household wiring unless proper transfer equipment has been installed by a qualified electrician.

    Power stations avoid carbon monoxide while supplying power, but they are not risk-free. Lithium-ion batteries can overheat or ignite if damaged, defective or charged improperly. Use the supplied or approved charging equipment, follow storage-temperature instructions, stop using a unit that is damaged, swollen, unusually hot or subject to a safety recall, and follow the manufacturer’s directions for inspection and disposal.

    How to Make the Decision Before You Shop

    1. List only the equipment you truly need during an outage.
    2. Record each item’s running wattage and any starting or surge requirement.
    3. Decide how many hours per day each item must operate.
    4. Confirm that your property has a safe generator location.
    5. Write down how you would recharge a battery or obtain and store generator fuel during a prolonged outage.

    If your list consists mainly of electronics, lights and modest overnight loads, begin by evaluating power stations. If it includes pumps, several major appliances or extended operation, begin by evaluating generators. If the list contains both kinds of needs, a combined system may be more practical than oversizing either device to do everything.

    Do not use advertised output alone to make the purchase. Confirm the continuous output, surge capability, stored energy or fuel runtime, outlet types, charging inputs and operating instructions against your actual equipment.

    Portable Generators for Home Outages: Our Picks by Power Need

    Best Portable Power Stations for Home Power Outages

    The Bottom Line

    A portable power station is not simply a smaller generator, and a generator is not automatically the better emergency tool because it produces more power.

    Power stations are strongest when quiet indoor operation, simple use and smaller essential loads matter most. Generators are strongest when higher output and long-duration operation matter most and the household can meet the fuel, maintenance and outdoor-safety requirements.

    Start with the loads, the outage duration and the operating environment. Once those are clear, the right category usually becomes much easier to identify.

    Sources

  • How Much Water Should You Store for an Emergency?

    How Much Water Should You Store for an Emergency?

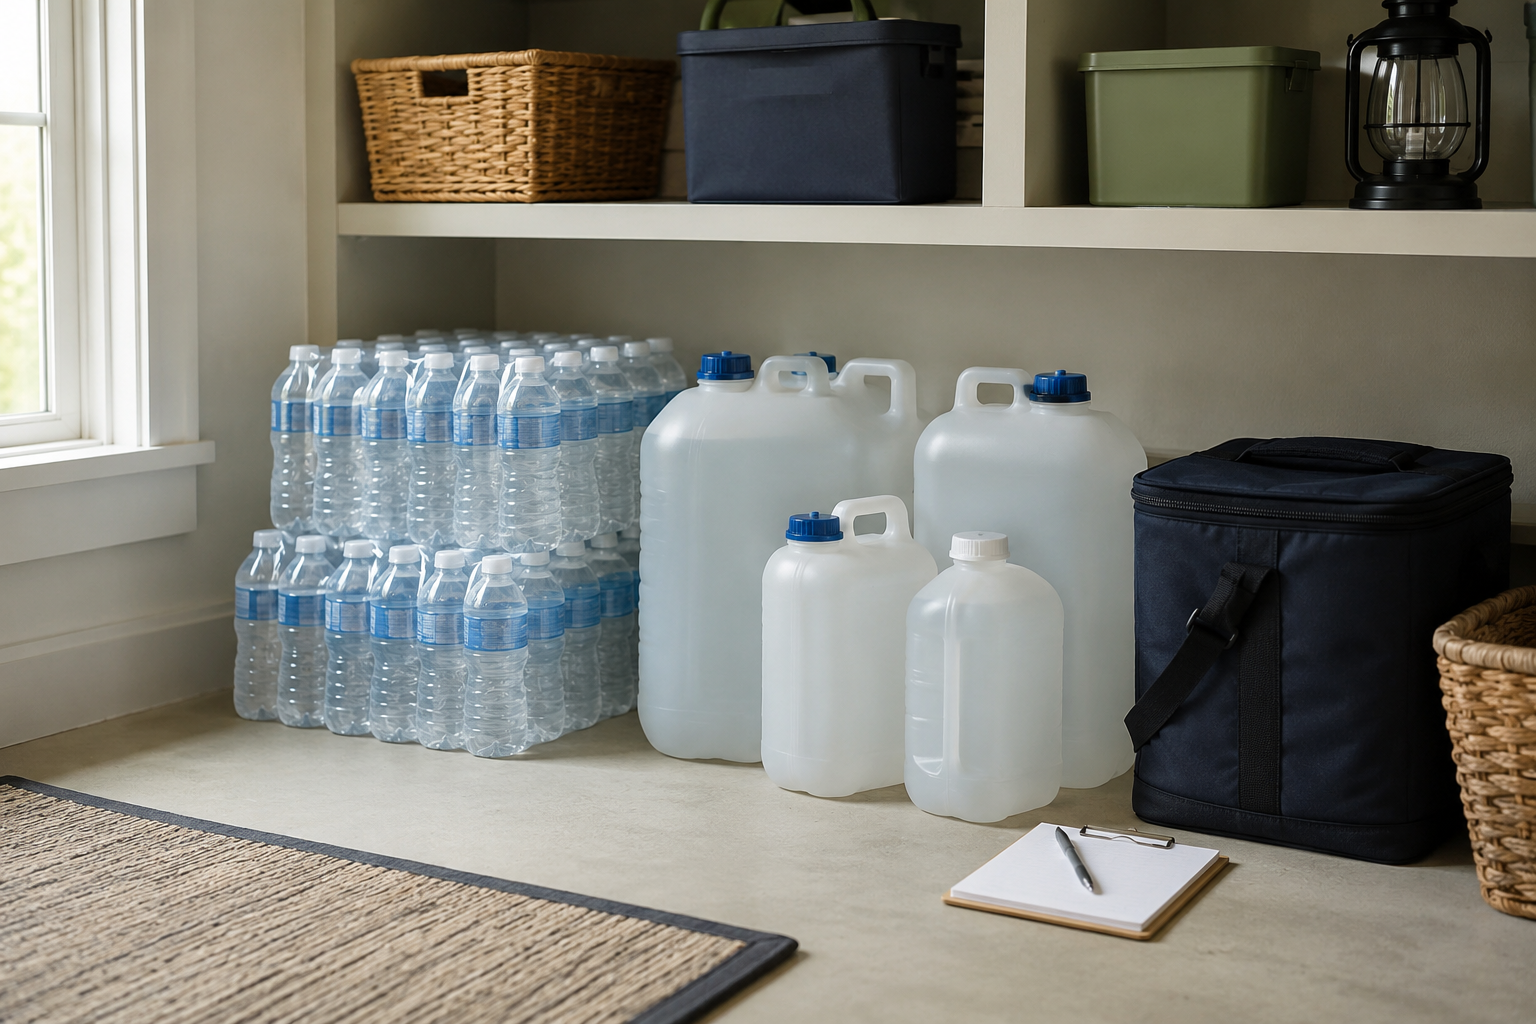
    Water is easy to overlook because it is usually available with a turn of the faucet. Then a water main breaks, a storm contaminates the system, a private well pump loses power or local officials issue a drinking-water advisory—and the amount already in your home suddenly matters.

    Unlike flashlights, batteries or canned food, water is bulky and heavy. A household can need dozens of gallons, yet many people have little more than a few bottles in the refrigerator.

    The goal is not to fill every available corner with water. It is to establish a realistic minimum, adjust it for your household and build the supply in manageable stages.

    The Short Answer

    Store at least one gallon of water per person per day for a minimum of three days. If space and circumstances allow, work toward a two-week supply for use at home.

    For a household of four, that means:

    • 12 gallons for three days
    • 28 gallons for seven days
    • 56 gallons for fourteen days

    Those figures are the human baseline. Pets, hot weather, illness, pregnancy, infant feeding and certain medical needs can increase the amount your household should have.

    The one-gallon guideline includes water for drinking, cooking, brushing teeth and limited hygiene. It does not preserve normal household water use. It is not enough for regular showers, laundry, routine dishwashing or normal toilet flushing.

    Think of one gallon per person per day as a minimum planning allowance—not a promise that every household will be comfortable on that amount.

    How to Calculate Your Household’s Baseline

    Use this simple formula:

    Number of people × number of days = baseline gallons

    Examples:

    • One person for three days: 1 × 3 = 3 gallons
    • Two people for seven days: 2 × 7 = 14 gallons
    • Four people for fourteen days: 4 × 14 = 56 gallons
    • Six people for fourteen days: 6 × 14 = 84 gallons

    Do this calculation before choosing containers. The total quantity tells you how much storage space, lifting capacity and rotation work the plan will require.

    Three Days, Seven Days or Two Weeks?

    Three days is the minimum starting point.

    The Centers for Disease Control and Prevention recommends storing at least a three-day supply. That is the first threshold to meet if your household currently has little or no emergency water.

    Seven days is a practical intermediate goal.

    A week provides more margin for a prolonged outage without making the first step feel impossible. It is not a separate government standard; it is a practical bridge between the minimum and a stronger home supply.

    Two weeks is the stronger home-storage target.

    The CDC advises trying to store a two-week supply when possible. The American Red Cross similarly recommends three days of water for evacuation and two weeks for use at home.

    That distinction matters. An evacuation supply must be portable enough to load or carry. A home supply can be larger and divided among several safe locations.

    If two weeks is not realistic today, do not let the larger number prevent you from storing three days. Meet the minimum first, then add another day or another case at a time.

    Who Needs More Than the Baseline?

    The one-gallon rule is not equally generous for every household. Review the following adjustments before treating your calculation as complete.

    Hot weather and physical exertion

    People generally need more drinking water in hot conditions and when doing strenuous work. Households preparing for summer hurricanes, extreme heat or outdoor cleanup should build extra margin into the baseline rather than assuming one gallon will always be enough.

    Pregnancy and illness

    CDC guidance specifically advises storing additional water for pregnant women and people who are sick. The amount will depend on the person and the circumstances, so the safest approach is to plan above the baseline and follow medical guidance when a health condition affects fluid needs.

    Pets

    Calculate pet water separately. There is no useful one-size-fits-all amount for every animal. A cat, a large dog and a household with several pets will not have the same needs.

    Measure how much safe water your pets normally consume in a day, then add a margin for heat, stress, spills and cleaning bowls. The American Veterinary Medical Association recommends keeping at least seven days of water in a pet emergency kit. If your household is building toward a two-week home supply, extending the pet supply to the same period avoids leaving part of the household unprepared.

    Infants

    Water planning changes when an infant depends on formula. CDC guidance identifies ready-to-feed infant formula as the safest option during an emergency because it is sterile and does not require mixing with water. If powdered formula must be used, the household needs safe water for preparation and additional safe water for cleaning feeding items.

    Water-dependent medical needs

    A generic storage formula is not enough for someone whose care depends on dialysis or another water-sensitive medical plan. Follow the person’s healthcare provider or treatment facility instructions before an emergency. A prescribed fluid restriction can also conflict with ordinary emergency advice, so do not improvise a medical water plan from the one-gallon rule.

    How Much Space and Weight Will It Take?

    Water weighs about 8.34 pounds per gallon. The water alone in a fourteen-day supply for four people weighs about 467 pounds. For six people, 84 gallons weighs about 701 pounds.

    That does not mean a two-week supply is unreasonable. It means the storage plan must account for weight and access.

    • Do not place the entire supply on a questionable shelf.
    • Do not store every container where one leak or obstruction could make all of it unusable.
    • Keep at least part of the supply where it can be reached without moving heavy equipment.
    • Use container sizes that household members can safely lift and pour.

    Larger containers use space efficiently, but they are difficult to move once filled. Smaller containers are easier to carry and provide redundancy. Many households will be better served by a combination rather than one enormous container.

    Apartment/Renter Note

    Limited space does not make emergency water optional. Start with a three-day supply in smaller containers that fit the storage you actually have. Distribute the weight at floor level in sensible locations, protect containers from damage and keep enough water portable for an evacuation.

    A two-week supply for a small household may still fit when it is divided rather than concentrated in one place. The goal is useful water you can safely reach—not an impressive container that cannot be moved.

    Drinking Water and Utility Water Are Not the Same

    The baseline calculation should represent water that is safe for drinking and food preparation. Do not count a swimming pool, hot tub, decorative pond or rain barrel as part of your drinking-water supply.

    Some nonpotable water may be useful for toilet flushing or certain cleaning tasks when local conditions make that safe. Keeping a separate utility-water plan can protect the drinking supply, but questionable water should never be treated as safe merely because it looks clear.

    Storage Basics That Affect the Quantity Plan

    Container selection and water treatment deserve their own detailed guides. For purposes of calculating your supply, these rules are enough to prevent common planning mistakes:

    • Unopened commercially bottled water is the safest and most reliable emergency supply, according to the CDC.
    • Use food-grade water-storage containers when filling your own supply.
    • Never use a container that previously held bleach, pesticides or other toxic chemicals.
    • Label home-filled containers as drinking water and include the storage date.
    • Replace home-filled water every six months.
    • Follow the manufacturer’s date and storage directions for commercially bottled water.
    • Store water in a cool place away from direct sunlight, gasoline, pesticides and other toxic substances.

    Do not postpone the quantity calculation while searching for the perfect container. Safe bottled water can establish the first three days while you decide how to build the larger supply.

    A Practical Water-Storage Plan

    1. Count every person who normally depends on the household.
    2. Multiply that number by three to establish the minimum human supply.
    3. Calculate pets and special household needs separately.
    4. Separate the water that must travel during an evacuation from the larger supply that can remain at home.
    5. Build from three days to seven days, then toward fourteen days when practical.
    6. Record where the water is stored and when it must be rotated.

    This approach follows the same People → Risks → Inventory → Essentials → Gaps → Maintenance framework used in Start With the Basics. It also turns the water section of The Complete Home Emergency Preparedness Checklist into a measurable household target.

    Your First Step

    Count the people in your household and multiply by three. Then compare that number with the safe drinking water you already have.

    If the calculation says twelve gallons and you have four, your immediate gap is eight gallons. Close that gap before worrying about specialized tanks, filters or a perfect long-term system.

    Once the three-day minimum is in place, repeat the calculation for seven and fourteen days. That gives you a clear improvement path instead of one overwhelming purchase.

    When the Water Emergency Begins

    Use stored safe water for drinking, cooking, brushing teeth and any task covered by local drinking-water instructions. Follow official notices about whether tap water must be boiled, disinfected or avoided entirely.

    Do not assume water is safe because it looks or smells normal. If your stored supply begins running low, Ready.gov advises against rationing drinking water unless authorities direct you to do so. Use what you need for health today while seeking an additional safe source for tomorrow.

    If the disruption is related to a power outage, the steps in What to Do When the Power Goes Out can help you address the rest of the household safely while protecting your water supply.

    The Bottom Line

    Store at least one gallon per person per day for three days. Treat that as the minimum, not the finish line. Add water for pets and special needs, keep part of the supply portable and work toward two weeks at home when space and circumstances allow.

    Emergency water storage does not need to happen in one expensive purchase. Count the household, close the three-day gap and build from there. A modest supply you can reach, rotate and use is more valuable than a perfect plan that never leaves the shopping list.

    Sources Consulted

  • Why Your Generator Won’t Start After Sitting—and How to Prevent It

    Why Your Generator Won’t Start After Sitting—and How to Prevent It

    A portable generator can sit quietly in a garage or shed for years and still look ready. The fuel tank may not be empty. The oil may still be in the engine. Nothing appears broken.

    Then a hurricane approaches, the power goes out or you finally decide to test it—and the engine will not start.

    That is exactly what happened to me.

    I bought my generator in a hurry while preparing for a major hurricane. Once the immediate threat passed, I stored it with gasoline still in the tank. I did not add fuel stabilizer, drain the fuel system or take the generator out for periodic testing. It sat for a couple of years.

    Before another hurricane, I pulled it out and tested it while I still had time to deal with a problem. The old fuel had to be drained, and I eventually removed the carburetor and cleaned its clogged jets and fuel passages before the generator would run properly again.

    The neglect caused the problem. Testing before the storm kept it from becoming an emergency.

    If your generator has been sitting and will not start, do not assume it is ruined—and do not begin by taking the carburetor apart. Work from the simplest checks toward the more involved possibilities. Old fuel is a frequent cause, but the problem may be as simple as a closed fuel valve, the wrong choke position, low oil, a loose spark-plug connection or a discharged starting battery.

    Safety Comes Before Troubleshooting

    Safety First

    Do all troubleshooting outdoors, at least 20 feet from the house, with the exhaust pointed away from the home and other occupied buildings. Never start or run a portable generator in a garage, shed, basement, carport, porch or other enclosed or partially enclosed space.

    Carbon monoxide is colorless and odorless. Opening a garage door does not make generator operation inside the garage safe.

    Before working around gasoline:

    • Turn the generator off.
    • Let the engine cool completely.
    • Keep cigarettes, flames, sparks and other ignition sources away.
    • Work in a well-ventilated outdoor area.
    • Wipe up spilled fuel and allow vapors to disperse before trying to start the engine.
    • Keep the generator level so gasoline and oil do not spill.
    • Disconnect the spark-plug wire before performing service when the owner’s manual directs you to do so.

    Read the owner’s manual for your specific generator before draining fuel, removing components or performing maintenance. Control positions, fuel-draining procedures, oil requirements and service limits vary by model.

    Do not bypass a low-oil sensor, carbon-monoxide shutoff or any other safety system simply to make the engine run. Stop if you find damaged wiring, a cracked fuel line, a persistent fuel leak or anything else you cannot address confidently.

    Start With the Simple Checks

    A generator that has been sitting may have more than one problem. Begin with the starting procedure in the owner’s manual and confirm the basics before blaming the carburetor.

    1. Remove every electrical load

    Unplug extension cords, appliances and transfer equipment before starting the generator unless the owner’s manual says otherwise. A portable generator should normally be started without a connected load.

    2. Confirm the controls

    Make sure the engine switch is on, the fuel valve is open and any fuel-cap vent is in the operating position. Set the choke exactly as the manual specifies for a cold or warm engine.

    It is easy to overlook one control when a storm is approaching and you are working from memory.

    3. Check the fuel

    Verify that the tank contains the fuel type required by the manufacturer. If the gasoline has been sitting for months—or you do not know how old it is—do not assume it is usable merely because it still smells like gasoline.

    Do not try to rescue years-old gasoline by pouring fresh fuel or stabilizer on top of it. Fuel stabilizer can slow deterioration when added to fresh gasoline, but it cannot restore gasoline that has already degraded.

    4. Check the oil

    Place the generator on a level surface and verify the oil level using the procedure in the owner’s manual. Many portable generators have a low-oil shutdown system that prevents the engine from starting or stops it during operation when the oil level is too low.

    Use the specified oil and do not overfill the crankcase.

    5. Check the starting battery

    If the generator has electric start, inspect the battery and its connections. A battery can discharge while the generator sits, especially if the manual’s storage-charging instructions were not followed.

    A dead electric-start battery does not necessarily mean the engine has failed. Some models may also have a recoil starter, but follow the manufacturer’s instructions rather than assuming the two starting methods work the same way.

    6. Inspect the spark plug and air filter

    Make sure the spark-plug wire is firmly connected. If the manual permits homeowner inspection, remove and examine the spark plug for heavy deposits, damage or an incorrect gap. Replace it with the specified plug when necessary.

    How to Inspect, Clean and Gap a Spark Plug

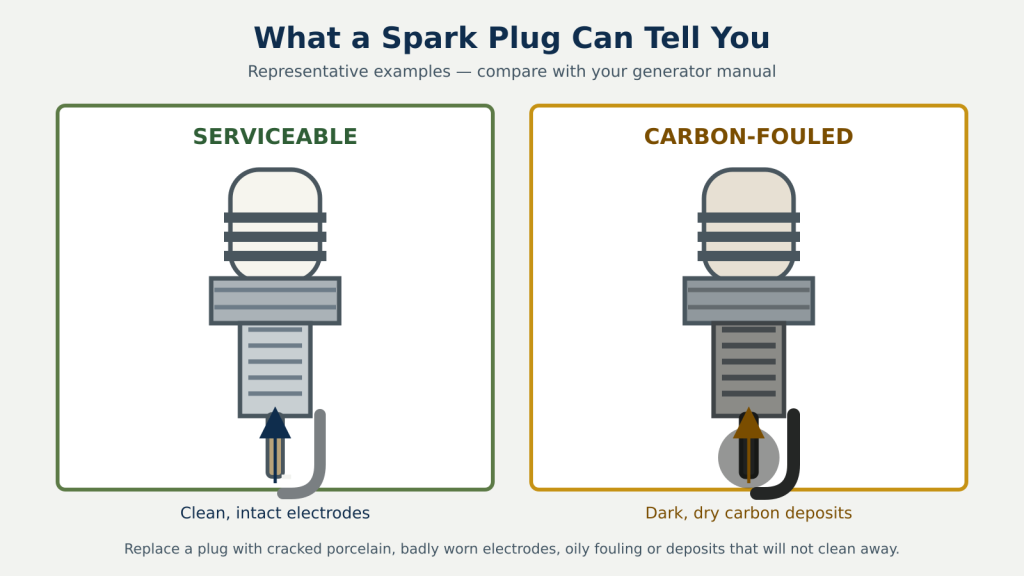
    A spark plug may show dark, dry carbon deposits and still be serviceable after cleaning. Replace it instead if the porcelain is cracked, the electrodes are badly worn or burned, it has oily contamination, or stubborn deposits cannot be removed.

    Side-by-side illustration of a serviceable generator spark plug and a carbon-fouled spark plug.
    • Clean around the plug before removing it so debris cannot fall into the cylinder.
    • Remove the plug with the correct spark-plug socket.
    • Remove light deposits with a small wire brush and approved spray-on spark-plug cleaner.
    • Do not use abrasive blasting.
    • Replace the plug if the porcelain or electrodes are damaged or the deposits cannot be removed.

    The correct spark-plug gap varies by engine. Find the required measurement in the generator’s owner’s manual before checking or adjusting it.

    To check the gap with a feeler gauge:

    • Select the blade or combined blades that match the specified gap.
    • Slide the gauge between the center electrode and the curved ground electrode.
    • A correctly sized gauge should pass through with slight resistance.
    • If adjustment is permitted, bend only the curved ground electrode.
    • Do not pry against the center electrode or porcelain.
    • Measure again after every adjustment.

    When reinstalling the plug, start the threads by hand to reduce the risk of cross-threading. Tighten it exactly as the manufacturer directs, then reconnect the spark-plug lead.

    Inspect the air filter for dirt, deterioration, oil saturation or obstruction. Clean or replace it only according to the model’s instructions.

    Why Old Gasoline Causes So Many Starting Problems

    Gasoline changes during storage. It oxidizes and loses volatility, and it can leave gum or varnish-like deposits inside the fuel system. The small amount of fuel sitting in a carburetor can deteriorate faster than the larger amount in the tank.

    Those deposits can restrict the carburetor’s tiny jets and fuel passages. The float or needle may also stick. The engine then receives too little fuel, too much fuel or an improper mixture of fuel and air.

    Possible fuel-system symptoms include:

    • The engine will not start.
    • The engine starts briefly and dies.
    • The engine runs only with the choke partly or fully engaged.
    • The engine surges or runs unevenly.
    • Fuel does not appear to reach the carburetor.
    • Gasoline leaks from the carburetor or enters the engine oil.

    Those symptoms can have other causes, so treat them as clues rather than a diagnosis.

    What to Do With Old Fuel

    Use the fuel-draining procedure in the owner’s manual. Depending on the generator, that may involve the tank, the carburetor bowl or both.

    Drain gasoline only into an approved fuel container. Never pour unwanted gasoline onto the ground, into a drain, into a storm sewer or into household plumbing. Contact your local household hazardous-waste program for disposal instructions.

    Once the old fuel has been removed, inspect the drained gasoline and the generator’s fuel system for water, rust, debris or damaged components. Add only fresh fuel that meets the manufacturer’s requirements.

    If fresh fuel and the correct starting procedure solve the problem, do not stop there. Watch for leaks, unstable running or an inability to carry a normal load. A generator that starts but runs poorly is not yet ready for an outage.

    Can Tapping the Carburetor Help?

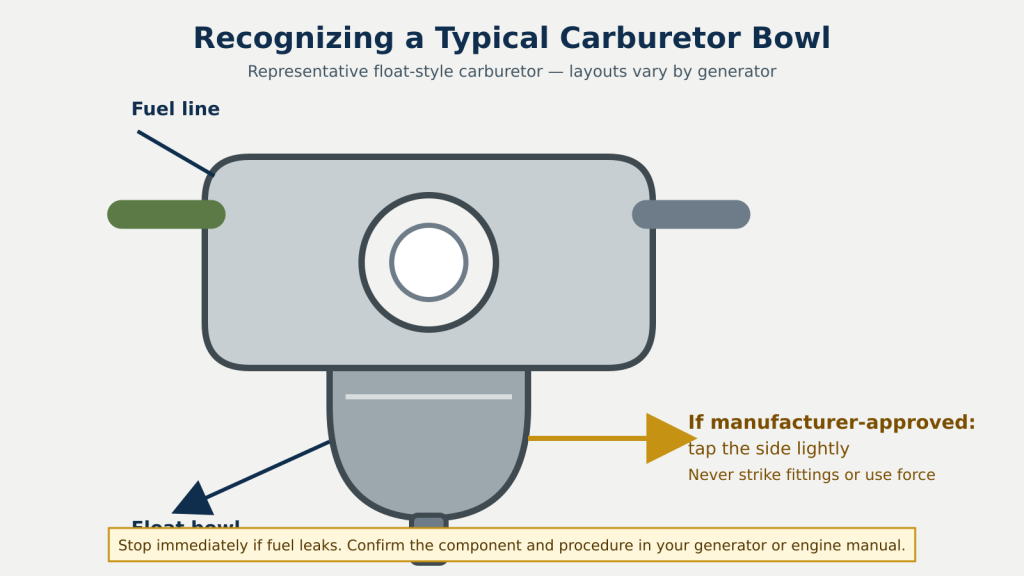
    Sometimes fuel is not flowing because the carburetor float or needle is stuck. Briggs & Stratton includes lightly tapping the side of a carburetor among its troubleshooting suggestions for some small engines when fuel is not reaching the engine.

    Labeled illustration showing the float bowl on a representative small-engine carburetor.

    That does not make it a universal generator repair.

    This is a limited troubleshooting measure—not a cure for stale fuel, clogged jets, corrosion or damaged parts. If it works, the generator still needs to be inspected and tested. If fuel begins leaking, turn the fuel valve off, move away from ignition sources and correct the leak before attempting another start.

    Before You Follow a Repair Video

    A good video can make carburetor removal, linkage placement and reassembly much easier to understand than written instructions alone. YouTube can be useful, but the video must match your equipment.

    Find the generator’s model and serial-number label before searching. Also identify the engine model when it is listed separately. Two generators with similar names or wattage ratings may use different engines, carburetors, control layouts and service procedures.

    Search using the exact manufacturer and model number followed by the repair:

    [manufacturer] [model number] carburetor cleaning

    Before following a video:

    • Start with the generator or engine manufacturer’s official channel when one is available.
    • Confirm that the generator or engine shown matches yours.
    • Compare the procedure with the owner’s or service manual.
    • Watch the entire video before removing anything.
    • Photograph hoses, springs and linkages before disconnecting them.
    • Avoid instructions that bypass sensors, alter factory adjustments or dismiss fuel-leak precautions.
    • Stop if the video and your equipment do not match.

    Manufacturer videos are generally the better source for specifications, controls, maintenance procedures and safety requirements. Independent repair videos can be helpful because they often show real disassembly and common problems, but they require more judgment.

    Champion Power Equipment’s official carburetor-cleaning video is a useful example of the detail a manufacturer video can provide. NGK’s official spark-plug gap video demonstrates the general measuring and adjustment principle. Neither replaces the specifications or procedure for your generator.

    When Carburetor Cleaning Becomes the Next Step

    If the controls are correct, the oil level is correct, the ignition and air-filter checks do not reveal the problem, old gasoline has been removed and fresh fuel still does not reach the engine properly, the carburetor may need cleaning or service.

    This is where my own generator repair ended up.

    Carburetor cleaning can be a manageable job for someone who is comfortable working on small engines, but it is not identical on every generator. Linkages, gaskets, drain screws, jets, adjustment settings and replacement parts vary.

    At a minimum, the work may involve:

    • Turning off and safely controlling the fuel supply
    • Disconnecting the spark-plug wire
    • Removing the air-cleaner assembly
    • Documenting the position of hoses, springs and linkages
    • Removing the carburetor without bending or damaging the linkage
    • Disassembling only the components permitted by the service information
    • Cleaning jets and fuel passages without enlarging calibrated openings
    • Inspecting the float, needle, bowl, seals and gaskets
    • Reassembling the carburetor exactly as designed
    • Checking carefully for fuel leaks before starting the engine

    Do not force wire, drill bits or other hard objects through a carburetor jet. Enlarging or damaging a calibrated passage can change the fuel mixture and create another problem.

    Stop and use a qualified small-engine technician if you do not have model-specific instructions, cannot control the fuel safely, find corrosion or damaged parts, are uncertain about linkages or adjustments, or see any leak after reassembly.

    In some cases, replacing the carburetor or having it professionally serviced may be more practical than cleaning it repeatedly.

    When the Generator Still Will Not Start

    A generator that still will not start after the basic fuel, oil, control, spark-plug and air-filter checks may have a blocked fuel line, damaged ignition component, compression problem, electrical fault or another model-specific condition.

    Professional service is the appropriate next step when:

    • Fuel leaks persist.
    • The engine has little or no compression.
    • Wiring or ignition components are damaged.
    • The recoil starter or electric starter is not operating correctly.
    • The engine starts but surges, stalls or produces abnormal smoke.
    • The generator engine runs but electrical output is absent or unstable.
    • A safety-shutdown indicator or fault code remains active.
    • The repair exceeds your tools, information or experience.

    A successful start is not the only standard. The generator must run safely and supply stable power under an appropriate load before you depend on it.

    How to Prevent the Problem From Happening Again

    There is no single fuel-storage rule that fits every generator and every storage period.

    Honda provides different fuel procedures for short, medium and long storage periods on some models. Generac recommends treating fuel that will sit even for shorter periods and draining the fuel tank and running the carburetor dry before storage longer than 30 days on many portable models. Other manufacturers and models may specify different steps.

    Your owner’s manual is the authority for your machine.

    Depending on the model and expected storage time, the correct procedure may include:

    • Adding the specified amount of fuel stabilizer to fresh gasoline
    • Running the engine long enough for treated fuel to reach the carburetor
    • Closing the fuel valve and running the carburetor dry
    • Draining the carburetor bowl
    • Draining both the tank and carburetor for long-term storage
    • Charging or removing the electric-start battery
    • Changing or checking the oil
    • Storing the generator upright in a dry, protected location

    Never assume that fuel stabilizer makes gasoline permanent. Date stored fuel, follow the stabilizer manufacturer’s directions and replace it within the period permitted by the generator and fuel-treatment manufacturers.

    Build a Generator Readiness Routine

    The best time to discover a starting problem is when the weather is calm and repair shops are not overwhelmed.

    After each use

    • Inspect the generator for leaks, damage and loose connections.
    • Record the operating hours.
    • Check the maintenance schedule.
    • Prepare the fuel system for the expected storage period.
    • Store cords and necessary accessories where they can be found.

    During storage

    • Follow the manufacturer’s exercise or test interval.
    • Check an electric-start battery as directed.
    • Inspect the storage area for moisture, pests, corrosion or fuel odor.
    • Keep the owner’s manual with the generator.
    • Record each test and the next scheduled check.

    Before hurricane or severe-weather season

    • Move the generator to its safe outdoor operating location.
    • Inspect the fuel system, oil, air filter, spark plug and battery.
    • Start it using fresh, approved fuel.
    • Let it warm up according to the manual.
    • Test it under an appropriate load if the manufacturer permits.
    • Confirm that required cords, inlet equipment or transfer equipment are ready.
    • Test the home’s carbon-monoxide alarms.
    • Correct problems before a storm is approaching.

    A maintenance record does not need to be complicated. Record the date, operating hours, fuel treatment or draining performed, maintenance completed, test load and anything that needs attention.

    The Most Important Step: Test It Early

    My generator problem was caused by neglect. But the most important thing I did was test the generator before the next hurricane arrived.

    That created time to drain the old fuel, clean the carburetor and confirm that the generator worked again. Waiting until the power failed would have turned a repairable maintenance problem into an emergency.

    If your generator has been sitting, find the owner’s manual and test it now—not when the forecast changes and not after the lights go out.

    Buying the generator was only the beginning. Maintaining it, testing it and knowing that it will operate safely are what make it part of a real preparedness plan.

    Sources

    Consumer Product Safety Commission — Portable Generator Safety

    Honda Power Equipment — Generator Fuel Recommendations

    Generac — Portable Generator Troubleshooting Guide

    Generac — Preparing a Portable Generator for Storage

    Briggs & Stratton — Small Engine Fuel Recommendations

    Briggs & Stratton — Carburetor Troubleshooting and Cleaning

    EPA — Household Hazardous Waste

    Briggs & Stratton — Changing and Gapping Spark Plugs

    Generac — Inspecting a Portable Generator Spark Plug

    Champion Power Equipment — Official Carburetor-Cleaning Video

    NGK Spark Plugs — Official Spark-Plug Gap Video

  • What to Do When the Power Goes Out: A Homeowner’s Complete Guide

    What to Do When the Power Goes Out: A Homeowner’s Complete Guide

    When the power goes out, you don’t need to solve every problem at once.

    Start with the people in your home, check for immediate hazards, find out what happened, and protect the things that actually matter. A short outage may require little more than patience. An outage that lasts through the night or into the next day requires a different plan.

    The key is knowing what matters now—and what matters next.


    Power Just Went Out? Do These Things First

    If the lights just went out, start here.

    1. Check the People First

    Before worrying about the refrigerator, generator, or Wi-Fi, make sure everyone in the household is safe.

    Pay particular attention to anyone who depends on electricity for:

    • Medical equipment
    • Refrigerated medication
    • Mobility or accessibility equipment
    • Safe heating or cooling
    • Other essential powered devices

    If losing electricity creates an immediate medical or safety problem, address that first. Follow the backup instructions provided by the person’s healthcare provider, device manufacturer, or medication provider.

    The FDA recommends that people who rely on medical devices understand what happens if power is lost, what backup supplies they need, and whether devices, supplies, or medicines have special temperature requirements.

    2. Check for Immediate Hazards

    Look and listen before you start troubleshooting.

    Watch for:

    • Smoke or fire
    • A burning electrical smell
    • Sparking or damaged electrical equipment
    • Downed power lines
    • Flooding or water around electrical equipment
    • A carbon monoxide alarm

    If your home relies on a sump pump and the outage occurs during heavy rain or flooding, check that risk immediately. A sump pump that has stopped operating can turn a power outage into a flooding problem quickly.

    Stay away from fallen or damaged power lines and anything they may be touching.

    If electrical equipment or the breaker panel is wet, damaged, or surrounded by water, don’t attempt to operate it. Never enter standing water to reach electrical equipment.

    3. Determine Whether the Outage Is Just Your House

    Look outside. Do neighboring homes have power? Are streetlights on?

    Check your electric utility’s outage information if phone service is available.

    If the outage appears limited to your home, and your electrical panel and the surrounding area are dry and undamaged, check for an obviously tripped circuit breaker if you’re comfortable doing so.

    If a breaker trips again after being reset, stop. Repeatedly resetting it doesn’t fix the underlying problem.

    Don’t remove panel covers or attempt electrical repairs.

    4. Get Safe Lighting

    Use flashlights, battery-powered lanterns, or rechargeable lighting if available.

    Avoid candles when practical. Open flames add a fire hazard at exactly the time when people are moving around with limited visibility.

    5. Keep the Refrigerator and Freezer Closed

    Keep both doors closed. Don’t start moving food yet.

    An unopened refrigerator can keep food cold for about four hours. A full freezer can maintain its temperature for about 48 hours, while a half-full freezer generally provides about 24 hours, as long as the door stays closed.

    Every unnecessary opening gives away some of that time.

    6. Turn Off or Disconnect Sensitive Equipment

    Turn off or disconnect sensitive electronics and appliances when practical. Leave one light switched on so you’ll know when service returns.

    Don’t handle equipment that is wet or damaged.

    7. Find Out What Is Happening

    Check reliable sources such as:

    • Your electric utility
    • Local emergency-management alerts
    • Local government information
    • National Weather Service information when weather is involved

    A restoration time is useful, but remember: it’s an estimate.

    Make decisions based on how long your household can safely manage without electricity—not solely on when the utility expects the lights to come back on.

    If everyone is safe and you’ve completed these first steps, you have time to make the next decisions.


    The First Hour: Understand What You’re Dealing With

    Not every outage deserves the same response.

    A problem affecting one house is different from a neighborhood outage. A neighborhood outage is different from widespread storm damage that may take days to repair.

    Find out what you can from your utility and local authorities.

    If your utility hasn’t already recorded the outage, report it through its outage line, app, website, or other reporting system. Don’t assume someone else has already done it.

    If severe weather is involved, look beyond the restoration estimate. More storms, extreme temperatures, flooding, ice, or high winds can affect not only the power but your ability to get fuel, food, or other supplies later.

    Preserve Your Communications

    Your phone may become one of your most useful pieces of emergency equipment.

    Use it accordingly.

    Limit unnecessary streaming and other battery-heavy activity. Use low-power settings when appropriate, and don’t burn through your power banks simply because they’re available.

    You don’t need every device in the house at 100 percent.

    You need a reliable way to receive information and communicate if the outage lasts longer than expected.


    Decide What Actually Needs Electricity

    One of the easiest mistakes during an outage is trying to power everything because everything normally uses electricity.

    Instead, ask:

    What actually needs power right now?

    Think in three groups.

    Critical

    Things whose loss could threaten someone’s health, safety, or the home itself.

    Depending on your household, that might include:

    • Essential medical equipment
    • A sump pump during flooding
    • A well pump when water is needed
    • Other household-specific safety equipment

    Important

    Things that make an extended outage manageable and may become essential over time:

    • Refrigerator or freezer
    • Phones and communications
    • Selected lighting
    • Fans during hot weather
    • Other household-specific needs

    Convenience

    Things you’d prefer to have but can safely live without for a while.

    This distinction matters because backup power is limited.

    You don’t need to replace the electrical grid. You need to protect the functions that matter.


    Decide Whether You Need Backup Power

    Don’t start a generator simply because the electricity went out.

    Ask:

    What problem am I trying to solve?

    Charging phones and running a few lights is one problem.

    Keeping a refrigerator, well pump, sump pump, or medical equipment operating is another.

    Start with what matters most and work from there. Don’t consume limited fuel or battery capacity powering things you don’t really need.

    Choosing between a generator and a portable power station, calculating generator size, and determining how long different equipment can run are separate subjects. During the outage, your first job is simpler:

    Decide what needs power and what can wait.

    If you don’t have a generator or portable power station, that’s fine. Skip the backup-power section below and continue with food, temperature, water, and extended-outage planning.


    If You Use a Portable Generator, Keep It Safe

    A portable generator can make an extended outage much easier to manage. Used incorrectly, it can also create serious hazards.

    Keep It Outside—and Away From the House

    Never operate a portable generator inside a house, garage, basement, carport, porch, or other enclosed or partially enclosed space—even with doors or windows open.

    Generator exhaust contains carbon monoxide, an odorless and colorless gas that can kill without warning.

    Current CPSC guidance says to operate portable generators outdoors at least 20 feet from homes and buildings, with the exhaust directed away from windows, doors, and vents.

    Keep working carbon monoxide detectors inside the home.

    CPSC portable-generator safety guidance

    What If the Generator Cord Won’t Reach?

    This is a real-world problem. The cord that came with your generator—or the cord you already own—may not be long enough to reach from a safe generator location.

    Don’t move the generator closer to the house just because the cord is too short.

    If you’re powering appliances directly, use appropriately rated extension cords long enough to maintain safe generator placement. CDC specifically recommends having at least 20 feet of outdoor-rated extension cord available with a generator.

    If your generator connects to a permanently installed generator inlet or transfer/interlock system, don’t improvise an extension or adapter. Use a properly rated generator connection cable of the needed length that is compatible with your generator and installed system.

    Before the next outage, put the generator where you would safely operate it and make sure the connection equipment you own will actually reach.

    Keep It Dry

    A generator needs to remain outside, but it also needs protection from rain and standing water.

    Don’t solve the rain problem by moving it into a garage, enclosed porch, or similar space.

    Follow the generator manufacturer’s instructions for operating in wet weather. CPSC notes that manufacturer instructions may call for an appropriate noncombustible generator tent or may advise waiting until the rain or snow passes.

    Don’t Use Fuel-Burning Equipment Indoors

    Don’t use a gas oven to heat the house. Don’t bring grills, camp stoves, charcoal burners, or similar equipment indoors.

    These devices can produce carbon monoxide. If a CO alarm sounds, get everyone outside to fresh air and seek emergency help.


    What About a “Suicide Cord”?

    This comes up in the real world, so it deserves a direct answer.

    A male-to-male extension cord—sometimes called a “suicide cord”—should not be used to feed generator power into a household outlet.

    The answer is no—even if you plan to switch off the main breaker first.

    The exposed male prongs can become energized, creating an electrocution hazard. Improper backfeeding can also create electrical and fire hazards and potentially endanger utility workers.

    The problem isn’t simply that there is a more expensive or more code-compliant way to connect a generator. The improvised connection introduces hazards that aren’t eliminated by following a particular breaker sequence.

    No Generator Inlet? You Still Have an Option

    You don’t need to power the house to use your generator.

    Plug the appliances you actually need directly into the generator with appropriate extension cords.

    Start with the essentials. That might mean the refrigerator or freezer, a light, and a way to charge phones.

    Add other loads only when needed and only within the generator’s capacity.

    It’s less convenient than powering household circuits, but it’s practical—and it avoids improvising a dangerous connection to the home’s wiring. CDC specifically recommends individual heavy-duty, outdoor-rated extension cords for appliances powered directly by a generator.

    Choosing an Extension Cord Without an Engineering Degree

    Don’t choose by color.

    Green, orange, and yellow are common extension-cord colors, but the color doesn’t tell you how much electrical load the cord can safely carry.

    Look at the writing on the cord itself. You’ll usually see a wire size such as:

    16/3 — 14/3 — 12/3 — 10/3

    Here’s the part worth remembering:

    The smaller the first number, the heavier the wire.

    A 12/3 cord is heavier than a 16/3 cord. A 10/3 is heavier still.

    For a small load such as a lamp or phone charger, a lighter properly rated outdoor cord may be enough. For a refrigerator, freezer, or other larger load, use a heavier cord rated to handle the appliance.

    If you have two suitable cords and aren’t sure which to use, use the heavier one.

    Also:

    • Keep the cord run as short as practical
    • Don’t use damaged cords
    • Keep plugs and connections dry
    • Don’t pile several large loads onto one cord just because the plugs fit
    • Don’t exceed the generator’s capacity

    You don’t need to calculate voltage drop during a blackout. You need a sound, outdoor-rated cord that is rated for the appliance you’re powering.

    If you’re dealing with a particularly high-draw appliance, a very long cord run, or something you’re unsure about, check the appliance and cord ratings rather than guessing.

    For the future, if you want a portable generator to power household circuits, have appropriate generator connection equipment installed for your electrical system.

    Owning a generator and having a safe way to use its power are two different things.


    Protect Your Refrigerated and Frozen Food

    Food doesn’t become unsafe the moment the lights go out.

    Time and temperature matter.

    During the First Four Hours

    Keep the refrigerator closed.

    An unopened refrigerator should keep food cold for about four hours.

    For a short outage, don’t make the situation worse by repeatedly opening the door to check what’s inside.

    Preserve the cold you already have.

    After About Four Hours

    Now you need to pay closer attention.

    Don’t assume that everything suddenly becomes unsafe at the four-hour mark, and don’t simply start another countdown.

    Food safety depends on what the food is, the temperature it reached, and how long it remained there. Use current USDA/FoodSafety.gov guidance to decide what should be kept and what should be discarded.

    Don’t taste questionable food to decide whether it’s safe.

    The Freezer Gives You More Time

    With the door kept closed:

    • A full freezer can maintain temperature for about 48 hours
    • A half-full freezer can maintain temperature for about 24 hours

    Frozen food that still contains ice crystals or remains at 40°F or below may be safely refrozen, although the quality may change.

    When you’re uncertain, use current federal food-safety guidance rather than smell, appearance, or guesswork.

    FoodSafety.gov power-outage food guidance


    Watch the Temperature—and the People

    Sometimes electricity isn’t the real emergency.

    What happens because the electricity is gone is the emergency.

    During extreme heat, losing air conditioning can make the house unsafe. During severe cold, losing heat can do the same.

    Pay particular attention to people who are more vulnerable to temperature extremes.

    Don’t wait until everyone is miserable before considering alternatives.

    If the house can no longer provide a safe environment, moving temporarily to another safe location may be the better preparedness decision.


    Don’t Forget About Water

    A power outage does not automatically mean your tap water is unsafe.

    But electricity and water can be connected in ways that aren’t always obvious.

    Municipal Water

    Water service may continue normally during an outage.

    Pay attention to notices from your water utility or local authorities. If they issue a boil-water, conservation, or other advisory, follow it.

    Don’t assume the water is contaminated simply because the electricity is off—and don’t ignore an official advisory because the water still looks normal.

    Private Wells

    If your home depends on an electric well pump, losing electricity may also mean losing your normal water supply.

    That’s one reason stored emergency water matters even when the emergency itself isn’t a water emergency.

    Water storage and treatment deserve their own guide. For now, simply recognize whether your household’s water depends on electricity.


    If the Outage Lasts Overnight

    An overnight outage is a good time to reassess.

    Not because midnight creates a special safety threshold, but because your situation has changed.

    Before going to sleep, ask:

    • Is everyone safe?
    • Is the indoor temperature acceptable?
    • Are medical equipment and medications secure?
    • Do we have safe lighting available?
    • Are phones sufficiently charged?
    • What is the status of the refrigerator and freezer?
    • Do we have enough water?
    • How much generator fuel or battery capacity remains?
    • Has the restoration estimate changed?
    • Is the weather improving or getting worse?

    Before You Go to Sleep

    Take a few minutes to make sure:

    • Flashlights are easy to reach
    • Walkways are clear
    • Phones and essential communications are available
    • Carbon monoxide detectors are working
    • No unnecessary candles or open flames remain burning
    • Everyone knows what to do if conditions change

    If you’re using backup power, ask one more question:

    What actually needs to remain powered overnight?

    Don’t keep a generator running merely because you’ve been running it all day. Decide which loads truly need continuous power and whether the generator needs to operate overnight to support them.

    If it does need to continue operating, make sure it remains safely positioned and operated according to the manufacturer’s instructions.

    Don’t become so focused on maintaining power that you create a different hazard.


    If the Outage Extends Into the Next Day

    Don’t simply repeat yesterday’s plan.

    Reassess it.

    Ask one useful question:

    Are conditions improving, stable, or deteriorating?

    Then reconsider:

    People → Water → Food → Medication → Temperature → Fuel → Communications → Sanitation → Backup Power

    A household that managed the first six hours easily may face different problems after a full day.

    Fuel may be getting low. Food decisions may be changing. A home with a well may be short on water. Indoor temperatures may be moving in the wrong direction. Medical backup supplies may be running down.

    Preparedness means responding to the situation you actually have—not stubbornly following the plan you started with.


    Know When Staying Home Is No Longer the Best Plan

    Staying home isn’t always the goal.

    Consider moving to a safer location when:

    • Critical medical needs can no longer be supported
    • Indoor temperatures are becoming unsafe
    • Authorities order or recommend evacuation
    • Fire, flooding, electrical, or structural hazards develop
    • Essential water or sanitation can no longer be maintained
    • Someone in the household can no longer remain reasonably safe
    • Conditions are deteriorating faster than your available resources can support

    There isn’t a universal number of hours after which everyone should leave.

    One household may safely manage a long outage during mild weather. Another may need to relocate within a few hours because of medical needs or dangerous temperatures.

    Preparedness isn’t measured by how long you can stay in your house.

    Sometimes the prepared decision is leaving before conditions become dangerous.


    When the Power Comes Back

    The lights coming back on doesn’t mean you’re finished.

    Take a few minutes to return the household to normal.

    Check for Problems

    If the outage involved flooding, storm damage, burning odors, sparking, or damaged electrical equipment, don’t energize questionable equipment simply because utility power has returned.

    Wet or damaged electrical equipment may need professional inspection.

    Evaluate Your Food

    If the outage lasted long enough to affect refrigerated or frozen food, use the time-and-temperature guidance discussed earlier.

    Don’t rely on taste or appearance.

    Make Sure Important Systems Are Working

    Check the household systems that matter.

    Did the refrigerator restart? Is the well pump operating? Did heating or cooling return normally? Is medical equipment functioning properly?

    Don’t assume that every system returned to normal just because the lights came back on.

    Recharge What You Used

    Recharge the things you’ll depend on during the next outage:

    • Phones
    • Power banks
    • Flashlights and lanterns
    • Radios
    • Portable power stations
    • Medical-device backup batteries
    • Other rechargeable emergency equipment

    An emergency battery that goes back into the closet empty isn’t ready for the next emergency.

    Shut Down Backup Equipment Properly

    Follow the manufacturer’s instructions for shutting down your generator or other backup-power equipment.

    Maintenance and storage can come later. For now, shut it down correctly and make note of anything that needs attention.


    Before You Put Everything Away

    One of the most useful things you can do after an outage takes about ten minutes.

    Don’t rely on remembering the details six months from now.

    Look at what actually happened.

    The Ready Chateau 10-Minute Outage Review

    Ask:

    What couldn’t we find?

    Flashlights? Extension cords? Instructions? Something else?

    What didn’t work?

    Did the generator refuse to start? Did a flashlight fail? Was a power bank dead?

    What wasn’t charged?

    What did you expect to be ready but wasn’t?

    What did we run out of?

    Fuel? Batteries? Water? Ice? Medication? Easy-to-prepare food?

    What information didn’t we have?

    Utility information? Generator instructions? Medication guidance? Important phone numbers?

    What did we think was essential but barely use?

    Preparedness isn’t always about adding more things.

    What proved more important than expected?

    Maybe it was a battery fan, a lantern, a power bank, a cooler—or something unique to your household.

    What would have become a serious problem if the outage lasted another 24 hours?

    That may be the most useful question of all.

    Fix the Weaknesses While You Remember Them

    Don’t wait for the next storm forecast.

    Replace what failed.

    Recharge what was depleted.

    Repair what didn’t work.

    Restock what you used.

    Reorganize what you couldn’t find.

    Learn what you didn’t know.

    Test what you’re counting on next time.

    The outage just gave you a real-world test of your household preparedness.

    Use the results.


    The Bottom Line

    You don’t need to power everything in your house during an outage.

    You need to protect the people in it.

    Start with safety. Find reliable information. Protect essential functions. Use backup power carefully. Reassess as conditions change, and recognize when staying home is no longer the safest option.

    Then, when the lights come back on, don’t simply put everything away.

    Fix what didn’t work before the next outage.

    That’s how a household becomes better prepared—not by owning more equipment, but by understanding what it actually needs and keeping those resources ready.


  • The Complete Home Emergency Preparedness Checklist

    The Complete Home Emergency Preparedness Checklist

    Emergencies rarely happen at a convenient time.

    Want a printable version? Download the free Ready Chateau Home Preparedness Checklist and review your household’s preparations at your own pace.

    A storm can knock out power overnight. A water-main break can interrupt service. Severe weather can make roads unsafe. An evacuation order can mean leaving home with little notice.

    Being prepared doesn’t mean trying to anticipate every possible disaster. It means making sure your household can handle the basic problems emergencies tend to create.

    If you’ve already read Start With the Basics: A Practical Guide to Household Preparedness, you know the Ready Chateau approach:

    People → Risks → Inventory → Essentials → Gaps → Maintenance

    This checklist takes the next step.

    Use it to evaluate what your household already has, identify what’s missing, and build a practical preparedness plan without turning the process into a shopping spree.

    FEMA’s emergency-supply guidance is a useful starting point, but FEMA also emphasizes that a basic supply list is only a starting point and should be adapted to the unique needs of your household, including pets.

    You don’t have to complete everything today.

    Start with what matters most, work through the checklist, and improve your preparedness over time.

    1. Start With the People in Your Household

    Before thinking about equipment or supplies, think about the people who will depend on them.

    An emergency plan for one healthy adult will look very different from a plan for a family with young children, an older adult, someone who depends on refrigerated medication, or a person who uses electrically powered medical equipment.

    CDC preparedness guidance specifically emphasizes individual needs such as prescription medications, medical devices, mobility equipment, eyeglasses and specialized foods.

    Household Checklist

    • List everyone who normally lives in your household.
    • Identify infants, young children or older adults who may need additional help.
    • Identify mobility, accessibility or other functional needs.
    • Identify prescription medications household members depend on.
    • Identify medical equipment that requires electricity, batteries or refrigeration.
    • Account for prescription glasses, hearing aids, mobility equipment and other essential devices.
    • Identify food allergies, dietary restrictions and specialized nutritional needs.
    • Include pets and service animals in your planning.
    • Identify anyone outside your household who may depend on you during an emergency.

    Ready Chateau Tip: Don’t build a generic emergency plan and then try to fit your household into it. Build the plan around the people who will actually use it.

    2. Know Your Risks

    You don’t need to prepare equally for every disaster imaginable.

    Start with events that are realistic where you live.

    Depending on your location, those might include:

    • Power outages
    • Hurricanes
    • Tornadoes
    • Flooding
    • Winter storms
    • Extreme heat
    • Wildfires
    • Water interruptions
    • Local evacuation events

    Some problems can occur almost anywhere. A prolonged power outage, communications failure or temporary interruption in water service doesn’t require a major natural disaster.

    Risk Checklist

    • Identify the severe-weather hazards common to your area.
    • Know whether your home is in a flood-prone, wildfire-prone or evacuation area.
    • Consider how a prolonged power outage would affect your household.
    • Consider what would happen if your normal water supply became unavailable.
    • Know where you would shelter during the hazards most likely to affect your area.
    • Know which circumstances could require you to evacuate.

    The goal isn’t to predict the next emergency.

    It’s to avoid being surprised by problems you could reasonably have anticipated.

    3. Emergency Water

    Water belongs near the top of every preparedness checklist.

    CDC recommends storing at least 1 gallon of water per person per day for 3 days and, when possible, trying to maintain a 2-week supply. Additional water may be necessary for people who are pregnant or sick, pets, or households in hot climates.

    Water Checklist

    • Store at least 1 gallon of water per person per day for a minimum of 3 days.
    • Work toward a 2-week household supply when practical.
    • Include additional water needed for pets.
    • Account for health, climate and other circumstances that may increase water needs.
    • Use appropriate food-grade water-storage containers if you fill your own containers.
    • Store water away from harmful chemicals and in an appropriate location.
    • Observe manufacturer expiration dates on commercially bottled water.
    • Replace water stored in home-filled containers every 6 months.
    • Have a reliable backup method for making water safe if your stored supply becomes insufficient.
    • Make sure everyone who may need the water knows where it is stored.

    CDC identifies unopened commercially bottled water as the safest and most reliable emergency water source. For water stored in containers filled at home, CDC recommends food-grade containers and replacement every six months.

    We’ll cover quantities, storage methods and treatment options in greater detail in Ready Chateau’s dedicated emergency-water guides.

    4. Emergency Food

    Emergency food should be food your household can realistically eat and prepare under emergency conditions.

    It’s easy to buy specialty emergency food without considering allergies, preparation requirements, available cooking methods or whether anyone in the household actually likes it.

    Food Checklist

    • Keep several days of nonperishable food available.
    • Choose foods your household normally eats when practical.
    • Account for allergies, dietary restrictions and medical diets.
    • Include infant formula or specialized nutrition products when needed.
    • Include foods that require little or no cooking.
    • Consider how food will be prepared if electricity or gas service is unavailable.
    • Keep a manual can opener if any emergency food requires one.
    • Monitor expiration or best-quality dates.
    • Rotate appropriate foods into normal household use rather than allowing them to be forgotten.

    CDC includes emergency food and specialty foods for infants, people with dietary restrictions, food allergies and certain medical conditions among important personal emergency needs.

    Preparedness food doesn’t have to be exotic.

    For many households, the most practical emergency pantry begins with ordinary shelf-stable foods they already use.

    5. Lighting and Backup Power

    A power outage becomes much easier to manage when you can see, communicate and keep essential small devices operating.

    Start with basic capability before worrying about large backup-power systems.

    Lighting & Power Checklist

    • Have working flashlights where household members can find them easily.
    • Have a way to provide safe area lighting.
    • Keep the correct spare batteries for battery-powered equipment.
    • Have at least one way to recharge mobile phones during an outage.
    • Keep power banks charged if they’re part of your plan.
    • Identify medical devices or other essential equipment that cannot tolerate an extended outage.
    • Determine whether essential equipment requires a larger backup-power solution.
    • Know how your backup-power equipment is supposed to be used safely before an emergency occurs.

    FEMA includes flashlights, extra batteries, and an extra cellphone battery or charger among basic emergency supplies.

    A generator or portable power station may eventually make sense for your household, but backup power should solve an identified need—not simply add another piece of equipment to the garage.

    6. Stay Informed and Connected

    A charged phone is useful, but it shouldn’t be your entire emergency communications plan.

    Cellular networks can become congested. Internet service can fail. Power outages can interrupt charging.

    The National Weather Service recommends having multiple ways to receive warnings, including a method capable of alerting you during the night.

    Communications Checklist

    • Make sure Wireless Emergency Alerts are enabled on compatible phones.
    • Know how your local government distributes emergency notifications.
    • Have multiple ways to receive severe-weather warnings.
    • Include a warning method capable of waking you at night.
    • Consider a NOAA Weather Radio with battery backup.
    • Keep important telephone numbers somewhere besides your phone’s contact list.
    • Establish an out-of-area contact household members can reach.
    • Choose household meeting locations.
    • Make sure children and other household members understand the basic communication plan.
    • Keep charging cables and backup charging equipment accessible.

    The important principle is redundancy.

    No single warning or communication method should be expected to work perfectly under every circumstance.

    7. First Aid, Health and Medications

    An emergency can make routine healthcare harder to access even when nobody is injured by the emergency itself.

    Pharmacies may close. Roads may be blocked. Electricity may be unavailable. Normal appointments may be disrupted.

    Health Checklist

    • Keep an appropriate household first-aid kit.
    • Know where it is stored.
    • Review its contents periodically and replace used or expired items.
    • Maintain a current list of prescription medications.
    • Record dosage, frequency, medical needs and allergy information.
    • Talk with your physician or pharmacist about an appropriate emergency supply of necessary medications.
    • Plan for medications that require refrigeration.
    • Keep essential medical-device supplies available.
    • Include prescription glasses, contact-lens supplies, hearing-aid supplies and other essential personal items.
    • Have a backup-power plan for essential electrically powered medical equipment.

    CDC recommends discussing emergency medication supplies with a physician or pharmacist and maintaining current information about prescriptions, dosage, medical needs and allergies.

    Medication planning is one area where a generic checklist cannot replace individualized medical advice.

    8. Sanitation and Personal Needs

    Emergencies don’t eliminate ordinary human needs.

    If water, electricity or normal retail access is interrupted, basic hygiene and sanitation supplies become much more important.

    Sanitation Checklist

    • Toilet paper
    • Soap and hand-cleaning supplies
    • Personal hygiene products
    • Feminine hygiene products where needed
    • Diapers and infant-care supplies where needed
    • Older-adult or incontinence supplies where needed
    • Garbage bags and ties
    • Moist towelettes or other appropriate cleaning supplies
    • Basic household disinfecting and cleaning supplies
    • A plan for sanitation if normal water or sewer service is interrupted

    FEMA includes moist towelettes, garbage bags and plastic ties for personal sanitation among basic emergency supplies.

    This isn’t the glamorous side of preparedness, but it can quickly become one of the most important.

    9. Home Safety and Basic Tools

    Preparedness also means knowing how to keep an emergency from becoming worse.

    Home Safety Checklist

    • Confirm that smoke alarms are installed and working.
    • Confirm that carbon-monoxide alarms are installed and working where appropriate.
    • Keep an appropriate fire extinguisher accessible.
    • Make sure household members know basic fire-safety procedures.
    • Know where your home’s utility shutoffs are located.
    • Learn the correct procedures for your home’s utilities before an emergency.
    • Keep basic household tools accessible.
    • Keep sturdy work gloves available.
    • Have a whistle or another simple means of signaling for help.
    • Keep local maps available in case normal navigation services are unavailable.

    FEMA’s basic emergency-supply guidance includes a whistle, local maps, and a non-sparking wrench or pliers for utility shutoff.

    Important: Don’t shut off gas or other utilities simply because an emergency has occurred. Follow instructions from your utility provider and local authorities and understand the correct procedures for your home before an emergency happens.

    10. Documents and Emergency Cash

    Some emergencies create paperwork problems long after the immediate danger has passed.

    Having essential information organized beforehand can make evacuation, insurance claims, medical care and recovery much easier.

    Documents & Money Checklist

    • Identification documents
    • Insurance policies and contact information
    • Medical and prescription information
    • Emergency contact information
    • Property ownership or lease information
    • Vehicle information
    • Pet records
    • A basic household inventory
    • Photographs or video documenting important household property
    • Secure physical or digital backups of critical information
    • Some emergency cash in an appropriate secure location

    Store sensitive documents securely and protect them from unauthorized access as well as physical damage.

    CDC’s preparedness program identifies paperwork—including insurance information, personal identification and emergency plans—as a core part of personal health preparedness.

    You don’t need to carry your entire filing cabinet during an evacuation.

    You do need a way to access information that would be difficult to replace when you need it most.

    11. Don’t Forget Your Pets

    Pets are part of the household preparedness plan, not an afterthought.

    If conditions aren’t safe for you, they may not be safe for your animals either.

    Pet Preparedness Checklist

    • Keep a 2-week emergency supply of food for each animal.
    • Keep a 2-week emergency supply of water for each animal.
    • Keep a 2-week supply of necessary pet medications when applicable.
    • Keep feeding and medication instructions.
    • Have leashes, harnesses and collars with identification.
    • Keep appropriate carriers readily available.
    • Maintain veterinary and vaccination records.
    • Keep recent photographs and ownership information.
    • Maintain microchip information where applicable.
    • Include appropriate sanitation and cleaning supplies.
    • Identify pet-friendly evacuation destinations.
    • Identify someone who could care for or evacuate your animals if you cannot.

    CDC’s pet disaster checklist recommends two weeks of food and water for each animal, two weeks of applicable medications, veterinary records, identification, carriers and other animal-specific supplies.

    Practice matters here, too.

    A carrier isn’t much help during an evacuation if you can’t get a frightened animal into it.

    12. Can You Shelter at Home?

    Many emergencies don’t require evacuation.

    Instead, you may need to remain home while utilities, transportation or normal services are disrupted.

    Walk through these questions realistically.

    Shelter-at-Home Checklist

    • Could your household manage several days without normal electrical service?
    • Could you safely light the areas you need after dark?
    • Could you keep phones and essential communications equipment operating?
    • Could you manage if tap water became temporarily unavailable?
    • Could you prepare food without your normal cooking appliances?
    • Could you manage household sanitation during a utility interruption?
    • Could you safely maintain necessary medications and medical equipment?
    • Could you manage extreme heat or cold if normal heating or cooling failed?
    • Do you have a safe location in your home for the severe-weather hazards common to your area?
    • Does everyone in the household know where that location is?

    This exercise often reveals preparedness gaps more clearly than a shopping checklist does.

    13. Could You Leave Quickly If Necessary?

    Preparedness also means being able to leave.

    Wildfires, flooding, chemical incidents and other emergencies can make evacuation safer than staying home.

    Evacuation Checklist

    • Know where you would go if you had to leave home.
    • Identify more than one possible evacuation destination.
    • Know the primary routes out of your area.
    • Identify alternate routes.
    • Keep your vehicle reasonably prepared if it’s part of your evacuation plan.
    • Decide which essential supplies would go with you.
    • Keep critical medications and medical supplies accessible.
    • Make important documents or copies accessible.
    • Include pets in transportation and destination planning.
    • Establish a household meeting or reunification plan.
    • Make arrangements for household members who may need transportation or assistance.
    • Know how you would receive changing instructions while traveling.

    CDC recommends involving the entire household in planning how to remain informed and connected during an emergency.

    Don’t wait for an evacuation order to decide where you’re going.

    14. Preparedness Requires Maintenance

    Buying emergency supplies is not the end of preparedness.

    Water ages. Food expires. Batteries discharge. Phone numbers change. Children grow. Prescriptions change. Equipment that worked last year may not work today.

    That’s why maintenance is part of preparedness.

    Maintenance Checklist

    • Review emergency food dates and condition.
    • Replace water stored in home-filled containers every 6 months.
    • Check flashlights and replace weak batteries.
    • Recharge power banks and rechargeable equipment.
    • Test radios and warning equipment.
    • Inspect first-aid supplies.
    • Review medications and medical requirements.
    • Update emergency contacts.
    • Update important-document copies when necessary.
    • Review pet supplies and records.
    • Test emergency equipment according to manufacturer recommendations.
    • Revisit household risks and evacuation plans.
    • Replace anything that has been used, damaged, expired or outgrown.

    A practical approach is to give your overall preparedness supplies and equipment a thorough review about every six months, while following any shorter expiration, medication, manufacturer or maintenance schedule that applies.

    Put the review on your calendar.

    Preparedness that isn’t maintained gradually becomes the illusion of preparedness.

    You Don’t Have to Finish Everything Today

    If this checklist revealed a lot of gaps, don’t let that discourage you.

    That’s what the checklist is supposed to do.

    You now know where to begin.

    Start with the needs that would affect your household most quickly:

    Water. Food. Medication. Lighting. Communications. Safety.

    Then work outward.

    You may discover that you already own much of what you need. Some gaps may require nothing more than organizing supplies, writing down information, charging equipment or making a family plan.

    Other improvements can happen gradually.

    The goal isn’t to build the perfect emergency kit this weekend.

    The goal is to make your household more capable, more resilient and easier to manage when normal life is disrupted.

    Your Next Step

    If you haven’t already, read Start With the Basics: A Practical Guide to Household Preparedness. It explains how to evaluate your household, understand your realistic risks, inventory what you already have and prioritize the gaps that actually matter.

    Then return to this checklist and work through it one section at a time.

    As Ready Chateau’s preparedness library grows, we’ll add detailed guides covering emergency water, food, power outages, backup power, severe weather, emergency equipment and equipment maintenance.

    You don’t need to prepare for everything.

    You need a practical plan for your household, supplies that meet your needs, and equipment you can depend on when you actually need it.

    That’s what being ready means.