Category: Emergency Power

Practical guidance on generators, portable power stations, batteries, backup power, and keeping essential equipment running during an outage.

  • Portable Generators for Home Outages: Our Picks by Power Need

    Portable Generators for Home Outages: Our Picks by Power Need

    I bought my first generator in a hurry during last-minute hurricane preparation. The big-box stores in my area were sold out. Then one store got a truckload just before the storm was expected to arrive. In a small town, news travels fast. I joined the line, and by the time I reached the generators, I had one choice.

    I was lucky to get one. I still have it, and it works. But I suspect I paid more than I would have with time to shop, and I ended up with less generator than I needed. When a hurricane is on the way and the shelves are nearly empty, you take what you can get. I wish I had done the research before I was in that line.

    This guide is for homeowners who have time to make that decision now. It starts with what you need to power and how you will connect it, then offers two generator options for each of three situations. The first is our pick for that situation; the second is worth considering when a different feature matters more to you.

    Quick answer

    If you plan to plug a few individual appliances into a generator through properly rated outdoor cords, start with the 120-volt plug-in essentials category. If you plan to power selected household circuits through a professionally installed inlet and transfer equipment, start with the 120/240-volt home connection category. Choose a higher-capacity model only after calculating the loads you intend to run together.

    Our current short list:

    These are comparisons of published specifications and connection fit. We have not personally tested these generators.

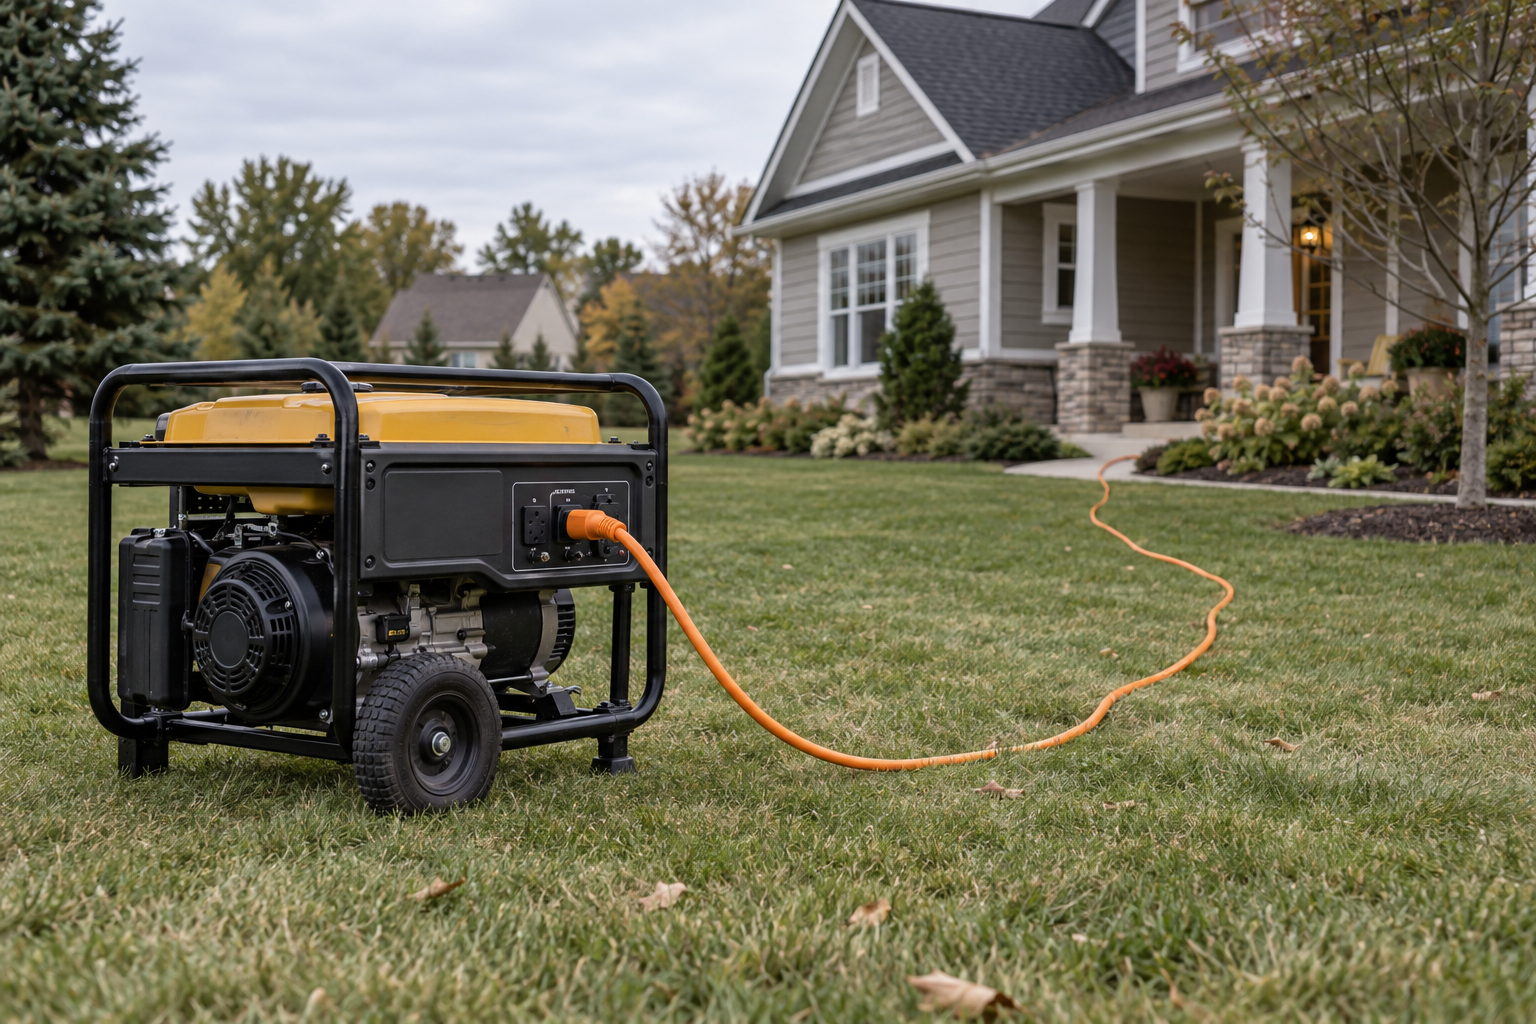
    No gasoline or propane generator belongs inside a home, garage, basement, shed or other enclosed space. The Consumer Product Safety Commission says to operate it outdoors at least 20 feet from homes and buildings, with exhaust directed away from openings. A CO shutoff feature adds protection; it does not change that placement rule.

    Choose the connection before the generator

    Your planWhat to verify before shoppingWhere to start below
    Plug individual appliances into the generatorEach appliance’s running and starting load; the generator’s 120V outlet rating; grounded, outdoor-use cords that reach from a safe location120V plug-in essentials
    Supply selected circuits through a home inletThe professionally installed inlet and transfer equipment; its connector and capacity; the planned 120V and 240V circuit loadsSelected household circuits
    Supply more circuits or larger starting loadsThe same installed-connection checks, plus a realistic load calculation and the capacity of the entire connectionMore simultaneous loads

    A TT-30R RV outlet is 120 volts. It is not the same as a four-prong L14-30R 120/240-volt outlet. Do not select a generator for a home inlet from its advertised wattage alone. Have a qualified electrician confirm the inlet, transfer equipment, generator outlet, cord and grounding arrangement. Never plug a generator into an ordinary wall outlet or use a male-to-male cord to feed home wiring. The Electrical Safety Foundation International explains the backfeed hazard.

    If you have not sized your loads, use our generator sizing guide first. If you will run appliances directly, our generator extension cord guide explains the different cord connections, and our generator cord recommendations cover specific cord types.

    How we selected these generators

    We compared the manufacturer’s running watts, not just the larger starting-watt number. For dual-fuel models we checked the gasoline and propane ratings separately. We also checked outlet types, CO shutoff, fuel choices, weight, starting method, published noise and warranty information. A model had to fit the connection described in its category. A 120V-only model cannot serve a 120/240V load merely because it has a 30-amp RV receptacle.

    These are researched picks based on manufacturer documentation, current listings and safety guidance. We did not run the generators under load, measure their noise, or independently test long-term reliability. Published runtime and sound measurements can use different load levels and conditions, so they should not be treated as directly comparable unless the methods match. Check the exact model number, current manual, availability and price before buying.

    As an Amazon Associate, Ready Chateau may earn from qualifying purchases at no additional cost to you.

    Our picks for 120V plug-in essentials

    This category is for individual, compatible plug-in loads, not a promise to power a house. A refrigerator, a few lights and device charging may fit; an appliance with a large motor-starting demand may not. Add the loads you expect to run together and leave room for starting surges. Observe the rating of each outlet, not only the generator’s total running watts.

    Our Pick WEN DF480iX for several 120V loads

    The WEN DF480iX gives this category useful headroom: 4,000 running watts on gasoline or 3,600 on propane. It has four 120V 5-20R household receptacles, a separate 120V TT-30R RV receptacle, electric start with a recoil backup, wheels and a CO shutdown sensor. WEN also lists less than 1.2% total harmonic distortion at full load.

    View WEN DF480iX on Amazon

    Choose it if: Your calculated plug-in loads call for more capacity than a small carryable inverter, and you want propane as a second fuel option.

    Know its limits: It is a 120V-only generator. Its TT-30R does not make it a match for an L14-30 home inlet or 240V equipment. The 4,000-watt total does not mean a single 20-amp receptacle can deliver 4,000 watts. It is larger than the carryable option below, and an electric-start battery needs attention during storage.

    Also Consider WEN DF280iX for a smaller load and easier carrying

    The WEN DF280iX provides 2,250 running watts on gasoline or 2,000 on propane. It weighs about 45 pounds and has two 120V 5-20R receptacles, CO shutdown and fuel shutoff for storage. It may be the more sensible purchase when the actual loads are modest and you need to move the unit yourself.

    Choose it if: Your appliance list fits its running and starting limits, and compact size matters more than capacity for additional loads.

    Know its limits: It has no 120/240V outlet, and it will not run every combination of refrigerator, pump, cooking equipment and other essentials. Confirm the starting requirement of motor-driven appliances before counting on it.

    Our picks for selected household circuits

    These models have a 120/240V L14-30R outlet that may fit a matching, professionally installed inlet and transfer arrangement. They can also supply compatible plug-in appliances from their household outlets. The installed inlet and its circuit plan determine what the house can actually use. A 30-amp connector does not increase a generator’s rated output.

    Our Pick Champion 201239 for inverter output and manageable size

    The Champion 201239 is an open-frame inverter with 5,500 running watts on gasoline. Its outlets include an L14-30R rated by Champion at 120/240V and 22.9 amps, two GFCI household duplex outlets, and a 120V TT-30R. Champion lists CO Shield automatic shutdown, less than 3% total harmonic distortion, 111.6 pounds with a wheel kit, and compliance with PGMA G300-2023.

    View Champion 201239 on Amazon

    Choose it if: A 5,500-watt gasoline-only plan fits your calculated circuits and you place value on inverter output, lighter weight and the manufacturer’s lower published noise figure compared with the conventional option below.

    Know its limits: It has recoil start and runs on gasoline only. Its L14-30R has a 30-amp connector shape, but the generator’s continuous output at 240V is 22.9 amps. Do not plan loads as though the full 30 amps were available continuously.

    Also Consider Champion 201463 for propane flexibility and more rated output

    The Champion 201463 is a conventional dual-fuel model with 6,250 running watts on gasoline or 5,600 on propane. It has an L14-30R and two GFCI household duplex outlets, CO Shield, a wheel kit, and a 3-year limited warranty. Champion lists PGMA G300-2023 compliance.

    Choose it if: Fuel flexibility or the additional gasoline running capacity matters more to you than the first model’s lower published noise and inverter output.

    Know its limits: Champion lists 74 dBA at 23 feet and a weight of 171 pounds, versus 69 dBA and 111.6 pounds for the 201239 under Champion’s published specifications. It uses recoil start. Propane reduces its rated running output, so size the load for the fuel you expect to use.

    Our picks for more simultaneous loads

    Move to this category when a calculated set of circuits and appliance starting loads exceeds the middle category. Higher wattage is not a reason to skip the connection plan. In particular, a 14-50R receptacle does not mean the generator produces 50 amps continuously at 240V. Match the generator, cord, inlet and transfer equipment, then manage loads within the lowest applicable limit.

    Our Pick Champion 201417 for high-capacity inverter power

    The Champion 201417 is an enclosed dual-fuel inverter. Champion lists 9,000 running watts on gasoline and 8,100 on propane, electric start with recoil backup, CO Shield, two GFCI household duplex outlets, an L14-30R and a 14-50R. Its gasoline rating is 37.5 amps at 240V, below the 50-amp connector’s nominal rating. Champion reports less than 3% total harmonic distortion, 64 dBA and PGMA G300-2023 compliance.

    See Champion 201417 on Amazon

    Choose it if: Your load calculation justifies this size and you want dual fuel, inverter output and the manufacturer’s lower published noise figure in a high-capacity unit.

    Know its limits: At 205.1 pounds, it still needs a sensible storage and movement plan. Propane running output is lower. The L14-30R path remains limited by that outlet and the installed connection even though the generator has a larger 14-50R outlet.

    Also Consider Westinghouse WGen9500DFc EFI for fuel injection and output

    The Westinghouse WGen9500DFc EFI lists 9,500 running watts on gasoline and 8,500 on propane. It offers electric, remote and recoil starting, electronic fuel injection, CO sensor shutdown, an L14-30R, a 14-50R and GFCI household outlets. Westinghouse lists California emissions compliance for this exact EFI model.

    See Westinghouse WGen9500DFc EFI on Amazon.

    Choose it if: You favor its extra rated output, fuel injection or remote start, and those features fit your actual connection and load plan.

    Know its limits: Westinghouse reports 74 dBA and up to 23% total harmonic distortion, compared with Champion’s published 64 dBA and under 3% THD. These published noise figures are manufacturer claims, not our side-by-side measurements. Its gasoline rating is about 39.6 amps at 240V, not 50 amps from the 14-50R. Check the requirements of sensitive equipment and the installation with a qualified electrician.

    The safety features do not replace safe operation

    All six models above advertise a CO detection and shutdown feature. CPSC advises buyers to look for that feature, while still requiring outdoor operation at least 20 feet away, exhaust pointed away from openings, and working CO alarms in the home. Never operate a generator in a garage, even with the door open. Follow the manual’s instructions for rain and wet conditions; do not place the generator under a porch or move it closer because a cord is short.

    Do not backfeed a wall receptacle. If you want to power circuits, arrange the inlet and transfer equipment with a qualified electrician before an outage. If you want to power individual appliances, use only compatible, properly rated outdoor cords and keep the generator in its safe outdoor location. Our portable generator safety guide covers CO, fire and electrical risks in more detail.

    What I would do before buying again

    I would list the appliances and circuits I actually need, including their running and starting loads. I would decide whether I am using individual cords or an installed inlet. Then I would check the generator’s running output on the fuel I plan to keep, its exact receptacles, and the capacity of every part of the connection. I would also decide where the generator can operate safely outdoors and measure the cord route from there.

    That is the homework I wish I had done before the hurricane line formed. The generator I bought in a rush still works, but I would rather make the next choice with a load list and a connection plan than with whatever happens to be left on a truck. Once you have chosen a model, our generator maintenance checklist can help keep it ready for the outage you cannot schedule.
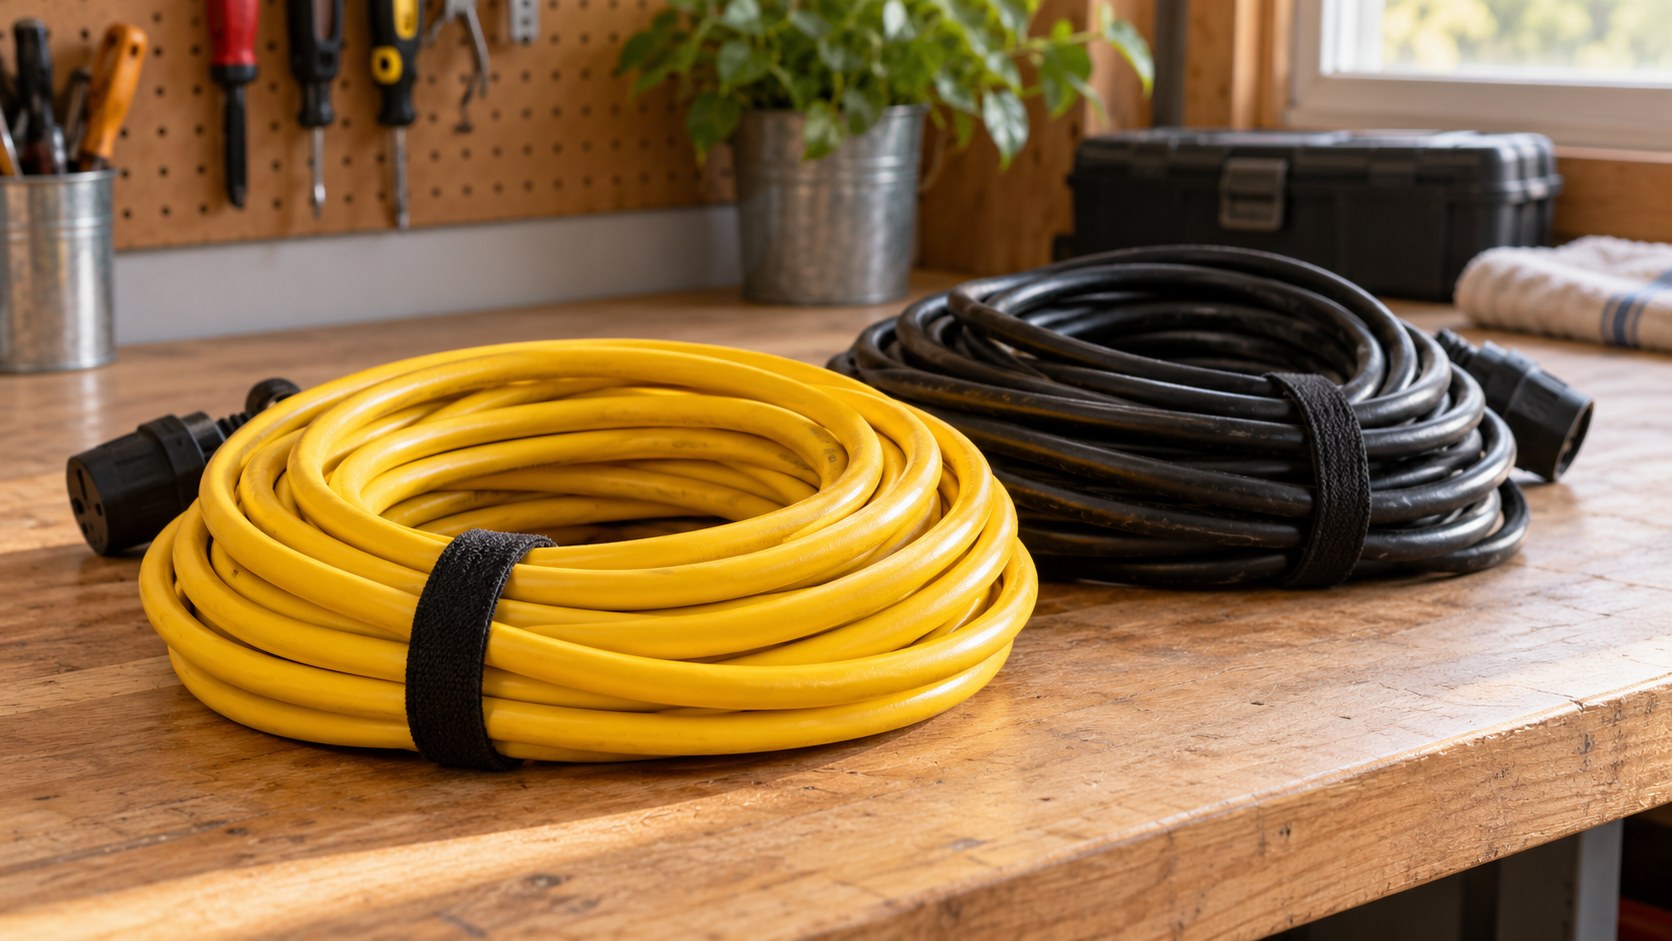
  • Best Extension Cords for Generators: Match the Cord to the Connection

    Best Extension Cords for Generators: Match the Cord to the Connection

    A portable generator can be powerful enough to run your essential equipment and still be connected with the wrong cord. The outlet on the generator, the equipment at the other end, the electrical load and the distance all matter.

    These recommendations are based on manufacturer specifications and practical fit; Ready Chateau has not completed hands-on testing of these cords. Verify the current product listing and your generator manual before buying.

    This guide recommends three different kinds of cord for three different jobs. They are not interchangeable. If you have not identified the outlet on your generator, start with our guide to extension cords for generators before choosing a product.

    Quick Answer

    For a standard 120-volt generator outlet and one appliance, start with a properly rated, grounded, outdoor-use extension cord long enough for the entire route. Our 50-foot, 15-amp candidate is the Southwire 2588SW0002.

    For a generator’s four-prong L14-30R outlet, first decide whether you are supplying individual appliances or connecting to a matching, professionally installed power inlet. The appliance connection needs a distribution cord with household receptacles. The installed inlet needs an L14-30 power cord with a locking connector at each end. Buying one in place of the other will not solve the problem.

    The U.S. Consumer Product Safety Commission advises operating a fuel-burning generator outdoors at least 20 feet from the home, with exhaust directed away from doors, windows and vents. Measure the whole cord route from that location. Never move the generator closer to make a short cord reach.

    Identify the Connection Before You Shop

    Generator outletWhere power is goingCord type to consider
    Standard 120V 5-15R or 5-20RDirectly to a compatible applianceGrounded outdoor extension cord, rated for the appliance and full route
    120/240V L14-30RIndividual 120V appliancesMatching L14-30P distribution cord with household receptacles
    120/240V L14-30RMatching installed inlet and transfer equipmentL14-30P-to-L14-30R generator power cord

    Read the actual outlet marking and the generator manual. A cord’s plug must match the outlet without improvised adapters. Other outlet types, including L5-30, TT-30 and 14-50, call for different equipment. The cord recommendations below do not cover those outlets.

    Our Generator Cord Recommendations

    Ready Chateau affiliate disclosure: As an Amazon Associate, I earn from qualifying purchases. There is no additional cost to you.

    Best for a Standard Household-Style Outlet: Southwire 2588SW0002, 50 Feet

    Southwire’s 50-foot 12/3 SJTW cord is a practical starting point when you are using a standard 120-volt generator receptacle to supply one compatible appliance. Southwire lists it for outdoor use, with grounded NEMA 5-15 fittings, a 15-amp maximum and a bright yellow jacket that is easier to see along the route.

    We favor the 50-foot length because the generator must remain well away from the house. The extra length may allow the cord to reach an appliance without compromising placement. It does not mean every 50-foot route is suitable: measure yours and confirm the connected appliance and generator manual permit the arrangement.

    Best for: A 5-15R or compatible 5-20R generator outlet supplying one appliance whose load is within the cord’s 15-amp rating.

    Main limitation: The 12-gauge conductors do not turn its 5-15 plug and connector into a 20-amp cord. Do not treat the generator’s larger outlet or total wattage as permission to exceed this cord’s rating.

    Check price and availability on Amazon (paid link)

    View Southwire’s specifications.

    Best L14-30 Distribution Cord When 25 Feet Truly Reaches: Champion 48043

    If your generator has an L14-30R locking outlet and you want to run several individual 120-volt appliances, Champion’s 48043 is a 25-foot, 10-gauge outdoor-rated cord. Its L14-30P plug connects to the matching generator outlet. The other end provides four 5-20R household receptacles with circuit breakers for the outlet groups.

    This is a connection-specific choice, not a universal cord for every generator. Add the loads you plan to use, observe each receptacle’s limits and the generator’s output limits, and follow both manuals. Four receptacles do not mean four appliances can each draw 20 amps at once.

    The length is a serious constraint. With the generator at least 20 feet from the building, a 25-foot cord might not reach the intended distribution point. We would recommend this model only after measuring a safe, workable route. Do not place a generator inside a garage, on a porch or closer to an opening to make it fit.

    Best for: A measured, compatible L14-30-to-appliance arrangement where 25 feet is sufficient.

    Main limitation: Too short for many home layouts. If it does not reach, select a verified longer product designed for this same connection rather than joining cords or compromising generator placement.

    Check Price and Availability on Amazon (paid link)

    View Champion’s specifications.

    Best for a Matching Installed Power Inlet: AC WORKS L1430EX, 50 Feet

    Some homes have a power inlet and transfer equipment installed by a qualified electrician. For a system with a matching L14-30 inlet and a generator with an L14-30R outlet, the 50-foot AC WORKS L1430EX is a candidate. The manufacturer lists a 10/4 STW cord rated at 30 amps, with an L14-30P plug for the generator and an L14-30R connector for the inlet.

    This cord supplies the inlet; it does not end in household receptacles for individual appliances. Confirm the generator’s output, inlet, transfer equipment and required cord specifications with the electrician who installed or verifies the system. A matching plug shape alone does not establish that the complete setup is suitable for your loads.

    Best for: A compatible, professionally installed L14-30 inlet and transfer arrangement needing a measured 50-foot route.

    Main limitation: It does not replace an inlet or transfer equipment. Never plug a generator into a normal wall outlet or use a male-to-male cord to feed household wiring.

    Check price and availability on Amazon (paid link)

    View the AC WORKS specifications and select the 50-foot version.

    Why There Is No One Cord for Every Generator

    The generator’s running wattage is not the cord’s rating. A generator may have several outlets with different voltage, amperage and plug configurations. The appliance or installed inlet sets another limit. Every part of the connection has to fit, and the lowest-rated part limits what that path can carry.

    Length matters as well. A cord that is thick enough for a short run is not automatically the right choice for a much longer run. Longer cords can create more voltage drop, particularly under heavier loads. Consult the generator and appliance instructions when choosing the gauge and length, and use the shortest safe and practical route that still preserves generator placement.

    An outdoor-use cord is made for the relevant environment; that label does not make exposed connections safe in standing water or give permission to run the generator in rain contrary to its manual. Inspect the entire cord before each use. Replace one with damaged insulation, a loose connector, heat marks or a missing ground prong. Keep the cord visible and away from foot traffic, sharp edges and places where a door or window would crush it. Do not run it under rugs.

    Check These Five Things Before Buying

    1. Outlet: Read the generator receptacle’s NEMA label, voltage and amp rating.
    2. Destination: Decide whether you are connecting individual appliances or a matching installed inlet.
    3. Load: Check the appliance’s running and starting requirements and the limits of the generator outlet, cord and connector.
    4. Route: Put the generator at a safe outdoor location first, then measure the full route to the destination.
    5. Condition and approval: Confirm the product’s outdoor-use marking, grounded connectors and appropriate safety listing; inspect the cord each time you use it.

    If any of these do not match, pause before purchasing. A different plug configuration or an installed household connection is a technical decision, not a reason to improvise an adapter.

    Final Recommendation

    Most readers should begin by reading the outlet label rather than by shopping for the thickest-looking cord. For one modest appliance on a standard generator outlet, the 50-foot Southwire 12/3 cord is our straightforward candidate, subject to its 15-amp limit. The Champion distribution cord serves a different L14-30-to-appliance setup, but its 25-foot length requires a carefully measured route. A home with a compatible installed inlet needs a cord like the 50-foot AC WORKS L1430EX instead.

    Choose the connection first. Then choose a cord that reaches while the generator remains safely outdoors and that carries the planned load within every component’s rating. Our generator safety guide covers placement, carbon monoxide and electrical hazards before the next outage.

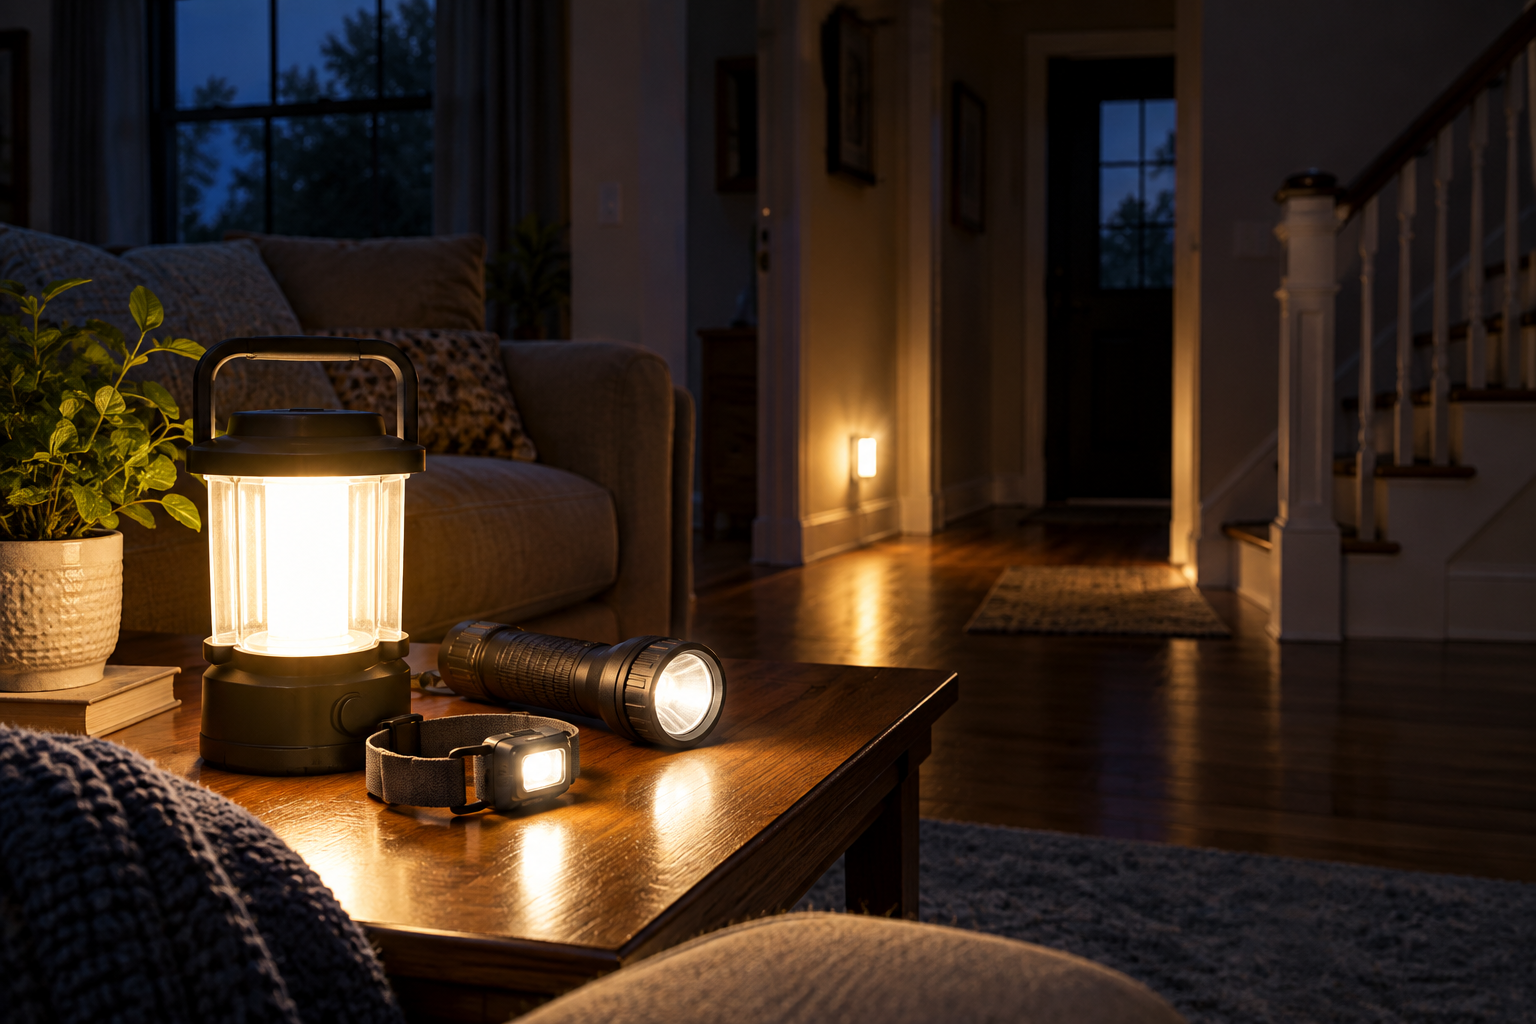
  • Best Emergency Lighting for a Power Outage

    Best Emergency Lighting for a Power Outage

    When my kids ask what I want for Christmas, my birthday or Father’s Day, I usually give them the same answer: a house can never have too many flashlights or tape measures.

    Tape measures may not be especially useful during a power outage, but flashlights certainly are. So are headlamps, lanterns and the other forms of emergency lighting we will cover below.

    Over the years, I have learned that owning several flashlights is not quite the same as being prepared. The batteries may be dead, the light may be buried in a drawer or every flashlight may somehow end up in the same room. When the power goes out after dark, you need working lights positioned where people can actually reach them.

    Rooms that were familiar an hour ago suddenly have dark stairways, hidden obstacles and cabinets you cannot search without holding up your phone. Using your phone as a flashlight also drains the battery you may need for alerts, emergency calls and communication.

    The best emergency lighting plan is not one extremely bright flashlight. It is a small group of reliable lights that handle different jobs throughout your home.

    Quick Answer

    Most homes should have one flashlight for every household member, at least one hands-free headlamp, one or two LED lanterns for shared rooms and a backup light that uses a different power source. Choose lights with multiple brightness settings and keep extra batteries with them.

    The Best Emergency Lighting Setup for Most Homes

    A practical home setup includes:

    • One flashlight for each person
    • At least one headlamp for hands-free work
    • One or two LED lanterns for shared living areas
    • Automatic emergency lights near stairs or hallways
    • A backup light with a different power source
    • Extra batteries stored in a cool, dry place

    This combination provides personal lighting, room lighting and redundancy without making the system unnecessarily complicated.

    Ready.gov recommends having a flashlight for every household member. That is a good starting point, but flashlights alone do not solve every lighting problem during an extended outage.

    Four Emergency Lights We Would Keep at Home

    These four lights are not competing for the same job. Each fills a different role in a practical home lighting plan: automatic light when the power first fails, hands-free light for essential tasks, dependable battery-powered room lighting and a brighter rechargeable lantern with another way to generate power.

    Affiliate disclosure: Ready Chateau may earn a commission from qualifying purchases made through links on this page, at no additional cost to you.

    1. Energizer Auto-On Rechargeable LED Flashlight

    The first few seconds of an outage are often when emergency lighting matters most. This Energizer light stays plugged into an outlet and charges while utility power is available, then turns on automatically when the power fails. You can also remove it from the outlet and use it as a handheld flashlight. We like it near a hallway, staircase or bedroom where immediate light can help someone move safely before the other emergency lights are located.

    Limitation: Its built-in rechargeable battery has limited runtime, so we would use it as the automatic first layer of an emergency lighting plan—not as the primary light for a long outage.

    Check the Energizer Auto-On Rechargeable LED Flashlight on Amazon

    2. COAST FL75 Headlamp — Best for Hands-Free Tasks

    A headlamp is most useful when the job requires both hands. The COAST FL75 provides up to 700 lumens, an adjustable beam and a red-light option, but the feature we especially like for emergency preparedness is its use of three common AAA batteries. During a long outage, you can replace depleted batteries immediately instead of waiting for a light to recharge.

    Limitation: At its highest brightness, it will use batteries much faster. For most indoor tasks, use a lower setting and save maximum output for situations where you actually need it.

    Check the COAST FL75 Headlamp on Amazon

    3. Streamlight Siege AA Lantern — Best for Replaceable-Battery Room Lighting

    The Streamlight Siege AA is designed for area lighting rather than throwing a narrow beam across a long distance. It produces up to 200 lumens and uses three AA batteries. On its 50-lumen low setting, Streamlight rates it for up to 37 hours of runtime. It also includes red and SOS modes, is waterproof, and floats if dropped in water. We like it as a dependable room lantern that does not depend on household power or a rechargeable battery.

    Limitation: Its 200-lumen maximum output is modest compared with larger rechargeable lanterns. That is intentional in our setup—we would use the Siege AA for efficient, dependable lighting and use a higher-output lantern when more light is actually needed.

    Check the Streamlight Siege AA Lantern on Amazon

    4. Goal Zero Lighthouse 600 — Best for Rechargeable Area Lighting

    The Goal Zero Lighthouse 600 provides up to 600 lumens for lighting a larger shared area. Its built-in rechargeable battery can be charged by USB or a compatible solar panel, and it can also provide USB power to a small device such as a phone. The built-in hand crank adds another charging option when other power sources are unavailable. We like it as the higher-output rechargeable part of the system rather than as the only lantern in the house.

    Limitation: Treat the hand crank as an emergency backup, not the primary charging method. Cranking produces relatively little energy compared with USB or solar charging, and using the lantern at high brightness will shorten runtime considerably.

    Check the Goal Zero Lighthouse 600 on Amazon

    You do not need to buy all four of these products if you already own reliable lights that fill the same roles. The goal is the system, not the brand names: immediate automatic light, hands-free light, dependable replaceable-battery lighting and rechargeable area lighting. Use what you already have when it works, then fill the gaps in your setup.

    Flashlights for Personal Use

    A dependable flashlight is still the most important emergency light to own.

    It gives you a focused beam for moving through the house, checking outside, finding supplies or inspecting a problem. Every person should know where their flashlight is stored and be able to reach it without crossing a dark room.

    Look for a flashlight with:

    • Low, medium and high brightness settings
    • A simple physical power button
    • A textured or nonslip grip
    • A battery indicator
    • Water resistance
    • A shape that will not roll off a table
    • Common, easy-to-replace batteries

    The brightest flashlight is not automatically the best one. A lower setting is usually more comfortable indoors and preserves battery power. High brightness is more useful when checking a yard, driveway or exterior damage.

    Headlamps for Hands-Free Tasks

    A headlamp becomes surprisingly useful once you have to cook, provide first aid, carry supplies or check an electrical panel in the dark.

    Because the light follows your line of sight, both hands remain available. That makes a headlamp especially useful for:

    • Preparing food
    • Helping children or older adults
    • Administering first aid
    • Handling tools
    • Checking a generator from a safe location
    • Walking a pet
    • Navigating stairs while carrying something

    Choose a headlamp with an adjustable strap and more than one brightness level. A very bright, single-setting headlamp can be uncomfortable indoors and may blind anyone who looks toward you.

    A red-light mode can be useful when you want enough light to move around without fully disrupting your night vision, but it is an optional feature rather than a necessity.

    LED Lanterns for Lighting a Room

    Lanterns spread light across a room instead of concentrating it into a narrow beam. They work well on a kitchen counter, dining table or bathroom shelf.

    The best emergency lantern should have:

    • A wide, even light pattern
    • Multiple brightness settings
    • A stable base
    • A carrying handle
    • A hook for hanging
    • A battery indicator
    • Enough runtime to last through the night on a lower setting

    Avoid relying on one oversized lantern for the entire house. It may create glare in one room while leaving hallways, bathrooms and bedrooms completely dark.

    Two smaller lanterns are often more useful than one extremely bright model because they can be placed where people actually need them.

    Automatic Emergency Lights for Hallways and Stairs

    Plug-in emergency lights remain charged while power is available and turn on automatically when the electricity goes out.

    They are particularly helpful near:

    • Stairways
    • Main hallways
    • Bedrooms
    • Bathrooms
    • Exterior doors

    An automatic light gives everyone immediate visibility before flashlights or lanterns have been located. This can reduce the chance of a fall during the first confusing moments of an outage.

    These lights should not be your only emergency lighting. Their internal batteries still need to be tested, and their useful runtime may be limited. Treat them as an automatic first layer, not the entire plan.

    Solar and Hand-Crank Lights as Backups

    Solar and hand-crank lights can provide another way to produce light when replacement batteries or household power are unavailable.

    They are most useful as secondary lights because charging speed depends on the product, available sunlight and the amount of time spent cranking. A small solar panel that works well during a sunny afternoon may be far less effective during several days of stormy weather.

    Keep one if it adds useful redundancy, but do not make it your only source of emergency light.

    What Do Lumens Mean?

    Lumens describe how much visible light a product produces. A higher number means a brighter light.

    Watts measure the electrical power a light uses, not how bright it appears. When comparing modern LED lights, lumens are more useful than watts.

    As a practical starting point:

    • A low setting is best for reading, close work and conserving batteries.
    • A moderate setting works well for most indoor navigation and room lighting.
    • A high setting is useful for outdoor checks and longer distances.

    Do not shop by the maximum lumen number alone. Multiple brightness settings and useful runtime are usually more valuable during a power outage than a very bright mode that quickly drains the battery.

    Choose a Useful Beam Pattern

    Flashlights generally produce one of two beam styles.

    A flood beam spreads light across a wider area. It is comfortable indoors and useful for close work.

    A spot beam reaches farther and is better for checking a yard, driveway or distant object.

    Some flashlights allow you to adjust between the two. If you are purchasing one general-purpose emergency flashlight, a balanced or adjustable beam provides the most flexibility.

    Battery-Powered or Rechargeable?

    Both options have advantages. The most reliable plan is to avoid depending entirely on one battery system.

    Replaceable-Battery Lights

    Lights powered by common disposable batteries can be restored immediately by installing a fresh set. They are useful during long outages when wall charging is unavailable.

    Their disadvantages include battery leakage, the cost of replacements and the need to keep the correct sizes on hand.

    Rechargeable Lights

    Rechargeable lights are convenient for regular use and reduce the number of disposable batteries you need to buy. However, they must be charged before an outage begins.

    A rechargeable light that has been sitting untouched for a year may not be ready when you need it.

    Dual-Power Lights

    Some lights can operate from a rechargeable battery pack or standard replaceable batteries. This can provide excellent flexibility, provided both power options are tested and stored correctly.

    For most households, a mix works well: rechargeable lights for regular use and at least one replaceable-battery light as a backup.

    Standardize Your Batteries When Possible

    Emergency lighting becomes easier to maintain when several devices use the same battery size.

    Instead of keeping four or five different battery types, consider choosing lights that mostly use one or two common sizes. This reduces confusion and makes it easier to rotate your supply.

    Store batteries:

    • In a cool, dry location
    • In their original packaging when possible
    • Away from metal objects
    • Away from excessive heat
    • Separately from damaged or leaking batteries

    Do not mix old and new batteries or combine different battery types in the same device. Follow the light manufacturer’s instructions for the correct batteries and charging equipment.

    Features Worth Paying For

    Emergency lights do not need dozens of modes. A few practical features matter more.

    Multiple Brightness Settings

    A lower setting extends runtime and reduces glare indoors. Save the highest setting for situations where you truly need it.

    Battery-Level Indicator

    An indicator helps you identify a weak battery before the outage.

    Easy Controls

    The power button should be easy to find and operate in the dark. Complicated sequences and tiny switches become frustrating when you are under stress.

    Stable Base or Hanging Hook

    A flashlight that can stand upright or a lantern that can hang overhead becomes much more useful as temporary room lighting.

    Water Resistance

    Storm-related outages may require you to step outside in rain or handle the light with wet hands. Some level of water resistance is valuable for an emergency light.

    Lockout Feature

    A lockout prevents a light from switching on inside an emergency kit and quietly draining its battery.

    Where to Keep Emergency Lights

    A flashlight stored somewhere in the garage will not help when the power goes out while you are upstairs.

    Keep lights where you can reach them without navigating through darkness:

    • Beside each bed
    • Near the main living area
    • In or near the kitchen
    • Near stairs
    • With the household emergency kit
    • Near—but not directly on—the electrical panel
    • In each vehicle

    Do not place every light in one container. If that area becomes inaccessible, the entire lighting supply becomes inaccessible with it.

    If hurricanes are a concern where you live, add emergency lighting to your Hurricane Preparedness Checklist before the storm arrives.

    How Many Emergency Lights Does a Home Need?

    There is no single number that fits every home, but this is a practical starting point:

    • One personal flashlight per household member
    • One headlamp for each adult who may need to perform tasks
    • One lantern for the main shared living area
    • One additional lantern for another floor or major room
    • One automatic light near a central hallway or staircase
    • One backup light in the emergency kit

    Larger homes, multi-level homes and households with mobility concerns may need additional pathway lighting.

    The goal is not to illuminate every room as brightly as normal. The goal is to let everyone move safely, complete essential tasks and preserve battery power.

    Test Your Lights Before You Need Them

    Emergency lighting is only useful if it works.

    Add a quick lighting check to your regular home-preparedness routine:

    1. Turn on every flashlight, headlamp and lantern.
    2. Test every brightness setting.
    3. Check for battery corrosion or leakage.
    4. Recharge rechargeable models according to the manufacturer’s instructions.
    5. Replace damaged batteries, charging cables or lights.
    6. Confirm that spare batteries are still in good condition.
    7. Check the Consumer Product Safety Commission recall database for rechargeable products.

    Test automatic plug-in lights by unplugging them or using their test button.

    A monthly check is ideal, but attaching the task to an existing routine—such as testing smoke alarms or reviewing your emergency supplies—makes it easier to remember.

    Power Outage Lighting Mistakes to Avoid

    Depending on Your Phone

    A phone flashlight is useful for the first few minutes, but it drains the same battery you need for weather alerts, communication and emergency information.

    Buying Only One Very Bright Light

    One light cannot be in the kitchen, hallway and bedroom at the same time. Several modest lights placed around the home are more useful.

    Ignoring Low-Mode Runtime

    Product packaging often emphasizes maximum brightness. During a long outage, runtime on a lower setting may matter much more.

    Storing Lights Without Checking the Batteries

    Disposable batteries can leak, and rechargeable batteries gradually lose their charge. An untested light should not be considered ready.

    Using Candles for Primary Lighting

    The U.S. Fire Administration advises using flashlights instead of candles during power outages. Open flames can be knocked over, left unattended or placed too close to combustible materials.

    Battery-operated flameless candles can provide gentle marker lighting, but they should not replace a flashlight or lantern for navigation and essential tasks.

    Using Fuel-Burning Lanterns Indoors

    Do not use gasoline-, propane- or other fuel-burning camping lanterns inside your home, garage, tent or camper. They create both fire and carbon-monoxide hazards.

    The CDC recommends battery-powered flashlights and lanterns rather than candles, gas lanterns or torches. Use battery-powered flashlights and LED lanterns indoors.

    A Simple Emergency Lighting Plan

    If you are starting from scratch, you do not need to buy everything at once.

    Begin with:

    1. One flashlight for every person
    2. One LED lantern for the main living area
    3. One headlamp
    4. A package of compatible replacement batteries
    5. One backup light with a different power source

    Place the lights around the home, show everyone where they are and test them regularly.

    If you also operate a portable generator, lighting is only one part of safe outage preparation. Review Extension Cords for Generators before connecting equipment.

    Final Recommendation

    I still believe a house can never have too many flashlights. But preparing for a power outage involves more than collecting them over the years and dropping them into different drawers.

    The lights need to work, everyone needs to know where they are, and each one should have a purpose.

    Use flashlights for personal movement, headlamps for hands-free tasks, lanterns for shared rooms and automatic lights for immediate visibility in hallways. Include more than one power source, keep extra batteries ready and test everything regularly.

    You do not need enough emergency lighting to make your home look as though the power never went out. You need enough reliable light to help everyone move safely, care for one another and handle essential tasks until the electricity returns.

    And if my kids are still wondering what to get me for Father’s Day, another good flashlight will never go to waste. I probably have enough tape measures—for now.

  • Extension Cords for Generators: What Homeowners Need to Know

    Extension Cords for Generators: What Homeowners Need to Know

    A portable generator can make a power outage far more manageable. But the extension cord between the generator and the appliance is not just an accessory. It is part of the electrical system you are building for the duration of the outage.

    That means the cord has to do more than reach. It must be rated for outdoor use, heavy enough for the electrical load, long enough to keep the generator safely away from the house and in good enough condition to use without creating a shock or fire hazard.

    The good news is that you do not need to become an electrician to make a sensible choice. You do need to check a few details instead of grabbing the first orange cord in the garage.

    Quick Answer

    For most direct-to-appliance generator use, choose a heavy-duty, outdoor-rated, three-wire grounded extension cord. Its amp or watt rating must be at least as high as the connected appliance’s demand, and the cord must be appropriately sized for its length. Shorter is generally better, provided the generator still remains at least 20 feet from the home.

    Before every use, inspect the entire cord, plug and connector. Do not use a damaged cord, a cord with a missing grounding pin or a male-to-male cord. Never plug a portable generator into a household wall outlet.

    Safety First

    Operate a portable generator outdoors only, at least 20 feet from the home, with the exhaust pointed away from the building. Never run one in a garage, shed, basement, porch or other enclosed or partly enclosed space—even if doors or windows are open.

    The extension cord should help you maintain that safe distance. A short cord is not a reason to move the generator closer. If the cord cannot reach safely, it is the wrong cord for the setup.

    If you are new to generator use, review Ready Chateau’s portable generator safety guide before planning what to connect.

    Why an Ordinary Household Cord May Not Be Enough

    A light-duty extension cord may work perfectly well for a lamp indoors. That does not make it a safe choice for a refrigerator, freezer, sump pump or other important appliance during an outage.

    As electricity moves through a cord, the cord resists some of that flow. A longer, thinner cord has more resistance than a shorter, thicker one. Under a substantial load, an undersized cord can experience excessive voltage drop and heat buildup. The appliance may not receive the voltage it needs, and the cord can become dangerously warm.

    A generator cord also lives in a harder environment. It may cross a damp yard, cold pavement or a route where people are carrying fuel, food or supplies. Its jacket, plugs and connections need to be suitable for outdoor use and protected from damage.

    Start With What You Plan to Power

    Do not choose a cord by generator size alone. Start with the appliance that will be connected to it.

    Look for the appliance nameplate or manual and record its voltage, amps and watts. Many common generator outlets provide 120-volt power, but you should confirm the actual outlet you intend to use. If a 120-volt appliance lists watts but not amps, a simple estimate is:

    Amps = watts ÷ volts

    A 1,200-watt load at 120 volts is about 10 amps. That does not automatically mean any cord labeled for 10 amps is the best choice. Motors and compressors may draw additional current when they start, and the equipment manual may specify a heavier cord or a maximum length.

    Think of the system as a chain: generator receptacle, extension cord and appliance. Every part must be compatible, and the lowest-rated part limits the setup. A 20-amp generator outlet does not make a 13-amp cord capable of carrying 20 amps.

    If you are still deciding what your generator should support, first list the essential loads and use Ready Chateau’s generator sizing guide. That prevents buying cords for a power plan the generator cannot safely deliver.

    Understand Gauge Before You Shop

    Extension-cord thickness is commonly described by American Wire Gauge, or AWG. The numbering feels backward at first: a smaller gauge number means a thicker conductor.

    For example, a 12-gauge cord is heavier than a 14-gauge cord, and a 10-gauge cord is heavier than a 12-gauge cord. Thicker is not always necessary, but a cord must be heavy enough for the current and distance involved.

    The Electrical Safety Foundation International provides this general length-and-amperage guidance:

    • For a 25- to 50-foot cord: 16 gauge for 1–13 amps; 14 gauge for 14–15 amps; 12 or 10 gauge for 16–20 amps.
    • For a 100-foot cord: 16 gauge for 1–10 amps; 14 gauge for 11–13 amps; 12 gauge for 14–15 amps; 10 gauge for 16–20 amps.
    • For a 150-foot cord: 14 gauge for 1–7 amps; 12 gauge for 8–10 amps; 10 gauge for 11–15 amps.

    Treat those numbers as a practical screening tool, not permission to ignore the cord label or equipment manuals. A generator or appliance manufacturer may require a heavier cord, a shorter maximum length or a particular connector.

    When two suitable cords are available, the shorter one usually reduces voltage drop and is easier to protect. But generator placement comes first: the cord still has to reach from a generator at least 20 feet outside the home to the appliance without being stretched tight.

    Check the Cord’s Markings

    A proper cord should tell you what it is designed to do. Check the jacket, tag or packaging for:

    • Outdoor rating. The letter W in a cord designation indicates outdoor use. Do not assume that color alone tells you where a cord may be used.
    • Wire gauge. Look for a size such as 16 AWG, 14 AWG, 12 AWG or 10 AWG.
    • Number of conductors. A grounded household-style cord is commonly marked with three conductors, such as 12/3.
    • Electrical rating. Confirm the listed amps, volts or watts are adequate for the connected load at the cord’s length.
    • Grounded plug and connector. All three prongs must be present, including the round grounding pin.
    • Independent certification. Look for a mark from a recognized testing laboratory such as UL, ETL or CSA.

    If the markings are missing or unreadable, you cannot reliably confirm what the cord can carry. Retire it from generator duty rather than guessing.

    Match the Plug to the Generator Outlet

    Portable generators may have several receptacles: familiar 120-volt household-style outlets, locking 30-amp outlets or other configurations. Use a cord designed for the specific receptacle and the intended load.

    Do not force a plug, remove a grounding pin or stack adapters until something fits. The plug shape, voltage and amperage are part of the safety design.

    A high-capacity generator cord with a locking plug and multiple household-style connectors can be useful when it is designed for that generator outlet. Its total connected load still cannot exceed the cord, connector or generator-receptacle rating. Several outlets on the far end do not create additional capacity.

    For a 30- or 50-amp connection to a power inlet box or transfer switch, use the cord type and configuration specified for that equipment. This is different from running an ordinary extension cord directly to a refrigerator.

    Set Up the Cord Safely

    Once you have the right cord, route it as carefully as you chose it.

    • Keep plug-and-connector points dry. Do not leave a connection where water or snow can collect.
    • Avoid puddles, wet grass and low spots whenever possible.
    • Protect the cord from vehicle traffic, sharp edges and places where it will be crushed or cut.
    • Do not run a cord through walls, ceilings or floors, and do not hide it under rugs or other coverings that trap heat.
    • Avoid pinching the cord in a tightly closed door or window. A flattened jacket can conceal conductor damage.
    • Do not stretch the cord tight. Leave enough slack to prevent strain on plugs and receptacles.
    • Do not daisy-chain extension cords or power strips to gain length or outlets.
    • Fully uncoil the cord during use so heat can dissipate, especially under a substantial load.
    • Keep children and pets away from the generator, cord route and electrical connections.

    Check the cord during operation. If it feels hot, smells scorched, crackles, sparks or causes the generator breaker to trip, shut down the load and investigate. Do not keep resetting a breaker without finding the cause.

    Inspect Before Every Use

    A cord can look fine from several feet away and still have a damaged plug or a crushed section. Before starting the generator, unplug the cord and examine it from end to end.

    Look for:

    • Cuts, tears, cracks or exposed wire
    • Flattened, crushed or sharply kinked areas
    • Burn marks, melted insulation or discoloration
    • Loose plug blades or a loose connector
    • Bent prongs or a missing grounding pin
    • Corrosion, moisture or debris in the connector
    • A jacket that has become brittle with age

    Do not wrap electrical tape around a seriously damaged section and put the cord back into emergency service. Replace the cord. A power outage is the wrong time to depend on a questionable repair.

    Also inspect cords when you put them away. That gives you time to replace a damaged one before the next storm instead of discovering the problem in the dark.

    One Cord, One Planned Load

    ESFI advises using an extension cord for one appliance. That is a clean rule for household generator planning because it makes the load easier to understand and reduces the temptation to keep adding devices.

    If a manufacturer-approved generator cord provides several connectors, plan the combined load before plugging anything in. Add the running watts and account for startup demand. Do not assume an unused socket means unused electrical capacity.

    Some appliances should not be run from an extension cord at all. Follow the appliance manufacturer’s instructions. For example, CPSC advises plugging electric space heaters directly into a wall outlet, never an extension cord or power strip.

    What Never to Do

    • Never use a male-to-male extension cord. These cords have exposed prongs that can become energized, creating a severe shock or electrocution hazard.
    • Never plug a generator into a wall outlet. This practice, often called backfeeding, bypasses important safety protections and can cause electrocution or fire.
    • Never remove a grounding pin or force an incompatible connection.
    • Never use an indoor-only, damaged or undersized cord outside with a generator.
    • Never move the generator closer to the house because the available cord is too short.
    • Never assume a cord is safe because the appliance turns on. Excess heat and voltage drop may develop under load.

    CPSC has specifically warned consumers to stop using and dispose of male-to-male cords sold for generator backfeeding. If you find one in your supplies, do not save it for a future emergency.

    When a Transfer Switch Is the Better Answer

    Extension cords are useful when you are powering individual plug-in appliances directly from a portable generator. They are not a substitute for a proper connection to the home’s wiring.

    If you want to power hardwired equipment or selected household circuits—such as a well pump, furnace controls or several fixed lights—talk with a qualified electrician about a properly rated transfer switch or other approved transfer equipment. The installation must match the generator, the home’s electrical system and applicable codes.

    A transfer setup can make outage power easier to manage, but it does not change the generator’s outdoor operating requirements. The generator still belongs outside, at least 20 feet from the home, with exhaust directed away.

    A Practical Buying Checklist

    Before buying a generator extension cord, confirm all of the following:

    • The generator outlet voltage, amperage and receptacle type
    • The appliance’s running load and any startup demand
    • The shortest practical length that still preserves safe generator placement
    • Adequate wire gauge for the load and length
    • Outdoor rating and a durable jacket
    • A three-prong grounded configuration where required
    • Compatible plugs and connectors without improvised adapters
    • A clear electrical rating and recognized testing-laboratory certification
    • No cuts, loose parts, heat damage or missing prongs
    • Compatibility with the generator and appliance manuals

    Buying the right cord once is usually less expensive than replacing an appliance damaged by poor power delivery—or dealing with an overheated cord during an outage.

    Once you know your generator’s outlet type, the equipment you need to power and the full cord distance, see our Best Extension Cords for Generators guide for connection-specific recommendations.

    Prepare the Cord Before the Outage

    Do not wait until the lights go out to work through these details. Match each essential appliance to a cord, label the cord if helpful and test the setup in daylight while following the generator manual.

    Then store cords loosely coiled in a clean, dry place where they will not be crushed. Keep them with your other generator supplies and include them in your regular generator maintenance check.

    That small amount of preparation removes one more decision from an already stressful day. When an outage happens, you will know which cord belongs with which load—and which shortcuts are off limits.

    Bottom Line

    The safest generator extension cord is not simply the thickest or the most expensive. It is the cord that matches the load, length and outlet; is rated for outdoor use; remains in sound condition; and lets the generator stay safely away from the home.

    Check the numbers, respect the cord’s limits and never use an improvised connection to power household wiring. A generator can be a useful temporary tool. The cord is part of using that tool responsibly.

    Sources Consulted

  • Best Portable Power Stations for Home Power Outages

    Best Portable Power Stations for Home Power Outages

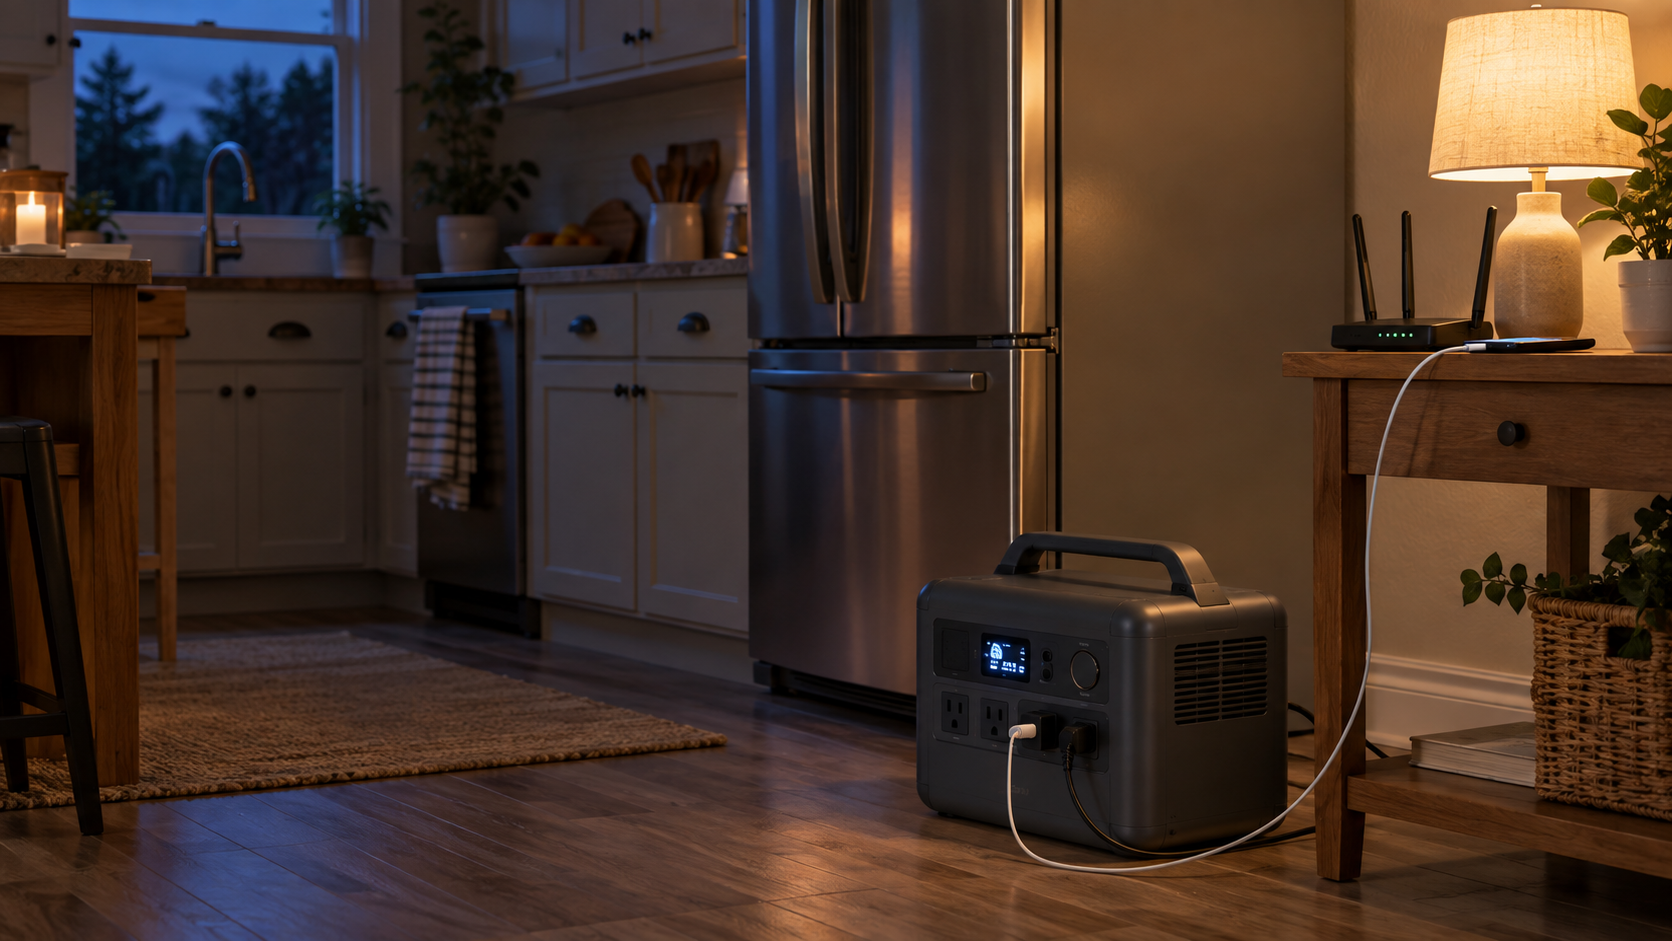
    A portable power station can keep a refrigerator cold, charge phones, run lights and maintain internet service without the fuel, exhaust or noise of a gasoline generator. The difficult part is choosing one with enough battery capacity and output for the equipment your household actually needs.

    For most homes, a power station in the 1,000-watt-hour class is the practical starting point. It can cover a refrigerator and several smaller essentials during a short outage while remaining light enough for one person to move.

    Households preparing for longer outages should consider a 2,000-watt-hour model. A large 4,000-watt-hour system makes sense when the goal includes heavier appliances, 240-volt equipment or connection to selected household circuits. If you are still deciding between battery backup and fuel-powered equipment, begin with Portable Power Station vs. Generator: Which Do You Need?

    Affiliate disclosure: Ready Chateau may earn a commission from qualifying purchases made through links on this page, at no additional cost to you.

    Our current recommendations are:

    This guide compares current manufacturer specifications and practical outage use. Ready Chateau has not completed hands-on testing of every model listed. Prices and specifications can change, so confirm the current warranty, included accessories and operating limits before purchasing.

    Quick Comparison

    RecommendationCapacityRated AC outputWeightBest use
    Anker SOLIX C1000 Gen 21,024Wh2,000W24.9 lb.Short outages and everyday household essentials
    Jackery Explorer 1000 v21,070Wh1,500W23.8 lb.Households prioritizing portability
    BLUETTI Elite 200 V22,073.6Wh2,600W53.4 lb.Longer refrigerator and communications coverage
    EcoFlow DELTA Pro 34,096Wh4,000W113.5 lb.High-capacity backup and expandable systems

    Capacity tells you approximately how much energy the battery stores. Output tells you how much power it can deliver at one time. A unit can have plenty of stored energy but still be unable to start an appliance if its output or surge rating is too low.

    Best Overall: Anker SOLIX C1000 Gen 2

    The Anker SOLIX C1000 Gen 2 is the strongest general-purpose choice for most households because it combines useful output, manageable weight and fast recharging in a compact package.

    It provides 1,024 watt-hours of capacity, 2,000 watts of continuous output and a manufacturer-listed 3,000-watt peak. At 24.9 pounds, it can be moved between rooms without turning the job into a two-person lift.

    That 2,000-watt output gives the C1000 Gen 2 more flexibility than many similarly sized units. It can support a refrigerator along with phones, LED lights, a modem, a television or a fan, provided the combined load remains within its limits.

    Anker says the lithium iron phosphate battery should retain at least 80 percent of its original capacity after 4,000 charge cycles. The unit also accepts up to 600 watts of solar input and can recharge from an electrical outlet in as little as 49 minutes when its UltraFast charging mode is enabled in the app. Anker advises using that fastest setting only when necessary to help protect battery life. View the Anker SOLIX C1000 Gen 2 specifications.

    Best for: Most households preparing for short outages.

    Main limitation: Its capacity cannot be expanded with an additional battery. If you expect outages to last more than a day, a larger system or a separate recharging plan may be more appropriate.

    Check the Anker Solix C1000 Gen 2 on Amazon

    Best Lightweight Option: Jackery Explorer 1000 v2

    The Jackery Explorer 1000 v2 is a good fit for people who want approximately 1,000 watt-hours of backup power in the lightest package among our primary recommendations.

    It stores 1,070 watt-hours, provides 1,500 watts of rated AC output and weighs approximately 23.8 pounds. Its folding handle and relatively compact size make it easier to move, store or take with you during an evacuation.

    The Explorer 1000 v2 uses lithium iron phosphate battery cells. Jackery lists a battery life of approximately 4,000 cycles before the battery declines to 70 percent of its original capacity. The company also advertises a one-hour emergency charging mode and warranty coverage of up to five years, subject to its registration and warranty terms. View the Jackery Explorer 1000 v2 specifications.

    The lower 1,500-watt output is adequate for many outage essentials, but it provides less room for combining appliances than the Anker. Check the starting surge requirements of refrigerators, freezers, pumps and other motor-driven equipment before relying on it.

    Best for: Apartments, smaller homes and anyone who expects to carry the unit regularly.

    Main limitation: The 1,500-watt output requires more careful load management when using high-wattage appliances.

    Check the Jackery Explorer 1000 v2 on Amazon

    Best for Longer Outages: BLUETTI Elite 200 V2

    The BLUETTI Elite 200 V2 roughly doubles the battery capacity of the 1,000-watt-hour models without moving into the size and expense of a full home-backup system.

    It provides 2,073.6 watt-hours of capacity and 2,600 watts of continuous output. That combination makes it better suited to keeping a refrigerator, communications equipment, lights and selected small appliances operating through a longer outage.

    BLUETTI uses lithium iron phosphate cells and states that the battery should retain 80 percent of its capacity after more than 6,000 cycles. The manufacturer also provides a five-year warranty. View the BLUETTI Elite 200 V2 specifications.

    The tradeoff is weight. At 53.4 pounds, this is technically portable, but many people will want help moving it. Before an outage, decide where it will normally be stored and whether it can reach the appliances you intend to power.

    Best for: Longer outages, multiple refrigeration appliances or households wanting more runtime without installing a permanent system.

    Main limitation: It is considerably heavier than a 1,000-watt-hour power station.

    Check the BLUETTI Elite 200 V2 on Amazon

    Best High-Capacity Home-Backup Option: EcoFlow DELTA Pro 3

    The EcoFlow DELTA Pro 3 moves beyond basic portable backup and into expandable home-energy territory.

    A single unit provides 4,096 watt-hours of capacity, 4,000 watts of continuous output and both 120- and 240-volt connections. EcoFlow lists an 8,000-watt surge rating, a lithium iron phosphate battery and approximately 4,000 cycles before capacity declines to 80 percent.

    The base unit can be expanded to approximately 12 kilowatt-hours with two compatible extra batteries. Larger configurations are possible when multiple units and EcoFlow home-backup equipment are used. The DELTA Pro 3 carries a five-year warranty and is listed by EcoFlow as UL 9540 certified. View the EcoFlow DELTA Pro 3 specifications.

    At approximately 113.5 pounds, it is better described as movable than easily portable. Built-in wheels help, but stairs, vehicle loading and storage still require planning.

    Best for: Larger outage loads, expandable backup and households planning a professionally installed connection to selected circuits.

    Main limitation: Its size, weight and cost are more than most households need for basic refrigerator, lighting and communications coverage.

    Check the EcoFlow DELTA Pro 3 on Amazon

    How Much Capacity Do You Need?

    Start with the equipment you actually intend to power. Our guide to what you can run during a power outage can help you separate essential loads from conveniences.

    A practical planning formula is:

    Estimated runtime = battery capacity in watt-hours × 0.85 ÷ average load in watts

    The 0.85 factor provides a rough allowance for inverter losses and other real-world inefficiencies. Actual efficiency varies by power station, temperature, appliance and load.

    For example, a 1,024-watt-hour power station supporting an average 100-watt load might provide:

    1,024 × 0.85 ÷ 100 = approximately 8.7 hours

    A 2,073.6-watt-hour model supporting the same average load might provide approximately 17.6 hours.

    These calculations are planning estimates, not guarantees. Refrigerators cycle on and off, and their compressors may draw substantially more power at startup than while running. Opening the door frequently, warm room temperatures and adding other equipment will shorten runtime. For a closer look at that load, see How Long Can a Portable Power Station Run a Refrigerator?

    Choose by Outage Plan, Not by the Largest Number

    A smaller power station is often the better choice when it can cover the household’s real needs.

    Choose approximately 1,000Wh when:

    • Your outages are usually short.
    • You primarily need refrigeration, phones, lights and internet.
    • One person needs to be able to move the unit.
    • You have a reliable way to recharge it if the outage continues.

    Choose approximately 2,000Wh when:

    • Outages commonly last overnight or longer.
    • You have both a refrigerator and freezer.
    • You need more reserve capacity for communications, fans or small medical equipment.
    • You are comfortable handling a unit weighing more than 50 pounds.

    Choose 4,000Wh or more when:

    • You need heavier appliances or 240-volt capability.
    • You want expandable capacity.
    • The unit will remain in one primary location.
    • You are prepared for the cost and possible electrical installation involved.

    A 300- or 500-watt-hour unit can be useful for phones, lights, radios and laptops, but it is generally too small to serve as the main household power source during a prolonged outage.

    High-Wattage Appliances Drain Batteries Quickly

    Output capacity does not guarantee long runtime.

    A 1,500-watt space heater, kettle or hot plate can consume most of the usable energy in a 1,000-watt-hour power station in considerably less than an hour. Microwaves, coffee makers, hair dryers and electric cooking appliances can have a similar effect.

    During an outage, battery power is usually better reserved for refrigeration, communication, lighting and other essential needs. If you plan to cook with electricity, use the shortest practical cooking time and check both the appliance’s wattage and the power station’s output rating.

    Large central air conditioners, electric water heaters, electric ranges, well pumps and furnace systems may require 240-volt service, substantial starting power or a professionally installed connection. A standard 120-volt portable power station should not be assumed capable of running them.

    Features Worth Paying For

    Lithium Iron Phosphate Batteries

    Lithium iron phosphate, commonly shown as LFP or LiFePO₄, has become the preferred chemistry for many backup power stations. It generally provides a longer cycle life than older lithium-ion formulations and has good thermal stability.

    Battery chemistry does not eliminate the need for careful charging, storage and inspection. Follow a routine such as the one in Portable Power Station Maintenance: Make the Battery Last.

    Adequate Continuous and Surge Output

    Use the continuous AC rating when adding the wattage of equipment you plan to operate at the same time. Check the surge rating separately for refrigerators, freezers, pumps and other appliances with motors or compressors.

    Do not treat a manufacturer’s “power lifting” or similar marketing mode as equivalent to normal continuous output. Those modes may reduce voltage or be limited to certain resistive appliances.

    Fast AC Recharging

    Fast charging is useful when utility power returns briefly or when the unit must be recharged from a generator. The fastest setting may create more heat or place more stress on the battery, so follow the manufacturer’s directions.

    Solar Charging

    Solar panels can extend an outage plan, but their advertised wattage represents favorable conditions. Clouds, shade, panel angle, temperature and available daylight can substantially reduce production.

    Confirm the power station’s supported solar voltage, current and connector requirements before purchasing panels. Do not assume that any panel with the right plug is electrically compatible.

    Useful Warranty Coverage

    These units contain expensive batteries and power electronics that are not ordinarily homeowner-serviceable. A clear multiyear warranty, established customer support and readily available replacement cables matter more than a long list of app features.

    Independent Safety Certification

    Look for certification by a nationally recognized testing laboratory and identify the standard involved. UL 2743 applies to portable power packs, while larger installed or integrated energy-storage systems may fall under different standards. A vague statement that a product is “tested” is not the same as a verifiable certification.

    Portable Power Station Safety

    Portable power stations do not burn fuel and do not produce carbon monoxide during normal battery operation. They can therefore be used indoors, unlike gasoline or propane generators. They still require basic battery and electrical precautions.

    • Keep the unit dry and do not operate it in standing water.
    • Keep ventilation openings clear.
    • Use manufacturer-provided or authorized charging equipment.
    • Follow the listed charging, operating and storage temperatures.
    • Stop using a unit that becomes abnormally hot, swells, leaks, smokes, changes shape or produces an unusual odor.
    • Do not modify the battery or attempt an unqualified internal repair.
    • Inspect cords and connectors before use.
    • Keep the unit away from direct heat and combustible materials while charging.

    The Electrical Safety Foundation International recommends purchasing certified equipment, using authorized chargers and discontinuing use when a lithium-ion battery shows signs of damage or overheating. Read the ESFI lithium-ion battery safety guidance.

    Warning: Never Backfeed Household Wiring

    Never connect a portable power station to household wiring through a wall outlet or a homemade male-to-male cord. That can energize wiring unexpectedly, damage equipment and expose utility workers or neighbors to electrical hazards.

    Any connection to household circuits should use equipment approved for that purpose and be installed according to the manufacturer’s instructions and local electrical requirements. A qualified electrician should handle transfer equipment or home-panel connections.

    A power station’s UPS or backup-transfer feature should also not be treated as a guarantee that it is suitable for life-support or other critical medical equipment. Verify compatibility with the medical-device manufacturer and maintain a separate emergency plan.

    The Bottom Line

    The Anker SOLIX C1000 Gen 2 is the best starting point for most households. It provides strong output, fast recharging and manageable weight in the practical 1,000-watt-hour class.

    Choose the Jackery Explorer 1000 v2 when low weight and easy movement are the priority. Step up to the BLUETTI Elite 200 V2 when longer refrigerator and communications coverage matters more than portability.

    The EcoFlow DELTA Pro 3 is the more capable choice for high-capacity or expandable home backup, but its weight, cost and installation possibilities put it in a different category from a typical portable unit.

    The right power station is not necessarily the one with the largest battery. It is the one that can start your essential equipment, provide the runtime your outage plan requires and still be safely stored, moved and recharged by your household.

  • How to Cook During a Power Outage

    How to Cook During a Power Outage

    A power outage does not automatically mean your household has to live on crackers until the lights return. It does change which cooking methods are safe, how much fuel and water a meal may require, and which food should be used first.

    The safest plan begins with foods that need no cooking. If you want a hot meal, use an appliance that is designed for the location where you are operating it, and make sure your power or fuel source can support it. A power outage is not the time to improvise with charcoal, a camp stove or an unfamiliar flame inside the house.

    Quick Answer

    During a power outage, use this order of preference:

    1. Eat shelf-stable foods that require no cooking.
    2. Use an indoor-rated electric appliance only if it is powered safely by a portable power station or a correctly operated generator.
    3. Use a gas cooktop only if the gas service is safe and the manufacturer provides an approved way to operate that model without normal electrical ignition.
    4. Use grills, charcoal cookers and camp stoves outdoors only, well away from the house and every door, window and vent.

    Never operate a generator, charcoal grill, propane grill or camping stove inside a house, garage, basement, carport, tent or other enclosed or partly enclosed space. Opening a garage door or window does not make the space safe from carbon monoxide.

    Decide Whether You Need to Cook

    Hot food is comforting, but cooking is not always the best first move. Every hot meal uses something that may be limited during an outage: electricity, fuel, safe water or time outdoors.

    Begin by checking what your household can eat without heat. Useful combinations include:

    • Canned chicken or tuna with crackers
    • Peanut butter with bread or tortillas
    • Canned beans, corn and tomatoes mixed as a simple salad
    • Shelf-stable milk with cereal
    • Fruit cups, applesauce, nuts, jerky and snack bars
    • Ready-to-eat soup or pasta that your household is willing to eat at room temperature

    Keep a manual can opener with these foods. Choose cans with pull tabs when practical, but do not make them your only option because the tabs can break.

    No-cook food also gives you a safe fallback when high winds, flooding, wildfire restrictions or extreme weather make outdoor cooking impractical. If there is no safe place to operate a fuel-burning appliance, do not force the issue. Eat a cold meal and wait for safer conditions.

    If your pantry is not ready for that kind of meal, Build an Emergency Food Supply Without Wasting Money explains how to add familiar food gradually instead of buying a separate menu that your household may never use.

    Safe Ways to Heat Food

    The right method depends on the equipment already in your home, the weather outside and the amount of power or fuel you can use safely.

    Small Electric Appliances

    A portable power station can run some countertop cooking appliances indoors because it does not produce engine exhaust. The limiting factor is electrical demand. Electric kettles, microwaves, hot plates, toaster ovens and pressure cookers can draw substantial power, even when they are used for only a few minutes.

    Check the appliance nameplate and the power station’s continuous-output rating before connecting them. Confirm that the battery has enough usable capacity for the planned cooking time, and follow the power station manufacturer’s ventilation, charging and operating instructions. Keep the unit dry and do not place it against fabric, bedding or another surface that can trap heat.

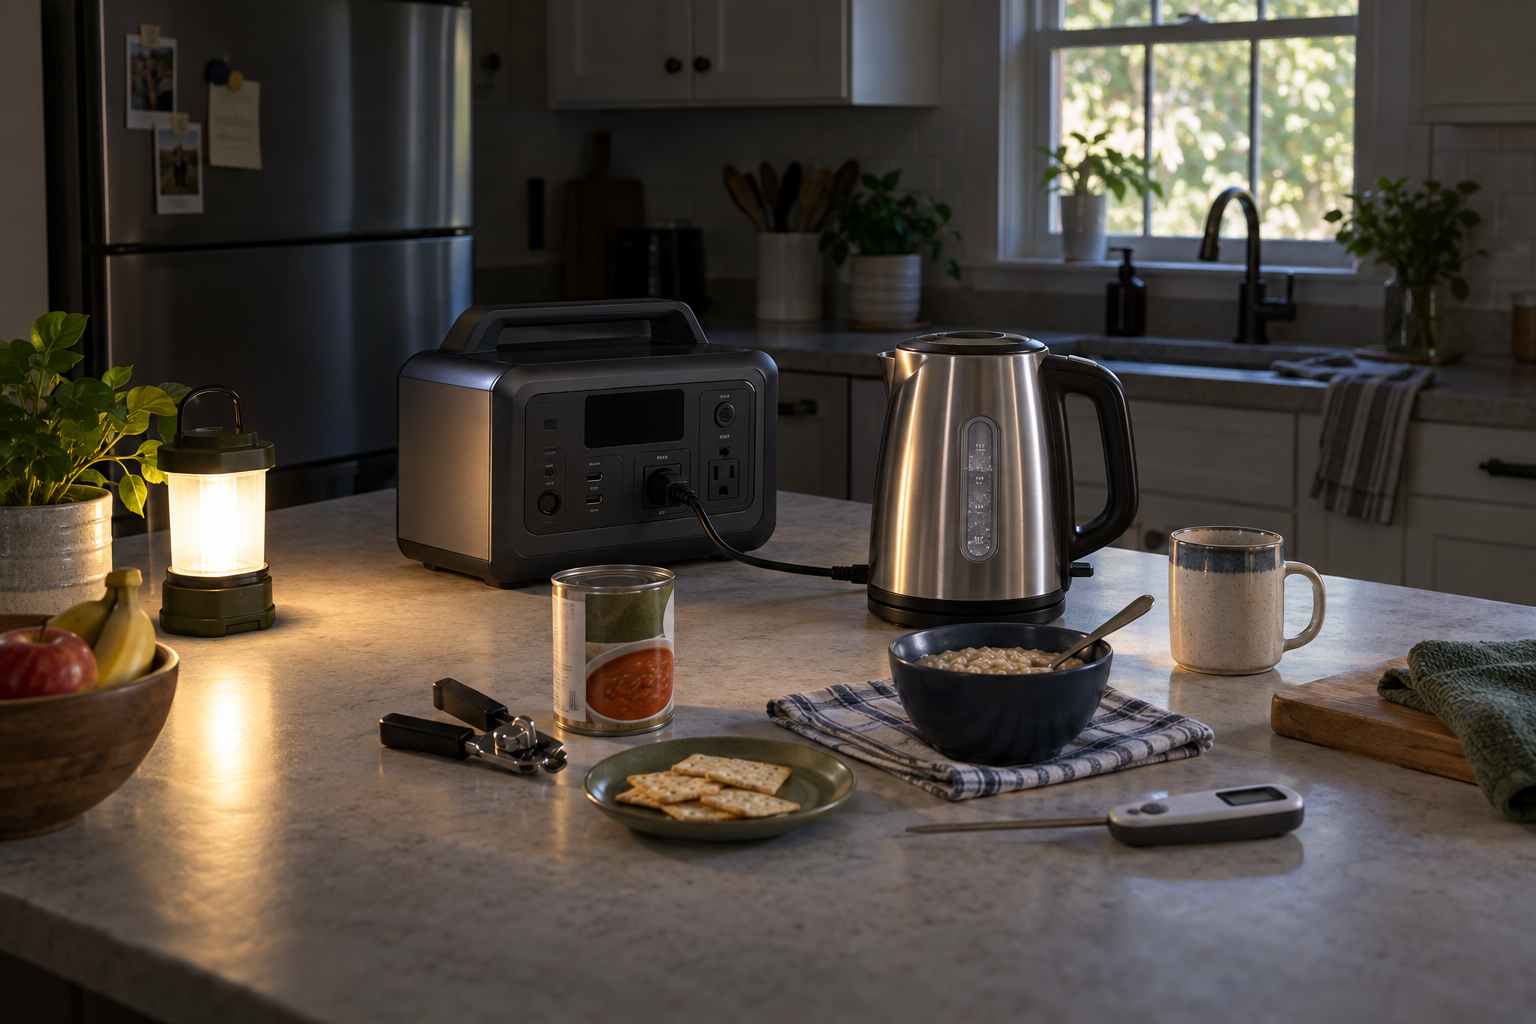
    An electric kettle is often one of the most efficient choices because it heats only the water you need. That hot water can prepare oatmeal, instant grits, couscous, instant potatoes, dehydrated meals and some quick-cooking noodles. A microwave can heat canned food quickly, but its electrical input may be considerably higher than the cooking wattage printed on the front of the appliance.

    Before planning meals around battery power, use What Can You Actually Run During a Power Outage to compare appliance demand with the power you have available.

    Generator Powered Cooking

    A portable generator can power a refrigerator or selected cooking appliance, but the generator itself must remain outdoors. The U.S. Consumer Product Safety Commission says to place a portable generator at least 20 feet from the home with the exhaust directed away from the house.

    Do not run a generator in a garage, even with the door open. Do not place it on a porch, under a carport or near a window, door, crawlspace opening or vent. Keep working carbon-monoxide alarms on every level of the home and outside sleeping areas.

    Use a heavy-duty outdoor-rated extension cord that is suitable for the appliance load, or use a properly installed transfer system. Never connect a generator to a wall outlet. If you are using a generator for both refrigeration and cooking, confirm that the total running and starting demand stays within the generator’s capacity.

    Review Portable Generator Safety before making a generator part of the cooking plan.

    A Gas Cooktop

    Some gas cooktops can operate during a power outage, while others depend on electrical ignition or safety controls. Do not assume that every burner can be lit manually. Check the appliance manual before an outage and follow the manufacturer’s instructions for that exact model.

    Do not use the cooktop if you smell gas, if the appliance may have been damaged, or if emergency officials or the gas utility have told customers not to use gas service. Never use a gas range or oven to heat the home.

    Even when a cooktop is approved for use, keep combustible items away from the flame, turn pot handles inward and supervise the food from start to finish. A flashlight or battery lantern is safer than placing candles around the cooking area.

    Grills and Camp Stoves

    Propane grills, charcoal grills and camping stoves can be useful outage tools when they are operated outdoors in a safe location. They are not indoor appliances.

    The U.S. Fire Administration advises using propane, charcoal and wood-pellet grills outside only and placing them well away from siding, deck railings, eaves and overhanging branches. Keep at least a three-foot child- and pet-free zone around the cooking area. Stay with the appliance while it is lit.

    Set the cooker on a stable, level surface. Keep the area clear of dry grass and anything that can burn. Follow the manufacturer’s lighting and shutdown procedure, let equipment cool before moving it, and never bring a charcoal grill indoors while the coals are still producing heat or fumes.

    A covered porch, attached garage or carport is not a safe substitute for open outdoor space. Carbon monoxide has no color or odor, and partial ventilation does not make an outdoor cooker safe indoors.

    Methods That Are Not Worth the Risk

    An outage can make a questionable shortcut look reasonable. Avoid these improvised methods:

    • Burning charcoal anywhere inside a building, vehicle or tent
    • Operating a propane or liquid-fuel camp stove indoors
    • Running a generator in a garage or close to the house
    • Heating food over candles
    • Building a homemade alcohol stove or pouring fuel into an open burner
    • Using an oven or cooktop to heat the room
    • Cooking in an unvented fireplace or on a wood stove that was not designed for the purpose

    If an appliance’s instructions do not clearly permit the planned use, choose another method. The emergency plan should reduce risk, not trade a cold dinner for carbon-monoxide poisoning, fire or serious burns.

    Protect the Food Before You Plan the Menu

    The first food decision during an outage may be what not to open. Keep refrigerator and freezer doors closed while you determine whether the outage is likely to be short.

    According to the U.S. Department of Agriculture:

    • An unopened refrigerator keeps food safely cold for about four hours.
    • A full freezer holds a safe temperature for about 48 hours if the door remains closed.
    • A half-full freezer holds a safe temperature for about 24 hours if the door remains closed.

    A refrigerator or appliance thermometer removes much of the guesswork. Refrigerated perishable food that has been above 40 degrees Fahrenheit for more than two hours should be discarded. Frozen food that still contains ice crystals or measures 40 degrees Fahrenheit or below can generally be refrozen or cooked, although its quality may decline.

    Never taste food to decide whether it is safe. Smell and appearance are not reliable safety tests. When the time or temperature is uncertain, throw the food away.

    Cooking does not restore food that has been held outside safe temperature limits. Do not turn questionable meat, dairy, eggs or leftovers into an outage meal simply to avoid wasting them.

    Use Perishable Food in the Right Order

    If the outage is expected to last and you have a safe cooking method, a simple order can prevent waste without encouraging you to open the refrigerator repeatedly.

    During the First Four Hours

    Leave the refrigerator closed if power may return soon. If the outage is clearly becoming extended, choose one planned meal, remove everything you need at once and close the door again.

    Use only food that is still at 40 degrees Fahrenheit or below. Cook a manageable amount so you do not create leftovers that cannot be refrigerated.

    After Four Hours

    Do not assume refrigerated meat, poultry, fish, milk, soft cheese, eggs or leftovers are safe. Check their temperature and follow the USDA’s emergency food-safety guidance. Discard perishable food that has been above 40 degrees Fahrenheit for more than two hours.

    Move to shelf-stable meals rather than spending scarce fuel trying to save questionable food.

    From the Freezer

    Keep the freezer closed as long as possible. When you do open it, group remaining frozen food together to help it stay cold. Use a thermometer rather than relying on how the package feels.

    Food that still has ice crystals or remains at 40 degrees Fahrenheit or below can generally be cooked or refrozen. Once food thaws and remains above that temperature for too long, discard it according to USDA guidance.

    Cook Food to a Safe Temperature

    Power loss does not change safe cooking temperatures. Use a food thermometer, especially when wind, cold weather or an unfamiliar cooker makes cooking time unpredictable.

    The USDA’s minimum internal temperatures include:

    FoodMinimum internal temperature
    Poultry, including ground poultry165 degrees Fahrenheit
    Leftovers and casseroles165 degrees Fahrenheit
    Ground beef, pork, lamb and veal160 degrees Fahrenheit
    Beef, pork, lamb and veal steaks, chops and roasts145 degrees Fahrenheit followed by a three-minute rest
    Fish145 degrees Fahrenheit

    Cook eggs until the yolks and whites are firm unless you are following a recipe that reaches a verified safe temperature. Keep raw meat separate from ready-to-eat food, and wash hands, utensils and preparation surfaces with safe water.

    Use Safe Water for Cooking

    An outage may occur at the same time as a boil-water advisory, flood or loss of water pressure. Do not assume the kitchen faucet is safe simply because water still comes out.

    Use bottled, boiled or properly treated water for drinking and food preparation when local officials say the water supply may be unsafe. The Centers for Disease Control and Prevention advises bringing clear water to a rolling boil for one minute, or three minutes at elevations above 6,500 feet. Boiling does not remove fuel, toxic chemicals or radioactive contamination. If officials issue a do-not-drink advisory, use a different water source and follow their instructions.

    Rice, pasta and dried beans can use far more water and fuel than expected. During a short outage, canned beans, canned meat, instant grains and other foods that need little water are usually easier choices.

    For water planning, see How Long Does Stored Water Last.

    Build Meals Around the Method You Have

    You do not need an elaborate outage cookbook. Match familiar food to the safest method available.

    Available methodPractical meal ideasMain limitation
    No heatTuna and crackers, peanut butter tortillas, canned bean salad, cereal with shelf-stable milkRequires food your household will eat without warming
    Electric kettleOatmeal, instant grits, couscous, instant potatoes, dehydrated soupNeeds substantial short-duration electrical power
    MicrowaveCanned soup, vegetables, rice cups and leftovers that are still safeHigh electrical demand and short battery runtime
    Hot plate or induction burnerOne-pot soup, canned chili, eggs, quick-cooking pastaHigh continuous electrical draw
    Outdoor grillMeat that is still safely cold, foil packets, one-pan mealsOutdoor use only; weather and fuel may limit use
    Outdoor camp stoveSoup, oatmeal, coffee, quick-cooking grains and one-pot mealsOutdoor use only; requires stable setup and stored fuel

    Favor meals that use one pot, a short cooking time and little water. Add canned meat, beans or shelf-stable milk when a simple starch needs more protein. Prepare only what the household can finish unless you have a dependable way to keep leftovers at 40 degrees Fahrenheit or below.

    Prepare Before the Power Fails

    A useful outage cooking plan can be tested in one ordinary evening. Turn off the intended appliance, leave the emergency equipment where it is normally stored and prepare one meal without using the regular kitchen power.

    The test should answer these questions:

    • Can you reach the cooker, fuel, extension cord and manual can opener in the dark
    • Does the selected appliance work with the power source you own
    • How much battery capacity or fuel does one meal use
    • Can you operate the equipment in bad weather without moving it into an unsafe location
    • Do you have a food thermometer, refrigerator thermometer, flashlight and working carbon-monoxide alarms
    • Will the household actually eat the planned meal

    Store printed appliance instructions with the equipment. Label fuel clearly and store it according to the manufacturer’s directions and local fire rules. Do not wait for an outage to discover that a power station cannot run the hot plate or that the only can opener is electric.

    A Practical Power Outage Cooking Plan

    Keep the plan simple:

    1. Leave the refrigerator and freezer closed while you assess the outage.
    2. Start with a no-cook meal if the outage is short or outdoor conditions are unsafe.
    3. Choose one approved cooking method and confirm its power or fuel requirements.
    4. Use safe water and a food thermometer.
    5. Cook only the amount your household can eat.
    6. Keep every fuel-burning cooker outdoors and well away from the home.
    7. Discard perishable food that has exceeded safe time and temperature limits.

    The goal is not to recreate a normal kitchen with emergency equipment. It is to feed the household safely with the food, water and energy that are actually available.

    Primary Sources Used for Safety Review

  • Portable Power Station Maintenance: How to Make the Battery Last

    Portable Power Station Maintenance: How to Make the Battery Last

    A portable power station is much easier to maintain than a gasoline generator. There is no oil to change, carburetor to clean or fuel to stabilize.

    But easier does not mean maintenance-free.

    A power station can sit quietly in a closet for months while its battery slowly loses charge. Heat, improper storage and repeated deep discharges can also reduce the amount of power it can deliver over time.

    The good news is that portable power station maintenance is simple. A few minutes several times a year can help protect the battery and make it more likely that the unit will be ready when the lights go out.

    Quick Answer

    Keep the power station in a cool, dry location. Do not leave it stored with an empty battery. Check it at least every three months, recharge it according to the instructions for your exact model and test it before storm season or any expected outage.

    The exact storage charge level is not the same for every power station. Your owner’s manual—not a generic percentage found online—should be the final authority.

    Start With the Manual and the Model Number

    Before creating a maintenance routine, find the manual for your exact model.

    Do not assume that instructions for another unit from the same company apply to yours. Manufacturers may use different battery chemistries, battery-management systems and storage procedures in different product lines.

    Record three things somewhere you can find them:

    • The manufacturer and exact model number
    • The serial number
    • A link to or saved copy of the owner’s manual

    The model and serial numbers also make it easier to check warranty information, contact support and determine whether the unit is affected by a safety recall.

    There Is No Universal Storage Percentage

    You will often see advice to store every lithium battery at 50% or 60%. That may be appropriate for some power stations, but it is not a safe universal rule.

    Current manufacturer guidance illustrates the difference:

    Those instructions are not interchangeable. They are examples of why Ready Chateau will not give every reader one storage number.

    Follow the manual for your model. If the manual is missing or unclear, ask the manufacturer rather than guessing.

    After You Use the Power Station

    When the outage, camping trip or household project is over, do not simply put the power station back on the shelf.

    1. Turn off the outputs. AC outlets, USB ports and DC outputs can draw standby power on some units even when nothing useful is being powered. Turn off the outputs and then shut down the unit according to its manual.
    2. Disconnect everything. Remove appliances, charging cables, solar panels and expansion batteries unless the manufacturer specifically directs you to leave something connected during storage.
    3. Let it return to a safe temperature. If the unit became hot during use or charging, allow it to cool in a dry, well-ventilated area before storing it. Do not cover the vents or place it immediately into a closed cabinet while it is still warm.
    4. Inspect and clean it. Look for damage to the case, ports, plugs and cables. Wipe the exterior with a dry, soft cloth and remove loose dust from the vents without pushing debris into the unit. Do not spray cleaner or water into the power station.
    5. Set the proper storage charge. Recharge or discharge the unit to the level specified in its manual. Do not leave it near empty and assume you will remember it later.

    Where You Store It Matters

    The best storage location is cool, dry, clean and protected from direct sunlight.

    A garage or shed may seem convenient, but it can become much hotter or colder than the air outside. A vehicle can become dangerously hot in the sun. The U.S. Fire Administration advises keeping lithium-ion batteries out of direct sunlight and hot vehicles.

    Also keep the unit:

    • Away from heaters, open flames and other heat sources
    • Away from water, flooding and excessive humidity
    • Where its vents will not be blocked
    • Where it cannot be crushed, punctured or knocked from a shelf
    • Away from materials that burn easily
    • Where children and pets cannot tamper with the controls or cables

    Do not use the operating-temperature range as the storage-temperature range. Charging, discharging and storage limits may be different. Check all three in the manual.

    Be Especially Careful With Cold Batteries

    Many portable power stations can supply power at temperatures that are too cold for charging. For example, several current models specify a minimum charging temperature around 32°F, but the limit varies.

    If a power station has been stored in a cold vehicle, garage or shed, do not connect it to a charger just because the display turns on. Move it to a dry location and allow it to reach the charging-temperature range listed in its manual.

    Some models include low-temperature charging protection, but that protection should be treated as a safeguard—not permission to ignore the manufacturer’s limits.

    The Three-Month Check

    Three months is a practical default reminder because several major manufacturers use that interval. If your manual requires a different schedule, use the shorter interval.

    Every three months:

    • Inspect the case for cracks, swelling, discoloration or other changes.
    • Check the charging cable, plug and ports for damage, looseness or corrosion.
    • Make sure the vents are clean and unobstructed.
    • Turn the unit on and confirm that the display and controls operate normally.
    • Check the remaining charge and service any expansion batteries separately.
    • Recharge or cycle the battery exactly as the manufacturer instructs.
    • Test the unit with a small, familiar load, such as a lamp or fan.
    • Check the manufacturer’s support page and the Consumer Product Safety Commission recall database for notices affecting your model.

    This is a function check, not a contest to see how far you can drain the battery. Unless the manual calls for a full discharge cycle, there is no reason to run the power station to zero merely to exercise it.

    Test It Before You Need It

    A charge indicator is helpful, but it does not prove that the outlets, inverter and cables will work with the equipment you plan to use.

    Before storm season—and before a forecast outage—perform a realistic test:

    1. Charge the power station for emergency readiness according to its manual.
    2. Connect one or two of the devices you actually expect it to power.
    3. Confirm that the power station carries the load without warnings or unexpected shutdowns.
    4. Verify that the display, cooling fan and charging inputs operate normally.
    5. Return the battery to the manufacturer’s recommended storage condition after the test.

    You do not need to recreate an all-day outage. The purpose is to discover a bad cable, damaged outlet, depleted battery or forgotten setting while normal power is still available.

    If you are unsure what equipment your unit can support, start with our guide to choosing between a portable power station and a generator. If refrigeration is the priority, use our refrigerator runtime guide and calculator to estimate what your battery capacity may provide.

    Remember that an estimate made when the unit was new may become less accurate as the battery ages. Actual runtime also changes with the appliance load, inverter losses, temperature and the condition of the battery.

    Habits That Can Shorten Battery Life

    Avoid these common mistakes:

    • Leaving it completely discharged. A power station that continues to self-discharge in storage may eventually reach a condition from which it cannot recover normally.
    • Storing it in heat. A hot vehicle, attic or unconditioned shed can expose the battery to temperatures outside its recommended range.
    • Ignoring standby drain. A forgotten AC or DC output can slowly consume power while the unit appears to be stored.
    • Using an incompatible charger or solar setup. Charging voltage, current, connectors and panel arrangements must remain within the limits specified for the unit.
    • Blocking the vents. The inverter and charging system need airflow. Do not operate the power station inside a closed box or with clothing, papers or other objects covering it.
    • Running every test to zero. A short function test normally tells you what you need to know. Follow the manual when a full charge-and-discharge cycle is required for maintenance or display calibration.
    • Assuming the app replaces inspection. Remote settings and firmware tools can be useful, but they cannot reveal a cracked case, damaged cord or blocked vent.

    Safety Warning: Know When to Stop Using It

    Stop using or charging the power station if you notice:

    • Swelling, bulging or a change in shape
    • Cracks, impact damage or a damaged charging port
    • Leaking or unusual discoloration
    • An unfamiliar chemical or burning odor
    • Hissing, popping or other unusual sounds
    • Smoke, visible gas or rapidly increasing heat
    • Repeated fault messages or shutdowns that the manual does not resolve

    The U.S. Fire Administration identifies excessive heat, changes in shape, leaking, odors and unusual noises as warning signs for lithium-ion batteries.

    If any of these signs appear, stop using the unit and keep people away from it. Disconnect power only if that can be done safely. Follow the manufacturer’s instructions for a damaged battery. If the unit is smoking, venting gas, rapidly heating or burning, leave the area and call 911.

    Do not open the case or attempt to repair the battery pack yourself. A portable power station may still contain dangerous stored energy even when its display reads zero.

    Check for Recalls

    Recalls are not merely a concern for old or unknown brands. The Consumer Product Safety Commission has announced recalls involving portable power stations from established manufacturers because of fire, burn or electrical hazards.

    Check the CPSC recall database when you buy a used power station, during your periodic maintenance review and whenever a unit begins behaving differently. Search by manufacturer and model number.

    If your power station is recalled, stop using it and follow the recall instructions. Do not assume that ordinary battery-recycling procedures are appropriate for a recalled or damaged unit.

    When the Battery Reaches the End of Its Life

    A battery that provides less runtime than it did when new is not automatically dangerous. Batteries gradually lose usable capacity with age and use. The practical question is whether the remaining capacity still meets your emergency needs.

    Consider manufacturer service or replacement when:

    • Runtime has fallen below what your household requires.
    • The battery loses a substantial amount of charge during a normal storage interval.
    • The unit can no longer support loads it previously handled.
    • Charging becomes unreliable or the unit reports persistent battery errors.

    Do not put a portable power station or its lithium-ion battery in household trash or curbside recycling. The Environmental Protection Agency recommends taking lithium-ion batteries and battery-containing devices to an appropriate battery recycler, electronics recycler or household hazardous-waste collection point. Damaged or recalled units require special handling, so contact the manufacturer and the collection facility before transporting one.

    A Simple Portable Power Station Maintenance Schedule

    After Each Use

    • Turn off outputs and disconnect equipment.
    • Inspect the unit and charging cables.
    • Let the unit cool and clean the vents if needed.
    • Return the battery to the storage condition specified in the manual.

    Every Three Months

    • Check the remaining charge.
    • Inspect the case, ports, cables and vents.
    • Recharge or cycle the battery as directed.
    • Run a short function test with a familiar load.
    • Check for manufacturer notices and recalls.

    Before Storm Season or an Expected Outage

    • Charge the unit for emergency readiness.
    • Test the equipment you expect it to power.
    • Confirm that all required cables and adapters are stored with it.
    • Review the maximum output and charging instructions.

    Once a Year

    • Review whether its remaining capacity still meets your household’s needs.
    • Confirm that the manual, serial number and warranty information are accessible.
    • Review battery-disposal options before an urgent problem forces the decision.

    The Bottom Line

    Portable power station maintenance is not complicated. Keep the unit cool and dry, do not let it sit empty, inspect it regularly and follow the storage instructions written for your exact model.

    Most of the work takes only a few minutes. What matters is remembering to do it before the power station has spent another year untouched in the back of a closet.

    The goal is not to preserve a battery forever. It is to know how much dependable power you have—and to keep it ready for the day your household needs it.

  • Portable Generator Maintenance Checklist: Keep It Ready for an Outage

    Portable Generator Maintenance Checklist: Keep It Ready for an Outage

    A portable generator does not need constant attention. It does need a routine.

    The trouble is that generators measure maintenance in two different ways: time on the calendar and hours on the engine. A generator can sit for months and develop fuel or battery problems without adding a single operating hour. During a long outage, it can reach an oil-change or inspection interval in just a few days.

    This checklist gives you a practical way to keep up with both. It is written for portable generators. Standby generators have different systems and service requirements.

    Your owner’s manual remains the authority for your machine. Use this checklist to remember what to inspect and when to look at the manual—not to replace the manufacturer’s schedule.

    Start With Four Pieces of Information

    Before you make a maintenance plan, find and record:

    • Generator manufacturer and model number
    • Engine model number, if listed separately
    • Required engine oil type and capacity
    • Maintenance intervals from the owner’s manual

    Keep the manual with the generator or save a digital copy where you can reach it during an outage. If the original is missing, use the manufacturer’s website and search by the exact model number.

    Also locate the hour meter. If your generator does not have one, keep a simple written estimate of operating hours. Calendar reminders alone cannot tell you when an engine has worked long enough to need service.

    Before Every Use

    Do this inspection while the generator is off, cool and sitting on a level surface:

    • Look for fuel or oil leaks.
    • Inspect fuel lines, the fuel cap and visible connections for cracks or damage.
    • Check the engine-oil level using the procedure in the manual.
    • Confirm that the air intake, cooling openings and exhaust area are clear.
    • Check the air filter if the manual calls for a pre-use inspection.
    • Inspect outlets, controls and the frame for damage.
    • Inspect extension cords from end to end for cuts, crushed areas, damaged insulation or missing ground prongs.
    • Make sure the fuel is fresh and approved for the generator.
    • Confirm that the generator will operate outdoors in its safe location.
    • Test the home’s carbon-monoxide alarms.

    Do not start a generator that is leaking fuel, has damaged wiring or shows another condition you cannot address confidently.

    Safety First

    Operate a portable generator outdoors only, at least 20 feet from the house, with the exhaust pointed away from the home and other occupied buildings. Never run one in a garage, shed, basement, porch, carport or other enclosed or partially enclosed space.

    The U.S. Consumer Product Safety Commission also recommends checking that outdoor extension cords have adequate wattage ratings, intact insulation and all three prongs. Never connect a generator to home wiring through a wall outlet. See our complete portable-generator safety guide before relying on the generator during an outage.

    During a Long Outage

    Maintenance does not pause because the power is out. Record the hours each day and compare the total with the manual’s service schedule.

    • Check the oil as often as the manufacturer requires.
    • Shut the generator down and let it cool before refueling or servicing it.
    • Watch for leaks, unusual vibration, surging, abnormal smoke or changing engine sound.
    • Keep cooling openings and the surrounding operating area clear.
    • Recheck cords and connections for heat or damage.
    • Complete hour-based service when it becomes due.

    A generator running around the clock can accumulate 72 operating hours in three days. That is why the hour meter matters. A service interval that sounds distant during storage can arrive quickly during an extended outage.

    Do not touch or reposition a damaged, wet or overheated cord while it is energized. Shut down the connected load and generator using the manufacturer’s procedure before inspecting or replacing it.

    After Every Use

    Once the generator is off and completely cool:

    • Record the ending hour-meter reading or estimated operating time.
    • Note any hard starting, surging, smoke, warning lights or shutdowns.
    • Inspect for new leaks, loose hardware or damage.
    • Remove dirt and debris using the cleaning method allowed by the manual.
    • Check whether an oil change or other hour-based service is now due.
    • Prepare the fuel system for the expected storage period.
    • Recharge the electric-start battery if the manual requires it.
    • Store cords and operating supplies where they can be found.

    Do not wash the generator with a garden hose or pressure washer unless the manufacturer specifically permits it. Water forced into the control panel, alternator or electrical connections can create damage that is not visible from the outside.

    Follow the Manual’s Maintenance Schedule

    Manufacturers do not use one universal schedule. Even generators from the same company may have different break-in periods, oil-change intervals and service requirements.

    Your manual may schedule maintenance by months, operating hours or whichever comes first. It may also call for more frequent service in dusty, hot or demanding conditions.

    Use the manual to fill in your generator’s actual intervals for these items:

    Engine oil

    • Check the oil level at the required interval.
    • Complete the first oil change after the specified break-in period.
    • Change the oil at the regular hour or calendar interval.
    • Use the specified oil type, viscosity and quantity.
    • Recycle used oil through an appropriate collection location.

    Do not assume that every generator uses the same first-change or regular-change interval. Honda and Generac manuals demonstrate how schedules can vary by model and operating conditions.

    Air filter

    • Inspect it at the interval in the manual.
    • Clean or replace it according to its type and the manufacturer’s procedure.
    • Service it more often when operating in dusty conditions if directed.
    • Replace a damaged filter.

    Foam and paper elements are not maintained the same way. Do not wash, oil or blow out a filter unless the instructions for that exact filter permit it.

    Spark plug

    • Inspect the plug at the scheduled interval.
    • Check the condition and gap using the manual’s specifications.
    • Replace it with the specified plug when required.
    • Start the threads by hand during installation to reduce the risk of cross-threading.

    Spark arrestor and cooling system

    • Inspect or clean the spark arrestor when the manual requires it.
    • Keep cooling-air openings and engine fins clear of debris.
    • Let the muffler and engine cool before touching nearby components.

    Fuel system

    • Use fresh fuel that meets the manual’s requirements.
    • Inspect hoses, the tank, cap and connections for deterioration or leaks.
    • Treat or drain gasoline according to the expected storage period.
    • Date stored fuel and rotate it before it becomes a problem.

    Fuel stabilizer can slow deterioration when added correctly to fresh gasoline, but it cannot restore stale fuel. See Should You Use Fuel Stabilizer in Your Generator? for the complete decision process.

    Electric-start battery

    • Inspect the battery and terminals as directed.
    • Maintain its charge using the manufacturer’s approved method.
    • Check for corrosion, swelling, leakage or damaged cables.
    • Replace the battery when it no longer holds a dependable charge.

    Dealer or technician service

    • Identify maintenance the manual assigns to a qualified technician.
    • Schedule valve-clearance checks or other specialized work when due.
    • Address recalls, persistent fuel leaks and electrical problems before the next outage.

    Some work requires model-specific procedures, special tools or mechanical experience. The checklist should help you catch those items—not encourage you to take apart equipment you are not prepared to service.

    Complete a Readiness Check Before Storm Season

    Do not wait for a warning cone to appear on the weather map.

    Several weeks before the season when outages are most likely:

    • Review the maintenance schedule and operating-hour record.
    • Complete any service that will become due soon.
    • Inspect the generator, cords and connection equipment.
    • Check the electric-start battery.
    • Confirm that stored fuel is fresh or properly rotated.
    • Move the generator to its planned outdoor operating location.
    • Start it using the manufacturer’s procedure.
    • Test it under an appropriate load if the manufacturer permits.
    • Confirm stable operation and electrical output.
    • Test the home’s smoke and carbon-monoxide alarms.
    • Replace missing supplies before stores become crowded.

    The goal is not simply to hear the engine start. The generator must operate safely and carry an appropriate load before you count it as ready.

    Our guide to how often you should run your generator explains why the manufacturer’s test schedule matters and why a brief no-load start may not prove enough.

    Prepare It Properly for Storage

    Storage is part of maintenance. Old gasoline, a discharged battery, moisture and pests can undo the work you completed during the rest of the year.

    Before putting the generator away:

    • Let it cool completely.
    • Inspect for leaks and damage.
    • Record operating hours and completed service.
    • Follow the manual’s fuel-treatment or draining procedure.
    • Maintain or disconnect the starting battery as directed.
    • Clean the exterior without forcing water into electrical components.
    • Store the generator upright in a dry, protected location.
    • Keep it away from flames, sparks and other ignition sources.
    • Store gasoline outside living areas in an approved container.

    See How to Store a Portable Generator the Right Way for the complete storage procedure.

    Keep a Simple Maintenance Record

    You do not need a complicated spreadsheet. A notebook page kept with the manual is enough if you use it consistently.

    Record:

    • Date
    • Hour-meter reading
    • Work performed
    • Oil, filter, spark plug or other parts used
    • Fuel treatment or draining completed
    • Problems noticed
    • Next service due

    The record answers the question that causes trouble during an outage: “Did I already do that, or was I planning to do it?”

    Stop and Get Help When Necessary

    Do not operate the generator until it has been properly inspected or repaired if you find:

    • A persistent fuel or oil leak
    • A cracked fuel line or damaged tank
    • Burned, loose or damaged wiring
    • A damaged outlet, plug or grounding component
    • Abnormal smoke, surging, knocking or vibration
    • Repeated low-oil, carbon-monoxide or fault shutdowns
    • Unstable or missing electrical output
    • A repair that exceeds your tools, manual or experience

    If the generator has already been neglected and will not start, use our guide to a generator that will not start after sitting before assuming the machine is ruined.

    The Bottom Line

    Generator maintenance becomes manageable when you stop treating it as one annual chore.

    Inspect the generator before every use. Track its operating hours. Follow the model-specific schedule for oil, filters, spark plug, fuel system, battery and professional service. Prepare it correctly for storage, then test it early enough to fix a problem before an outage.

    The generator may spend most of its life waiting. Your maintenance record is what makes that waiting useful instead of risky.

    Sources

  • Should You Use Fuel Stabilizer in Your Generator?

    Should You Use Fuel Stabilizer in Your Generator?

    Fuel stabilizer is useful for many portable generators, but it is not magic in a bottle.

    Added correctly to fresh gasoline, stabilizer can slow fuel deterioration while a generator sits unused. It cannot restore gasoline that has already gone stale, clean a clogged carburetor or replace the storage procedure in your generator’s owner’s manual.

    The practical answer is simple: Use fuel stabilizer when you plan to keep gasoline for later use and your generator manufacturer allows that storage method. Use it correctly, circulate it through the fuel system and do not treat it as permission to forget the fuel indefinitely.

    What Fuel Stabilizer Actually Does

    Gasoline begins changing as it sits. Its lighter components evaporate, oxidation occurs and deposits can develop inside the fuel system. Heat, air and moisture can accelerate the process.

    Fuel stabilizer is designed to slow that deterioration. It may help reduce the gum and deposits that contribute to hard starting, rough running and clogged carburetor passages.

    What it does not do is equally important:

    • It does not make old gasoline fresh again.
    • It does not remove water from contaminated fuel.
    • It does not clean an already clogged carburetor.
    • It does not guarantee that gasoline can remain in every generator for the same length of time.
    • It does not override the generator manufacturer’s instructions.

    Honda specifically warns that fuel stabilizer will not reconstitute stale fuel. Its generator guidance also recommends draining the carburetor during longer periods of inactivity for certain models. See Honda’s generator fuel guidance.

    When Stabilizer Makes Sense

    Fuel stabilizer is usually worth considering when:

    • You keep gasoline on hand for outages.
    • Your generator may sit unused for more than a few weeks.
    • You rotate stored fuel rather than buying it only when a storm approaches.
    • Your owner’s manual permits storage with treated gasoline.
    • You want fresh treated fuel available for periodic generator testing.

    Adding stabilizer to the portable fuel container when it is filled is often more practical than waiting until the gasoline has been sitting for months. That way, you know when the fuel was treated and can use it in either the generator or another compatible gasoline engine during normal rotation.

    When Draining May Be the Better Choice

    Stabilizer is not always the complete storage answer.

    Some manufacturers recommend draining the carburetor even when stabilized fuel remains in the tank. Others recommend emptying the entire fuel system for extended or indefinite storage. Instructions can also differ among models from the same manufacturer.

    Honda, for example, provides different procedures depending on storage time. Generac also directs owners to consult the storage instructions for their particular generator and describes both treated-fuel and drained-fuel methods. See Generac’s portable-generator storage guidance.

    This is why a universal rule such as “add stabilizer and forget about it” is unreliable.

    If you do not know when the generator will be used again, or its manual calls for draining, follow that procedure. See our guide to storing a portable generator for the broader storage process.

    How to Use Fuel Stabilizer Correctly

    1. Start with fresh gasoline

    Stabilizer works best when added before the gasoline has deteriorated. Pouring it into fuel that already smells stale or has been sitting for an unknown period does not reset the clock.

    2. Follow the product label

    Measure the amount specified for the volume of gasoline you are treating. More is not automatically better, and different products may use different treatment ratios.

    3. Follow the generator’s manual

    Check whether the manufacturer wants the tank filled, the carburetor drained or the fuel system emptied for your expected storage period.

    4. Circulate the treated fuel

    If the stabilizer was added after gasoline entered the generator, the treated fuel needs to reach the carburetor and fuel passages. Manufacturers commonly instruct owners to run the generator outdoors for several minutes after treatment. Use the exact time and procedure in your manual.

    Safety First

    Never run a generator in a garage, shed, basement, porch or other enclosed or partially enclosed space.

    5. Date the fuel

    Mark the fuel container with the purchase or treatment date. A small piece of tape and a permanent marker can prevent a surprising amount of confusion several months later.

    6. Rotate it

    Use stored gasoline while it is still suitable for compatible equipment, then replace it with fresh treated fuel. Stabilizer extends useful storage time; it does not make gasoline permanent.

    Common Fuel-Stabilizer Mistakes

    The most common mistake is waiting too long. Stabilizer should be added to fresh fuel, not used as a rescue treatment after a generator refuses to start.

    Other mistakes include:

    • Guessing at the treatment amount.
    • Failing to circulate treated fuel through the generator.
    • Leaving untreated gasoline in the carburetor.
    • Assuming every generator has the same storage procedure.
    • Losing track of when the fuel was purchased.
    • Storing fuel near ignition sources.
    • Keeping gasoline longer than the stabilizer label or equipment manual allows.

    If a generator already has old gasoline in it and will not start, adding stabilizer is unlikely to solve the problem. Start with our guide to a generator that will not start after sitting.

    What About Ethanol-Free Gasoline?

    Ethanol-free gasoline may reduce some moisture-related concerns, but it still ages. If you plan to store it, you still need a deliberate storage and rotation plan.

    Use the fuel type and ethanol limit specified in your generator’s manual. Do not assume that a more expensive fuel eliminates the need for proper storage.

    Store Gasoline Safely

    Fuel treatment does not reduce gasoline’s fire risk.

    Use an appropriate, closed fuel container and store it in a cool, well-ventilated location away from children and ignition sources. Never keep gasoline inside the house or basement. See the CPSC fuel-container safety guidance.

    Local fire codes may limit how much gasoline can be stored and where it may be kept.

    The Bottom Line

    Fuel stabilizer is a useful part of generator readiness when it is added to fresh gasoline and used according to both the product label and the generator’s manual.

    It is not a substitute for draining the carburetor when required, rotating stored gasoline or testing the generator regularly. A bottle of stabilizer can help protect your fuel system, but the real protection comes from having a repeatable routine.

    Treat fresh fuel. Date it. Circulate it properly. Store it safely. Rotate it before it becomes a problem.

    That is much more dependable than hoping an old can of gasoline will still be ready when the power goes out.

    Sources

  • What Can You Actually Run During a Power Outage?

    What Can You Actually Run During a Power Outage?

    When the power goes out, the goal is not to recreate normal life. It is to keep the household safe, protect the things that matter and use limited backup power where it does the most good.

    That means the first question is not, “How much can my generator or power station run?” It is, “What must keep working, and what can wait?”

    Short Answer

    Most households can cover a useful group of essentials with far less power than the whole house normally uses. A refrigerator, a few LED lights, phones, a modem or router and a portable fan may fit within a modest backup plan. Pumps, furnace blowers, medical equipment, cooking appliances and air conditioning require more careful planning.

    Whether a load will work depends on four things:

    • The power source’s continuous output
    • The extra power a motor or compressor needs when it starts
    • The voltage and connection the equipment requires
    • How long the battery or fuel must last

    A backup source can have enough watts to start a refrigerator but not enough stored energy to run it overnight. It can also have plenty of battery capacity but too little surge output to start the compressor. You have to check both power and runtime.

    Power the Household in Layers

    1. Protect health and immediate safety

    Equipment that supports breathing, mobility, medication, temperature control or another health need comes first. Do not estimate a medical device’s requirements from a generic chart. Use its exact label and instructions, and confirm the backup plan with the device manufacturer, supplier and health-care provider.

    Extreme heat or cold can also turn comfort into a safety issue. A fan may help someone feel cooler, but the CDC warns that fans alone do not prevent heat-related illness when temperatures are very high. Know where you can go if the home becomes unsafe.

    2. Protect refrigeration and necessary household systems

    A refrigerator or freezer is often the largest load in a basic outage plan. It cycles rather than running continuously, but its compressor can require several times more power for a moment when it starts.

    A sump pump, well pump or furnace blower may be even more important in some homes. These loads often have motors, high starting demand, hardwired connections or 240-volt requirements. They should not be added to a portable setup by guesswork.

    3. Keep communication and safe lighting available

    Phones, a modem or router, a radio and a few LED lights usually use much less power than heating, cooling or cooking appliances. They are often the easiest loads to keep running, and they help the household receive alerts, contact others and move safely after dark.

    Internet service may still be unavailable if the provider’s local equipment has lost power. Keep another way to receive emergency information.

    4. Add comfort and convenience only after the essentials fit

    A television, laptop, fan or small kitchen appliance may be reasonable when capacity allows. Electric heat, hot plates, toaster ovens, hair dryers and similar resistance-heating loads consume a large share of a small power station’s output and energy.

    Use them only if the source, connection and runtime plan can safely support them. During a limited outage, a lower-power alternative is often the better choice.

    A Quick Load Guide

    These figures are planning examples, not ratings for your equipment. Check the appliance label and manufacturer’s information before relying on any backup source.

    Load or groupTypical planning demandMain limit
    Phone chargers, LED lights, modem/routerUsually tens of watts each or lessAdd the label watts for every item. These are often the easiest loads to support.
    Refrigerator or freezerAbout 130–200W running; roughly 1,200–1,600W starting in Honda examplesThe compressor’s startup surge and the appliance’s cycling determine output and runtime needs.
    Portable fanAbout 40W running and 120W starting in Honda’s exampleUseful for comfort, but not a substitute for air conditioning in dangerous heat.
    Laptop or televisionOften about 50–250W eachActual model, brightness, charging and use can change demand.
    Microwave or coffee makerRoughly 600–1,500W while operatingHigh draw but short use. It may be practical to run one by itself.
    Sump pump, well pump or furnace blowerFrom hundreds to more than 2,000W; starting demand may be much higherCheck motor startup, voltage and whether the equipment is hardwired.
    Space heater or portable electric cookingOften about 1,300–1,500WThese loads can consume a small system’s output and stored energy quickly.
    Central air, electric water heater, range or dryerSeveral thousand watts; commonly 240V and hardwiredUsually outside a small portable-backup plan. Use a properly designed system.

    The ranges above are drawn from representative manufacturer planning examples. They show the scale of the problem; they do not replace the ratings for your equipment. A newer refrigerator, a larger pump or a different appliance may be far outside the example.

    A Realistic Essential-Load Example

    Suppose a household wants to run:

    • A refrigerator using 200W after startup
    • Four 10W LED bulbs
    • A 40W portable fan
    • A 15W modem and router
    • Two phone chargers using 30W together

    The combined running load is about 325W. That looks small, but the refrigerator may need about 1,600W for a moment when its compressor starts. If the other loads remain on, the source may need to supply roughly 1,725W during that start.

    A backup source with 1,000W of continuous output but only 1,000W of surge output would not be a dependable match for this example. A source with sufficient surge capacity may operate the group, but runtime is a separate question.

    For a generator, use How Much Generator Do I Need? to enter the actual running and starting figures. For a battery system, the refrigerator-runtime calculator can estimate how long the stored energy may last.

    What a Portable Power Station Can Usually Handle

    A portable power station is often a good fit for electronics, LED lighting, communication equipment and selected appliances that stay within its output limits. Larger stations may also operate a refrigerator, freezer, fan or certain medical devices if the exact startup, continuous-output and compatibility requirements are met.

    The number marked in watts tells you how much power the station can deliver at one time. The number marked in watt-hours tells you roughly how much energy it stores. Neither number replaces the other.

    A station that can start every connected load may still run out of energy quickly if it is powering a heater, cooking appliance or several devices continuously. Compare the two types of backup in Portable Power Station vs. Generator if you are still deciding which system fits your needs.

    What a Portable Generator Changes

    A portable generator can generally support larger or longer-running loads because it continues producing power while fuel is available. It still has output, voltage, receptacle, cord, fuel and connection limits.

    Do not add loads until a generator trips and call that a plan. Overloading can shut the system down when an essential motor starts. It can also overheat an undersized cord or create other hazards.

    A fuel-burning generator must operate outdoors only, at least 20 feet from the home, with the exhaust directed away from doors, windows and vents. Never operate one in a garage, porch, carport, shed or other enclosed or partly enclosed space. Never connect it to a wall outlet. Read the portable-generator safety guide before using one.

    240-Volt and Hardwired Loads Are a Separate Decision

    A wattage total does not tell you whether the equipment can be connected.

    Many well pumps, sump pumps, furnace blowers, central air conditioners, electric water heaters, ranges and dryers are hardwired or require 240V. Many portable power stations provide only 120V, and a generator’s full advertised output may not be available through every receptacle.

    Do not improvise a connection or alter household wiring. If the outage plan includes hardwired or 240V equipment, have a qualified electrician verify the power source, voltage, transfer equipment, inlet, breaker and local requirements.

    Medical Equipment Needs Its Own Plan

    An electrically powered medical device should not be treated as one more row in a household wattage chart.

    Ready.gov recommends talking with the medical provider about a power-outage plan for devices and refrigerated medicines. The FDA also advises checking the device instructions or contacting the distributor or manufacturer to determine whether the equipment can be used with a battery or generator.

    Confirm:

    • The device’s exact input and startup requirements
    • Whether it requires a particular power quality, accessory or backup battery
    • How long it can safely be without power
    • Who to contact if the backup fails
    • Where the person can go if the home becomes unsafe

    Do not change treatment, disconnect equipment or substitute an unapproved power source based on a generic online estimate. Make the medical backup plan with the appropriate provider and device professionals before an outage.

    Manage Loads Instead of Powering Everything at Once

    The 1960s sitcom Green Acres turned the need to manage generator loads into a running joke. Oliver Douglas assigned every appliance a number because the farmhouse generator could support only so much at once, and Lisa kept choosing combinations that exceeded the limit. The comedy was exaggerated; the electrical lesson was not. During a real outage, the same idea is called load management.

    Think of a generator or power station as a power budget. The refrigerator, pump and essential equipment get first claim. A coffee maker, microwave, television or other convenience load can take a turn when the plan leaves enough room for essential equipment to restart.

    Start large motors separately. Turn off a microwave, coffee maker or other high-draw appliance while a pump or refrigerator is starting. Charge phones and battery packs when other demand is low. Keep refrigerator and freezer doors closed so the compressors do not have to work as hard.

    Remember that some equipment restarts automatically. A refrigerator, freezer, pump or furnace blower can switch on while another appliance is operating. If two large loads could start together, the source and connection plan must account for it or reliably prevent it.

    Load management is not permission to exceed a rating. Every operating combination must remain within the limits of the power source, receptacle, cord, inlet and transfer equipment.

    Make Your Outage Load List Before You Need It

    Use this process while the power is still on:

    • Divide equipment into “must run,” “helpful” and “can wait.”
    • Record the voltage, running watts and starting watts from the label or official manual.
    • Mark every motor, compressor, 240V load and hardwired connection.
    • Add the running demand for equipment that may operate together.
    • Add the largest realistic startup demand.
    • Compare the result with every limit in the power path.
    • Estimate how long the battery or fuel must last.
    • Test the exact setup under safe, supervised conditions.

    If a rating or connection is unclear, stop and verify it with the manufacturer or a qualified professional. Guessing low does not make the load smaller.

    Bottom Line

    During an outage, a few carefully chosen loads can do more for the household than trying to power everything.

    Protect health first. Keep refrigeration, communication and safe lighting available. Add fans, electronics and short-use appliances only when capacity allows. Treat pumps, medical devices, hardwired equipment and 240V loads as special cases that require exact information.

    Then calculate with the real ratings, plan the runtime and test the setup before the next outage.

    If you are building the rest of the household plan, start with What to Do When the Power Goes Out.