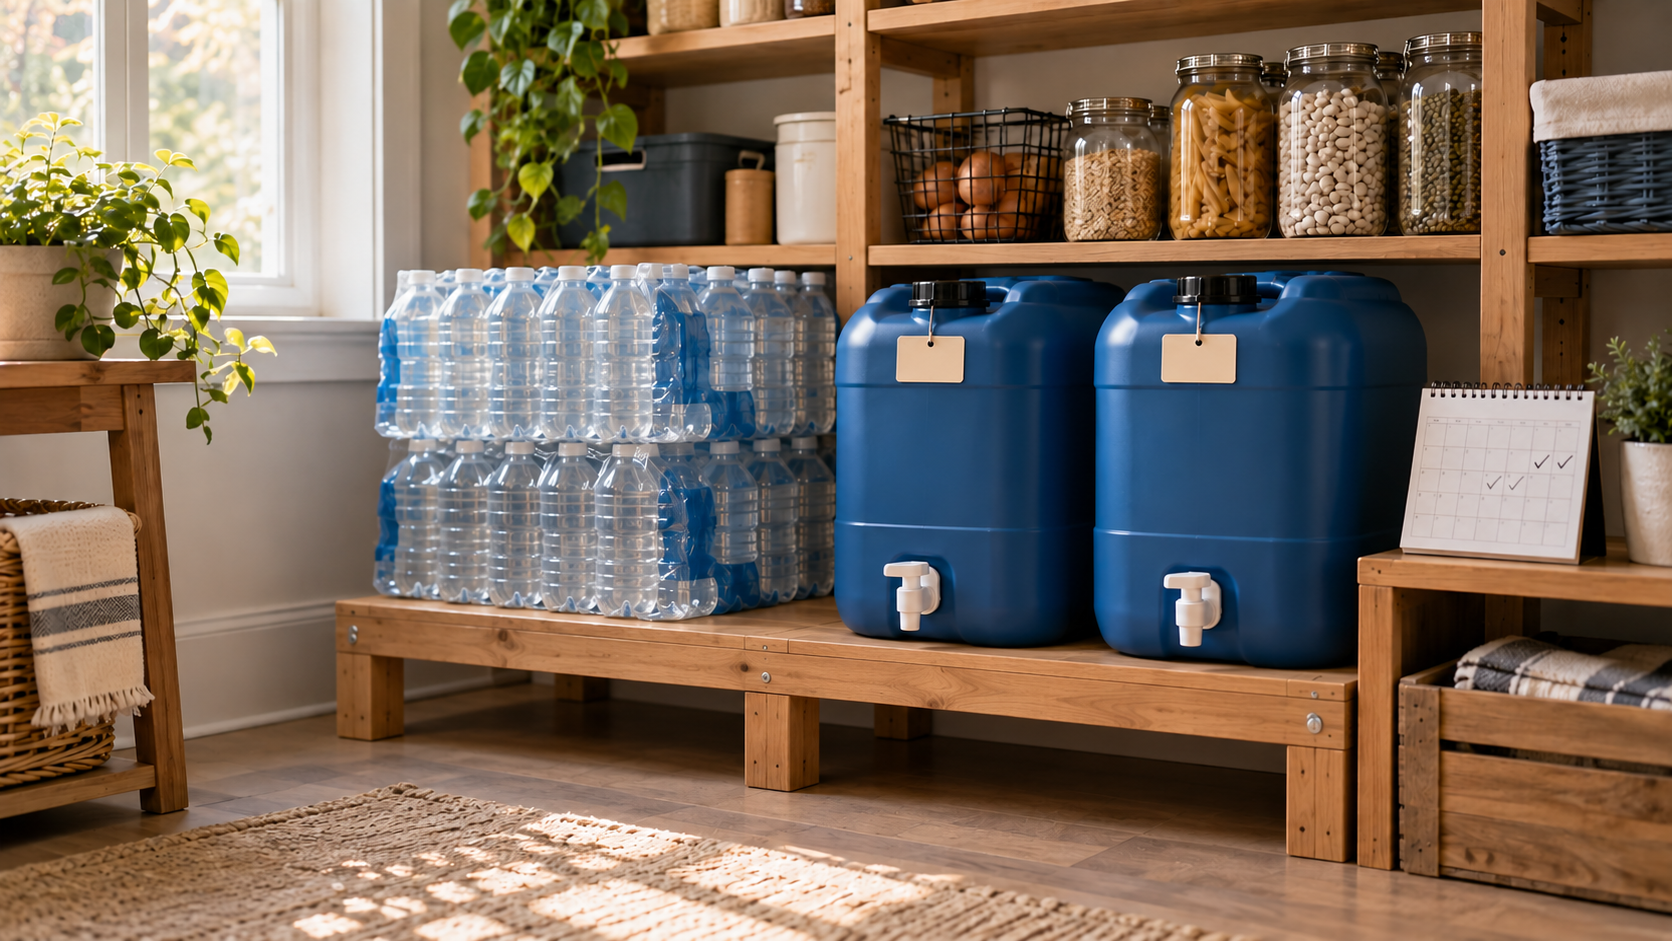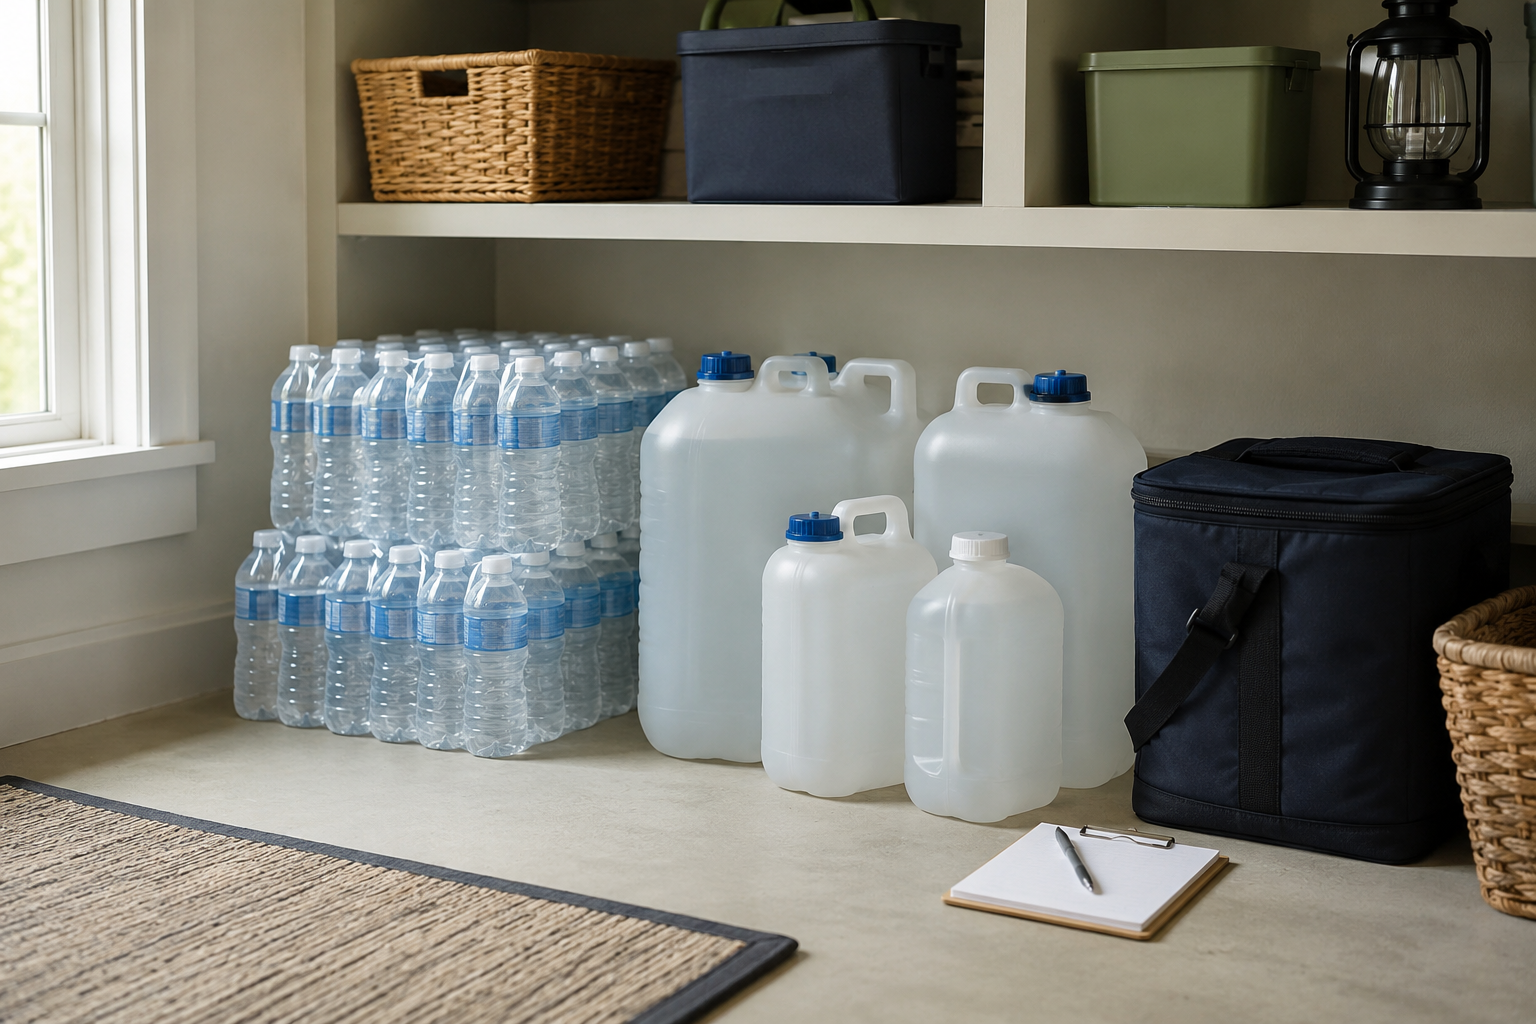
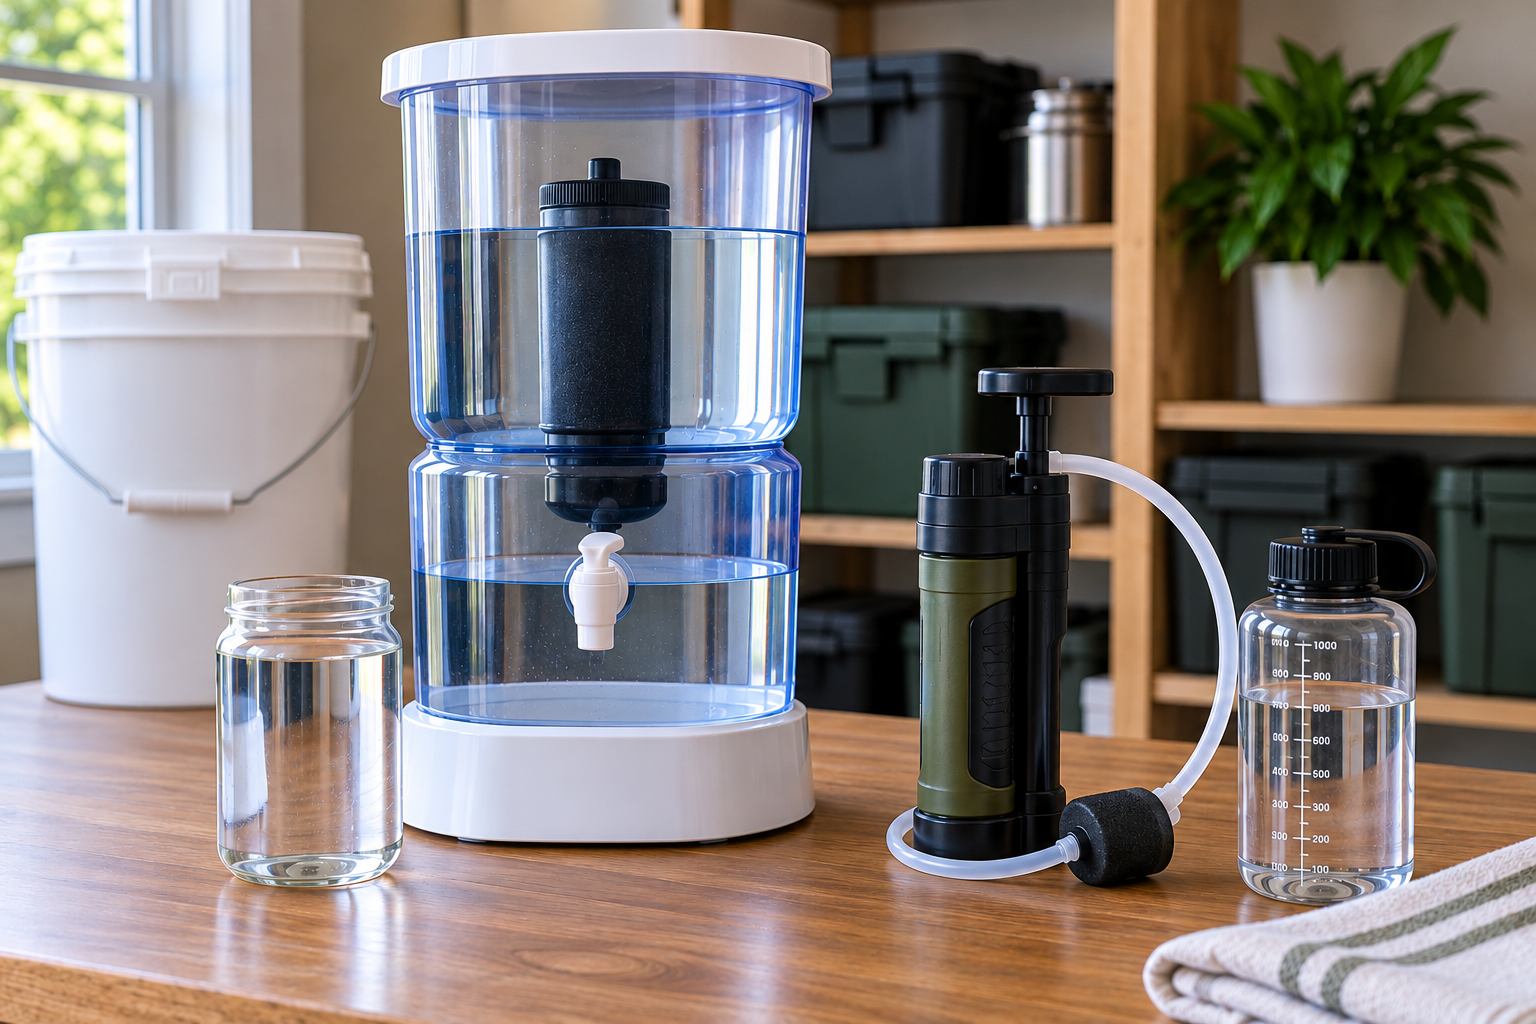
Category: Water

Practical guidance on emergency water storage, filtration, purification, and maintaining a safe household water supply during disruptions.

  • Water Filters vs. Water Purifiers: What’s the Difference?

    Water Filters vs. Water Purifiers: What’s the Difference?

    When people start thinking seriously about emergency water, one question usually comes up pretty quickly:

    Do I need a water filter, or do I need a water purifier?

    Those terms are often used as though they mean the same thing. They don’t.

    A filter may be very good at removing certain contaminants from water while doing little or nothing about others. A purifier is generally intended to provide broader protection against disease-causing microorganisms.

    That difference matters during an emergency.

    The right choice depends less on which product has the most impressive packaging and more on a simple question:

    What might be wrong with the water you’re trying to treat?

    Understanding that first makes choosing the right equipment much easier.

    The Simple Difference Between a Filter and a Purifier

    A water filter physically removes certain things from water as the water passes through the filter material.

    Depending on its design, a filter may remove sediment, parasites, bacteria, chlorine, lead or certain other contaminants. But there is no single filter that automatically removes everything.

    The CDC warns that portable water filters do not remove all types of germs. Pore size matters. For example, the CDC says a portable filter needs an absolute pore size of 1 micron or smaller to remove parasites such as Giardia and Cryptosporidium, and 0.3 micron or smaller to remove bacteria. Portable filters generally should not be assumed to remove viruses.

    A microbiological water purifier is designed to go further.

    The EPA’s testing protocol for microbiological water purifiers addresses bacteria, viruses and protozoan cysts. NSF also maintains Protocol P231 for microbiological water purifiers based on EPA recommendations.

    That gives us a useful rule of thumb:

    A filter removes specific contaminants. A true microbiological purifier provides broader protection against disease-causing microorganisms, including viruses.

    But don’t stop reading at the word purifier on the box. Look at exactly what the product has been tested or certified to reduce.

    Why Viruses Are the Big Difference

    Viruses are one of the biggest reasons the filter-versus-purifier distinction matters.

    Many portable filters can remove parasites and, depending on their pore size and design, bacteria. Viruses are much smaller and may pass through filters that are otherwise very effective.

    That’s why the CDC recommends that when the safety of untreated water is uncertain, boiling is the best way to kill germs. When boiling isn’t practical, the CDC describes filtering followed by disinfection as the next-best approach.

    That doesn’t mean every emergency requires a purifier.

    It means you need to understand the possible contamination before deciding that filtration alone is enough.

    Think About the Water Source First

    Imagine two different situations.

    In the first, you’re treating relatively clear water from a natural freshwater source. Your primary concern may be microorganisms such as Giardia, Cryptosporidium and bacteria.

    In the second, flooding has affected a community water system or potentially introduced sewage contamination. Now viruses may also be a concern.

    Those are very different treatment problems.

    And there is an even more important third possibility: water contaminated by fuel, pesticides, industrial chemicals or other toxic substances.

    In that situation, don’t assume that a camping filter, purifier, bleach or even boiling will solve the problem.

    The CDC specifically warns that water containing fuel, toxic chemicals or radioactive materials cannot be made safe by boiling or disinfecting and recommends using bottled water or another safe source instead. EPA similarly warns that boiling and emergency disinfection do not remove contaminants such as heavy metals, salts and most other chemicals.

    Ready Chateau Safety Note: If authorities issue a Do Not Drink or Do Not Use advisory, follow that advisory. Don’t substitute your home filtration equipment for the instructions of local health or water officials. During a boil-water advisory, CDC guidance says to use commercially bottled water or boil tap water even if the water has already passed through a typical home filter.

    Filter, Purifier or Something Else?

    Here is the practical way to think about the options:

    Treatment methodWhat it can doImportant limitation
    Portable filterDepending on design, may remove parasites, bacteria and sedimentDo not assume it removes viruses
    Microbiological purifierDesigned and tested for broader protection against bacteria, viruses and protozoan cystsVerify the actual certification and performance claims
    BoilingKills viruses, bacteria and parasitesDoes not remove harmful chemicals or other non-biological contaminants
    Chemical disinfectionCan kill many disease-causing microorganismsEffectiveness varies by disinfectant and organism
    UV treatmentCan kill germs when properly usedWorks poorly in cloudy water unless the water is clarified first
    Activated carbon / specialty filtrationMay reduce specific chemicals, taste, odor or other contaminantsPerformance depends entirely on the filter and its certified claims
    Reverse osmosisCan reduce a broad range of specific contaminants depending on the systemRequires the correct system, maintenance and verified contaminant-reduction claims

    CDC guidance says boiling is the best emergency method for killing germs. It also notes that UV treatment works best with clear water because suspended particles can shield microorganisms from the light.

    The lesson isn’t that one technology is always better.

    It’s that different technologies solve different problems.

    Don’t Buy a Filter Based on Micron Rating Alone

    Micron ratings are useful, particularly when evaluating a filter’s ability to physically block microorganisms.

    But micron size doesn’t tell you everything a water-treatment device can do.

    Some systems combine multiple technologies. Others use activated carbon to reduce certain chemicals or improve taste and odor. Reverse-osmosis systems use a different treatment process. Purifiers may combine filtration with chemical, ultraviolet or other treatment methods.

    Instead of looking for the smallest number on the package, look for evidence that the product has actually been tested for the contaminants you’re concerned about.

    That’s where certification becomes important.

    What Do NSF Certifications Mean?

    You may see NSF/ANSI numbers on water-treatment equipment. Those numbers are not product rankings. Each standard addresses particular types of performance claims.

    For example, NSF explains that NSF/ANSI 42 covers aesthetic effects such as chlorine, taste and odor. NSF/ANSI 53 addresses contaminants with health effects. NSF/ANSI 58 applies to reverse-osmosis systems, while NSF P231 addresses microbiological water purifiers.

    Certification still doesn’t mean a product removes every contaminant.

    A filter certified under a particular standard should be checked for the specific contaminant-reduction claim you need. NSF explicitly cautions that certification to a standard or protocol does not mean the treatment system reduces every possible contaminant.

    That’s an important distinction.

    Don’t ask only:

    “Is this NSF certified?”

    Also ask:

    “Certified to reduce what?”

    Home Water Filters Aren’t Necessarily Emergency Water Filters

    The pitcher in your refrigerator and the filter attached to your kitchen faucet may be perfectly useful for their intended purpose.

    That doesn’t make them emergency purification systems.

    Some household filters are primarily designed to improve taste and odor. Others are certified to reduce specific contaminants such as lead or certain chemicals. CDC recommends choosing a home filter based on the harmful germs or chemicals you’re actually concerned about and maintaining the filter according to the manufacturer’s instructions.

    This is particularly important during a water emergency.

    If local authorities issue a boil-water advisory because disease-causing microorganisms may be present, don’t assume your normal refrigerator, pitcher or faucet filter replaces boiling. Follow the advisory.

    When a Portable Filter Makes Sense

    A portable filter can be an excellent preparedness tool.

    It may be especially useful when you need a compact way to treat water and the filter has appropriate verified claims for the likely contaminants.

    For home preparedness, portability also matters.

    A large household may need much more treated water than a backpacking filter was designed to produce. Flow rate, filter life, replacement elements and the physical effort required to process several gallons of water can become important very quickly.

    A filter that’s convenient for one person on a hiking trip may be frustrating as the primary water-treatment method for a family during a week-long outage.

    That’s something we’ll consider carefully when Ready Chateau eventually evaluates specific water-treatment products.

    When a Purifier Makes More Sense

    A purifier becomes more attractive when broader microbiological protection is needed, particularly when viruses may be part of the risk.

    But the same rule applies:

    Verify the claims.

    Look for independent certification or credible test results showing exactly what the device reduces or inactivates. Don’t assume that a product is appropriate for every emergency simply because the manufacturer uses the word purifier.

    And remember that microbiological purification still doesn’t automatically solve chemical contamination.

    A device designed to deal with bacteria, viruses and protozoa isn’t necessarily designed to remove fuel, heavy metals or every chemical contaminant.

    Sometimes the Best Answer Is More Than One Treatment Step

    Emergency water treatment doesn’t always have to depend on one piece of equipment.

    CDC guidance specifically describes filtering followed by disinfection when boiling isn’t available. Cloudy water can also be allowed to settle or be passed through a clean cloth, paper towel or coffee filter before further treatment.

    That illustrates a broader preparedness principle:

    Redundancy is useful.

    Stored drinking water should remain your first line of defense. A good filter or purifier gives you another option. Boiling or an appropriate emergency disinfectant can provide another treatment method.

    One method doesn’t have to do everything.

    Don’t Forget Maintenance

    Water-treatment equipment is not something to buy, put on a shelf for ten years and automatically expect to work perfectly when you need it.

    Filters have service lives. Some have cartridges that must be replaced. Others require cleaning or backwashing. Seals and hoses need to remain usable. Batteries in UV systems need power.

    CDC recommends maintaining filters and replacing filter elements according to manufacturer instructions because improper maintenance can allow germs to grow or reduce the filter’s effectiveness.

    For emergency equipment, that means periodically checking the unit, knowing how to operate it and keeping any necessary replacement components with your preparedness supplies.

    The middle of a water outage is a bad time to discover that your only replacement cartridge is three years overdue.

    What Should You Buy?

    Don’t begin with a brand.

    Begin with the problem you’re trying to solve.

    If your goal is simply improving normal municipal tap water, you may need a very different product than someone preparing to treat questionable water after a hurricane or extended utility failure.

    For emergency preparedness, consider the likely water source, the contaminants the treatment system is verified to address, how much water your household needs, how quickly the system can produce it, how complicated it is to operate and what maintenance or replacement parts it requires.

    And before buying another piece of equipment, make sure you have an adequate supply of stored drinking water in the first place.

    A filter or purifier should strengthen your emergency water plan—not become an excuse for having no stored water at all.

    If you haven’t established your water supply yet, start with How Much Water Should You Store for an Emergency?, then review The Right Way to Store Emergency Water at Home and Best Emergency Water Storage Containers.

    The Bottom Line

    A water filter and a water purifier are not automatically interchangeable.

    A filter removes particular contaminants according to its design and tested capabilities. A microbiological purifier is intended to provide broader protection against disease-causing microorganisms, including viruses.

    Neither term tells you everything you need to know.

    The smarter approach is to identify the water problem first and then choose equipment with verified performance claims that address that problem.

    For most households, the strongest emergency water plan isn’t built around one miracle device.

    It’s built around stored water first, appropriate treatment equipment second, and more than one way to make water usable when circumstances change.
  • Best Emergency Water Storage Containers

    Best Emergency Water Storage Containers

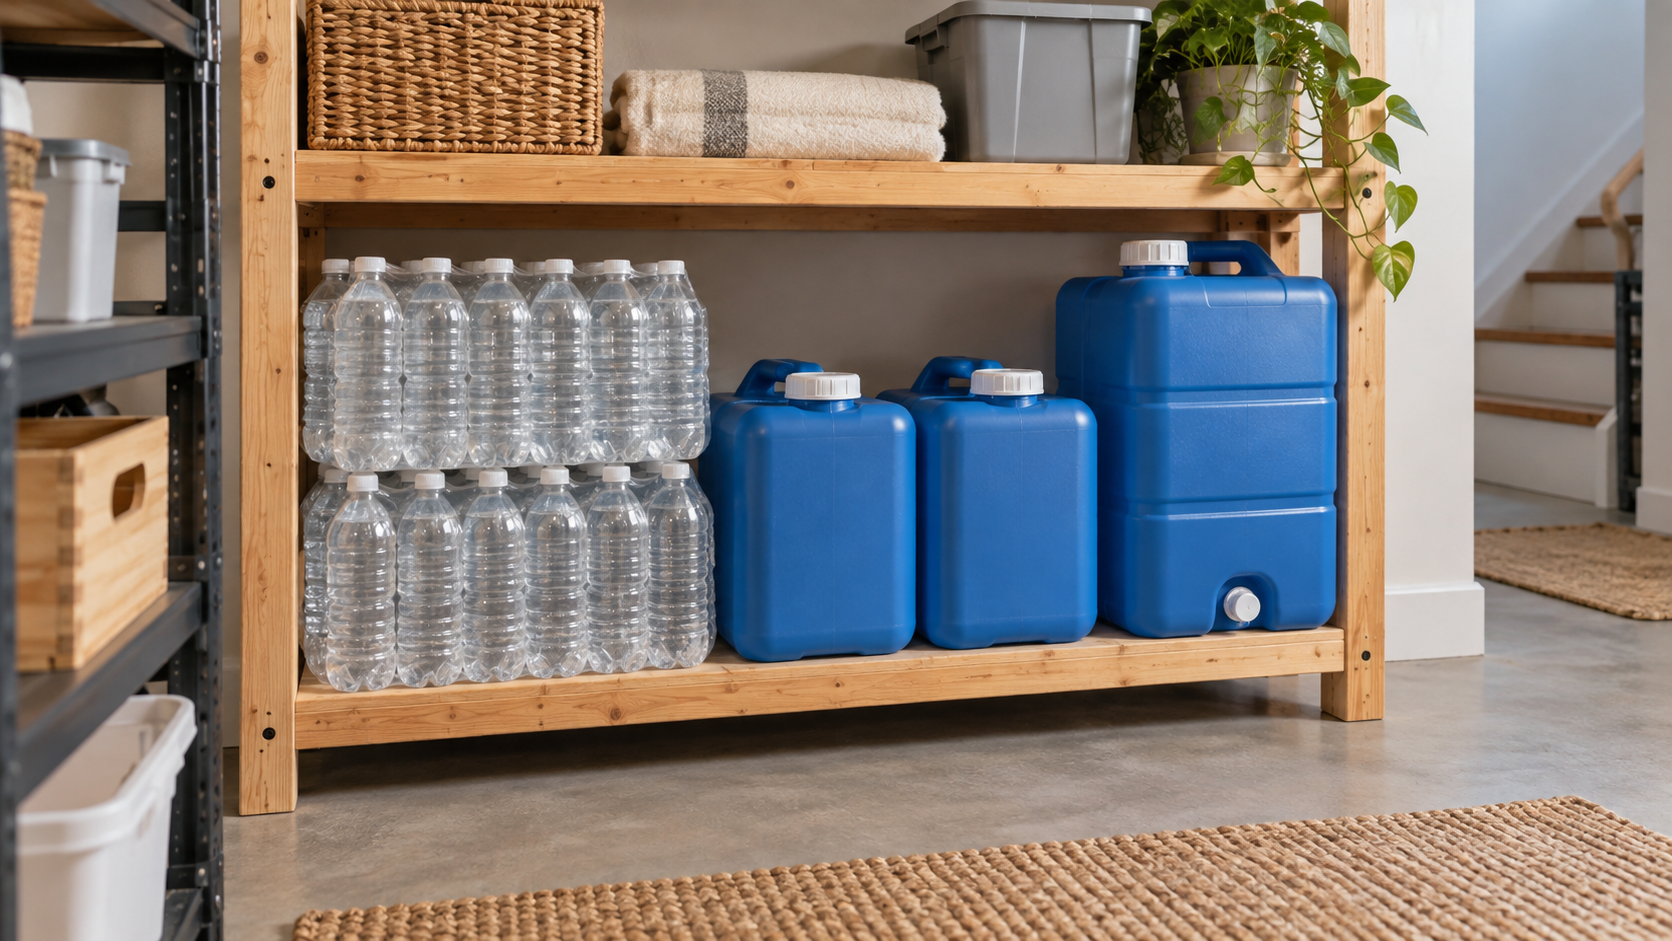
    Choosing an emergency water container looks simple until you calculate the weight, find a place to store it and try to pour from it. A container that holds plenty of water may be too heavy to move. A compact one may stack neatly but take longer to fill and rotate. A large tank may solve the capacity problem while creating a new problem if its valve leaks or the water must leave the house with you.

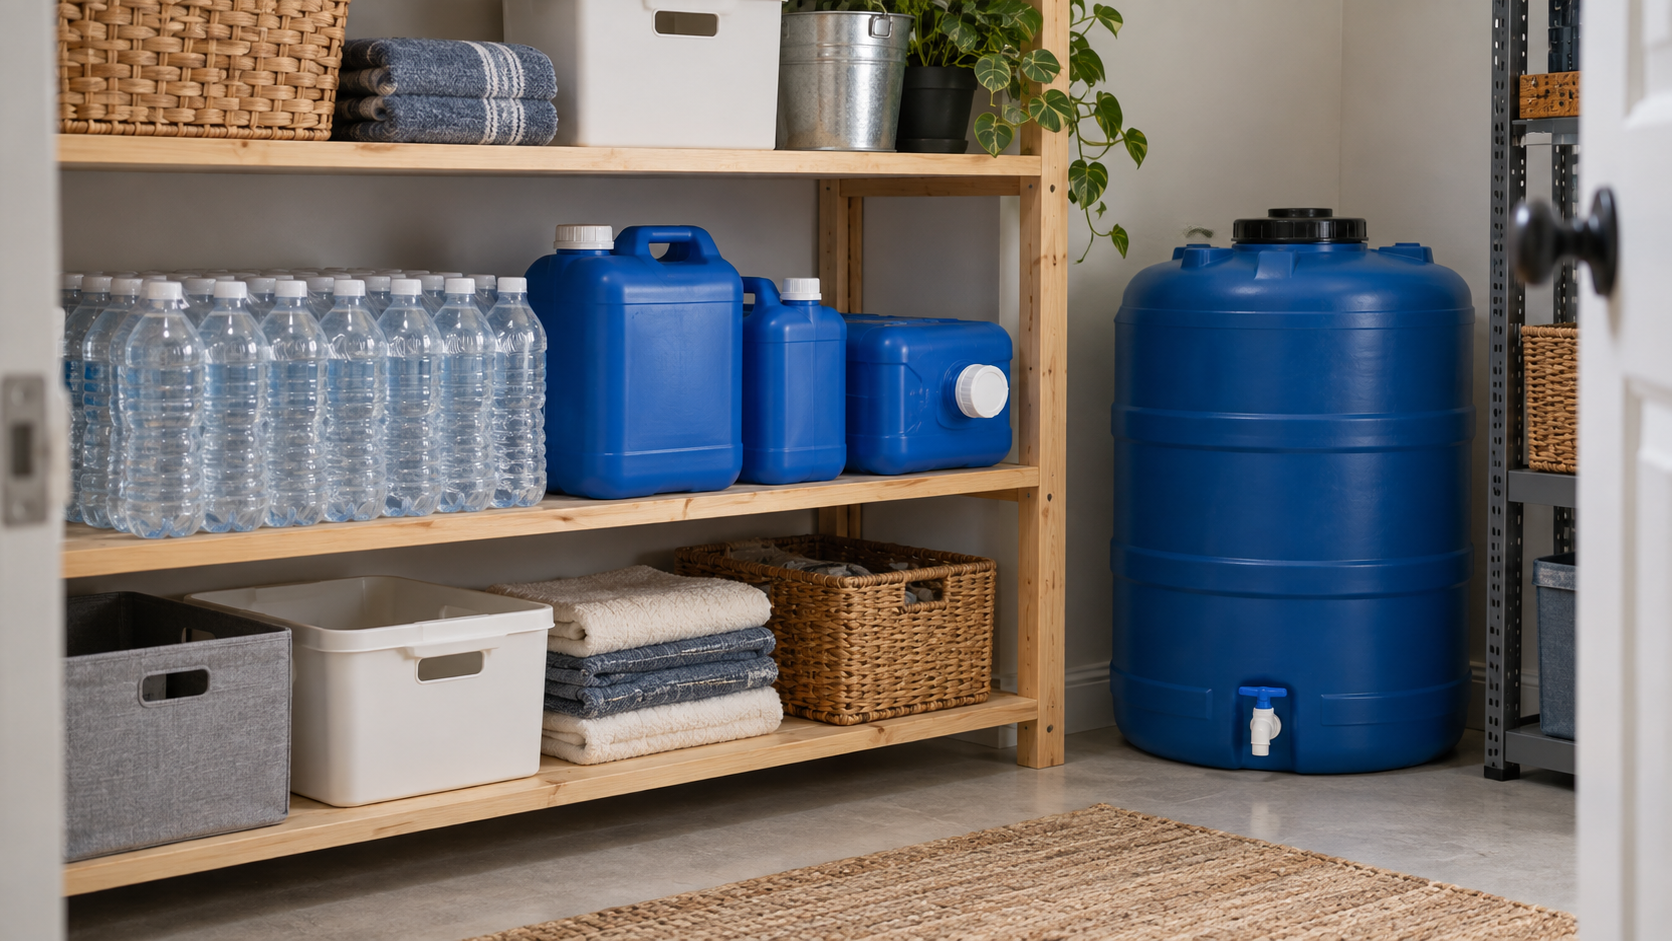
    The best setup is usually not one product. It is a combination of sealed bottled water for immediate use, manageable reusable containers for flexibility and, when the household has suitable space, a larger fixed container for added capacity.

    This guide compares five practical approaches and explains which one fits different homes. It does not repeat the cleaning, filling and rotation process covered in our guide to storing emergency water correctly.

    Affiliate disclosure: Ready Chateau may earn a commission from qualifying purchases made through links on this page, at no additional cost to you. As an Amazon Associate I earn from qualifying purchases.

    The Short Answer

    For most households, begin with unopened commercially bottled water, then add reusable food-grade containers in sizes the people in your home can actually lift and use. A large tank makes sense only after you have chosen a permanent, structurally sound location and a reliable way to dispense the water.

    Our quick picks:

    • Best first layer: Unopened commercially bottled water.
    • Best simple reusable jug: Reliance Aqua-Tainer, especially the 4-gallon size when lifting is a concern.
    • Best rugged portable container: Scepter 5-Gallon Military Water Container.
    • Best for tight or awkward storage spaces: 3.5-Gallon WaterBrick.
    • Best high-capacity fixed storage: WaterPrepared 55-Gallon Tank.

    No recommendation is best for every household. Capacity, filled weight, storage temperature, opening design and the way you will dispense the water matter more than a dramatic product claim.

    How We Chose These Options

    Ready Chateau has not performed laboratory or long-term hands-on testing on these containers. The recommendations are based on current public-health guidance, manufacturer specifications and practical household use. We considered:

    • Whether the container is identified for drinking-water or food storage.
    • Whether it closes tightly and is made from durable, unbreakable material.
    • How much it weighs when full.
    • Whether its opening, cap, gasket and dispensing method can be kept clean.
    • How efficiently it uses ordinary household storage space.
    • Whether the container remains useful during both a stay-at-home outage and an evacuation.

    The CDC recommends FDA-approved food-grade water-storage containers for water filled at home. It also advises choosing a tightly closing, durable container with a narrow opening when possible. Those requirements are the starting point for every recommendation below.

    Decide How Much Water You Need Before Buying Containers

    The CDC recommends storing at least one gallon per person per day for three days and trying to store a two-week supply when possible. Pregnant people, people who are ill, pets and households in hot climates may need more.

    Use our guide to calculate how much emergency water your household needs before choosing containers. The container decision becomes easier once you know whether you are trying to store 12 gallons, 30 gallons or more than 50.

    Remember that one gallon of water weighs about 8.3 pounds. That means:

    • A 3.5-gallon container holds about 29 pounds of water before the container is counted.
    • A 4-gallon container holds about 33 pounds of water before the container is counted.
    • A 5-gallon container holds about 42 pounds of water before the container is counted.
    • A 7-gallon container holds about 58 pounds of water before the container is counted.
    • A 55-gallon tank holds about 457 pounds of water before the tank and fittings are counted.

    A capacity you cannot safely lift, place or dispense is not useful capacity.

    1. Unopened Commercially Bottled Water

    Best for: The first three days, easy distribution and households that want the least complicated starting point.

    The CDC calls unopened commercially bottled water the safest and most reliable emergency source. It arrives sealed, requires no container preparation and is easy to divide among family members, vehicles and evacuation kits.

    Bottled water is also forgiving. If one bottle leaks, the rest of the supply remains protected. Smaller bottles can be handed to a child, an older adult or a neighbor without transferring water between containers.

    The tradeoff is storage efficiency. Cases of small bottles create more packaging and usually use more space per gallon than purpose-built reusable containers. Thin one-gallon retail jugs may also be less durable than rigid emergency-water containers.

    Ready Chateau recommendation: Use commercially bottled water to establish your first layer quickly. Store it in its original sealed packaging, follow the manufacturer’s date and storage guidance, and protect it from heat, sunlight and chemicals. Add reusable containers later if you want a larger supply.

    2. Reliance Aqua-Tainer

    Best for: A straightforward reusable jug for a pantry, closet, vehicle or short-term household outage.

    Reliance offers the rigid Aqua-Tainer in 4-gallon and 7-gallon sizes. That choice is useful because the same general design can serve households with very different lifting abilities.

    The 7-gallon version stores more water in one container, but the water alone weighs about 58 pounds. Once the container is included, it is portable in theory but heavy in practice. The 4-gallon version gives up some capacity but is far easier for many adults to lift, place and pour.

    This is the uncomplicated middle-ground option: more durable and space-efficient than a collection of disposable bottles, but less permanent than a drum or tank.

    Consider before buying: Choose the size by filled weight, not by the number printed on the label. Inspect the cap and dispensing parts before every rotation, and do not stack filled containers unless the manufacturer’s current instructions specifically allow the arrangement you plan to use.

    Ready Chateau recommendation: For most households, the 4-gallon Aqua-Tainer is the safer default. Choose the 7-gallon model only when someone in the home can comfortably manage roughly 60 pounds or the container will remain in place while being dispensed.

    3. Scepter 5-Gallon Military Water Container

    Best for: Rugged portable storage, frequent transport and households willing to pay more for a tougher container.

    Scepter identifies its 5-gallon Military Water Container as food-grade and BPA-free, with superior impact resistance and an easy-to-transport design. Its narrow, upright shape makes it useful when containers must fit beside other supplies or travel in a vehicle.

    Five gallons is a practical compromise between capacity and handling, but it is not light. Expect roughly 42 pounds of water plus the weight of the container. That may be manageable for one adult and too much for another.

    The Scepter is strongest where durability and transport matter. A household that expects the container to stay untouched in a closet may not benefit enough from the heavier-duty construction to justify its typically higher cost.

    Consider before buying: Confirm that you are buying the water container, not a similar-looking fuel container. Use only the cap, gasket and dispensing accessories intended for that model, and label it clearly as drinking water.

    Ready Chateau recommendation: Choose the Scepter when the container may be moved regularly, loaded into a vehicle or used beyond a stationary home supply. For quiet indoor storage, a less expensive food-grade jug may do the same basic job.

    4. 3.5-Gallon WaterBrick

    Best for: Apartments, closets, under-bed areas and households that need smaller modular containers.

    The standard WaterBrick holds 3.5 gallons and measures 9 by 18 by 6 inches. The manufacturer lists an empty weight of 2.52 pounds and describes the container, lid and gasket as BPA-free, FDA-compliant materials. Its interlocking shape allows the containers to be cross-stacked, which can make better use of low or narrow spaces.

    The smaller capacity is the main advantage. About 29 pounds of water is still substantial, but it is easier to manage than a 5- or 7-gallon load. Several small containers also reduce the risk that one damaged seal will affect the entire supply.

    The tradeoff is complexity. More containers mean more caps, gaskets, labels and surfaces to inspect. The 3¼-inch lid is wider than the narrow opening preferred by the CDC when possible, so clean handling and a clean dispensing method deserve extra attention.

    Check current price: WaterBrick 3.5-Gallon Water Containers — 4-Pack on Amazon

    Consider before buying: Plan the stack before filling, follow the manufacturer’s stacking instructions and keep every lid accessible enough to inspect. Do not assume that a stackable shape makes any shelf or floor capable of carrying the combined weight.

    Ready Chateau recommendation: WaterBrick is the strongest choice here for limited space or limited lifting ability. It is less attractive when low cost per gallon and the fewest possible components are the priorities.

    5. WaterPrepared 55-Gallon Tank

    Best for: A larger stay-at-home supply in a house with a permanent, level and properly supported location.

    WaterPrepared lists its 55-gallon tank at approximately 22 by 28 by 30 inches. The manufacturer describes it as stackable and made from BPA-free, FDA food-grade materials, with a large fill cap and front dispensing connections.

    A 55-gallon tank approaches the two-week, one-gallon-per-person-per-day target for a four-person household. That capacity is difficult to match with small jugs without using a great deal of shelf and floor space.

    The limitation is equally important: a filled tank can approach 480 pounds after the tank and fittings are included. It is not an evacuation container, and it should not be filled until its permanent location, floor capacity, clearance and dispensing method have been settled.

    A large tank also concentrates risk. One damaged valve, contaminated opening or inaccessible room can affect most of the household supply. Keep a separate layer of bottled water or smaller containers even when a tank holds the majority.

    Check current price: WaterPrepared 55-Gallon Water Storage Tank on Amazon

    Consider before buying: Measure the route into the storage area as well as the final footprint. Confirm that the floor can support the filled weight, test every valve before relying on it, and follow the manufacturer’s current instructions for installation and stacking. Marketing claims about UV resistance do not replace the CDC recommendation to store water in a cool location away from direct sunlight and toxic substances.

    Ready Chateau recommendation: Choose a 55-gallon tank only as the fixed-capacity layer of a mixed system. It should supplement—not replace—water that household members can lift and carry.

    Which Container Fits Your Household?

    Apartment or very limited storage: Begin with bottled water, then add WaterBricks or other smaller food-grade containers that fit under beds or on properly rated low shelving.

    Typical house with a pantry or conditioned storage room: Combine bottled water with several 4- or 5-gallon containers. This provides useful capacity without making the entire supply immovable.

    Household with limited lifting ability: Favor individual bottles, one-gallon commercial containers and 3.5- or 4-gallon reusable containers. More pieces are easier to manage than one oversized jug.

    Household preparing for evacuation: Keep small sealed bottles and rugged portable containers with the 72-hour emergency kit. A large tank can support sheltering at home but cannot travel with you.

    Household building toward two weeks: Use a layered system. Keep small water for immediate use, medium containers for flexible household needs and a fixed tank only if the home can support it.

    What to Avoid

    • Containers that previously held bleach, pesticides, fuel or any other toxic substance.
    • Unlabeled generic containers whose food-grade or drinking-water suitability cannot be confirmed.
    • Glass containers that can break during an emergency.
    • Thin milk jugs or similar containers that are difficult to clean thoroughly and prone to leaking.
    • A single oversized container with no backup supply.
    • A barrel or tank purchased before its filled location and dispensing method are planned.
    • Collapsible containers as the only long-term supply. They can be useful for temporary collection or transport, but they are a weaker primary choice than durable rigid containers.

    Accessories That Actually Matter

    • A compatible spigot or pump tested before the emergency.
    • A spare manufacturer-approved cap, gasket or valve when those parts are replaceable.
    • A permanent marker or durable labels for “Drinking Water” and the fill date.
    • A clean, food-grade transfer hose when a large tank requires one.
    • Shelving or a platform rated for the full stored weight—not merely the empty containers.

    Accessories should solve a real handling problem. A full tank with a missing pump is not ready, and an expensive rack is not useful if the floor below it cannot support the load.

    How to Build the Supply Without Overspending

    Start with the minimum instead of waiting to afford the perfect system. One case of bottled water is more useful today than a large tank that remains on a wish list.

    Then add capacity in stages:

    • Calculate the three-day target for everyone in the household, including pets.
    • Cover as much of that target as practical with sealed bottled water.
    • Add one or two manageable reusable containers.
    • Use the containers through one filling and rotation cycle before buying more.
    • Expand toward two weeks only after the storage location and routine work in real life.

    This approach also reveals whether a cap is frustrating, a container is too heavy or a spigot is difficult to clean before you repeat the purchase several times.

    Do Not Let the Container Replace the Routine

    A food-grade label does not keep water safe by itself. Reusable containers must still be cleaned and sanitized, filled without recontamination, labeled, protected from heat and chemicals, inspected and rotated.

    The CDC recommends replacing water filled at home every six months. For unopened commercially bottled water, follow the manufacturer’s date and storage guidance. Review how long stored water lasts and set a rotation schedule before the purchase disappears into a closet.

    The Bottom Line

    The best emergency water-storage system is a mix of containers matched to the household. Commercially bottled water is the simplest first layer. A 4- or 5-gallon rigid container adds reusable capacity. WaterBricks help when space or lifting is limited. A 55-gallon tank can extend a stay-at-home supply when the home has a safe permanent location.

    Do not buy solely by gallon capacity. Buy by filled weight, storage space, clean dispensing and the people who will actually use the water. A modest supply divided among manageable containers is more resilient than one impressive container no one can move.

    Sources

  • The Right Way to Store Emergency Water at Home

    The Right Way to Store Emergency Water at Home

    Emergency water is only useful if it is safe to drink, protected from contamination and stored where you can actually reach it. A row of containers in the garage may look prepared, but heat, chemicals, damaged seals or containers that are too heavy to move can undermine the entire supply.

    A sound storage plan does not require a basement full of specialized equipment. It requires safe water, the right containers, a suitable location and a rotation routine simple enough to maintain.

    If you have not calculated your target yet, start with how much emergency water your household needs. Once you know the number of gallons, this guide will help you store them correctly.

    The Short Answer

    The simplest approach is to keep unopened commercially bottled water and follow the manufacturer’s storage guidance. If you fill your own containers, use food-grade water-storage containers, clean and sanitize them first, fill them with safe tap water, close them tightly, label and date them, and replace the water every six months.

    Store all emergency water in a cool place away from direct sunlight and away from gasoline, pesticides, cleaners and other toxic substances. Divide the supply among manageable containers and more than one safe location.

    Start With Safe Water

    The CDC describes unopened commercially bottled water as the safest and most reliable emergency source. It is sealed at the factory, easy to distribute and requires no container preparation. For many households, cases of bottles or factory-sealed jugs are the easiest way to establish the first three days of supply.

    Commercial water still needs sensible storage. Keep it in its original sealed container, protect it from heat and sunlight, and observe the date and storage instructions provided by the manufacturer.

    Home-filled water can be practical when you need larger quantities or want reusable containers. Begin with water that is safe to drink. If your public water supply is treated, the CDC says it can be placed in clean, sanitized containers and sealed. If you use a private well or have any reason to question the water, follow your local health department’s advice before storing it.

    Do not treat routine storage and emergency water treatment as the same job. Water collected after a flood, from an uncertain source or during a drinking-water advisory may require boiling, disinfection or another response directed by local officials. Boiling or disinfecting water can kill many disease-causing organisms, but it does not remove heavy metals, salts or most chemicals.

    Choose Containers Made for Drinking Water

    For home-filled water, use containers identified by the manufacturer as food-grade and intended for water storage. A suitable container should be durable, unbreakable, able to close tightly and, when possible, have a narrow opening that limits hand contact and makes pouring easier.

    Never use a container that previously held bleach, pesticides, fuel or another toxic substance. Washing does not make that container appropriate for drinking water.

    Container size matters as much as material. One gallon of water weighs about 8.3 pounds. A five-gallon container holds roughly 42 pounds of water before the container itself is counted. Larger barrels can be efficient, but they become permanent fixtures once filled.

    A mixed-size supply works well for most homes:

    • Small bottles are easy to carry, share and place in an evacuation kit.
    • One- or two-gallon containers are manageable for many adults and fit into several storage areas.
    • Five- to seven-gallon containers reduce the number of packages but require more lifting strength.
    • Large drums conserve floor space, but they need a stable location and a compatible hand pump or spigot.

    Do not make your entire supply dependent on one large container. A failed cap, cracked seam or contaminated opening should not jeopardize every gallon you own.

    Clean and Sanitize Reusable Containers

    A new container should not be assumed clean simply because it came from a store. Follow the manufacturer’s instructions first. If the container is designed for home-filled drinking water and does not require another method, the CDC provides this process:

    • Wash the container with soap and rinse it completely with water.
    • Mix 1 teaspoon of unscented liquid household chlorine bleach containing 5% to 9% sodium hypochlorite with 1 quart, or 4 cups, of water.
    • Pour the sanitizing solution into the container, close it tightly and shake it so the solution touches every inside surface.
    • Wait at least 30 seconds, then pour out the solution.
    • Allow the empty container to air-dry.
    • Fill it with safe water and close the lid tightly.

    Safety First

    That bleach mixture is for sanitizing the empty container. It is not a general formula for treating an uncertain water supply. If emergency water must be disinfected, use the current CDC or EPA instructions for the exact bleach concentration and water condition.

    Fill Without Recontaminating the Container

    Clean hands, a clean work surface and a clean filling method matter. Do not touch the inside of the cap, opening or container. Avoid resting the cap on a dirty counter while filling.

    Fill the container as directed by its manufacturer and leave any required expansion space. Close it immediately and check that the cap, gasket and spigot are secure. Wipe the outside dry so a small leak will be easier to spot.

    Label every home-filled container with “Drinking Water” and the date it was filled. If you keep separate water for toilet flushing or cleanup, label that supply just as clearly so it cannot be confused with drinking water.

    Choose the Storage Location Before You Fill

    Water becomes difficult to move quickly. Decide where a container will live before adding forty, one hundred or several hundred pounds to it.

    The CDC recommends a cool storage temperature of about 50°F to 70°F, away from direct sunlight and away from toxic substances such as gasoline and pesticides. An interior closet, pantry, conditioned basement or another clean, temperature-stable space is usually a better choice than a hot attic, sun-exposed shed or garage corner beside fuel and lawn chemicals.

    Use these placement rules:

    • Keep containers off weak or questionable shelving. Put heavy water low, on a stable floor or on shelving rated for the load.
    • Protect containers from freezing, excessive heat, sharp objects and anything that could puncture or crush them.
    • Leave enough room to inspect caps, seams and the floor beneath the containers.
    • Keep a small accessible supply on the main living level rather than placing every gallon behind boxes or down a difficult stairway.
    • Divide the supply between two safe locations when possible so one leak, obstruction or damaged room does not eliminate all of it.
    • If your area is prone to flooding, avoid placing the full supply directly on the lowest floor where contaminated floodwater could reach it.

    The goal is not a perfect storage room. It is a location that protects the water and still allows someone in the household to use it.

    Plan How You Will Dispense It

    A sealed container protects water only until you open it. Once it is in use, keep hands, cups and scoops out of the water. Pour from the container, use its clean spigot or use a compatible pump.

    If a scoop is necessary, the CDC advises using a clean one each time and avoiding contact between hands and the stored water or the inside of the container. Do not dip a used drinking cup back into the supply.

    Test pumps and spigots before the emergency. A full barrel without a working pump is not an accessible water source. Keep the required wrench, hose or replacement cap with the container rather than in another room.

    Build a Rotation Routine You Will Keep

    The rotation rule depends on how the water was packaged. For unopened commercially bottled water, observe the manufacturer’s date and storage guidance. For water you fill at home, the CDC recommends replacing it every six months.

    Choose two memorable months six months apart and add water rotation to your household calendar. At each check:

    • Confirm the label and fill date are readable.
    • Inspect the cap, gasket, seam, spigot and surrounding floor for leaks.
    • Look for damage, cloudiness, floating material or anything else unusual.
    • Replace home-filled water that has reached six months.
    • Check commercially bottled water against its manufacturer’s guidance.
    • Make sure pumps, spigots and other dispensing supplies are clean and present.

    Do not taste suspicious water to decide whether it is safe. If a seal has failed, the container is damaged or the water may have been exposed to chemicals or floodwater, do not use it for drinking.

    Common Storage Mistakes

    • Using ordinary household containers without checking whether they are food-grade.
    • Reusing milk jugs or other thin containers that are difficult to clean well and prone to leaking.
    • Placing every gallon in one container or one location.
    • Storing water beside gasoline, pesticides, paint, cleaners or other chemicals.
    • Putting heavy containers on shelving that was never designed for the load.
    • Filling a large barrel before deciding how it will be emptied.
    • Forgetting the date and allowing home-filled water to sit indefinitely.
    • Assuming a filter will make chemically contaminated water safe.

    A Practical Setup for Most Households

    Begin with the three-day minimum rather than waiting until you can build the ideal supply. Unopened bottled water can cover that first layer quickly. Then add food-grade reusable containers or more sealed water as you work toward a longer home supply.

    Keep some small containers for evacuation and easy daily use. Add medium containers that household members can lift. Use a large container only when its filled location, floor capacity and dispensing method are already settled.

    Finally, connect the storage plan to a twice-yearly inspection. Correct storage is not a one-time purchase. It is a small household system: calculate, containerize, protect, label, inspect and rotate.

    If you already have water stored, review how long stored water lasts and decide which containers need inspection or replacement now.

    The Bottom Line

    The right way to store emergency water is straightforward: start with safe water, use sealed commercial packaging or clean food-grade containers, keep it cool and away from sunlight and chemicals, divide it into usable sizes, label it, and rotate home-filled water every six months.

    A modest supply stored correctly is more useful than a larger supply that is contaminated, inaccessible or forgotten. Meet the three-day minimum first, then strengthen the system one container at a time.

    Sources

  • How Long Does Stored Water Last?

    How Long Does Stored Water Last?

    Stored water is easy to forget about. You tuck it onto a shelf, feel better knowing it is there, and then notice the date six months—or two years—later.

    Is it still safe? Does bottled water really expire? Should you empty every container and start over?

    The reassuring answer is that you do not need to guess. A simple rotation schedule will keep your emergency water supply dependable without turning it into another complicated household project.

    The Quick Answer

    • Unopened, commercially bottled water: Follow the expiration or best-by date printed by the manufacturer.
    • Water you fill and store at home: Replace it every six months.
    • Any stored water: Replace it sooner if the seal is broken, the container is damaged, the water has an unusual odor or appearance, or it may have been exposed to floodwater, fuel, pesticides, or other chemicals.

    Those are the practical household guidelines from the Centers for Disease Control and Prevention. You do not need to determine the exact day water “goes bad.” You only need a dependable date for rotating it.

    Ready Chateau Note: A date is a reminder to rotate your supply—not a home safety test. Water can be compromised before that date if its container, seal, or storage conditions have been compromised.

    Start With the Kind of Water You Have

    Not all stored water starts in the same place. The right rotation schedule depends on whether it came sealed from a commercial bottler or whether you filled the container yourself.

    Commercially Bottled Water

    For sealed bottled water, use the date printed on the package as your guide. The CDC advises households to observe the expiration date for store-bought water.

    That keeps the decision refreshingly simple:

    1. Leave the bottles sealed until you need them.
    2. Store them where they will stay protected.
    3. Rotate them by the printed date.

    The U.S. Food and Drug Administration regulates commercially bottled water as a food product. Bottlers must follow sanitation, testing, processing, and storage requirements intended to keep the product safe. You can read the FDA’s overview of how bottled water is regulated.

    If the outer case has several dates or the date is difficult to read, write the earliest visible date on a piece of tape and place it where you can see it. You are creating a reminder, not a filing system.

    Water You Fill at Home

    If you fill your own food-grade water containers, replace the water every six months. Mark the fill date directly on each container so you will not have to rely on memory later.

    Six months can sound surprisingly short. The point is not that water suddenly becomes unusable on day 181. The six-month schedule gives you a clear, conservative routine for water that was handled and packaged at home rather than in a regulated bottling facility.

    Home-filled water has more opportunities for contamination to enter through hands, lids, funnels, spigots, or containers. A regular refresh helps you stay ahead of those variables.

    If you are setting up home-filled containers for the first time, use containers made for drinking-water storage and follow the cleaning and filling directions in our guide, The Right Way to Store Emergency Water at Home. This article is about how long to keep the water; that guide will cover the container and setup decisions in full.

    What Can Shorten the Life of Stored Water?

    A rotation date assumes the water has remained sealed and properly stored. Replace it early when that is no longer true.

    A Broken or Questionable Seal

    Once a cap, lid, or spigot has been opened, the water is no longer in the same protected condition. Hands, cups, dust, and the surrounding air can introduce contamination.

    If you open a large emergency container, treat it as water you are actively using. Keep it covered, dispense it without touching the opening, and use it promptly. Do not pour leftover water from a cup back into the container.

    There is no single useful “opened water lasts exactly this many days” rule for every container and situation. A clean bottle opened in your kitchen is different from a jug being shared during a power outage. Good handling matters more than trying to stretch an opened container to a particular date.

    Heat and Direct Sunlight

    Stored water should be kept in a cool place and away from direct sunlight. Heat and sun can work against the container and the quality of the water over time.

    A hot garage, an exposed shed, or the trunk of a car may be convenient, but those locations can experience major temperature swings. If that is the only storage space you have, check the supply more often and rotate it sooner when the bottles or containers show damage or deterioration.

    Nearby Fuels, Pesticides, or Other Chemicals

    Do not store drinking water near gasoline, paint thinner, pesticides, household chemicals, or other toxic substances. If you suspect the water or its container has been exposed to a chemical spill or fumes, do not taste it to investigate.

    Boiling and ordinary household disinfection can kill many germs, but they cannot make water containing fuel, toxic chemicals, or radioactive material safe. The CDC’s emergency water guidance recommends using a different water source and contacting your local health department when chemical contamination is suspected.

    Floodwater

    Floodwater can carry sewage, chemicals, and other contaminants. Bottled water that has been exposed to floodwater should not be treated as part of your safe drinking supply.

    This is one reason to store emergency water above the floor when possible. A sturdy shelf or raised platform gives the supply a little more protection from leaks and minor flooding.

    A Damaged Container or Changed Water

    Replace water if the container is leaking, cracked, swollen, badly dented, or otherwise damaged. Do the same if the water has an unusual odor, color, or visible material in it.

    Just remember that normal-looking water is not proof that it is safe. Many contaminants cannot be seen, smelled, or tasted. When you know the seal or storage conditions were compromised, trust that information instead of the water’s appearance.

    Safety First

    Do Not Try to Rescue Chemically Contaminated Water

    If stored water may have been exposed to fuel, pesticides, toxic chemicals, or floodwater, set it aside and use a safe replacement source. Boiling is not a fix for chemical contamination.

    Can You Drink Stored Water After Its Date?

    The safest practical answer is to rotate it rather than debate it.

    For commercially bottled water, follow the printed date. For water filled at home, follow the six-month schedule. These rules give your household a clear standard and prevent an uncertain container from becoming the one you must rely on during an emergency.

    If a date has passed, do not use a taste test to decide whether the water is safe. Taste and smell cannot identify every harmful contaminant.

    Water that is merely due for routine rotation is different from water that may be contaminated. If the container stayed sealed, undamaged, and away from chemicals or flooding, you may be able to use the old water for non-drinking tasks such as flushing a toilet or cleaning outdoor tools. Do not use questionable water for drinking, cooking, brushing teeth, making ice, preparing infant formula, or giving to pets.

    When there is any reason to suspect chemical or flood contamination, follow local public-health instructions for disposal. Do not repurpose it around food, people, animals, or gardens.

    A Simple Water-Rotation Routine

    The easiest system is one you can maintain in a few minutes twice a year.

    1. Choose Two Reminder Dates

    Pick dates already connected to a household routine. The first weekends in March and September work well, as do daylight-saving weekends if your area observes them.

    Add a recurring calendar reminder called Check emergency water. If you fill containers at different times, put their exact replacement dates on the calendar instead.

    2. Read the Labels

    Check the date on commercially bottled water and the fill date on home-filled containers. If you cannot find a date, treat the container as due for rotation. A fresh label solves the uncertainty going forward.

    3. Inspect the Supply

    Look for:

    • Broken seals
    • Leaks or damp shelving
    • Cracks, swelling, or damaged caps
    • Unusual color, cloudiness, particles, or odor
    • Signs of heat, sunlight, pests, flooding, or chemical exposure

    If something looks wrong, replace it. Emergency water is there to remove uncertainty, not create more of it.

    4. Replace What Is Due

    Use the printed date for commercial bottles and the six-month rule for home-filled water. Replace any compromised containers immediately, even if their dates have not arrived.

    5. Mark the New Date Clearly

    Label home-filled containers Drinking Water and include the fill date. For cases of bottled water, place the printed date—or your planned rotation date—where it is easy to see without unpacking the case.

    Then reset the reminder and move on.

    The Five-Minute Version: Check the dates, check the seals, check the storage area, and replace anything you would hesitate to serve your family.

    Common Stored-Water Mistakes

    Waiting Until an Emergency to Inspect It

    The worst time to discover a leaking jug is after the tap stops working. A quick check twice a year gives you time to replace damaged containers while water is easy to get.

    Treating Every Date the Same

    Commercially bottled water follows its printed date. Home-filled water follows a six-month replacement schedule. Keeping those two rules separate prevents both confusion and unnecessary work.

    Keeping Water in a “Temporary” Location for Years

    Water placed beside gasoline, under a sunny window, or in a hot vehicle is not protected simply because it is sealed. Storage conditions remain part of the safety plan.

    Assuming Clear Water Must Be Safe

    Appearance is only one clue. If you know a container was opened, flooded, damaged, or exposed to chemicals, replace it even when the water looks normal.

    Forgetting Water for Pets

    Pets need safe water too. Include them when calculating your supply, and apply the same rotation and replacement rules to the water you plan to give them.

    Keep the Rest of the Plan Just as Simple

    Water rotation works best as part of a small, repeatable preparedness routine.

    If you are still deciding how much water your household needs, start with How Much Water Should You Store for an Emergency?. It will help you set a realistic target based on the people, pets, and needs in your home.

    Then make sure the water is included in your broader 72-hour emergency kit. You do not need to finish everything in one weekend. A dependable supply built in manageable steps is far more useful than a perfect plan that never leaves the page.

    The Bottom Line

    For commercially bottled water, follow the date on the package. For water you fill at home, replace it every six months. Replace either one sooner if the seal, container, or storage conditions have been compromised.

    That is the whole system: label it, protect it, check it, and rotate it. Once the reminder is on your calendar, your emergency water supply can go back to doing exactly what it should—waiting quietly until you need it.

  • How Much Water Should You Store for an Emergency?

    How Much Water Should You Store for an Emergency?

    Water is easy to overlook because it is usually available with a turn of the faucet. Then a water main breaks, a storm contaminates the system, a private well pump loses power or local officials issue a drinking-water advisory—and the amount already in your home suddenly matters.

    Unlike flashlights, batteries or canned food, water is bulky and heavy. A household can need dozens of gallons, yet many people have little more than a few bottles in the refrigerator.

    The goal is not to fill every available corner with water. It is to establish a realistic minimum, adjust it for your household and build the supply in manageable stages.

    The Short Answer

    Store at least one gallon of water per person per day for a minimum of three days. If space and circumstances allow, work toward a two-week supply for use at home.

    For a household of four, that means:

    • 12 gallons for three days
    • 28 gallons for seven days
    • 56 gallons for fourteen days

    Those figures are the human baseline. Pets, hot weather, illness, pregnancy, infant feeding and certain medical needs can increase the amount your household should have.

    The one-gallon guideline includes water for drinking, cooking, brushing teeth and limited hygiene. It does not preserve normal household water use. It is not enough for regular showers, laundry, routine dishwashing or normal toilet flushing.

    Think of one gallon per person per day as a minimum planning allowance—not a promise that every household will be comfortable on that amount.

    How to Calculate Your Household’s Baseline

    Use this simple formula:

    Number of people × number of days = baseline gallons

    Examples:

    • One person for three days: 1 × 3 = 3 gallons
    • Two people for seven days: 2 × 7 = 14 gallons
    • Four people for fourteen days: 4 × 14 = 56 gallons
    • Six people for fourteen days: 6 × 14 = 84 gallons

    Do this calculation before choosing containers. The total quantity tells you how much storage space, lifting capacity and rotation work the plan will require.

    Three Days, Seven Days or Two Weeks?

    Three days is the minimum starting point.

    The Centers for Disease Control and Prevention recommends storing at least a three-day supply. That is the first threshold to meet if your household currently has little or no emergency water.

    Seven days is a practical intermediate goal.

    A week provides more margin for a prolonged outage without making the first step feel impossible. It is not a separate government standard; it is a practical bridge between the minimum and a stronger home supply.

    Two weeks is the stronger home-storage target.

    The CDC advises trying to store a two-week supply when possible. The American Red Cross similarly recommends three days of water for evacuation and two weeks for use at home.

    That distinction matters. An evacuation supply must be portable enough to load or carry. A home supply can be larger and divided among several safe locations.

    If two weeks is not realistic today, do not let the larger number prevent you from storing three days. Meet the minimum first, then add another day or another case at a time.

    Who Needs More Than the Baseline?

    The one-gallon rule is not equally generous for every household. Review the following adjustments before treating your calculation as complete.

    Hot weather and physical exertion

    People generally need more drinking water in hot conditions and when doing strenuous work. Households preparing for summer hurricanes, extreme heat or outdoor cleanup should build extra margin into the baseline rather than assuming one gallon will always be enough.

    Pregnancy and illness

    CDC guidance specifically advises storing additional water for pregnant women and people who are sick. The amount will depend on the person and the circumstances, so the safest approach is to plan above the baseline and follow medical guidance when a health condition affects fluid needs.

    Pets

    Calculate pet water separately. There is no useful one-size-fits-all amount for every animal. A cat, a large dog and a household with several pets will not have the same needs.

    Measure how much safe water your pets normally consume in a day, then add a margin for heat, stress, spills and cleaning bowls. The American Veterinary Medical Association recommends keeping at least seven days of water in a pet emergency kit. If your household is building toward a two-week home supply, extending the pet supply to the same period avoids leaving part of the household unprepared.

    Infants

    Water planning changes when an infant depends on formula. CDC guidance identifies ready-to-feed infant formula as the safest option during an emergency because it is sterile and does not require mixing with water. If powdered formula must be used, the household needs safe water for preparation and additional safe water for cleaning feeding items.

    Water-dependent medical needs

    A generic storage formula is not enough for someone whose care depends on dialysis or another water-sensitive medical plan. Follow the person’s healthcare provider or treatment facility instructions before an emergency. A prescribed fluid restriction can also conflict with ordinary emergency advice, so do not improvise a medical water plan from the one-gallon rule.

    How Much Space and Weight Will It Take?

    Water weighs about 8.34 pounds per gallon. The water alone in a fourteen-day supply for four people weighs about 467 pounds. For six people, 84 gallons weighs about 701 pounds.

    That does not mean a two-week supply is unreasonable. It means the storage plan must account for weight and access.

    • Do not place the entire supply on a questionable shelf.
    • Do not store every container where one leak or obstruction could make all of it unusable.
    • Keep at least part of the supply where it can be reached without moving heavy equipment.
    • Use container sizes that household members can safely lift and pour.

    Larger containers use space efficiently, but they are difficult to move once filled. Smaller containers are easier to carry and provide redundancy. Many households will be better served by a combination rather than one enormous container.

    Apartment/Renter Note

    Limited space does not make emergency water optional. Start with a three-day supply in smaller containers that fit the storage you actually have. Distribute the weight at floor level in sensible locations, protect containers from damage and keep enough water portable for an evacuation.

    A two-week supply for a small household may still fit when it is divided rather than concentrated in one place. The goal is useful water you can safely reach—not an impressive container that cannot be moved.

    Drinking Water and Utility Water Are Not the Same

    The baseline calculation should represent water that is safe for drinking and food preparation. Do not count a swimming pool, hot tub, decorative pond or rain barrel as part of your drinking-water supply.

    Some nonpotable water may be useful for toilet flushing or certain cleaning tasks when local conditions make that safe. Keeping a separate utility-water plan can protect the drinking supply, but questionable water should never be treated as safe merely because it looks clear.

    Storage Basics That Affect the Quantity Plan

    Container selection and water treatment deserve their own detailed guides. For purposes of calculating your supply, these rules are enough to prevent common planning mistakes:

    • Unopened commercially bottled water is the safest and most reliable emergency supply, according to the CDC.
    • Use food-grade water-storage containers when filling your own supply.
    • Never use a container that previously held bleach, pesticides or other toxic chemicals.
    • Label home-filled containers as drinking water and include the storage date.
    • Replace home-filled water every six months.
    • Follow the manufacturer’s date and storage directions for commercially bottled water.
    • Store water in a cool place away from direct sunlight, gasoline, pesticides and other toxic substances.

    Do not postpone the quantity calculation while searching for the perfect container. Safe bottled water can establish the first three days while you decide how to build the larger supply.

    A Practical Water-Storage Plan

    1. Count every person who normally depends on the household.
    2. Multiply that number by three to establish the minimum human supply.
    3. Calculate pets and special household needs separately.
    4. Separate the water that must travel during an evacuation from the larger supply that can remain at home.
    5. Build from three days to seven days, then toward fourteen days when practical.
    6. Record where the water is stored and when it must be rotated.

    This approach follows the same People → Risks → Inventory → Essentials → Gaps → Maintenance framework used in Start With the Basics. It also turns the water section of The Complete Home Emergency Preparedness Checklist into a measurable household target.

    Your First Step

    Count the people in your household and multiply by three. Then compare that number with the safe drinking water you already have.

    If the calculation says twelve gallons and you have four, your immediate gap is eight gallons. Close that gap before worrying about specialized tanks, filters or a perfect long-term system.

    Once the three-day minimum is in place, repeat the calculation for seven and fourteen days. That gives you a clear improvement path instead of one overwhelming purchase.

    When the Water Emergency Begins

    Use stored safe water for drinking, cooking, brushing teeth and any task covered by local drinking-water instructions. Follow official notices about whether tap water must be boiled, disinfected or avoided entirely.

    Do not assume water is safe because it looks or smells normal. If your stored supply begins running low, Ready.gov advises against rationing drinking water unless authorities direct you to do so. Use what you need for health today while seeking an additional safe source for tomorrow.

    If the disruption is related to a power outage, the steps in What to Do When the Power Goes Out can help you address the rest of the household safely while protecting your water supply.

    The Bottom Line

    Store at least one gallon per person per day for three days. Treat that as the minimum, not the finish line. Add water for pets and special needs, keep part of the supply portable and work toward two weeks at home when space and circumstances allow.

    Emergency water storage does not need to happen in one expensive purchase. Count the household, close the three-day gap and build from there. A modest supply you can reach, rotate and use is more valuable than a perfect plan that never leaves the shopping list.

    Sources Consulted