Category: Food

Practical guidance on emergency food storage, shelf life, rotation, meal planning, and cooking when normal utilities are unavailable.

  • How to Rotate Emergency Food Without Waste

    How to Rotate Emergency Food Without Waste

    An emergency food supply should make life easier during an outage, storm or other disruption. It should not become an expensive shelf of cans, boxes and buckets that nobody remembers until the food tastes stale, the packaging fails or the household no longer wants it.

    Rotation solves that problem. The idea is simple: store food your household already uses, place newer items behind older ones, work the older items into normal meals and replace what you use. The system does not require a complicated spreadsheet, a wall of matching containers or a weekend devoted to reorganizing the entire pantry.

    A good rotation plan also separates ordinary pantry food from true long-term storage. The first group moves through your kitchen regularly. The second group may sit longer, but it still needs labels, inspections and a clear reason for being there.

    If you are still deciding how much food to keep, start with How Much Emergency Food Should You Keep at Home?. If you are building the supply gradually, read Build an Emergency Food Supply Without Wasting Money. This article focuses on keeping that food useful after you buy it.

    Quick Answer

    Use a first-in, first-out system. Put the oldest acceptable food where you will see and use it first, and place new purchases behind it. Keep a small “use next” area for items approaching their best-quality date. Review the pantry every three months, inspect packaging and storage conditions, plan ordinary meals around items that need to move, and replace only the foods your household actually used.

    The simplest workable routine is:

    • Label food with the purchase or packing date when that information is not obvious.
    • Put new items behind older items.
    • Move foods that should be used soon into one visible area.
    • Use those foods in normal meals before buying more of the same item.
    • Inspect the remaining supply for damage, moisture, pests and heat exposure.
    • Replace what you use instead of automatically replacing everything you discard.

    Why Emergency Food Gets Wasted

    Most emergency food waste is not caused by one missed date. It usually begins when a household buys food outside its normal habits and then stores it where nobody sees it.

    The food is unfamiliar

    A case of food that looked practical online may be difficult to prepare, unpopular with the household or unsuitable for someone’s dietary needs. If nobody wants it during an ordinary week, it may not suddenly become appealing during a stressful outage.

    Everything is treated as long-term storage

    Canned soup, crackers, peanut butter and cooking oil do not belong in the same management category as properly packaged long-term rice or freeze-dried food. Some items should move through the kitchen regularly. Others can remain in reserve longer.

    New food is placed in front

    When every grocery trip pushes older packages farther back, the oldest food becomes the least visible. That reverses the rotation system and almost guarantees waste.

    The household relies on dates alone

    Date labels matter, but they do not tell the whole story. Packaging condition, storage temperature, moisture, pests and the type of food all affect whether an item remains useful. A date is one inspection point, not a substitute for judgment and official storage guidance.

    There is no review routine

    A pantry can look organized on the day it is stocked and still fail six months later. Rotation works because it is repeated, not because the original setup was perfect.

    Use a Two-Part Emergency Pantry

    The easiest way to manage emergency food is to divide it into two practical layers.

    Layer 1: The rotating pantry

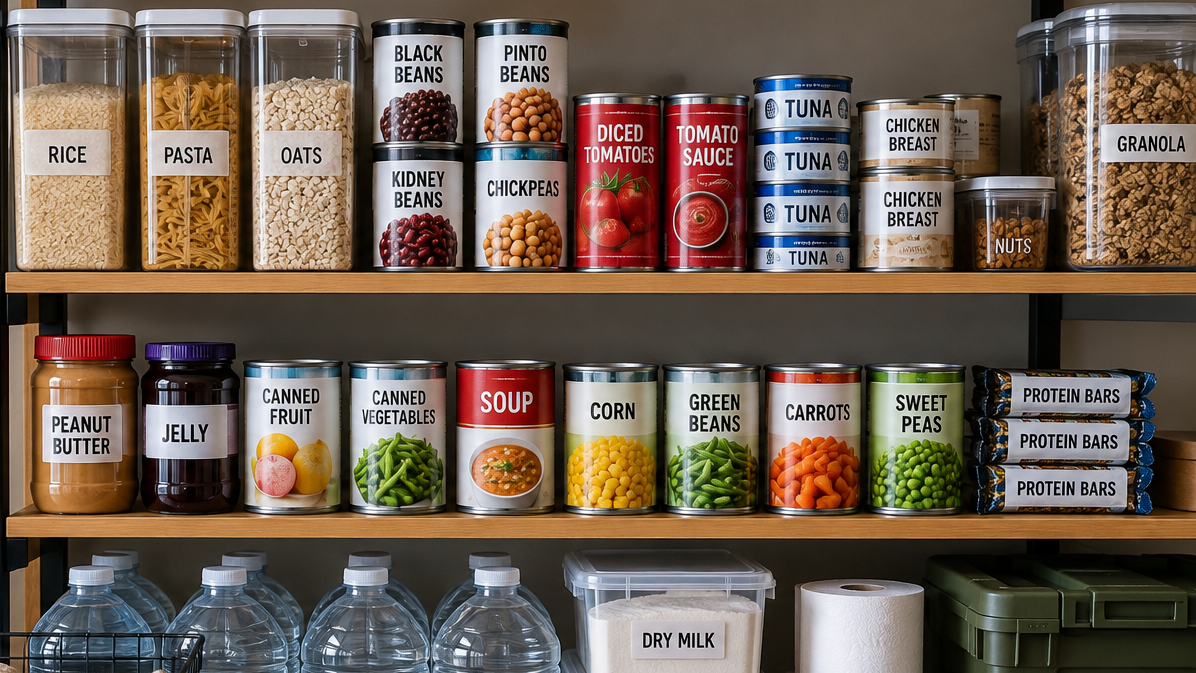
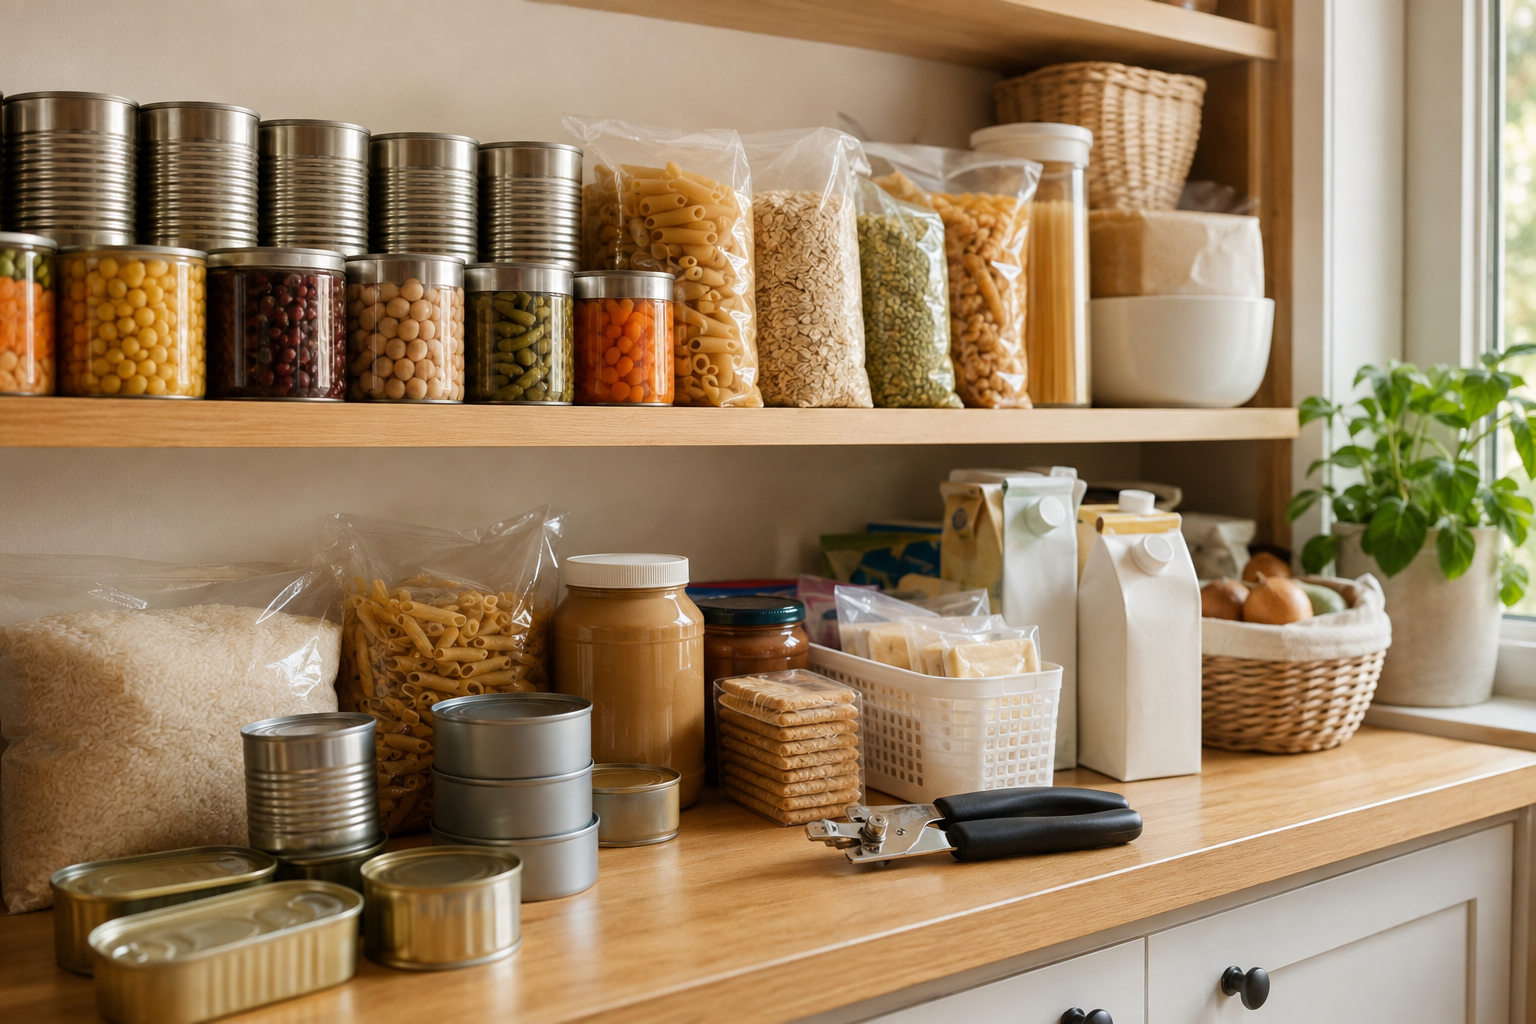
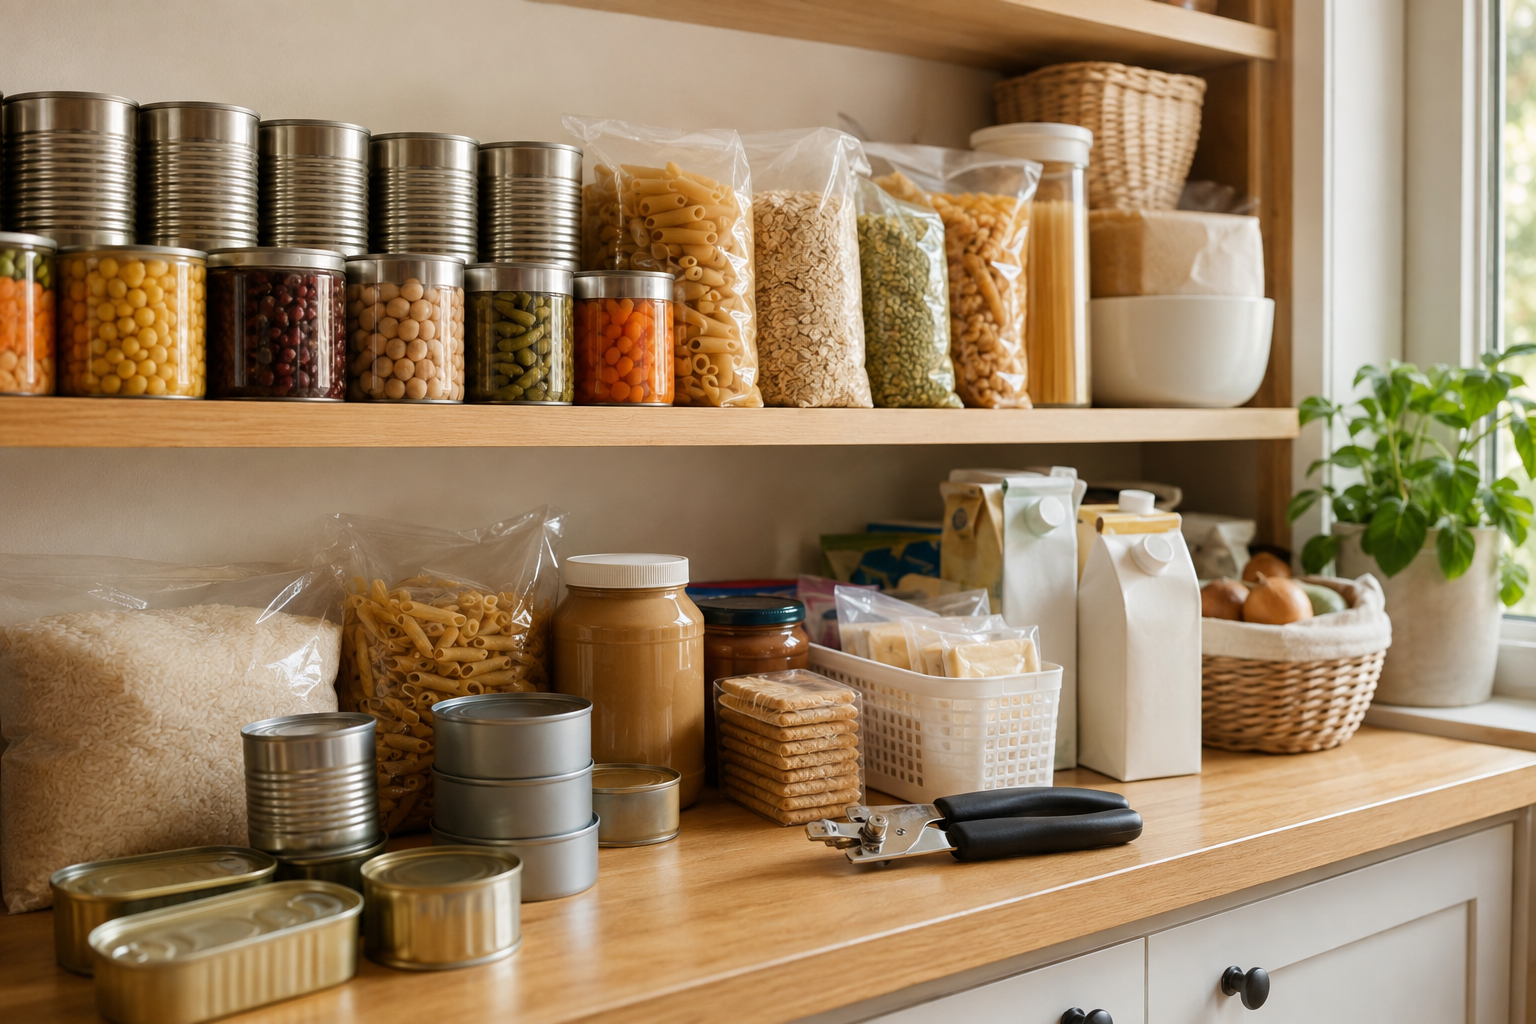
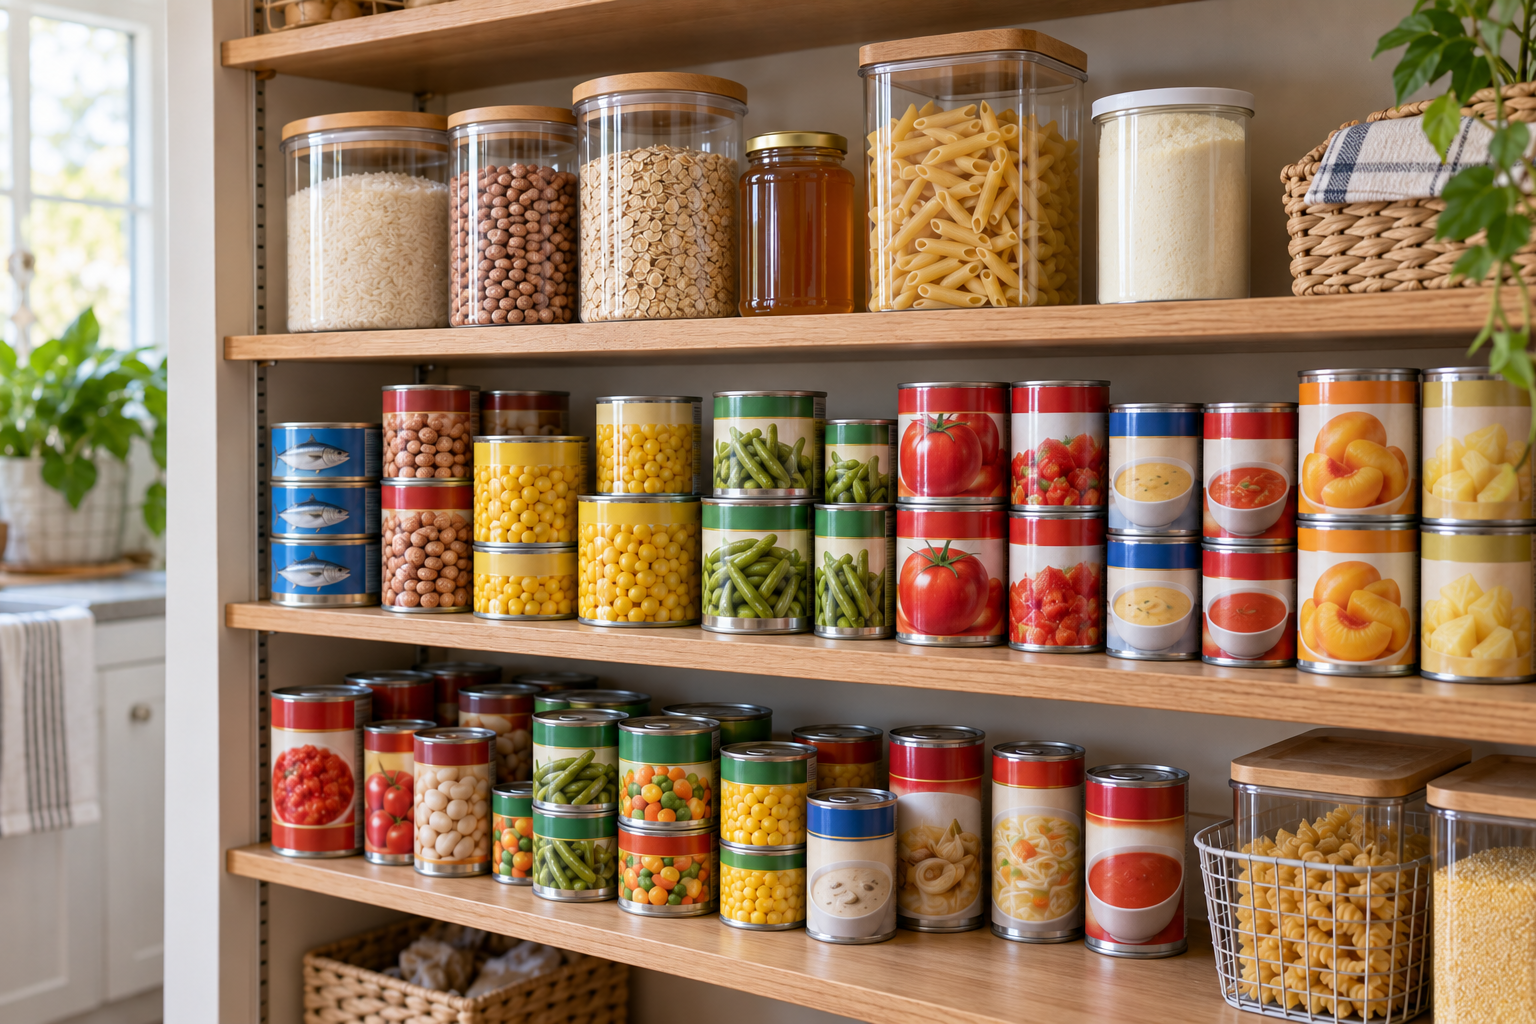
    This is food your household already eats: canned meat and fish, beans, vegetables, fruit, soup, pasta, rice, oats, cereal, shelf-stable milk, peanut butter, crackers and familiar snacks. Keep enough to support your emergency plan, but use it during ordinary meals and replace it through normal grocery shopping.

    Foods with more fat, fragile packaging or shorter quality windows belong here. Cooking oils, nuts, brown rice, whole-grain flour, crackers and many snack products generally need more active rotation than white rice or properly packaged dry beans.

    Layer 2: The longer-term reserve

    This may include properly packaged white rice, dried beans, freeze-dried food or other products designed for longer storage. These items do not need to appear in next week’s dinner plan, but they still need intact packaging, a cool and dry location, readable labels and periodic inspection.

    Do not assume every product marketed for long-term storage lasts the same amount of time. Follow the manufacturer’s instructions and storage dates for the specific product. For a practical comparison of storage potential and preparation limits, see What Foods Actually Last the Longest?.

    A Seven-Step Rotation System That Works

    1. Make one simple inventory

    Start with what is actually on the shelf. Record the food, quantity, location and the date you want to review or use it. A sheet of paper on the pantry door is enough. If a spreadsheet or app makes the job harder, do not use one.

    Group similar foods together instead of listing every can as a separate project. “Six cans of chicken” is useful. Recording the serial history of each can is not.

    2. Label what is not obvious

    Keep the original manufacturer label and date visible. Add the purchase date or packing date when it will help you distinguish older food from newer food. For food repackaged at home, label the contents and packing date clearly and use a storage method appropriate for that food.

    Do not cover lot numbers or manufacturer information that could matter during a recall.

    3. Put older food in front

    Arrange the pantry so the next item to use is the easiest item to reach. Place new cans, boxes and jars behind the older supply. Utah State University Extension describes this as FIFO—first in, first out.

    Deep shelves can hide food. Use shallow rows, small bins or clearly separated categories so an older package does not disappear behind twelve newer ones. You do not need to buy organizers if ordinary boxes or shelf sections already solve the problem.

    4. Create a small “use next” area

    Choose one basket, shelf section or box for food that should be used soon. Keep it small enough to remain visible. This is the bridge between emergency storage and the weekly meal plan.

    Move an item into this area when its quality date is approaching, when its packaging is still sound but showing wear, or when you realize the household has stopped using that food. If the food is still acceptable but no longer fits your household, donate it while it still meets the receiving organization’s guidelines.

    5. Plan ordinary meals around the older food

    Once or twice a month, choose a few meals that use items from the “use next” area. A can of chicken can become sandwiches, soup or a casserole. Beans can move into chili, tacos or a simple side dish. Shelf-stable milk can be tested in cereal or cooking before you depend on it during an outage.

    This is also a practical test. You may discover that a product needs more water, fuel or preparation than expected. You may learn that nobody likes it. That information is valuable before an emergency.

    6. Replace what proved useful

    When you use an emergency item, add it to the next grocery list. Buy the quantity that fits the plan and place the new item behind the remaining older stock.

    Do not automatically replace food that was repeatedly ignored. Decide whether it still serves a purpose. A smaller supply of familiar food is usually more dependable than a larger supply of food that nobody wants.

    7. Review on a schedule

    Tie the review to something you already do: changing smoke-alarm batteries, seasonal storm preparation, the first weekend of each quarter or another recurring household task. Rotation survives when it has a trigger.

    A Practical Review Schedule

    Every month

    • Look through the “use next” area.
    • Work one or two older items into normal meals.
    • Replace only what was used and still belongs in the plan.

    Every three months

    • Check dates and move older food forward.
    • Inspect cans, jars, boxes, pouches and dry-food containers.
    • Look for moisture, pests, damaged seals and signs of excessive heat.
    • Update the inventory and remove foods the household no longer uses.

    Every six months

    • Clean the storage area and check hidden corners.
    • Prepare one simple outage-style meal using stored food, safe water and the cooking method in your plan.
    • Confirm that a manual can opener and other basic preparation tools are available.

    Once a year

    • Recalculate the household’s food needs.
    • Account for changes in household size, medications, allergies, dietary restrictions and pet needs.
    • Review longer-term products against the manufacturer’s instructions.
    • Decide whether the storage location is still cool, dry, secure and accessible.

    What Food Dates Do—and Do Not—Tell You

    USDA guidance explains that, except for infant formula, federal law generally does not require food date labels as a measure of safety. A “Best if Used By” date commonly describes when the product is expected to have its best flavor or quality. The food may still be acceptable after that date if it was handled properly and shows no signs of spoilage.

    That does not mean every old package should be kept. Rotation is designed to use food while quality is still good, not to test the outer limit of every product. Follow product-specific instructions, pay attention to recalls and use a more conservative standard when the food will be served to someone at higher risk from foodborne illness.

    Infant formula is different. Follow its use-by date and storage directions. Do not treat it like an ordinary canned or dry pantry item.

    When to Discard Stored Food

    Do not taste questionable food to decide whether it is safe. Discard commercial cans that are bulging, leaking, badly rusted or deeply dented, particularly when the damage affects a seam. Discard jars with broken seals, leaks or other signs of failure.

    Dry goods should be discarded when moisture, mold, insects, rodent contamination, an unusual odor or a failed package seal makes the food questionable. A warm garage, attic or shed can shorten quality life even when the printed date looks reassuring.

    Home-canned food requires separate safety rules. Use current, research-tested canning methods and follow USDA or National Center for Home Food Preservation guidance. If you do not know how a jar was processed, do not make it part of the emergency supply.

    Practice With the Food Before You Need It

    Rotation is more than inventory control. It shows whether the plan works under realistic conditions.

    Choose an occasional meal that can be made with shelf-stable food and the equipment you would use during an outage. Check how much water it needs, how long it takes, whether the cooking method is safe and whether the household will eat it. The article How to Cook During a Power Outage explains the safety differences between no-cook foods, battery-powered appliances, approved gas cooktops and outdoor cooking equipment.

    A meal that looks simple on paper may require more fuel, cleanup or refrigeration than expected. Testing it now gives you time to replace weak choices without pressure.

    Common Rotation Mistakes

    • Buying a large quantity before trying the food.
    • Storing food in a hot garage or attic because the space is convenient.
    • Placing new groceries in front of older stock.
    • Keeping one giant inventory that is too tedious to update.
    • Treating every printed date as an automatic safety deadline.
    • Ignoring packaging damage because the date still looks good.
    • Rotating food without replacing the useful items.
    • Replacing food the household repeatedly refuses to eat.
    • Building a supply that depends on more water or cooking fuel than the plan provides.

    The Bottom Line

    Emergency food rotation does not need to become a second job. Keep food your household already uses, separate the rotating pantry from the longer-term reserve, put older items in front and maintain one visible “use next” area.

    Review the supply every three months. Inspect packaging and storage conditions, use older food in ordinary meals and replace only what still earns a place in the plan.

    The goal is not to keep the most food for the longest possible time. The goal is to have safe, useful food that your household can prepare and will actually eat when normal routines are disrupted.
    Research Sources

  • How to Cook During a Power Outage

    How to Cook During a Power Outage

    A power outage does not automatically mean your household has to live on crackers until the lights return. It does change which cooking methods are safe, how much fuel and water a meal may require, and which food should be used first.

    The safest plan begins with foods that need no cooking. If you want a hot meal, use an appliance that is designed for the location where you are operating it, and make sure your power or fuel source can support it. A power outage is not the time to improvise with charcoal, a camp stove or an unfamiliar flame inside the house.

    Quick Answer

    During a power outage, use this order of preference:

    1. Eat shelf-stable foods that require no cooking.
    2. Use an indoor-rated electric appliance only if it is powered safely by a portable power station or a correctly operated generator.
    3. Use a gas cooktop only if the gas service is safe and the manufacturer provides an approved way to operate that model without normal electrical ignition.
    4. Use grills, charcoal cookers and camp stoves outdoors only, well away from the house and every door, window and vent.

    Never operate a generator, charcoal grill, propane grill or camping stove inside a house, garage, basement, carport, tent or other enclosed or partly enclosed space. Opening a garage door or window does not make the space safe from carbon monoxide.

    Decide Whether You Need to Cook

    Hot food is comforting, but cooking is not always the best first move. Every hot meal uses something that may be limited during an outage: electricity, fuel, safe water or time outdoors.

    Begin by checking what your household can eat without heat. Useful combinations include:

    • Canned chicken or tuna with crackers
    • Peanut butter with bread or tortillas
    • Canned beans, corn and tomatoes mixed as a simple salad
    • Shelf-stable milk with cereal
    • Fruit cups, applesauce, nuts, jerky and snack bars
    • Ready-to-eat soup or pasta that your household is willing to eat at room temperature

    Keep a manual can opener with these foods. Choose cans with pull tabs when practical, but do not make them your only option because the tabs can break.

    No-cook food also gives you a safe fallback when high winds, flooding, wildfire restrictions or extreme weather make outdoor cooking impractical. If there is no safe place to operate a fuel-burning appliance, do not force the issue. Eat a cold meal and wait for safer conditions.

    If your pantry is not ready for that kind of meal, Build an Emergency Food Supply Without Wasting Money explains how to add familiar food gradually instead of buying a separate menu that your household may never use.

    Safe Ways to Heat Food

    The right method depends on the equipment already in your home, the weather outside and the amount of power or fuel you can use safely.

    Small Electric Appliances

    A portable power station can run some countertop cooking appliances indoors because it does not produce engine exhaust. The limiting factor is electrical demand. Electric kettles, microwaves, hot plates, toaster ovens and pressure cookers can draw substantial power, even when they are used for only a few minutes.

    Check the appliance nameplate and the power station’s continuous-output rating before connecting them. Confirm that the battery has enough usable capacity for the planned cooking time, and follow the power station manufacturer’s ventilation, charging and operating instructions. Keep the unit dry and do not place it against fabric, bedding or another surface that can trap heat.

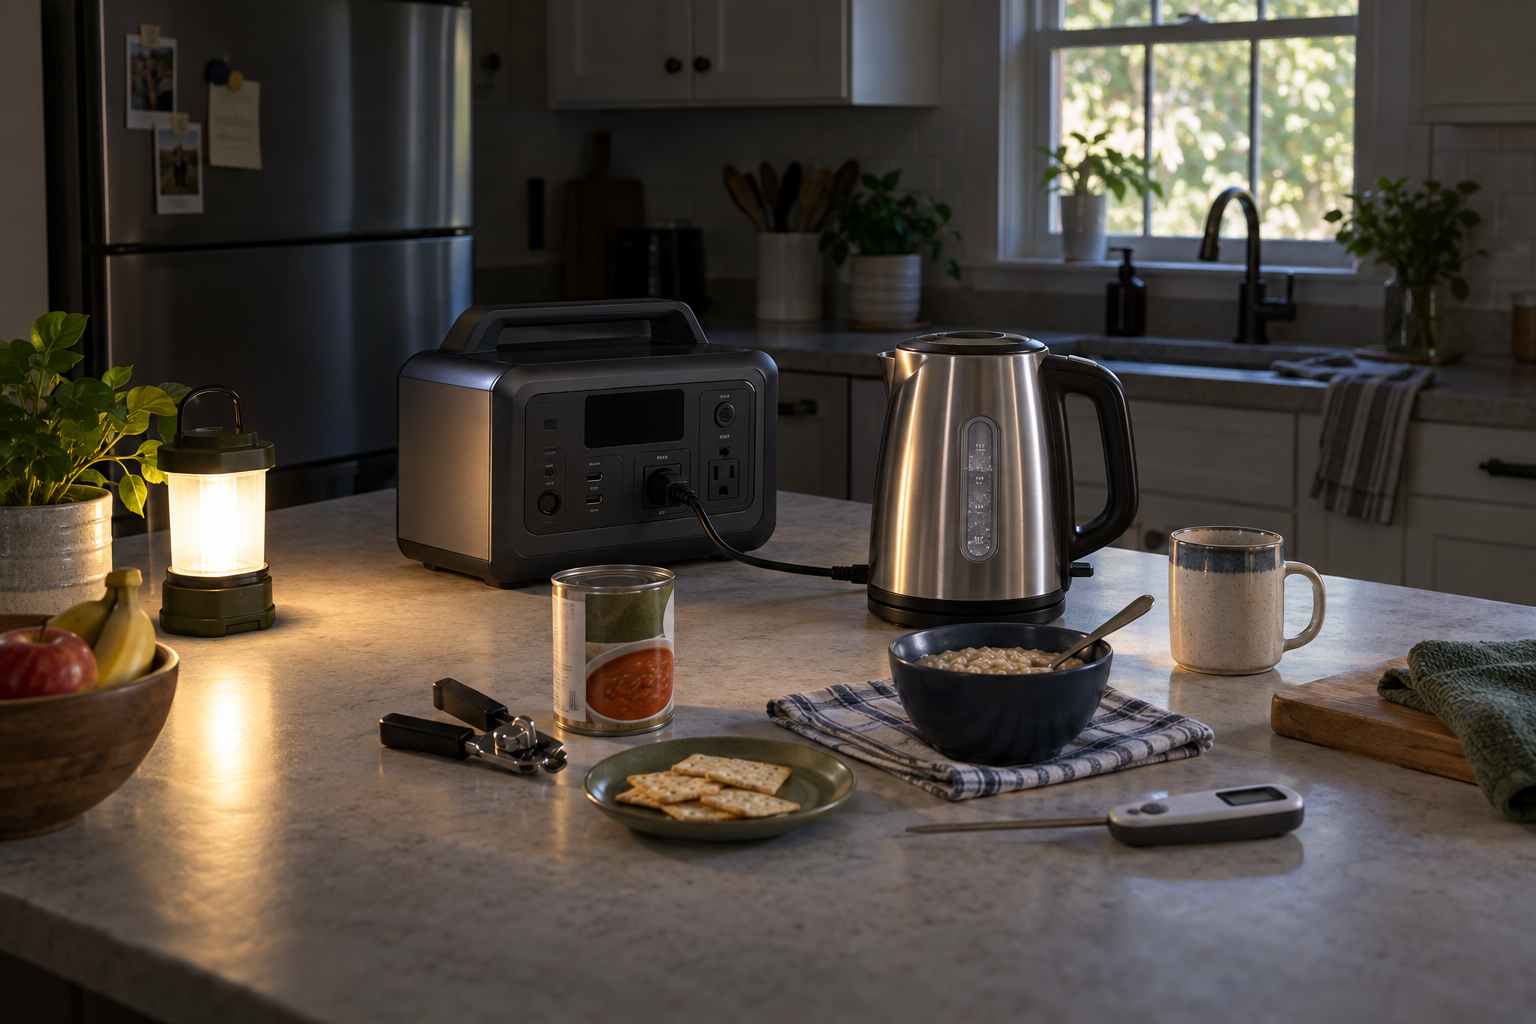
    An electric kettle is often one of the most efficient choices because it heats only the water you need. That hot water can prepare oatmeal, instant grits, couscous, instant potatoes, dehydrated meals and some quick-cooking noodles. A microwave can heat canned food quickly, but its electrical input may be considerably higher than the cooking wattage printed on the front of the appliance.

    Before planning meals around battery power, use What Can You Actually Run During a Power Outage to compare appliance demand with the power you have available.

    Generator Powered Cooking

    A portable generator can power a refrigerator or selected cooking appliance, but the generator itself must remain outdoors. The U.S. Consumer Product Safety Commission says to place a portable generator at least 20 feet from the home with the exhaust directed away from the house.

    Do not run a generator in a garage, even with the door open. Do not place it on a porch, under a carport or near a window, door, crawlspace opening or vent. Keep working carbon-monoxide alarms on every level of the home and outside sleeping areas.

    Use a heavy-duty outdoor-rated extension cord that is suitable for the appliance load, or use a properly installed transfer system. Never connect a generator to a wall outlet. If you are using a generator for both refrigeration and cooking, confirm that the total running and starting demand stays within the generator’s capacity.

    Review Portable Generator Safety before making a generator part of the cooking plan.

    A Gas Cooktop

    Some gas cooktops can operate during a power outage, while others depend on electrical ignition or safety controls. Do not assume that every burner can be lit manually. Check the appliance manual before an outage and follow the manufacturer’s instructions for that exact model.

    Do not use the cooktop if you smell gas, if the appliance may have been damaged, or if emergency officials or the gas utility have told customers not to use gas service. Never use a gas range or oven to heat the home.

    Even when a cooktop is approved for use, keep combustible items away from the flame, turn pot handles inward and supervise the food from start to finish. A flashlight or battery lantern is safer than placing candles around the cooking area.

    Grills and Camp Stoves

    Propane grills, charcoal grills and camping stoves can be useful outage tools when they are operated outdoors in a safe location. They are not indoor appliances.

    The U.S. Fire Administration advises using propane, charcoal and wood-pellet grills outside only and placing them well away from siding, deck railings, eaves and overhanging branches. Keep at least a three-foot child- and pet-free zone around the cooking area. Stay with the appliance while it is lit.

    Set the cooker on a stable, level surface. Keep the area clear of dry grass and anything that can burn. Follow the manufacturer’s lighting and shutdown procedure, let equipment cool before moving it, and never bring a charcoal grill indoors while the coals are still producing heat or fumes.

    A covered porch, attached garage or carport is not a safe substitute for open outdoor space. Carbon monoxide has no color or odor, and partial ventilation does not make an outdoor cooker safe indoors.

    Methods That Are Not Worth the Risk

    An outage can make a questionable shortcut look reasonable. Avoid these improvised methods:

    • Burning charcoal anywhere inside a building, vehicle or tent
    • Operating a propane or liquid-fuel camp stove indoors
    • Running a generator in a garage or close to the house
    • Heating food over candles
    • Building a homemade alcohol stove or pouring fuel into an open burner
    • Using an oven or cooktop to heat the room
    • Cooking in an unvented fireplace or on a wood stove that was not designed for the purpose

    If an appliance’s instructions do not clearly permit the planned use, choose another method. The emergency plan should reduce risk, not trade a cold dinner for carbon-monoxide poisoning, fire or serious burns.

    Protect the Food Before You Plan the Menu

    The first food decision during an outage may be what not to open. Keep refrigerator and freezer doors closed while you determine whether the outage is likely to be short.

    According to the U.S. Department of Agriculture:

    • An unopened refrigerator keeps food safely cold for about four hours.
    • A full freezer holds a safe temperature for about 48 hours if the door remains closed.
    • A half-full freezer holds a safe temperature for about 24 hours if the door remains closed.

    A refrigerator or appliance thermometer removes much of the guesswork. Refrigerated perishable food that has been above 40 degrees Fahrenheit for more than two hours should be discarded. Frozen food that still contains ice crystals or measures 40 degrees Fahrenheit or below can generally be refrozen or cooked, although its quality may decline.

    Never taste food to decide whether it is safe. Smell and appearance are not reliable safety tests. When the time or temperature is uncertain, throw the food away.

    Cooking does not restore food that has been held outside safe temperature limits. Do not turn questionable meat, dairy, eggs or leftovers into an outage meal simply to avoid wasting them.

    Use Perishable Food in the Right Order

    If the outage is expected to last and you have a safe cooking method, a simple order can prevent waste without encouraging you to open the refrigerator repeatedly.

    During the First Four Hours

    Leave the refrigerator closed if power may return soon. If the outage is clearly becoming extended, choose one planned meal, remove everything you need at once and close the door again.

    Use only food that is still at 40 degrees Fahrenheit or below. Cook a manageable amount so you do not create leftovers that cannot be refrigerated.

    After Four Hours

    Do not assume refrigerated meat, poultry, fish, milk, soft cheese, eggs or leftovers are safe. Check their temperature and follow the USDA’s emergency food-safety guidance. Discard perishable food that has been above 40 degrees Fahrenheit for more than two hours.

    Move to shelf-stable meals rather than spending scarce fuel trying to save questionable food.

    From the Freezer

    Keep the freezer closed as long as possible. When you do open it, group remaining frozen food together to help it stay cold. Use a thermometer rather than relying on how the package feels.

    Food that still has ice crystals or remains at 40 degrees Fahrenheit or below can generally be cooked or refrozen. Once food thaws and remains above that temperature for too long, discard it according to USDA guidance.

    Cook Food to a Safe Temperature

    Power loss does not change safe cooking temperatures. Use a food thermometer, especially when wind, cold weather or an unfamiliar cooker makes cooking time unpredictable.

    The USDA’s minimum internal temperatures include:

    FoodMinimum internal temperature
    Poultry, including ground poultry165 degrees Fahrenheit
    Leftovers and casseroles165 degrees Fahrenheit
    Ground beef, pork, lamb and veal160 degrees Fahrenheit
    Beef, pork, lamb and veal steaks, chops and roasts145 degrees Fahrenheit followed by a three-minute rest
    Fish145 degrees Fahrenheit

    Cook eggs until the yolks and whites are firm unless you are following a recipe that reaches a verified safe temperature. Keep raw meat separate from ready-to-eat food, and wash hands, utensils and preparation surfaces with safe water.

    Use Safe Water for Cooking

    An outage may occur at the same time as a boil-water advisory, flood or loss of water pressure. Do not assume the kitchen faucet is safe simply because water still comes out.

    Use bottled, boiled or properly treated water for drinking and food preparation when local officials say the water supply may be unsafe. The Centers for Disease Control and Prevention advises bringing clear water to a rolling boil for one minute, or three minutes at elevations above 6,500 feet. Boiling does not remove fuel, toxic chemicals or radioactive contamination. If officials issue a do-not-drink advisory, use a different water source and follow their instructions.

    Rice, pasta and dried beans can use far more water and fuel than expected. During a short outage, canned beans, canned meat, instant grains and other foods that need little water are usually easier choices.

    For water planning, see How Long Does Stored Water Last.

    Build Meals Around the Method You Have

    You do not need an elaborate outage cookbook. Match familiar food to the safest method available.

    Available methodPractical meal ideasMain limitation
    No heatTuna and crackers, peanut butter tortillas, canned bean salad, cereal with shelf-stable milkRequires food your household will eat without warming
    Electric kettleOatmeal, instant grits, couscous, instant potatoes, dehydrated soupNeeds substantial short-duration electrical power
    MicrowaveCanned soup, vegetables, rice cups and leftovers that are still safeHigh electrical demand and short battery runtime
    Hot plate or induction burnerOne-pot soup, canned chili, eggs, quick-cooking pastaHigh continuous electrical draw
    Outdoor grillMeat that is still safely cold, foil packets, one-pan mealsOutdoor use only; weather and fuel may limit use
    Outdoor camp stoveSoup, oatmeal, coffee, quick-cooking grains and one-pot mealsOutdoor use only; requires stable setup and stored fuel

    Favor meals that use one pot, a short cooking time and little water. Add canned meat, beans or shelf-stable milk when a simple starch needs more protein. Prepare only what the household can finish unless you have a dependable way to keep leftovers at 40 degrees Fahrenheit or below.

    Prepare Before the Power Fails

    A useful outage cooking plan can be tested in one ordinary evening. Turn off the intended appliance, leave the emergency equipment where it is normally stored and prepare one meal without using the regular kitchen power.

    The test should answer these questions:

    • Can you reach the cooker, fuel, extension cord and manual can opener in the dark
    • Does the selected appliance work with the power source you own
    • How much battery capacity or fuel does one meal use
    • Can you operate the equipment in bad weather without moving it into an unsafe location
    • Do you have a food thermometer, refrigerator thermometer, flashlight and working carbon-monoxide alarms
    • Will the household actually eat the planned meal

    Store printed appliance instructions with the equipment. Label fuel clearly and store it according to the manufacturer’s directions and local fire rules. Do not wait for an outage to discover that a power station cannot run the hot plate or that the only can opener is electric.

    A Practical Power Outage Cooking Plan

    Keep the plan simple:

    1. Leave the refrigerator and freezer closed while you assess the outage.
    2. Start with a no-cook meal if the outage is short or outdoor conditions are unsafe.
    3. Choose one approved cooking method and confirm its power or fuel requirements.
    4. Use safe water and a food thermometer.
    5. Cook only the amount your household can eat.
    6. Keep every fuel-burning cooker outdoors and well away from the home.
    7. Discard perishable food that has exceeded safe time and temperature limits.

    The goal is not to recreate a normal kitchen with emergency equipment. It is to feed the household safely with the food, water and energy that are actually available.

    Primary Sources Used for Safety Review

  • What Foods Actually Last the Longest?

    What Foods Actually Last the Longest?

    Some foods can remain usable for years—or even decades—when they are packaged and stored correctly. That does not mean every food with an impressive shelf-life claim belongs in your emergency supply.

    The longest-lasting food may require more water, fuel or preparation than you can manage during an outage. Another food may not last as long, but it may be easier to eat, more familiar to your household and far more useful when the power is off.

    The practical goal is not to find one food that lasts forever. It is to build a dependable mix of foods that store well, provide useful nutrition and can be prepared under the conditions you are actually planning for.

    Quick Answer

    Properly packaged white rice and dried beans are among the longest-lasting practical staples for most households. Granulated sugar and honey can remain safe for an exceptionally long time, although they are ingredients rather than complete meals. Commercial freeze-dried foods may also carry very long shelf-life claims, but the actual life depends on the product, packaging and storage conditions.

    Nonfat dry milk does not last for decades, but it deserves a place in the discussion because it adds protein, calcium and versatility that rice, beans and sugar do not provide. Under cool storage conditions, unopened nonfat dry milk may retain good quality for roughly three to five years. Heat can shorten that life dramatically.

    For most households, the best emergency food supply combines:

    • Familiar canned foods that can be eaten with little or no preparation
    • Dry staples such as white rice, pasta, oats and beans
    • Foods that provide protein, fat and variety
    • Nonfat dry milk or another shelf-stable milk option, if your household uses it
    • A smaller amount of specially packaged long-term food, if it fits the household’s plan

    If you are still deciding how much food to keep, start with How Much Emergency Food Should You Keep at Home? If you want a practical method for building the supply gradually, see Build an Emergency Food Supply Without Wasting Money.

    Shelf Life Is Not Just One Number

    Shelf-life discussions often mix together three different questions:

    1. Is the food still safe?
    2. Does it still taste and perform as expected?
    3. Does it still provide the same nutritional value?

    A dry food may remain safe from microbial growth while losing flavor, texture or vitamins. An old bean may still be edible but take much longer to soften. A can may remain sealed beyond its best-quality date while its color and texture gradually decline.

    That is why a “best if used by” date should not automatically be treated as the moment every food becomes unsafe. USDA guidance explains that most food date labels indicate quality rather than safety, with infant formula being an important exception. Packaging damage, moisture, pests, heat and a broken seal can matter more than the printed date.

    Which Foods Have the Longest Shelf Life?

    FoodLong-term potentialImportant limitation
    Granulated sugar and commercial honeyIndefinite resistance to microbial spoilage when properly storedProvides calories but not balanced nutrition; texture and flavor can change
    Properly packaged white riceApproximately 25–30 years under cool, oxygen-free storage conditionsOrdinary retail packaging does not provide decades of protection
    Whole wheat kernels, often called wheat berriesCan remain acceptable for decades under favorable storage conditionsSpecialized choice that requires grinding or other preparation
    Properly packaged dried beans10 years or more; some stored samples remained acceptable much longerOlder beans may require more water, fuel and cooking time
    Commercial freeze-dried foodOften among the longest-labeled prepared foodsShelf life varies by product; usually requires water and may be expensive
    Nonfat dry milkRoughly 3–5 years under cool storage conditionsHeat causes rapid quality loss; whole-milk powder stores less successfully
    Commercial low-acid canned foodCommonly 2–5 years for best qualityHeavy and bulky, but often easy to eat during an outage
    Commercial high-acid canned foodCommonly 12–18 months for best qualityAcidity can cause quality to decline faster

    These are not interchangeable promises. The multi-decade figures for rice, wheat and beans depend on specialized packaging and favorable temperatures. A bag of rice placed on a warm garage shelf should not be treated like rice sealed in an oxygen-free container and stored in a cool room.

    1. White Rice

    White rice is one of the strongest long-term storage staples because it is calorie-dense, versatile and relatively low in fat. Utah State University Extension reports that polished white rice can store well for 25 to 30 years when it is properly sealed and kept under appropriate conditions.

    The packaging matters. Rice intended for long-term storage needs protection from moisture, oxygen and insects. A thin retail bag is useful for a rotating pantry, but it is not a decades-long storage system.

    White rice also lasts considerably longer than brown rice. Brown rice retains its oily bran layer, which makes it more nutritious in some respects but also gives it a much shorter pantry life.

    Rice still has an emergency-planning drawback: it needs safe water and heat. Store it as part of a broader supply rather than making it your only food.

    2. Dried Beans and Lentils

    Dried beans provide protein, carbohydrates, fiber and minerals. Utah State University reports a shelf life of 10 years or more when beans are packaged in #10 cans or Mylar-type bags with oxygen removed. Some much older samples remained acceptable for emergency use.

    Age still affects performance. Older beans become harder, take longer to rehydrate and may eventually refuse to soften normally. Vitamins also decline during extended storage even when protein, carbohydrates and minerals remain.

    Beans can consume a surprising amount of water and fuel. Most dried beans require soaking and then prolonged cooking. Lentils and split peas generally cook faster, making them useful companions to traditional beans.

    3. Nonfat Dry Milk

    Nonfat dry milk is not the longest-lasting food on this list, but it may be one of the most useful additions to a balanced emergency pantry. It provides protein and calcium, can be mixed for drinking, and can be used in cereal, sauces, bread and other recipes.

    Utah State University Extension gives nonfat dry milk a general storage range of about three to five years when it is kept cool. Storage temperature makes a major difference. Under hot conditions, noticeable quality loss can occur in only a few months.

    The type of milk powder matters. Whole-milk powder and dried buttermilk contain more fat and are not as suitable for long-term storage. For the best storage potential, choose nonfat dry milk in intact, moisture-resistant packaging and follow the manufacturer’s date and storage directions.

    Dry milk still requires safe water. Once it is mixed, treat it like fresh milk and refrigerate it if refrigeration is available. If your household does not normally drink powdered milk, try a small package before buying a large supply.

    4. Sugar and Honey

    Granulated sugar and commercial filtered honey resist microbial growth and can remain safe for an exceptionally long time when kept dry and protected from contamination. Sugar may harden, and honey may crystallize or change color, but those quality changes do not automatically make them unsafe.

    Neither product is an emergency meal. They provide energy and make basic foods easier to use, but they lack protein, fat, fiber and most vitamins. Store them as supporting ingredients, not as the foundation of the plan.

    Do not place oxygen absorbers in sugar. Utah State University advises that oxygen removal is unnecessary and can turn granulated sugar into a hard block.

    5. Commercial Freeze-Dried Food

    Commercial freeze-dried foods can carry some of the longest shelf-life labels in the emergency-food market. The exact life varies by the food, moisture level, packaging, seal and storage temperature, so use the manufacturer’s date and storage instructions rather than assuming every freeze-dried product lasts 25 years.

    Freeze-dried food is lightweight and compact, but it normally needs water. It can also cost considerably more per serving than ordinary pantry food.

    Before buying a large package, check:

    • Total calories rather than the advertised number of servings
    • Protein, fiber and sodium
    • Allergens and dietary restrictions
    • Water required for preparation
    • Whether meals can be prepared without normal kitchen power
    • Whether your household has actually tried the food

    6. Commercial Canned Food

    Canned food does not win the decades-long shelf-life contest, but it may be the most useful category during a short household emergency.

    Many canned foods are ready to eat, require little or no water and can be served without cooking. USDA guidance commonly gives high-acid canned foods such as tomatoes and many fruits a best-quality window of about 12 to 18 months. Low-acid canned foods such as meats, vegetables and many soups commonly retain best quality for about two to five years.

    Those are quality guidelines, not permission to ignore the container. Discard cans that are bulging, leaking, badly rusted or deeply dented—especially around seams. Do not taste food from a suspect container.

    Keep a manual can opener with your emergency food.

    What About Whole Wheat Kernels?

    Whole wheat kernels, often called wheat berries, can remain usable far longer than flour. The intact grain offers better protection than a milled product, and research cited by Utah State University found that properly stored wheat remained acceptable after decades.

    Wheat kernels are a specialized choice rather than a basic recommendation for every household. You need a way to grind or cook them, enough water and fuel, and the knowledge to turn them into food your household will eat. Their baking performance can also decline during long storage.

    If your household already grinds wheat or cooks the whole kernels, they may deserve a place in your long-term supply. If you have never used them, more familiar staples are likely to serve you better.

    Foods That Do Not Last as Long as People Expect

    Some nutritious foods are poor candidates for very long room-temperature storage because they contain more fat or have fragile packaging.

    These include:

    • Brown rice
    • Whole-grain flour
    • Nuts and seeds
    • Nut butters
    • Cooking oils
    • Granola
    • Crackers
    • Many snack bars
    • Whole-milk powder and dried buttermilk

    That does not mean you should leave them out. Fat, protein, flavor and familiar snacks all matter during an emergency. It means these foods belong in the rotating part of the pantry rather than the forgotten back corner.

    Buy quantities your household can use before quality declines. Replace what you use and keep the newest package behind the older one.

    Storage Conditions Can Matter More Than the Food

    Heat and moisture shorten storage life. Utah State University Extension identifies moisture and temperature as two of the most important storage factors. In one cited study, wheat remained acceptable for 25 years in cool basement storage but only about five years in hot storage.

    For better results:

    • Choose a cool, dry and dark location
    • Avoid hot garages, sheds and uninsulated attics
    • Use clean, food-grade containers
    • Protect dry food from moisture, insects and rodents
    • Keep food off bare concrete floors
    • Label each container with the food and storage date
    • Divide bulk food into smaller containers so one failure does not ruin everything
    • Inspect the supply regularly
    • Use the oldest food first

    The ideal storage location is not always available. If your home runs warm, plan for shorter storage and faster rotation instead of pretending the temperature does not matter.

    What About Home-Canned Food?

    Home-canned food belongs in a separate safety category. Use only current, research-tested recipes and approved processing methods from USDA or a cooperative extension source.

    The National Center for Home Food Preservation recommends canning no more than you expect to use within about one year for best quality. Never rely on appearance or smell alone to prove that improperly processed food is safe.

    If you are uncertain about how a jar was processed, do not use it as emergency food.

    A More Useful Way to Build a Long-Lasting Food Supply

    Think in three layers.

    Layer 1: Foods You Already Eat

    Start with canned meat, fish, beans, vegetables, fruit, soup, pasta, rice, cereal and other shelf-stable foods already used in your household. Rotate these through normal meals.

    Layer 2: Longer-Term Staples

    Add carefully chosen quantities of white rice, dried beans, lentils or other dry staples that you know how to prepare. Include nonfat dry milk if your household will use it. Package foods for the length of time you realistically intend to store them.

    Layer 3: Specialty Emergency Food

    Add freeze-dried meals, whole wheat kernels or other specially packaged foods only when they solve a real problem, such as portability, limited storage space or the desire for a reserve that requires less rotation.

    Across all three layers, make sure you have:

    • Safe water
    • A manual can opener
    • A realistic cooking method
    • Enough fuel
    • Foods that fit medical, allergy and dietary needs
    • Some foods that require no cooking

    The Bottom Line

    Properly packaged white rice and dried beans are among the longest-lasting practical staples for most households. Sugar and honey can remain stable for an exceptionally long time, while nonfat dry milk adds protein, calcium and versatility for a shorter storage period. Commercial freeze-dried products may last a long time as well, but their labels and preparation requirements must be checked individually.

    Whole wheat kernels can last for decades under favorable conditions, but they make sense mainly for households that already know how to use them.

    The longest-lasting food is not automatically the best emergency food.

    A dependable supply includes food you can safely store, prepare and eat. Combine long-term staples with familiar canned and packaged foods, protect them from heat and moisture, and rotate the foods that do not belong in deep storage.

    Preparedness is not about winning a shelf-life contest. It is about having useful food when your household needs it.

    Sources

  • How Much Emergency Food Should You Keep at Home?

    How Much Emergency Food Should You Keep at Home?

    “How much emergency food do I need?” sounds like a question that should have one simple answer.

    It does not.

    A household with two adults who can cook during an outage has different needs from a family with young children, an older parent, food allergies, pets or no practical way to heat food. The right amount also depends on what kind of disruption you are preparing for and how long you want to be able to stay home without shopping.

    Fortunately, you do not need to calculate every calorie your household might consume during a disaster.

    A better place to begin is much simpler: choose how many days you want to cover, count the people you are feeding and build enough realistic meals for that period.

    Start With a 3-Day Minimum

    Federal preparedness guidance generally starts with enough food and other supplies to last several days. Ready.gov recommends keeping at least a several-day supply of nonperishable food, while North Carolina emergency preparedness guidance recommends enough food for three to seven days for each person and pet.

    Three days is a useful starting point because it gives a household some breathing room during a short power outage, storm, transportation disruption or temporary store closure.

    For one person, a basic three-day plan could mean:

    • 3 breakfasts
    • 3 lunches
    • 3 dinners
    • A few snacks or easy extras

    For four people, the same three-day plan becomes 36 meal portions:

    4 people × 3 days × 3 meals = 36 meal portions

    That does not mean you need 36 cans or 36 individual packages. One box of cereal might provide several breakfasts. A pot of shelf-stable soup ingredients may provide several servings. The point is to count usable meals instead of counting packages.

    Seven Days Is a Stronger Household Target

    Once you have three days covered, moving toward seven days gives you substantially more flexibility.

    ReadyNC recommends three to seven days of food and other supplies for each person and pet.

    A seven-day food supply can help when an outage lasts longer than expected, roads are difficult to travel, stores reopen slowly or you simply prefer not to join the rush for groceries immediately after a storm.

    Using the same simple calculation:

    People × Days × Meals Per Day

    A household of four planning for seven days would need:

    4 × 7 × 3 = 84 meal portions

    Again, that number is a planning tool, not a requirement to purchase 84 separate products.

    Think in meals:

    • What would everyone eat for breakfast?
    • What could serve as lunch?
    • What could serve as dinner?
    • Which meals work without refrigeration?
    • Which meals work without cooking?

    If you can answer those questions for seven days, you have a much clearer picture of what you actually need.

    Two Weeks Is a Practical Long-Term Home Goal

    The American Red Cross recommends a three-day supply of nonperishable, easy-to-prepare food for evacuation and a two-week supply for home use.

    That makes two weeks a reasonable longer-term target for a household that has the storage space, budget and ability to rotate the food.

    You do not have to reach two weeks immediately.

    A practical progression is:

    3 days → 7 days → 14 days

    Build the first three days. Make sure the meals work. Then extend the same system to a week. Once that feels manageable, add the second week.

    This approach fits the Ready Chateau philosophy much better than buying a large emergency-food package all at once and hoping it matches your household.

    How Much Food Is That for Your Household?

    Here is a simple planning table based on three meals per person per day.

    Household Size 3 Days 7 Days 14 Days
    1 person 9 meal portions 21 42
    2 people 18 42 84
    3 people 27 63 126
    4 people 36 84 168
    5 people 45 105 210
    6 people 54 126 252

    These numbers are not calorie recommendations. They are simply a way to make the size of the job visible.

    A “meal portion” should represent what that person would realistically eat.

    A six-year-old child and a large adult probably do not need identical portions. Someone with a medical diet may need completely different foods. Use the table as a planning framework, then adjust it to your household.

    Do Not Build the Plan Around Calories Alone

    You will sometimes see emergency-food plans built around a fixed number of calories per person per day.

    That can be useful for specialized planning, but it is not the easiest approach for most households.

    Calorie needs vary with age, body size, health, activity level and other factors. More importantly, a mathematically perfect calorie supply is not very useful if your family will not eat the food or cannot prepare it when the power is out.

    For most homeowners, complete meals are easier to plan and easier to manage.

    Instead of asking:

    “How many calories are in the pantry?”

    Ask:

    “How many breakfasts, lunches and dinners can we actually serve?”

    That question usually exposes shortages much faster.

    Include Food You Can Eat Without Cooking

    A household may have plenty of food and still have a problem if every meal requires a stove.

    FoodSafety.gov recommends emergency foods with a long storage life that require little or no cooking, water or refrigeration.

    Your supply should include at least some meals that can be eaten without heating.

    Examples might include combinations of:

    • Peanut or other nut butter
    • Crackers
    • Canned or pouched meat or fish
    • Ready-to-eat beans
    • Canned fruit
    • Shelf-stable milk
    • Dry cereal
    • Nutrition or granola bars
    • Applesauce or fruit cups
    • Other shelf-stable foods your household normally eats

    USDA guidance also recommends keeping a hand-held can opener with an emergency food supply.

    You do not need every meal to be no-cook. You do need enough options that losing electricity does not immediately make your emergency pantry useless.

    Your Refrigerator and Freezer Are the First Layer — Temporarily

    During a short outage, the food already in your refrigerator and freezer may be useful, but you should not count it as your entire emergency supply.

    FoodSafety.gov says an unopened refrigerator will generally keep food cold for about four hours. A full freezer can maintain temperature for approximately 48 hours, or about 24 hours if it is half full, when the door remains closed.

    That means refrigerated and frozen food can sometimes become the first food you use during an outage.

    But your longer-term plan should depend on shelf-stable food rather than assuming refrigeration will continue indefinitely.

    Never taste food to determine whether it is safe after a power outage. Follow food-safety guidance based on time and temperature and discard questionable perishables.

    Count Everyone You Are Actually Feeding

    Emergency-food planning should include more than the number of adults in the house.

    Consider:

    • Children
    • Older family members
    • Overnight guests who may realistically shelter with you
    • Infants
    • People with allergies or medically necessary diets
    • Pets

    Government preparedness guidance specifically reminds households to include infant needs, special diets and pet food when building an emergency supply.

    If your dog eats two cups of food per day, for example, a seven-day household plan needs at least seven days of dog food too.

    Pets should not become an afterthought once the storm arrives.

    Add a Little Margin

    If your calculation says your household needs exactly 84 meal portions for seven days, you do not need to treat 84 as a magic number.

    A small margin can cover:

    • Larger appetites
    • An extra person staying with you
    • A damaged package
    • A meal that does not work as expected
    • A disruption lasting longer than planned

    The goal is not to create an enormous stockpile. It is simply to avoid designing a plan with absolutely no room for error.

    Watch Foods That Use a Lot of Water

    Dry rice, pasta, dried beans and dehydrated meals can be useful because they store well.

    But they also consume something else you need during an emergency: water.

    Some foods require water for cooking. Others create pots and dishes that require additional water for cleanup.

    That means emergency food and emergency water planning cannot be completely separated.

    If a large portion of your food supply consists of dry foods, make sure your stored water plan includes the water required to prepare them.

    This is one reason a combination of dry staples and ready-to-eat foods works well for many households.

    A Simple Way to Build Your Supply

    You do not need to fill an entire pantry this weekend.

    Start with three days.

    Write down what your household would realistically eat for breakfast, lunch and dinner. Include at least a few no-cook meals.

    Then check your pantry.

    You may discover that you already have much of the first three days.

    Buy only what is missing.

    Once three days are complete, repeat the process until you have seven. If your space and budget allow, gradually work toward two weeks.

    Our guide Build an Emergency Food Supply Without Wasting Money explains how to choose foods your household will actually eat, select useful package sizes and rotate the supply instead of letting it expire in the back of a closet.

    Example: A Family of Four for Seven Days

    Suppose a four-person household wants one week of emergency food.

    Their planning target is:

    4 people × 7 days × 3 meals = 84 meal portions

    They might divide that into:

    • 28 breakfast portions
    • 28 lunch portions
    • 28 dinner portions

    Then they plan actual foods.

    Breakfast might rotate among cereal with shelf-stable milk, oatmeal when cooking is available and breakfast bars with fruit.

    Lunch might include tuna or chicken with crackers, peanut butter, canned fruit, soup or shelf-stable meal combinations.

    Dinner might include pasta, rice dishes, canned beans, canned meat, vegetables or other familiar pantry meals.

    Some meals require cooking. Others do not.

    That mixture is important. If the stove is unavailable, the family still has something useful to eat.

    Do Not Forget the Foods People Actually Want

    Emergency food is partly about nutrition, but morale matters too.

    A week of eating unfamiliar food under stressful conditions is not likely to improve anyone’s mood.

    Include a reasonable amount of familiar snacks, coffee or tea, powdered drink mixes, crackers, cookies or other comfort foods your household normally enjoys.

    That does not mean filling the pantry with junk food.

    It means recognizing that an emergency food supply is meant for real people living through an inconvenient or stressful situation.

    Three Days First. Then Build From There.

    You do not need a year’s worth of food to be better prepared tomorrow than you are today.

    For most households, the sensible progression is straightforward:

    Start with three complete days.

    Build toward seven days.

    Then consider a two-week home supply if your household, space and budget support it.

    Count meals instead of cans. Include food that works without cooking. Account for children, dietary needs and pets. Make sure the food matches the water and cooking resources you actually have.

    Most importantly, build a supply your household can really use.

    An emergency pantry should not be a museum of food you hope never to touch. It should be an extension of the pantry you already live with every day.

  • Build an Emergency Food Supply Without Wasting Money

    Build an Emergency Food Supply Without Wasting Money

    Emergency food does not have to mean expensive buckets of unfamiliar meals that sit untouched for years. For most households, the least wasteful place to begin is the food already in the pantry—and the meals people already know they will eat.

    The goal is not to build the largest stockpile possible. It is to keep enough practical, shelf-stable food to get through a disruption without depending on refrigeration, daily shopping or elaborate cooking. If those foods can also become part of ordinary meals before their quality declines, preparedness stops being a separate expense and becomes part of normal household management.

    Start With the Food You Already Eat

    Before buying anything, look through your pantry, refrigerator and freezer. Write down the shelf-stable foods your household uses regularly. That list may include canned vegetables, fruit, beans, meat or fish; dry pasta, rice, oats or cereal; shelf-stable milk; nut or seed butter; crackers; soup; sauces; and familiar snacks.

    This simple inventory does two things. It keeps you from buying food you already own, and it reveals which ordinary foods could serve two purposes: everyday meals now and emergency meals later. EPA guidance for reducing household food waste begins with the same basic practices—check what you already have, plan meals around it and buy only what you expect to use.

    Do not start with foods your family rarely eats merely because they are labeled for emergencies. A long advertised shelf life does not create value if no one wants the food, cannot tolerate it or does not know how to prepare it.

    Plan Meals, Not Just Ingredients

    A shelf full of cans and boxes may look reassuring, but it is not yet a meal plan. Group foods into simple combinations your household could actually eat during a power outage or another disruption.

    For example, a meal might combine:

    • Canned chicken or beans with crackers and canned fruit
    • Shelf-stable milk with cereal, oats or granola
    • Canned soup with crackers or shelf-stable bread
    • Pasta with jarred sauce and canned vegetables
    • Tuna or another shelf-stable protein with crackers and fruit cups

    These are only examples. Your best choices are the foods that fit your household’s tastes, dietary needs, culture and normal eating habits. The useful question is not simply, “How many cans do we own?” It is, “How many realistic meals can we make from what we have?”

    Include Food That Requires No Cooking

    Some emergencies interrupt power, fuel or safe water at the same time. Ready.gov recommends nonperishable foods and reminds households to include a manual can opener, utensils and any special dietary needs. FDA guidance also advises keeping a few days of ready-to-eat foods that do not require cooking or cooling.

    Keep at least some food that can be opened and eaten as it is. Possibilities include canned fruit, ready-to-eat beans, canned meat or fish, nut or seed butter, crackers, dry cereal, nutrition bars, shelf-stable milk and commercially packaged snacks. Choose pull-top containers where useful, but keep a manual can opener with the supply even if most cans have tabs.

    A few no-cook meals can take some pressure off when the power is out or cooking is not practical. They may be simple, but they should still include familiar foods everyone can eat safely. A mixture of protein, carbohydrates, fruit or vegetables and comfort foods will generally be more useful than a collection built around one type of food.

    Build the Supply in Small, Useful Steps

    You do not have to build your emergency pantry all at once. Start by adding one or two shelf-stable items to a normal grocery order. Once those items represent one complete household meal, build the next meal.

    A practical sequence is:

    1. Inventory food already on hand.
    2. Identify several ordinary shelf-stable meals your household will eat.
    3. Buy the missing ingredients for one meal at a time.
    4. Add several no-cook meals for outages that limit cooking.
    5. Use older food in normal meals and replace only what the household actually used.

    This approach spreads the cost across regular shopping trips and gives you a chance to learn what works. It also prevents a common mistake: buying a large quantity before discovering that the portions, preparation requirements or flavors are wrong for your household.

    Buy the Right Package Size

    Bulk packages are not automatically economical. They save money only when the food can be stored properly and used before it loses quality. During an outage, a large opened container may also create a new problem if the remainder requires refrigeration.

    Think about how much your household could realistically finish once a package is opened, especially when the remainder would normally require refrigeration. Smaller containers sometimes cost more per ounce, but they may waste less when refrigeration is unavailable.

    Before buying a case, test a single package in an ordinary meal. Confirm that everyone will eat it, that the portion is useful and that you have the equipment, water and energy needed to prepare it.

    Pay Attention to Water and Cooking Requirements

    Dry foods can be economical and compact, but they may require water, cooking time and fuel. Your emergency water supply must account for both drinking and food preparation. Rice, pasta, dried beans and dehydrated meals are less useful if your plan assumes unlimited water or a cooking method you cannot safely operate during an outage.

    For every planned meal, ask:

    • Does it require safe water?
    • How much water will preparation and cleanup use?
    • Does it require heating or extended cooking?
    • Can we prepare it with equipment we already own and know how to use?
    • What would we eat instead if cooking were unavailable?

    A practical pantry will probably include both: economical dry staples for times when you can cook and ready-to-eat foods for times when you cannot. Our guide to cooking during a power outage will cover that subject, including the safety limits of different cooking methods.

    Protect Special Household Needs

    Start with the people and animals in your home. Consider food allergies, diabetes, swallowing difficulties, low-sodium requirements, infant feeding, pregnancy, religious or cultural needs and any other dietary restriction that cannot simply be suspended during an emergency.

    Include familiar food for children and older adults, as well as pet food and any treats or supplements that are genuinely part of the animal’s routine. If someone relies on a medically necessary diet or specialized formula, discuss emergency substitutions and storage requirements with the appropriate clinician or manufacturer rather than improvising during a disruption.

    Store Food Where It Will Last

    FoodSafety.gov advises that canned and dried foods last best in a cool, dry, dark location and notes that specialty dehydrated emergency food is not required. Avoid locations exposed to heat, moisture, pests, household chemicals or possible floodwater. Do not store food above a stove, under a sink or in a hot garage simply because the space is convenient.

    Keep packages off the floor when flooding is a realistic risk. Inspect cans and packages periodically. Discard cans that are bulging, leaking, rusted through or badly damaged, and discard food that may have contacted floodwater. Never taste questionable food to decide whether it is safe.

    Dates Are Useful, but They Are Not All the Same

    Except for infant formula, federal law generally does not require food product dating, and USDA explains that many dates indicate quality rather than safety. Terms such as “Best if Used By” usually describe when a product is expected to have its best flavor or quality.

    You should still pay attention to package dates, but they are not all automatic throw-away dates. Follow any safety-related instructions on the package, use food before quality declines when practical and discard damaged, contaminated or suspicious products. USDA’s FoodKeeper resource provides storage guidance for hundreds of foods when a package date alone does not answer the question.

    Use a Simple First-In, First-Out Habit

    You do not need a detailed system to begin rotating emergency food. Start with one operating rule: place newer purchases behind older ones and use the older food first. Write the purchase month on a package if the printed date is hard to see.

    Once or twice a year, take a few minutes to look through your emergency food and pull out anything you should use soon. Move those foods into the everyday pantry, use them in normal meals and replace only what you still want in the emergency supply. If an item repeatedly reaches the end of its useful life without being eaten, stop buying it. The problem is probably the choice of food, not the rotation schedule.

    Common Ways Households Waste Money

    • Buying a large emergency-food package before trying the meals
    • Stocking foods no one normally eats
    • Buying ingredients without identifying complete meals
    • Ignoring water, cooking fuel or cleanup requirements
    • Buying containers too large to finish without refrigeration
    • Storing food in a hot, damp or pest-prone location
    • Forgetting allergies, medications, infants or pets
    • Treating a long shelf life as more important than usefulness

    The least expensive emergency food is not necessarily the product with the lowest price per ounce. It is food that meets a real need, stores safely and gets eaten before it becomes waste.

    A Practical Starter Exercise

    Choose three shelf-stable meals your household already likes. For each meal, list every required item, including water, seasonings and a safe way to open or prepare the food. Add one no-cook alternative.

    Then shop your pantry before shopping the store. Buy only the missing items. Keep the meals together on a written list—not necessarily on the same shelf—so anyone in the household can see what is available.

    Once those meals are complete, repeat the process. This creates a supply that grows in useful increments instead of becoming an expensive collection of disconnected products.

    A Useful Supply Is One You Can Actually Use

    A practical emergency food supply should reduce stress, not create another maintenance burden. Build it from familiar meals. Include food that works without cooking. Match packages to your household. Store everything properly. Use older items and replace them through normal shopping.

    Preparedness is not measured by the number of cans, buckets or years printed on a package. It is measured by whether your household has safe, usable food when normal routines stop—and whether the money spent today still provides value if the emergency never comes.