
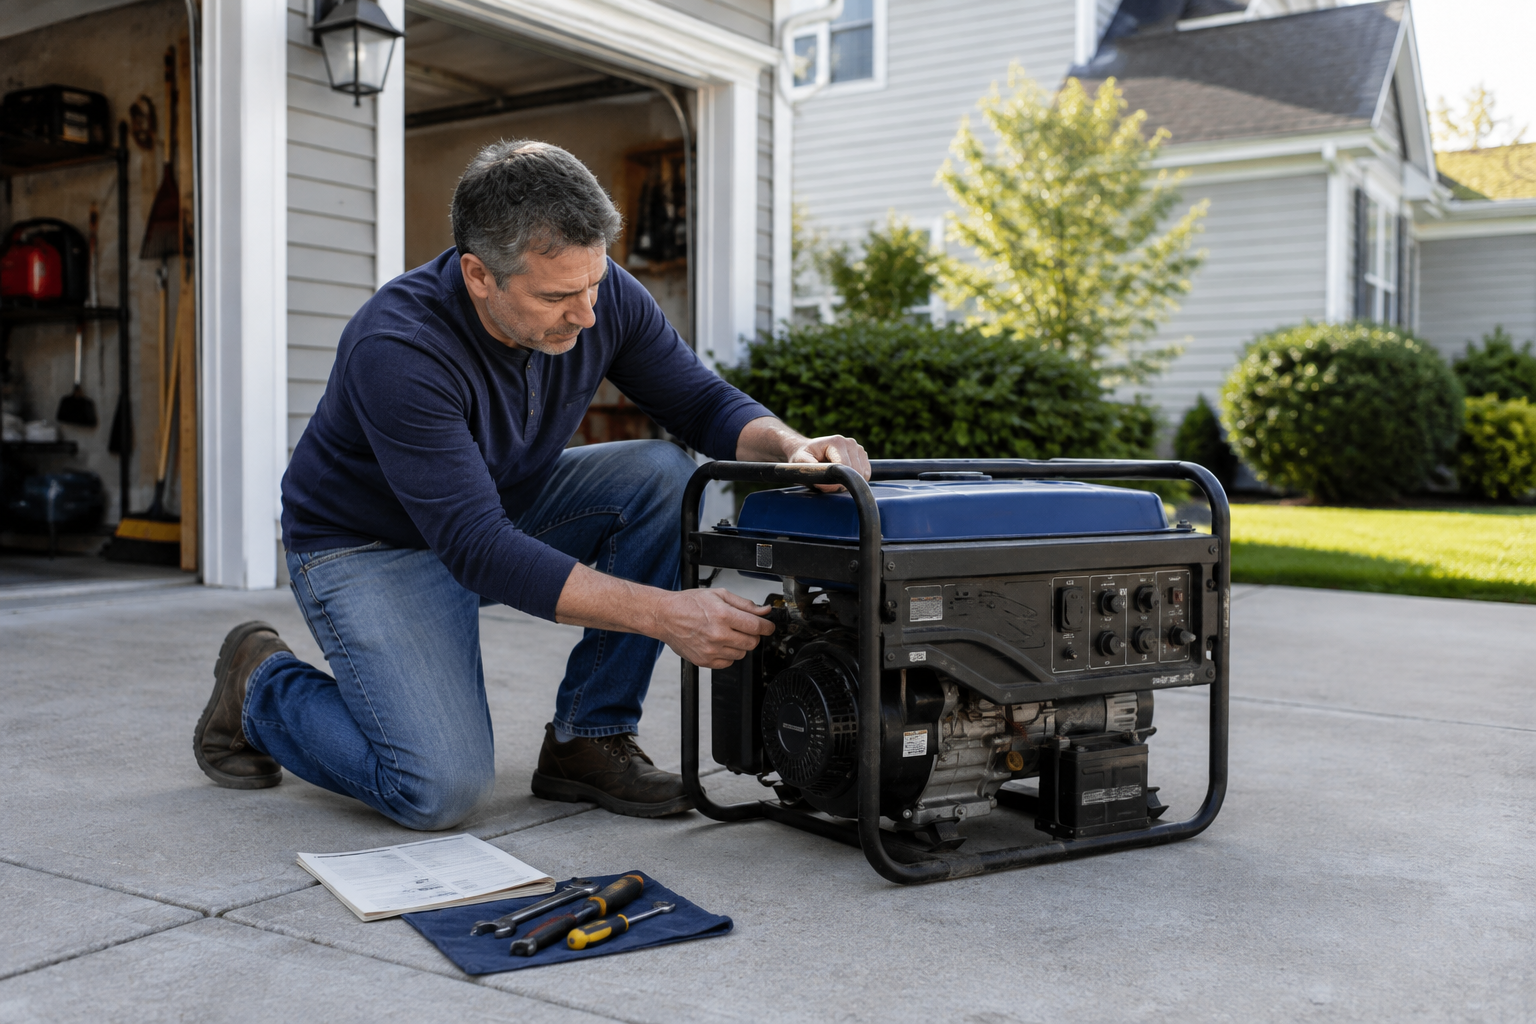
A portable generator can sit quietly in a garage or shed for years and still look ready. The fuel tank may not be empty. The oil may still be in the engine. Nothing appears broken.
Then a hurricane approaches, the power goes out or you finally decide to test it—and the engine will not start.
That is exactly what happened to me.
I bought my generator in a hurry while preparing for a major hurricane. Once the immediate threat passed, I stored it with gasoline still in the tank. I did not add fuel stabilizer, drain the fuel system or take the generator out for periodic testing. It sat for a couple of years.
Before another hurricane, I pulled it out and tested it while I still had time to deal with a problem. The old fuel had to be drained, and I eventually removed the carburetor and cleaned its clogged jets and fuel passages before the generator would run properly again.
The neglect caused the problem. Testing before the storm kept it from becoming an emergency.
If your generator has been sitting and will not start, do not assume it is ruined—and do not begin by taking the carburetor apart. Work from the simplest checks toward the more involved possibilities. Old fuel is a frequent cause, but the problem may be as simple as a closed fuel valve, the wrong choke position, low oil, a loose spark-plug connection or a discharged starting battery.
Safety Comes Before Troubleshooting
Safety First
Do all troubleshooting outdoors, at least 20 feet from the house, with the exhaust pointed away from the home and other occupied buildings. Never start or run a portable generator in a garage, shed, basement, carport, porch or other enclosed or partially enclosed space.
Carbon monoxide is colorless and odorless. Opening a garage door does not make generator operation inside the garage safe.
Before working around gasoline:
- Turn the generator off.
- Let the engine cool completely.
- Keep cigarettes, flames, sparks and other ignition sources away.
- Work in a well-ventilated outdoor area.
- Wipe up spilled fuel and allow vapors to disperse before trying to start the engine.
- Keep the generator level so gasoline and oil do not spill.
- Disconnect the spark-plug wire before performing service when the owner’s manual directs you to do so.
Read the owner’s manual for your specific generator before draining fuel, removing components or performing maintenance. Control positions, fuel-draining procedures, oil requirements and service limits vary by model.
Do not bypass a low-oil sensor, carbon-monoxide shutoff or any other safety system simply to make the engine run. Stop if you find damaged wiring, a cracked fuel line, a persistent fuel leak or anything else you cannot address confidently.
Start With the Simple Checks
A generator that has been sitting may have more than one problem. Begin with the starting procedure in the owner’s manual and confirm the basics before blaming the carburetor.
1. Remove every electrical load
Unplug extension cords, appliances and transfer equipment before starting the generator unless the owner’s manual says otherwise. A portable generator should normally be started without a connected load.
2. Confirm the controls
Make sure the engine switch is on, the fuel valve is open and any fuel-cap vent is in the operating position. Set the choke exactly as the manual specifies for a cold or warm engine.
It is easy to overlook one control when a storm is approaching and you are working from memory.
3. Check the fuel
Verify that the tank contains the fuel type required by the manufacturer. If the gasoline has been sitting for months—or you do not know how old it is—do not assume it is usable merely because it still smells like gasoline.
Do not try to rescue years-old gasoline by pouring fresh fuel or stabilizer on top of it. Fuel stabilizer can slow deterioration when added to fresh gasoline, but it cannot restore gasoline that has already degraded.
4. Check the oil
Place the generator on a level surface and verify the oil level using the procedure in the owner’s manual. Many portable generators have a low-oil shutdown system that prevents the engine from starting or stops it during operation when the oil level is too low.
Use the specified oil and do not overfill the crankcase.
5. Check the starting battery
If the generator has electric start, inspect the battery and its connections. A battery can discharge while the generator sits, especially if the manual’s storage-charging instructions were not followed.
A dead electric-start battery does not necessarily mean the engine has failed. Some models may also have a recoil starter, but follow the manufacturer’s instructions rather than assuming the two starting methods work the same way.
6. Inspect the spark plug and air filter
Make sure the spark-plug wire is firmly connected. If the manual permits homeowner inspection, remove and examine the spark plug for heavy deposits, damage or an incorrect gap. Replace it with the specified plug when necessary.
How to Inspect, Clean and Gap a Spark Plug
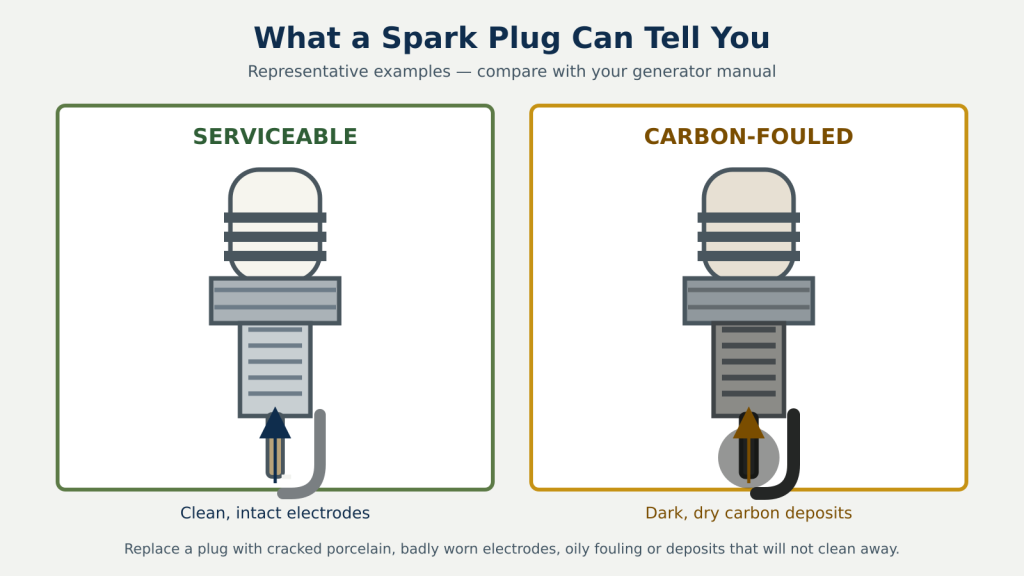
A spark plug may show dark, dry carbon deposits and still be serviceable after cleaning. Replace it instead if the porcelain is cracked, the electrodes are badly worn or burned, it has oily contamination, or stubborn deposits cannot be removed.
- Clean around the plug before removing it so debris cannot fall into the cylinder.
- Remove the plug with the correct spark-plug socket.
- Remove light deposits with a small wire brush and approved spray-on spark-plug cleaner.
- Do not use abrasive blasting.
- Replace the plug if the porcelain or electrodes are damaged or the deposits cannot be removed.
The correct spark-plug gap varies by engine. Find the required measurement in the generator’s owner’s manual before checking or adjusting it.
To check the gap with a feeler gauge:
- Select the blade or combined blades that match the specified gap.
- Slide the gauge between the center electrode and the curved ground electrode.
- A correctly sized gauge should pass through with slight resistance.
- If adjustment is permitted, bend only the curved ground electrode.
- Do not pry against the center electrode or porcelain.
- Measure again after every adjustment.
When reinstalling the plug, start the threads by hand to reduce the risk of cross-threading. Tighten it exactly as the manufacturer directs, then reconnect the spark-plug lead.
Inspect the air filter for dirt, deterioration, oil saturation or obstruction. Clean or replace it only according to the model’s instructions.
Why Old Gasoline Causes So Many Starting Problems
Gasoline changes during storage. It oxidizes and loses volatility, and it can leave gum or varnish-like deposits inside the fuel system. The small amount of fuel sitting in a carburetor can deteriorate faster than the larger amount in the tank.
Those deposits can restrict the carburetor’s tiny jets and fuel passages. The float or needle may also stick. The engine then receives too little fuel, too much fuel or an improper mixture of fuel and air.
Possible fuel-system symptoms include:
- The engine will not start.
- The engine starts briefly and dies.
- The engine runs only with the choke partly or fully engaged.
- The engine surges or runs unevenly.
- Fuel does not appear to reach the carburetor.
- Gasoline leaks from the carburetor or enters the engine oil.
Those symptoms can have other causes, so treat them as clues rather than a diagnosis.
What to Do With Old Fuel
Use the fuel-draining procedure in the owner’s manual. Depending on the generator, that may involve the tank, the carburetor bowl or both.
Drain gasoline only into an approved fuel container. Never pour unwanted gasoline onto the ground, into a drain, into a storm sewer or into household plumbing. Contact your local household hazardous-waste program for disposal instructions.
Once the old fuel has been removed, inspect the drained gasoline and the generator’s fuel system for water, rust, debris or damaged components. Add only fresh fuel that meets the manufacturer’s requirements.
If fresh fuel and the correct starting procedure solve the problem, do not stop there. Watch for leaks, unstable running or an inability to carry a normal load. A generator that starts but runs poorly is not yet ready for an outage.
Can Tapping the Carburetor Help?
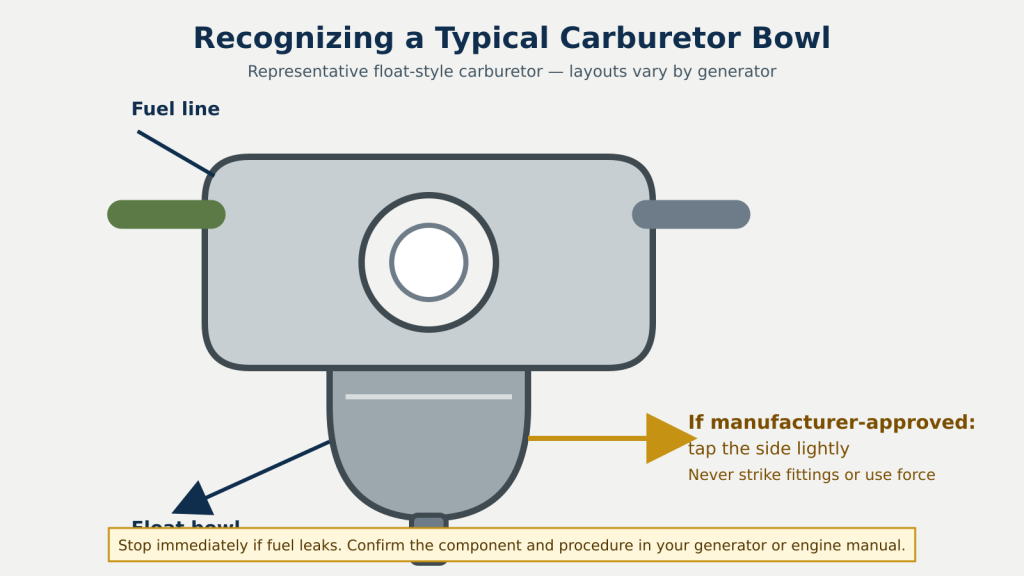
Sometimes fuel is not flowing because the carburetor float or needle is stuck. Briggs & Stratton includes lightly tapping the side of a carburetor among its troubleshooting suggestions for some small engines when fuel is not reaching the engine.
That does not make it a universal generator repair.
This is a limited troubleshooting measure—not a cure for stale fuel, clogged jets, corrosion or damaged parts. If it works, the generator still needs to be inspected and tested. If fuel begins leaking, turn the fuel valve off, move away from ignition sources and correct the leak before attempting another start.
Before You Follow a Repair Video
A good video can make carburetor removal, linkage placement and reassembly much easier to understand than written instructions alone. YouTube can be useful, but the video must match your equipment.
Find the generator’s model and serial-number label before searching. Also identify the engine model when it is listed separately. Two generators with similar names or wattage ratings may use different engines, carburetors, control layouts and service procedures.
Search using the exact manufacturer and model number followed by the repair:
[manufacturer] [model number] carburetor cleaning
Before following a video:
- Start with the generator or engine manufacturer’s official channel when one is available.
- Confirm that the generator or engine shown matches yours.
- Compare the procedure with the owner’s or service manual.
- Watch the entire video before removing anything.
- Photograph hoses, springs and linkages before disconnecting them.
- Avoid instructions that bypass sensors, alter factory adjustments or dismiss fuel-leak precautions.
- Stop if the video and your equipment do not match.
Manufacturer videos are generally the better source for specifications, controls, maintenance procedures and safety requirements. Independent repair videos can be helpful because they often show real disassembly and common problems, but they require more judgment.
Champion Power Equipment’s official carburetor-cleaning video is a useful example of the detail a manufacturer video can provide. NGK’s official spark-plug gap video demonstrates the general measuring and adjustment principle. Neither replaces the specifications or procedure for your generator.
When Carburetor Cleaning Becomes the Next Step
If the controls are correct, the oil level is correct, the ignition and air-filter checks do not reveal the problem, old gasoline has been removed and fresh fuel still does not reach the engine properly, the carburetor may need cleaning or service.
This is where my own generator repair ended up.
Carburetor cleaning can be a manageable job for someone who is comfortable working on small engines, but it is not identical on every generator. Linkages, gaskets, drain screws, jets, adjustment settings and replacement parts vary.
At a minimum, the work may involve:
- Turning off and safely controlling the fuel supply
- Disconnecting the spark-plug wire
- Removing the air-cleaner assembly
- Documenting the position of hoses, springs and linkages
- Removing the carburetor without bending or damaging the linkage
- Disassembling only the components permitted by the service information
- Cleaning jets and fuel passages without enlarging calibrated openings
- Inspecting the float, needle, bowl, seals and gaskets
- Reassembling the carburetor exactly as designed
- Checking carefully for fuel leaks before starting the engine
Do not force wire, drill bits or other hard objects through a carburetor jet. Enlarging or damaging a calibrated passage can change the fuel mixture and create another problem.
Stop and use a qualified small-engine technician if you do not have model-specific instructions, cannot control the fuel safely, find corrosion or damaged parts, are uncertain about linkages or adjustments, or see any leak after reassembly.
In some cases, replacing the carburetor or having it professionally serviced may be more practical than cleaning it repeatedly.
When the Generator Still Will Not Start
A generator that still will not start after the basic fuel, oil, control, spark-plug and air-filter checks may have a blocked fuel line, damaged ignition component, compression problem, electrical fault or another model-specific condition.
Professional service is the appropriate next step when:
- Fuel leaks persist.
- The engine has little or no compression.
- Wiring or ignition components are damaged.
- The recoil starter or electric starter is not operating correctly.
- The engine starts but surges, stalls or produces abnormal smoke.
- The generator engine runs but electrical output is absent or unstable.
- A safety-shutdown indicator or fault code remains active.
- The repair exceeds your tools, information or experience.
A successful start is not the only standard. The generator must run safely and supply stable power under an appropriate load before you depend on it.
How to Prevent the Problem From Happening Again
There is no single fuel-storage rule that fits every generator and every storage period.
Honda provides different fuel procedures for short, medium and long storage periods on some models. Generac recommends treating fuel that will sit even for shorter periods and draining the fuel tank and running the carburetor dry before storage longer than 30 days on many portable models. Other manufacturers and models may specify different steps.
Your owner’s manual is the authority for your machine.
Depending on the model and expected storage time, the correct procedure may include:
- Adding the specified amount of fuel stabilizer to fresh gasoline
- Running the engine long enough for treated fuel to reach the carburetor
- Closing the fuel valve and running the carburetor dry
- Draining the carburetor bowl
- Draining both the tank and carburetor for long-term storage
- Charging or removing the electric-start battery
- Changing or checking the oil
- Storing the generator upright in a dry, protected location
Never assume that fuel stabilizer makes gasoline permanent. Date stored fuel, follow the stabilizer manufacturer’s directions and replace it within the period permitted by the generator and fuel-treatment manufacturers.
Build a Generator Readiness Routine
The best time to discover a starting problem is when the weather is calm and repair shops are not overwhelmed.
After each use
- Inspect the generator for leaks, damage and loose connections.
- Record the operating hours.
- Check the maintenance schedule.
- Prepare the fuel system for the expected storage period.
- Store cords and necessary accessories where they can be found.
During storage
- Follow the manufacturer’s exercise or test interval.
- Check an electric-start battery as directed.
- Inspect the storage area for moisture, pests, corrosion or fuel odor.
- Keep the owner’s manual with the generator.
- Record each test and the next scheduled check.
Before hurricane or severe-weather season
- Move the generator to its safe outdoor operating location.
- Inspect the fuel system, oil, air filter, spark plug and battery.
- Start it using fresh, approved fuel.
- Let it warm up according to the manual.
- Test it under an appropriate load if the manufacturer permits.
- Confirm that required cords, inlet equipment or transfer equipment are ready.
- Test the home’s carbon-monoxide alarms.
- Correct problems before a storm is approaching.
A maintenance record does not need to be complicated. Record the date, operating hours, fuel treatment or draining performed, maintenance completed, test load and anything that needs attention.
The Most Important Step: Test It Early
My generator problem was caused by neglect. But the most important thing I did was test the generator before the next hurricane arrived.
That created time to drain the old fuel, clean the carburetor and confirm that the generator worked again. Waiting until the power failed would have turned a repairable maintenance problem into an emergency.
If your generator has been sitting, find the owner’s manual and test it now—not when the forecast changes and not after the lights go out.
Buying the generator was only the beginning. Maintaining it, testing it and knowing that it will operate safely are what make it part of a real preparedness plan.
Sources
Consumer Product Safety Commission — Portable Generator Safety
Honda Power Equipment — Generator Fuel Recommendations
Generac — Portable Generator Troubleshooting Guide
Generac — Preparing a Portable Generator for Storage
Briggs & Stratton — Small Engine Fuel Recommendations
Briggs & Stratton — Carburetor Troubleshooting and Cleaning
EPA — Household Hazardous Waste
Briggs & Stratton — Changing and Gapping Spark Plugs
Generac — Inspecting a Portable Generator Spark Plug
Champion Power Equipment — Official Carburetor-Cleaning Video